

Welcome to my “Stained Glass Projects Page.” I assembled all the projects on this webpage over the past 36+ years. I actually started working with Stained Glass after my wife, Carolyn, had taken a Stained Glass class, and I found it so interesting watching her work on her project that I decided to try the hobby. Well, 36+ years later, I am still at it, and enjoying each new project.
Stained glass is an enchanting artistic medium that has graced windows, churches, and buildings for centuries, captivating viewers with its interplay of light and color. This craft transforms ordinary sunlight into vibrant mosaics, producing a mesmerizing visual effect. Traditional techniques include the “leaded method,” where individual pieces of glass are joined with strips of lead to form intricate patterns, and the “Tiffany style,” which uses copper foil wrapped around glass edges, soldered together to create elaborate designs. While stained glass demands patience and meticulous attention to detail, the resulting artworks are both enduring and visually stunning, often becoming treasured heirlooms passed down through generations.
It is not my intent to teach you how to assemble a Stained Glass project. There are hundreds of excellent online courses and free tutorials you can use to get up and running. I have added several of them to my Stained Glass Links Page for you to use. In this webpage I present several of the projects I have completed over the many years with just a few images that show the progression of their assembly. Unlike my Balsa RC model builds, which have detailed build descriptions and many images of the model construction, I unfortunately had not taken that same approach when working on most of my Stained Glass projects. But for my more recent projects I developed detailed assembly descriptions with more images, and provided links for you to view or download to use for your projects. If you have any questions about my projects, I would be more than happy to try and answer them. Just send me an email @: Larry's Stained Glass Builds.
Click on any link below to jump to that Stained Glass Project
Current Build - Hot Air Balloons Panel
Ryan's Office Window Stained Glass Panel
"Fantasy Castle in the Sky"
My Workshop Outdoor Lantern
My First Stained Glass Project
A Sun and Moon Panel
My First Lead Channel Project
Lead Channel Porch Corners
Some Butterfly Panels
Cross and Lilies Table Lamp
Poppies Table Lamp
Ohio State University Table Lamp
A Four Sided Craftsman Table Lamp
Cat and Tree Frog Sun Catchers
Hummingbird Panels
Our Spring Yard Flowers Panel
Three Sunflowers Panel
A Winter Lighthouse Scene Panel
Buffalo on the Prairie Half Circle Scene
Our Yard Birds Panel
Our Front Porch Outdoor Lanterns
Pergola Outdoor Lanterns
Potting Shed & Mailbox Outdoor Lanterns
Window Header Panel
Misc Stained Glass Projects
Stacked Books Table Lamp
Our Home Front Door Panels
NOTE - You can view all images in a “Spotlight Box” by simply clicking on any image.
Hot Air Balloons Panel
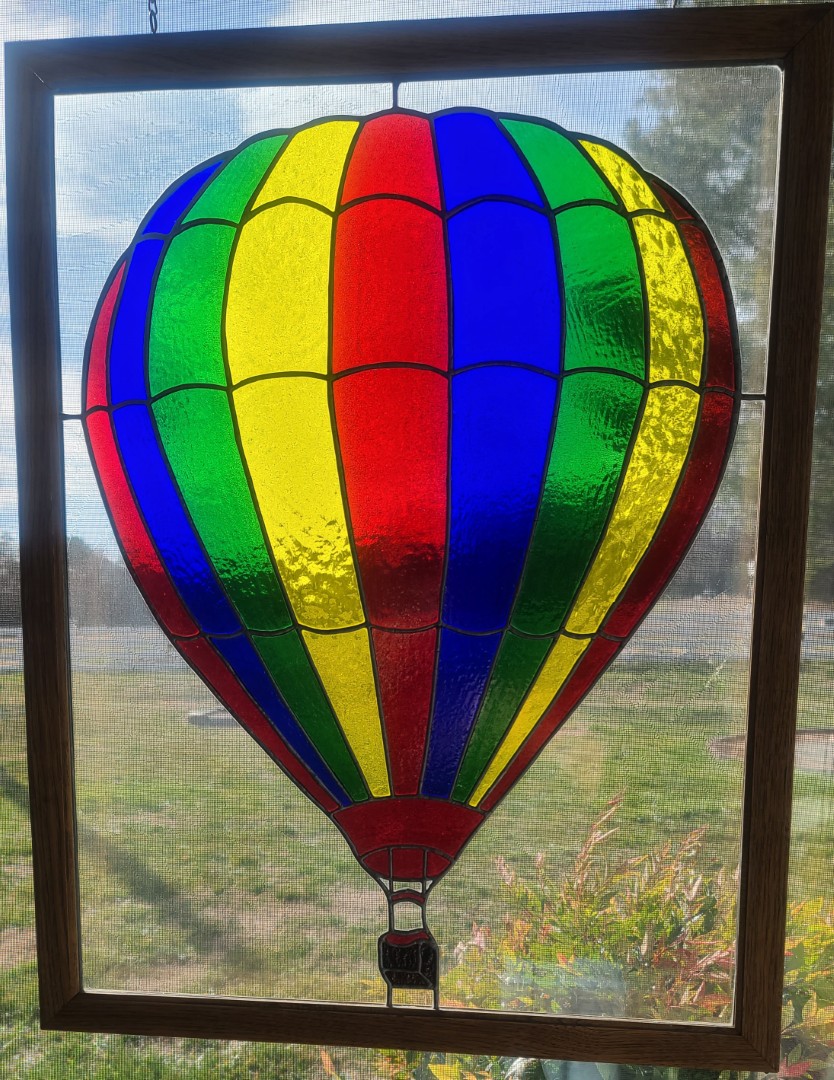
When I first started making Stained Glass panels, after a couple small panels I wanted to try my hand at something larger, but not with a hundred small pieces. After some initial ideas I drew up a pattern for a single hot air balloon which turned into the panel in the left image below. The panel measures 22″ x 28″ and only has 53 fairly large size pieces of copper foiled stained glass. This panel was given to my parents in Florida where it hung in their home for many years and now hangs in the sunroom of our North Carolina home.
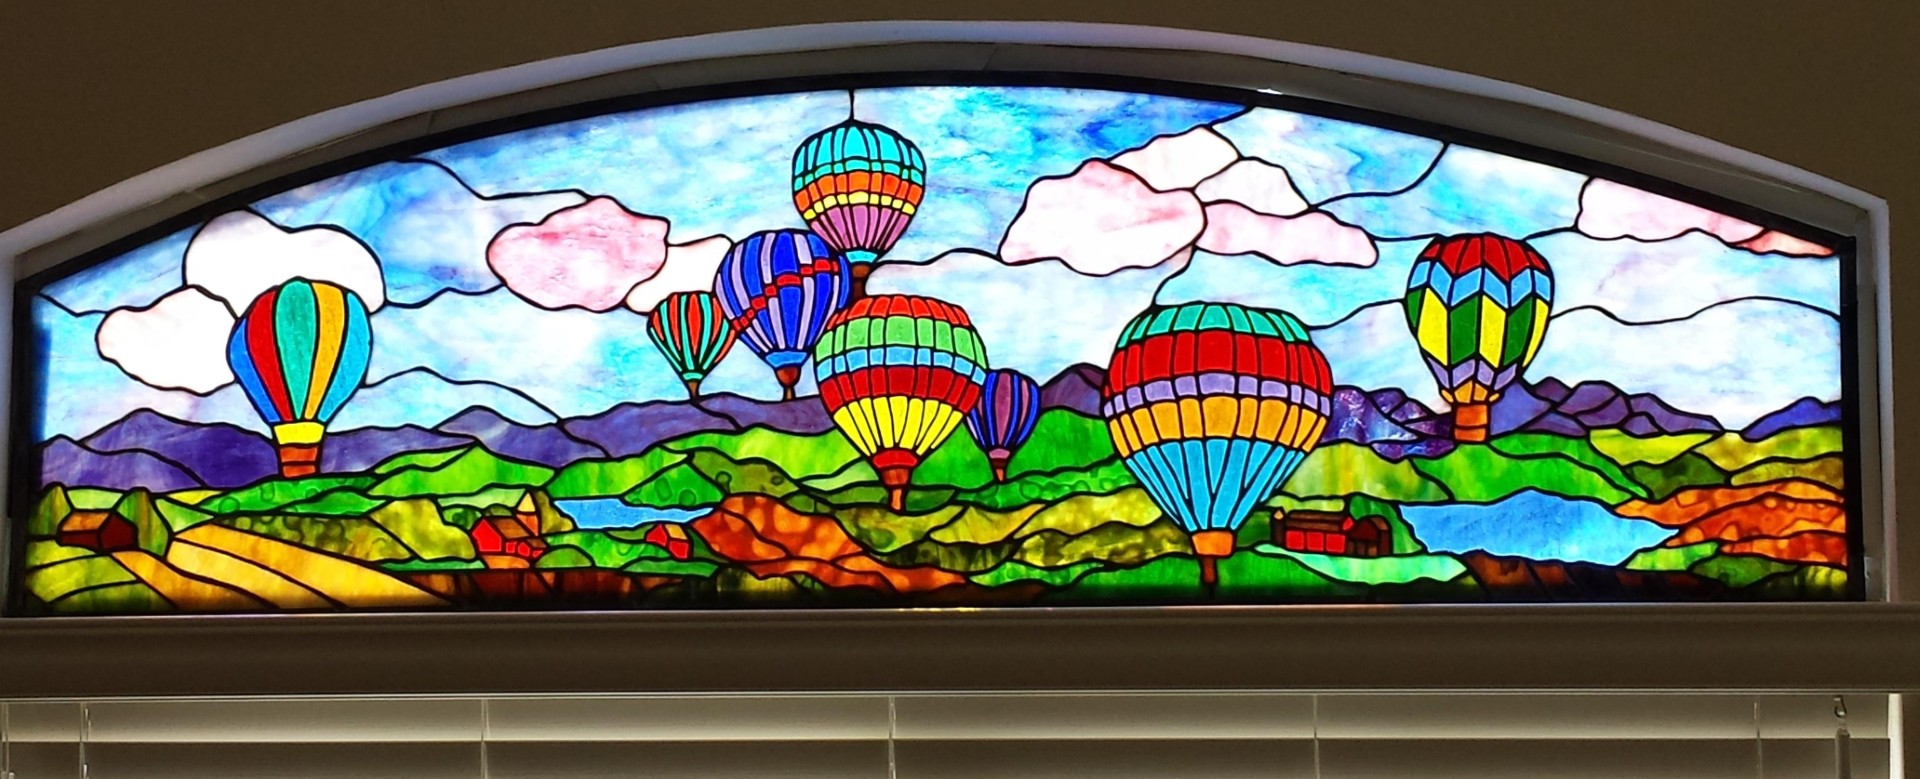
Having always liked hot air balloons because of their variety in design and colors, I wanted to come up with a new Stained Glass panel design that would have many different types of balloons participating in an event flying over a gentle rolling landscape. Something similar to the right image below, but with more variance in the balloon patterns.
This posting is as of 4 June 2026. For those that have not been following my regular webpage updates, you can read my Latest Version of Hot Air Balloons Panel Assembly Description to see everything I have worked through up to this point.
Hot Air Balloons Panel Assembly (cont.)
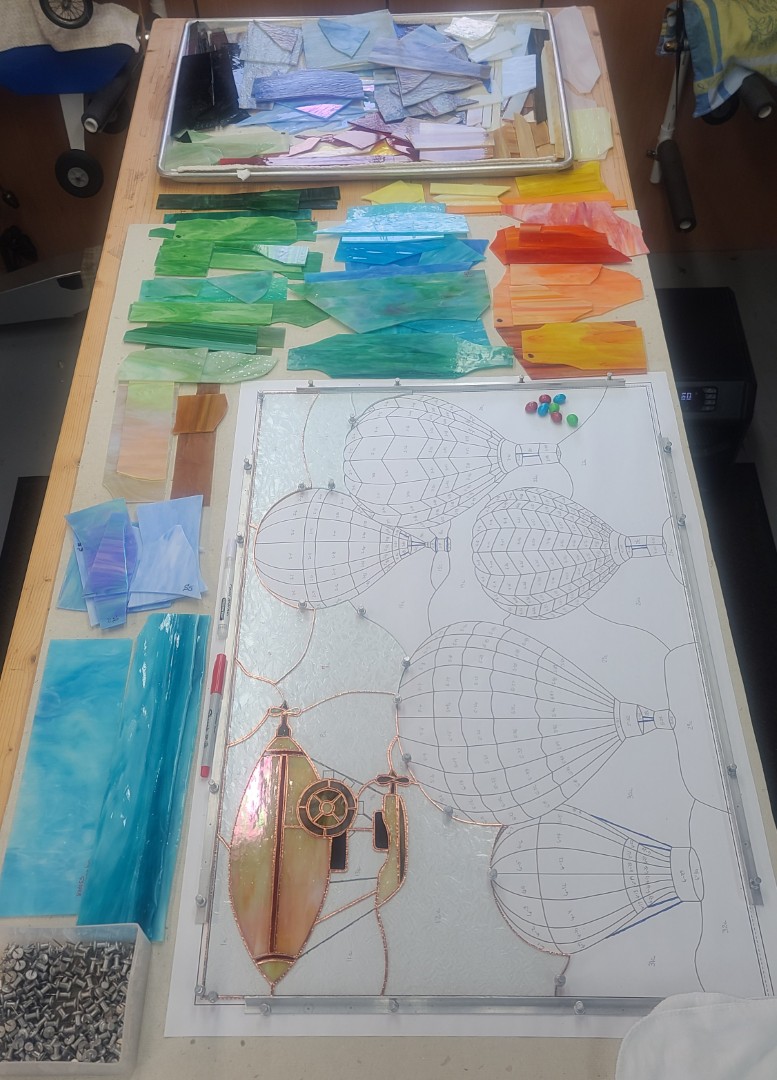
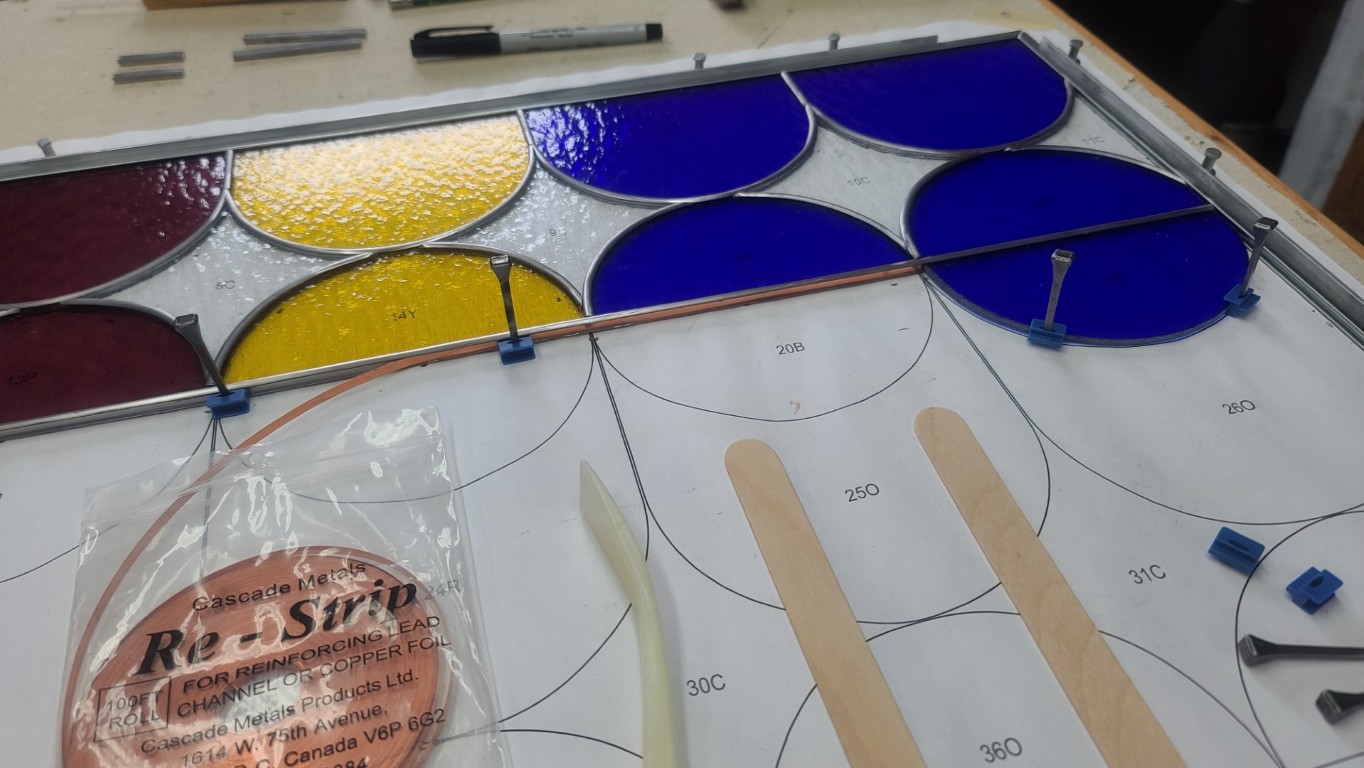
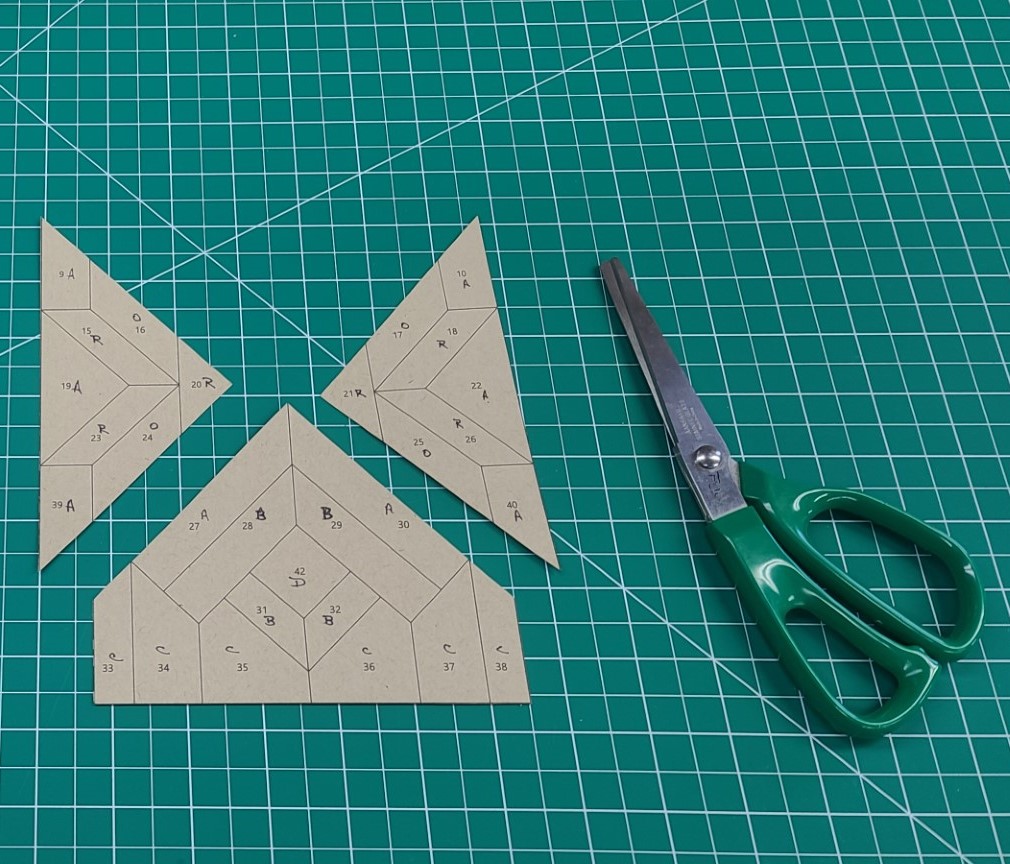
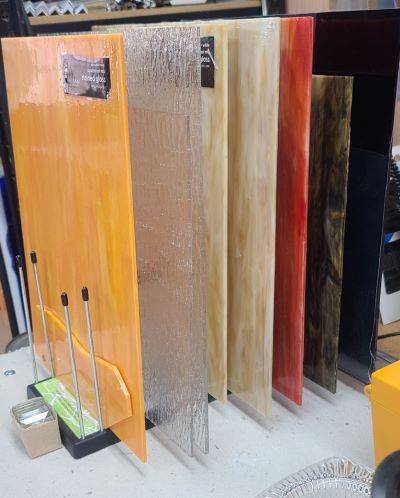
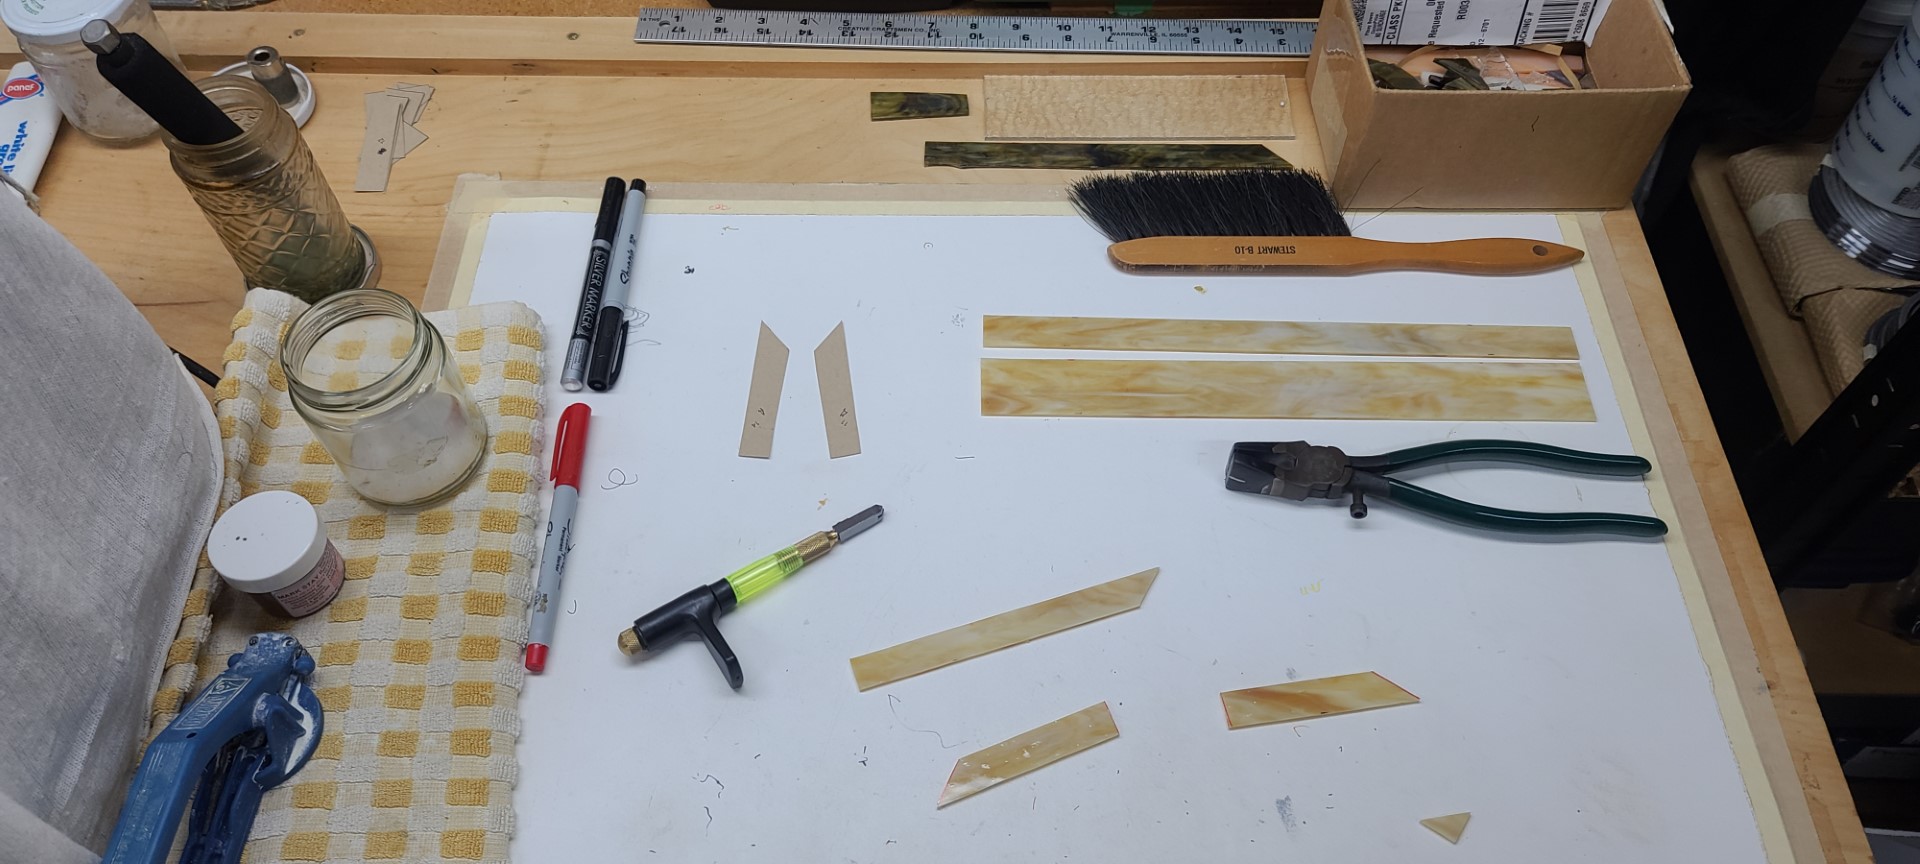
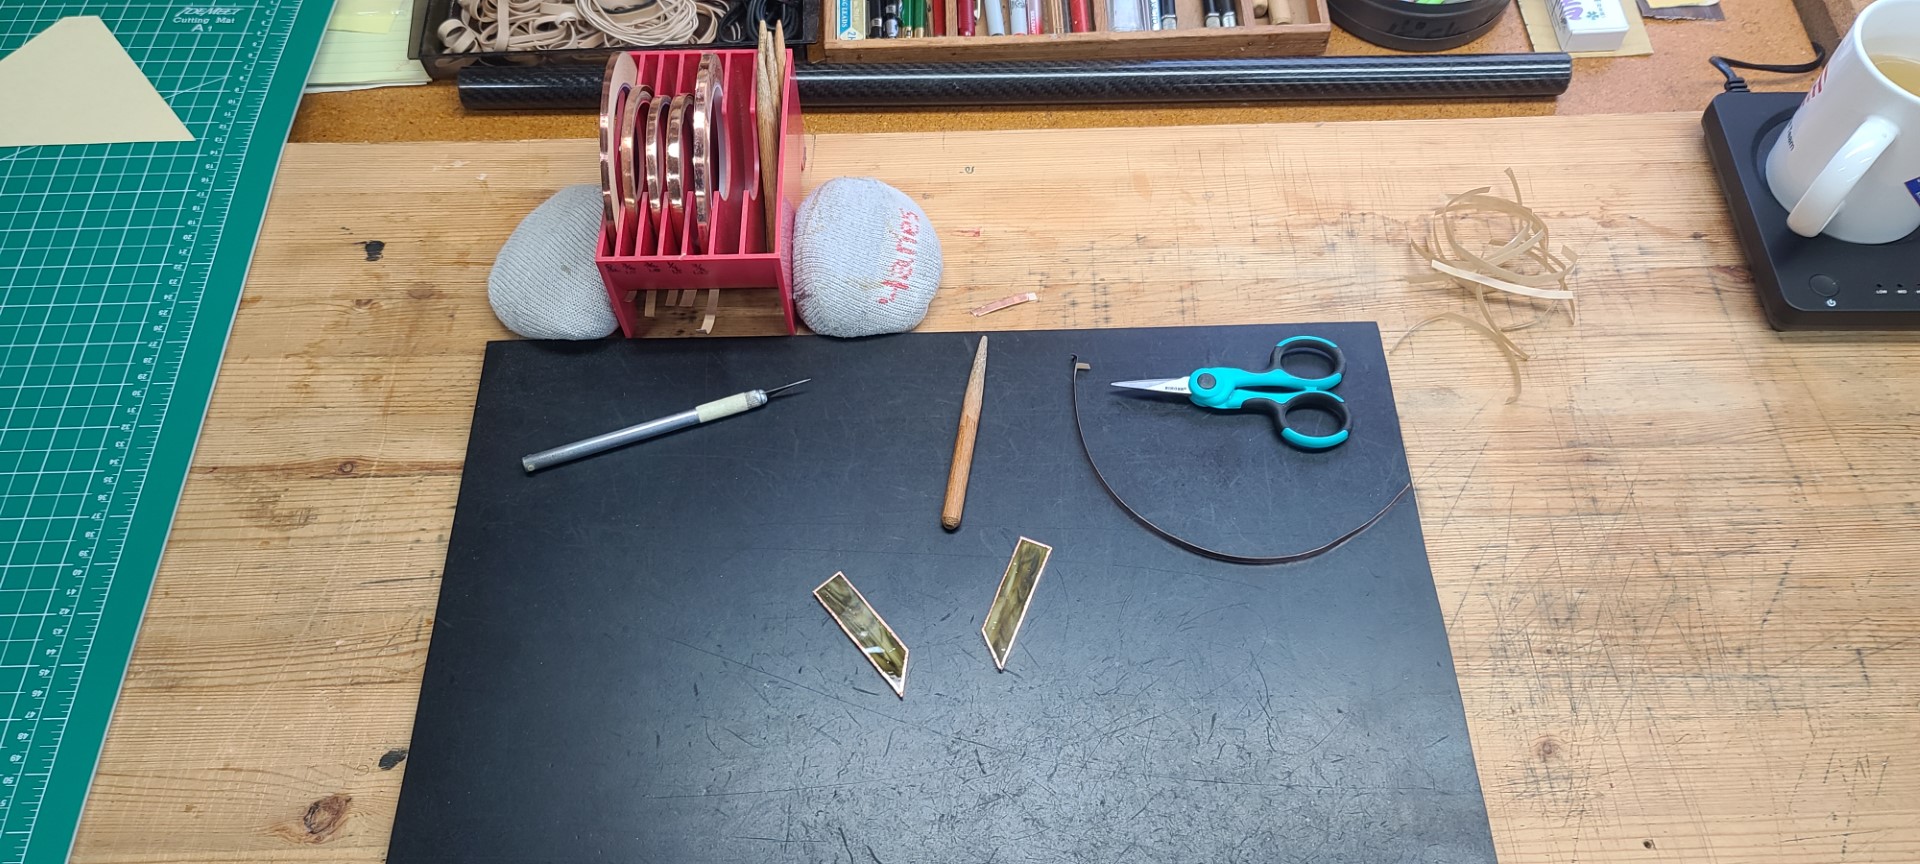
As you can see in the next image below, I am up to the point where I need to start selecting what colors of stained glass I want to use in each of the hot air balloons. To do this I pull out my scrap glass tray and spread out several different colors of opal, wispy, and streaky glass that I can select from before I dive into using any of the full sheets from my glass stock. As I mentioned earlier, for this project I decided to try once again tried a new foiler from Techniglass called “The Foiler.” So far this handy foiler has worked great for my larger glass pieces with straight and/or larger outside curved edges. But, when it came to the very small glass pieces, or pieces with tight inside curves (such as those around the propellers on the balloon in the upper left corner of my panel), I had to resort back to using just my fingers and a careful eye to properly align the foil along the edges.
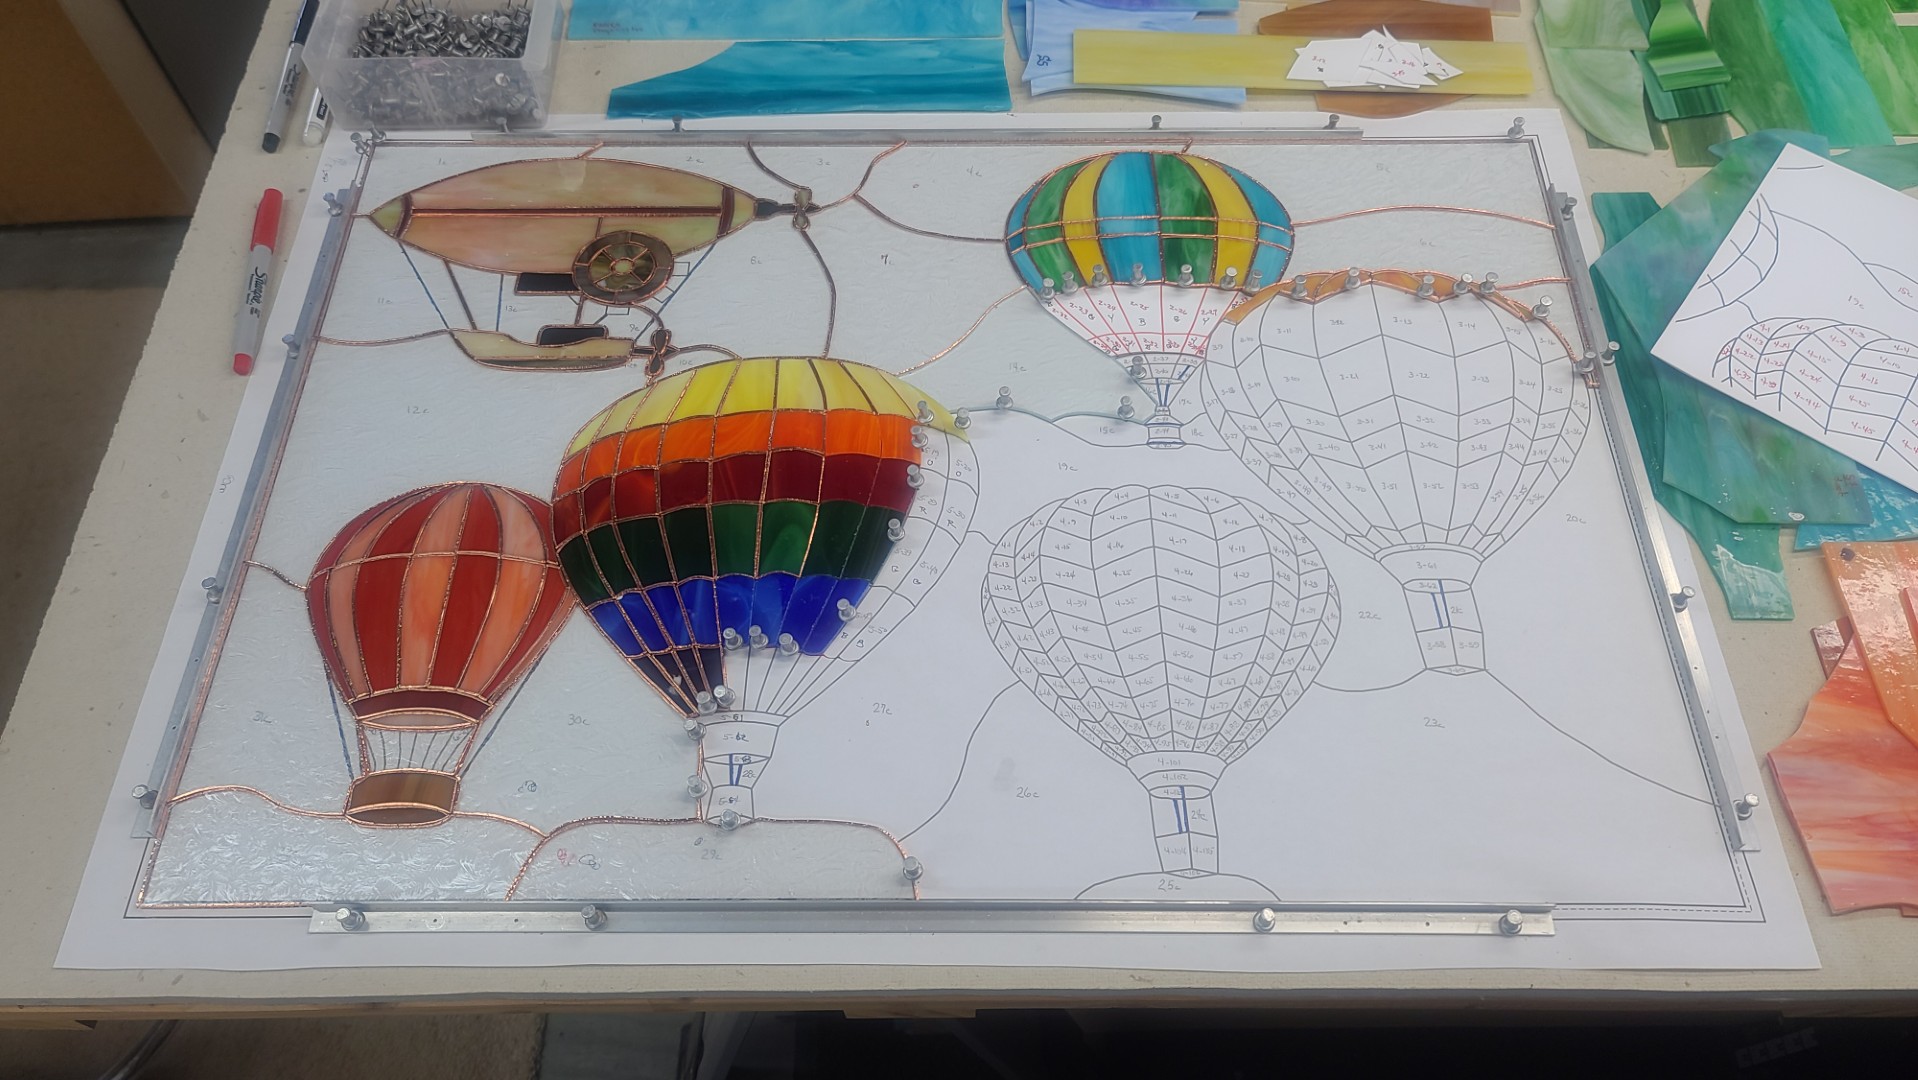
As with several of my other stained glass panels, while working my way through the panel pattern, I found I needed to make minor modifications to some pattern pieces to aid in getting the glass pieces to fit together better, or to simplify the glass cutting/grinding. An example of this was I had to eliminate the very tiny piece at the rear of the boat hot air balloon, and I will need to shorten the six pattern pieces at the bottom of the balloon in the lower left corner, so the balloon does not go all the way down into the basket. Any changes I've made during the panel assembly have been updated in the pattern PDF file.
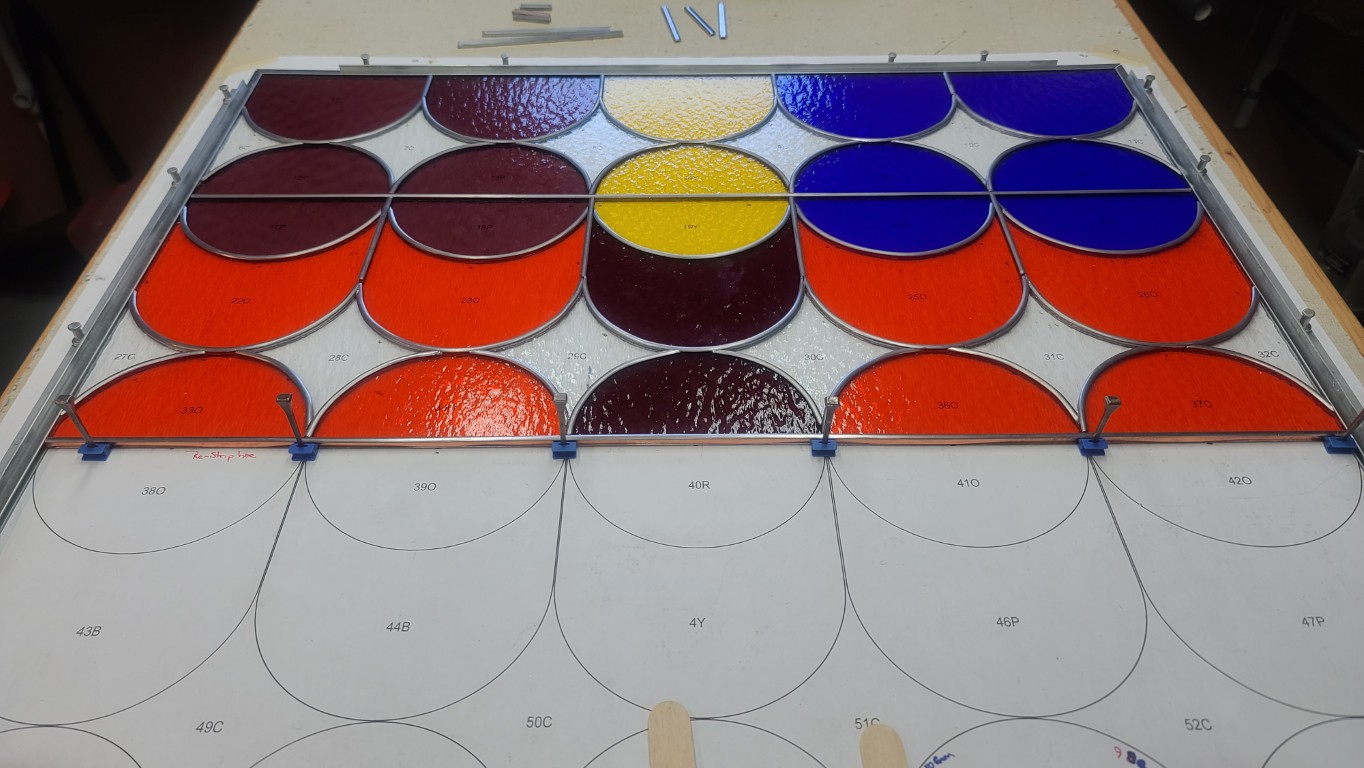
I continued to slowly work my way through the panel pattern pieces. Things get pretty slow in the Workshop in the early Spring due to the uptick in our home yard and garden work. And then there are the other Workshop projects also currently in work at is time. Some modifications were made to the lower portion of the rainbow colored balloon to reduce the length of the bottom narrow pieces, and to add another color to the rainbow sequence. I also increased the size of the gondola on this balloon.
As mentioned earlier, the new foiler I'm using from Techniglass called “The Foiler“ works really nice as long as the glass piece is fairly large and does not have any tight inside curves, otherwise I resort back to my old index finger and eyes method of foiling.
Hot Air Balloons Panel Pattern.
Latest Version of Hot Air Balloons Panel Assembly Description.
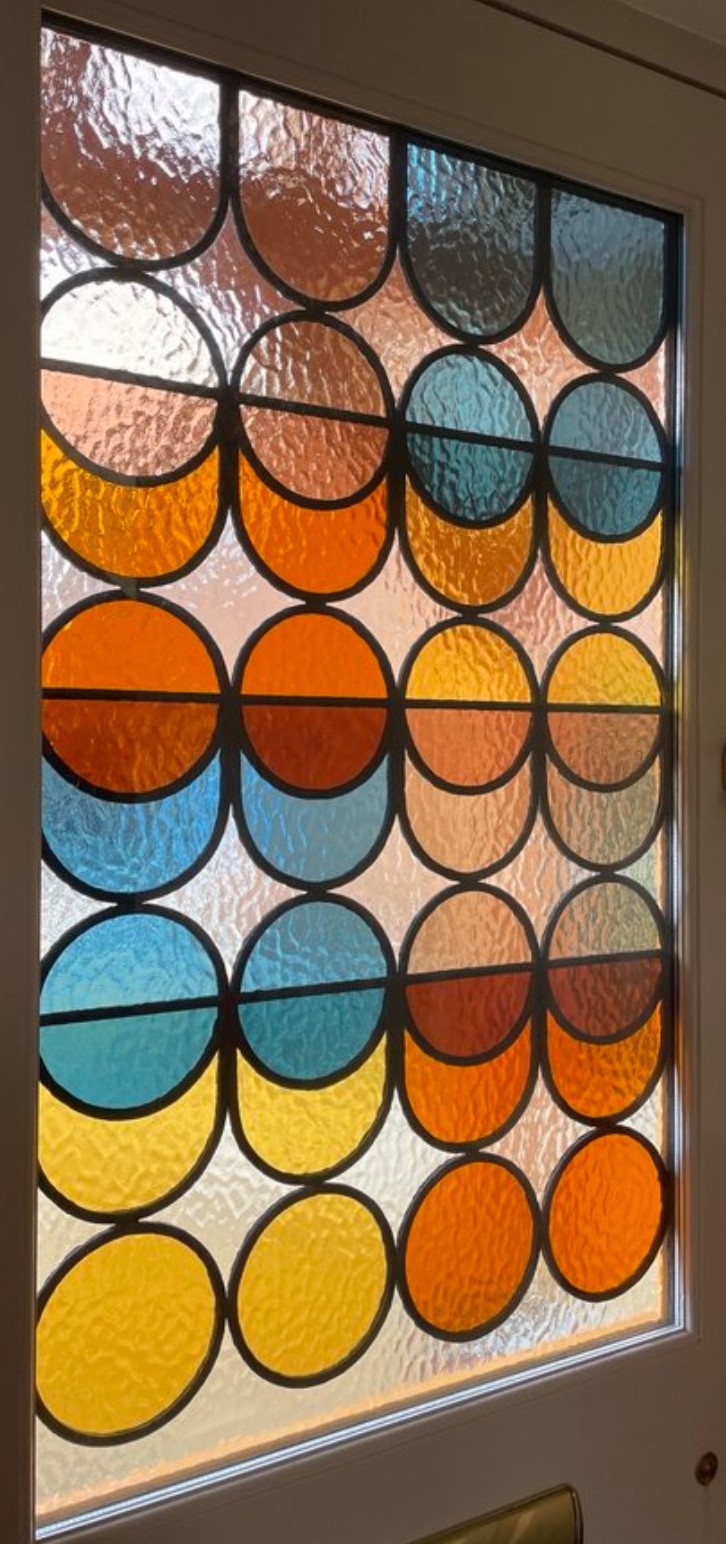
Ryan's Office Window Panel
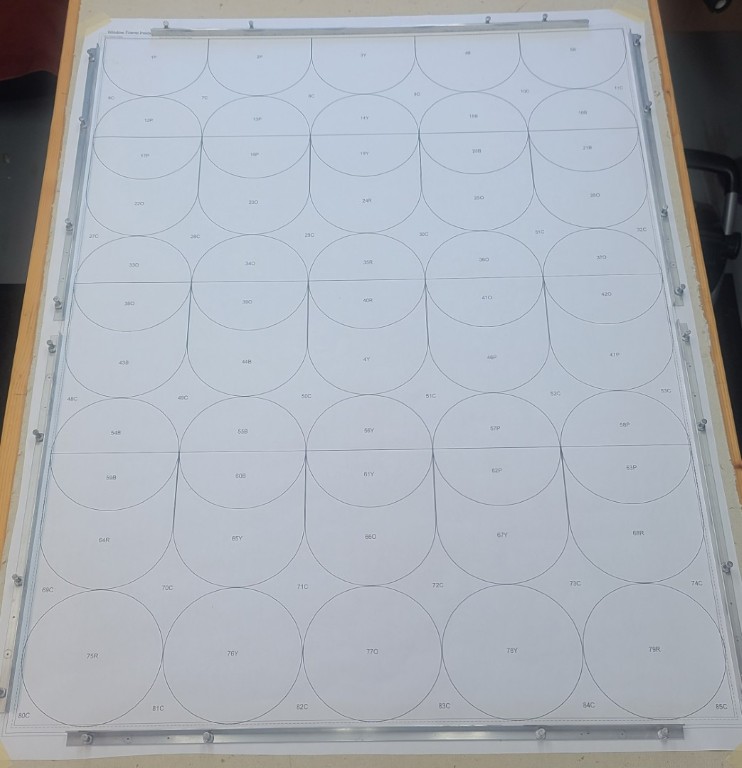
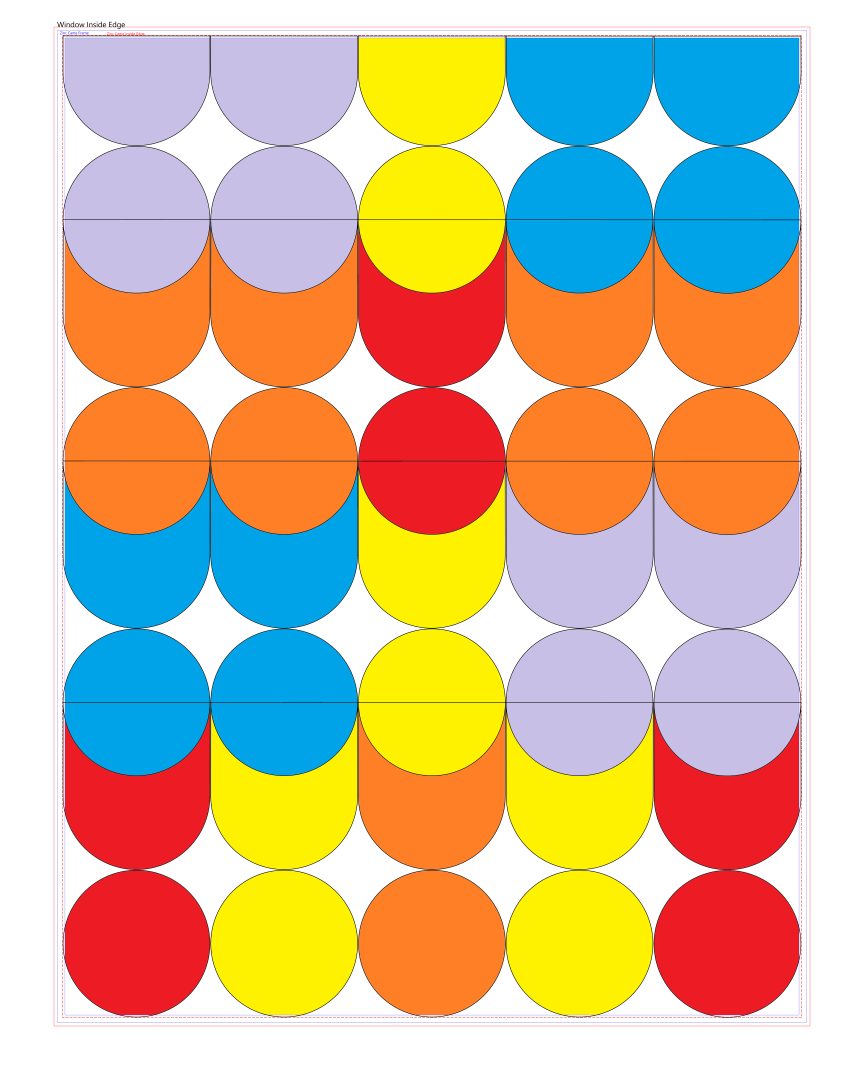
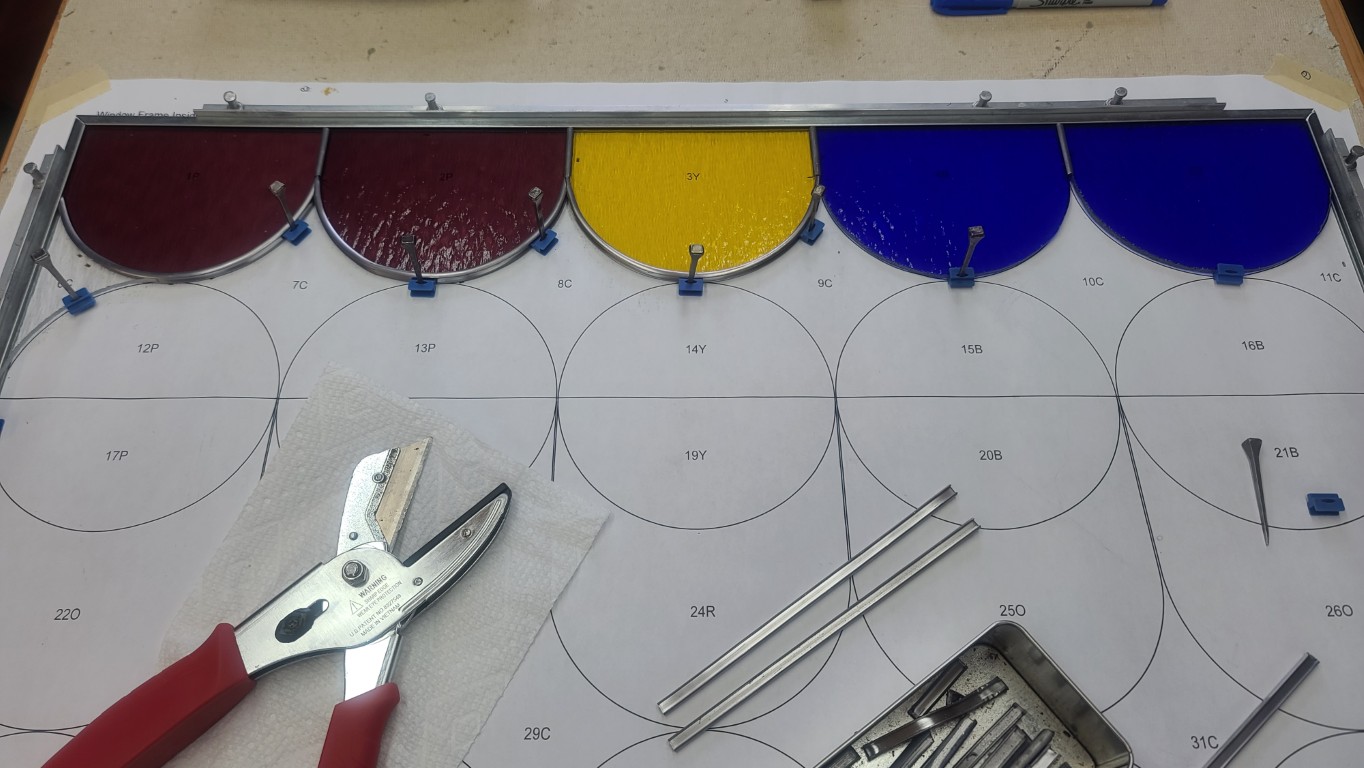
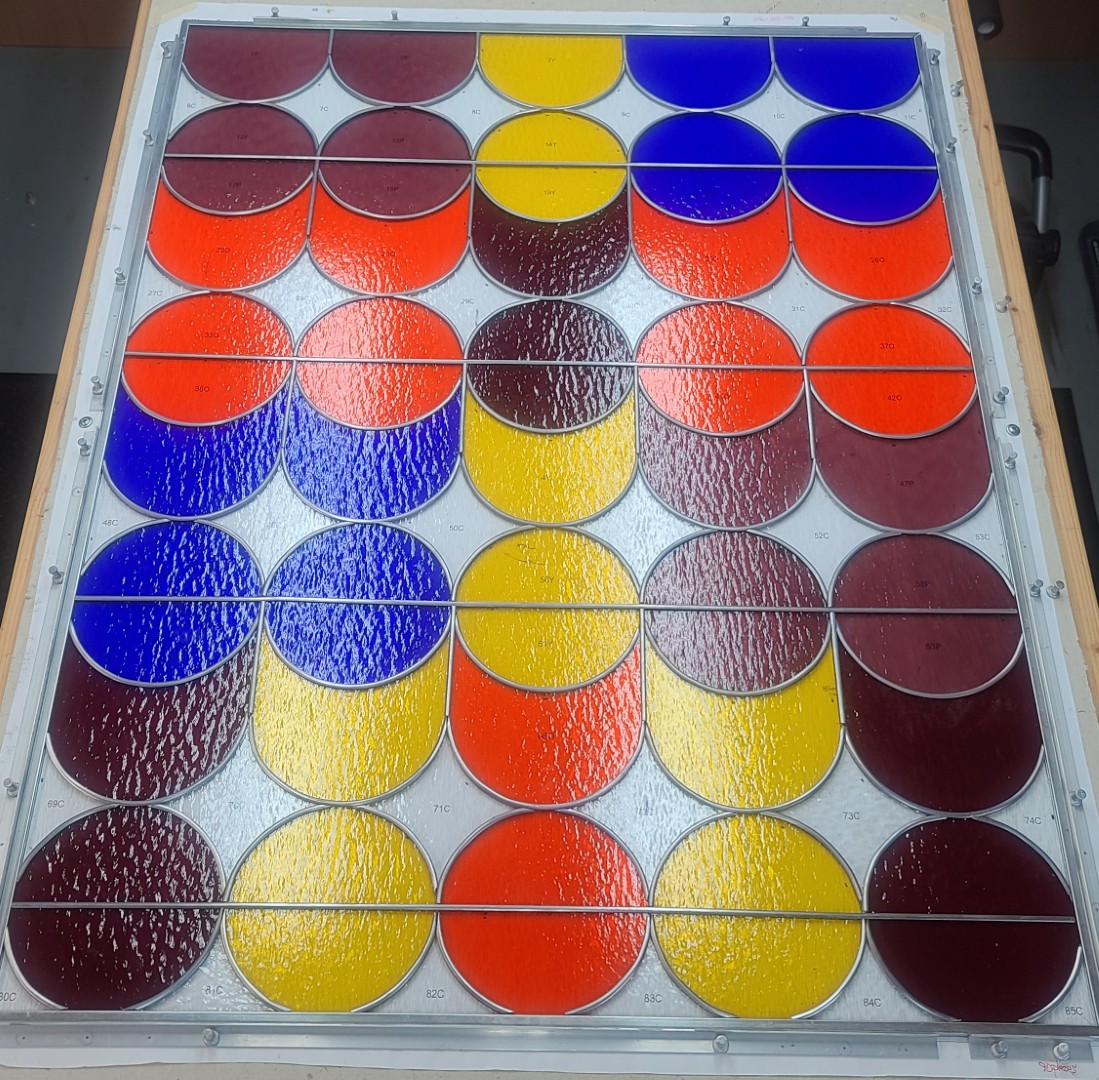
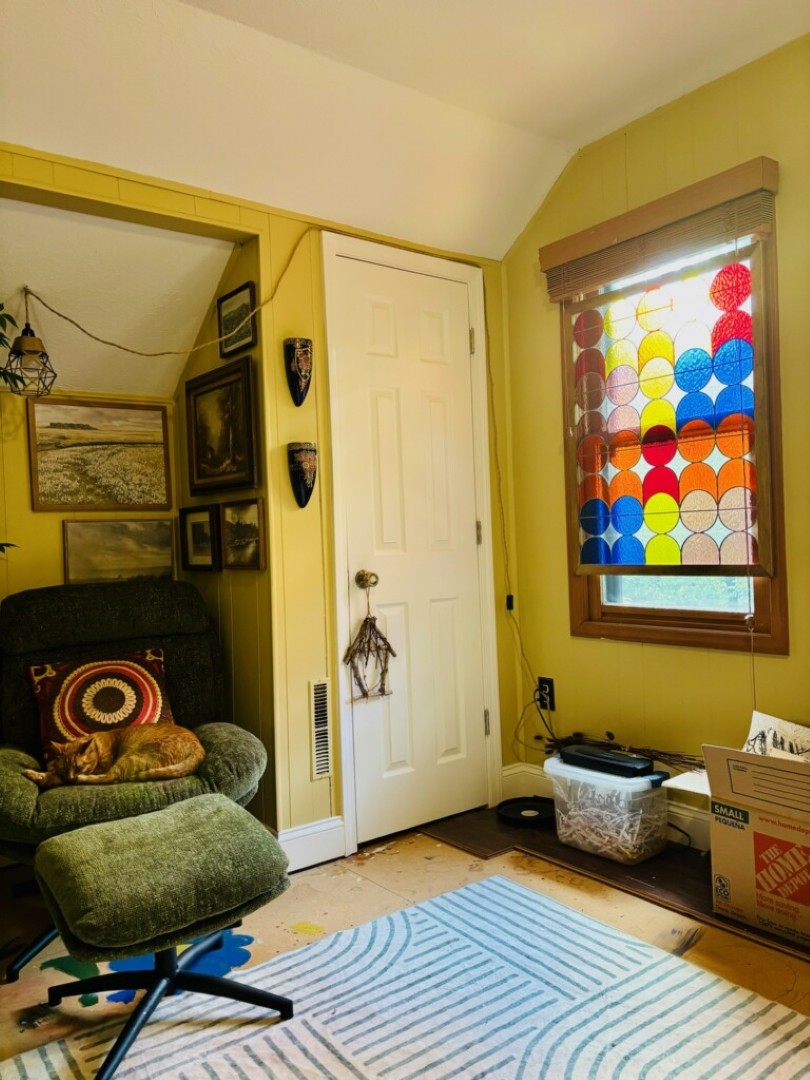
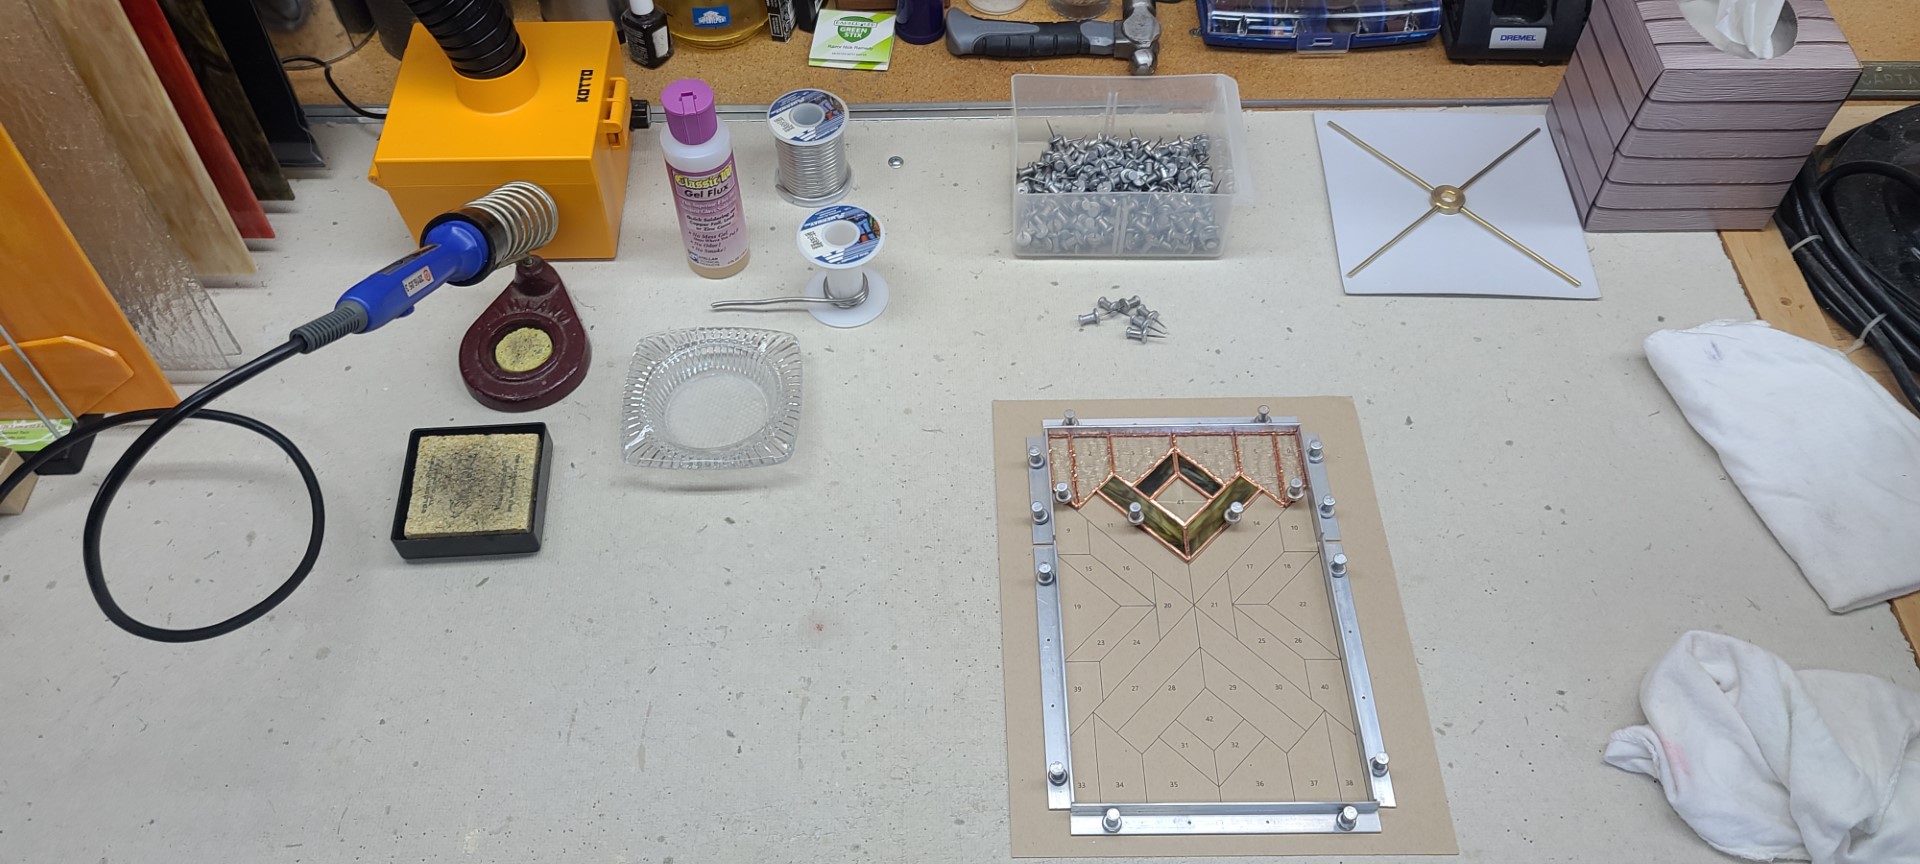
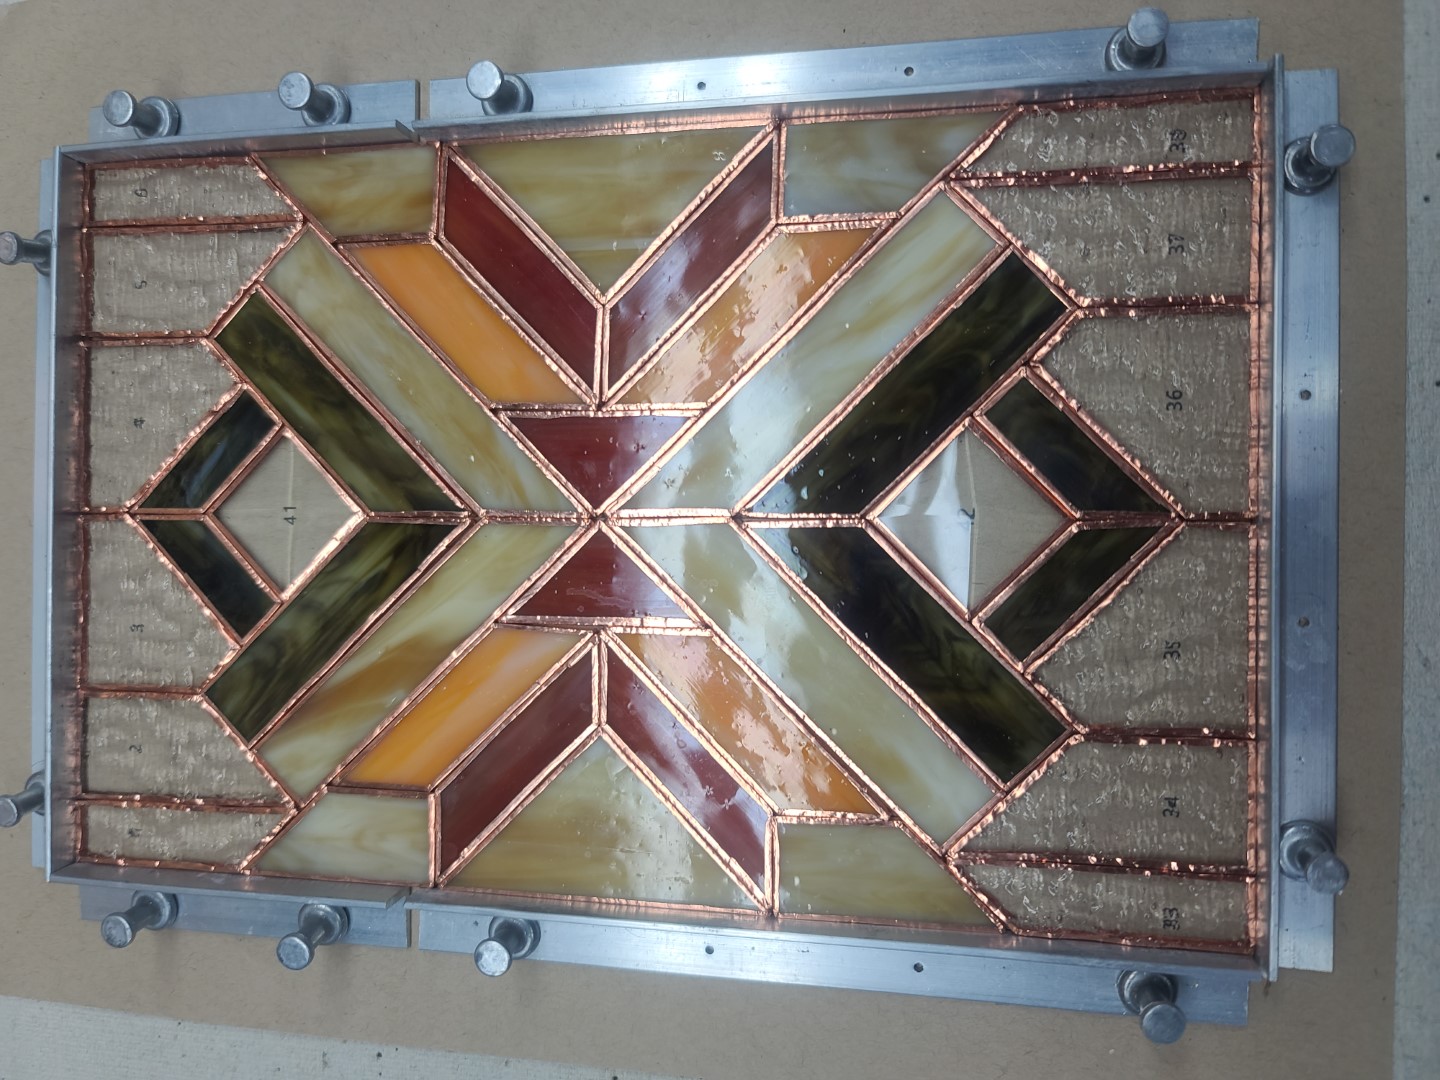
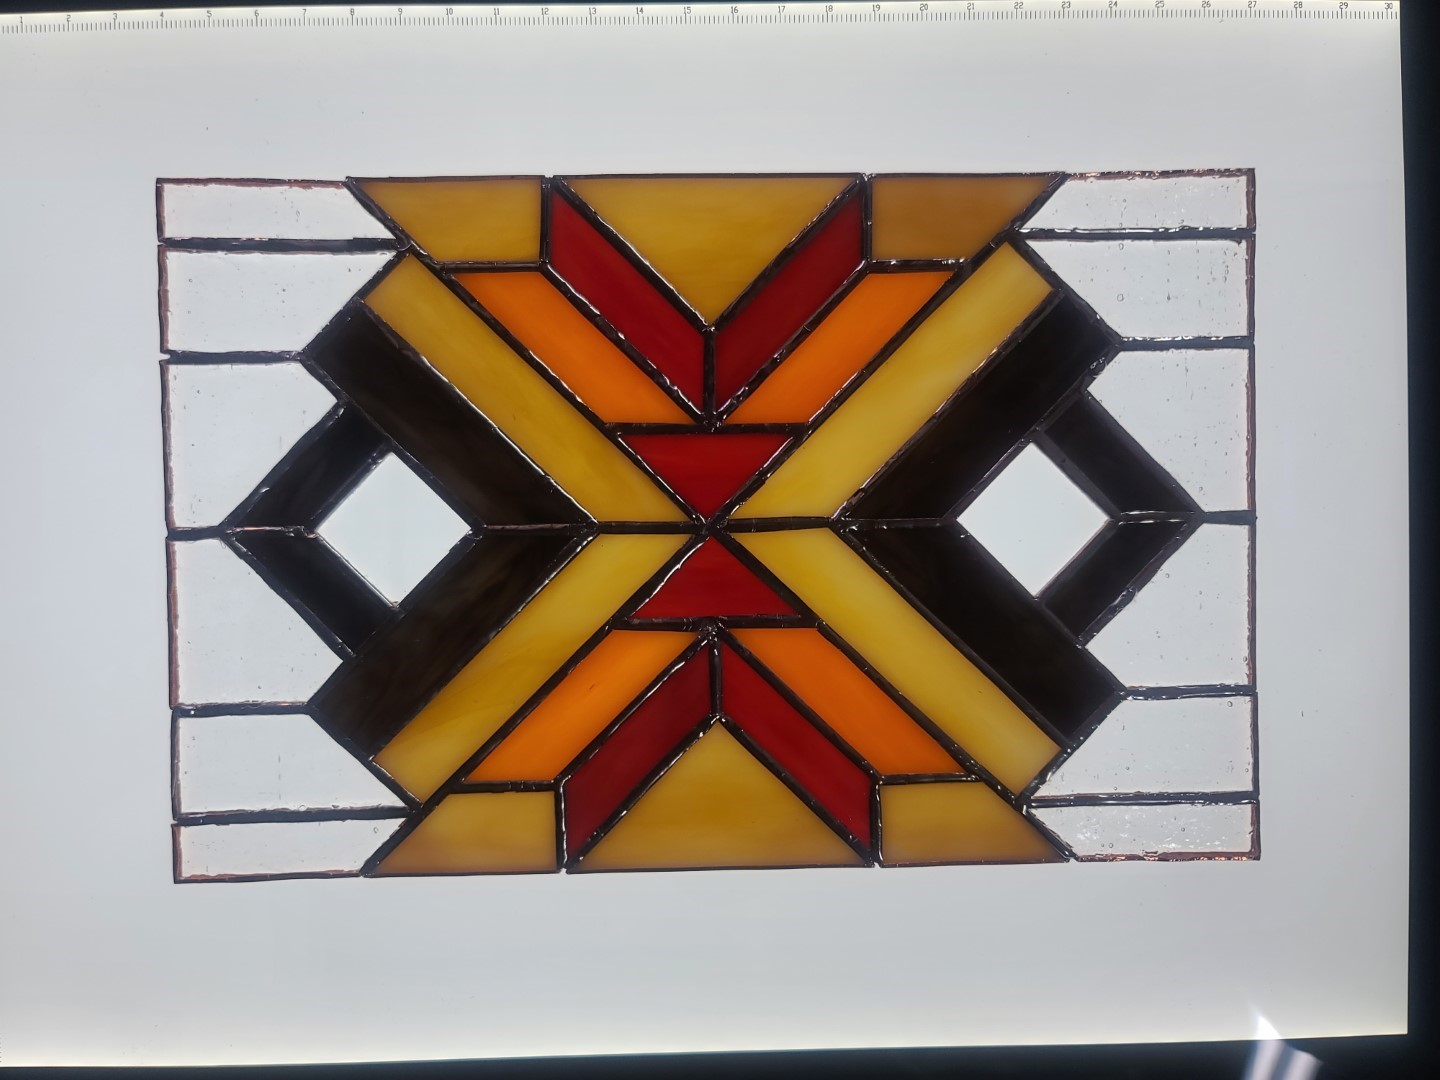
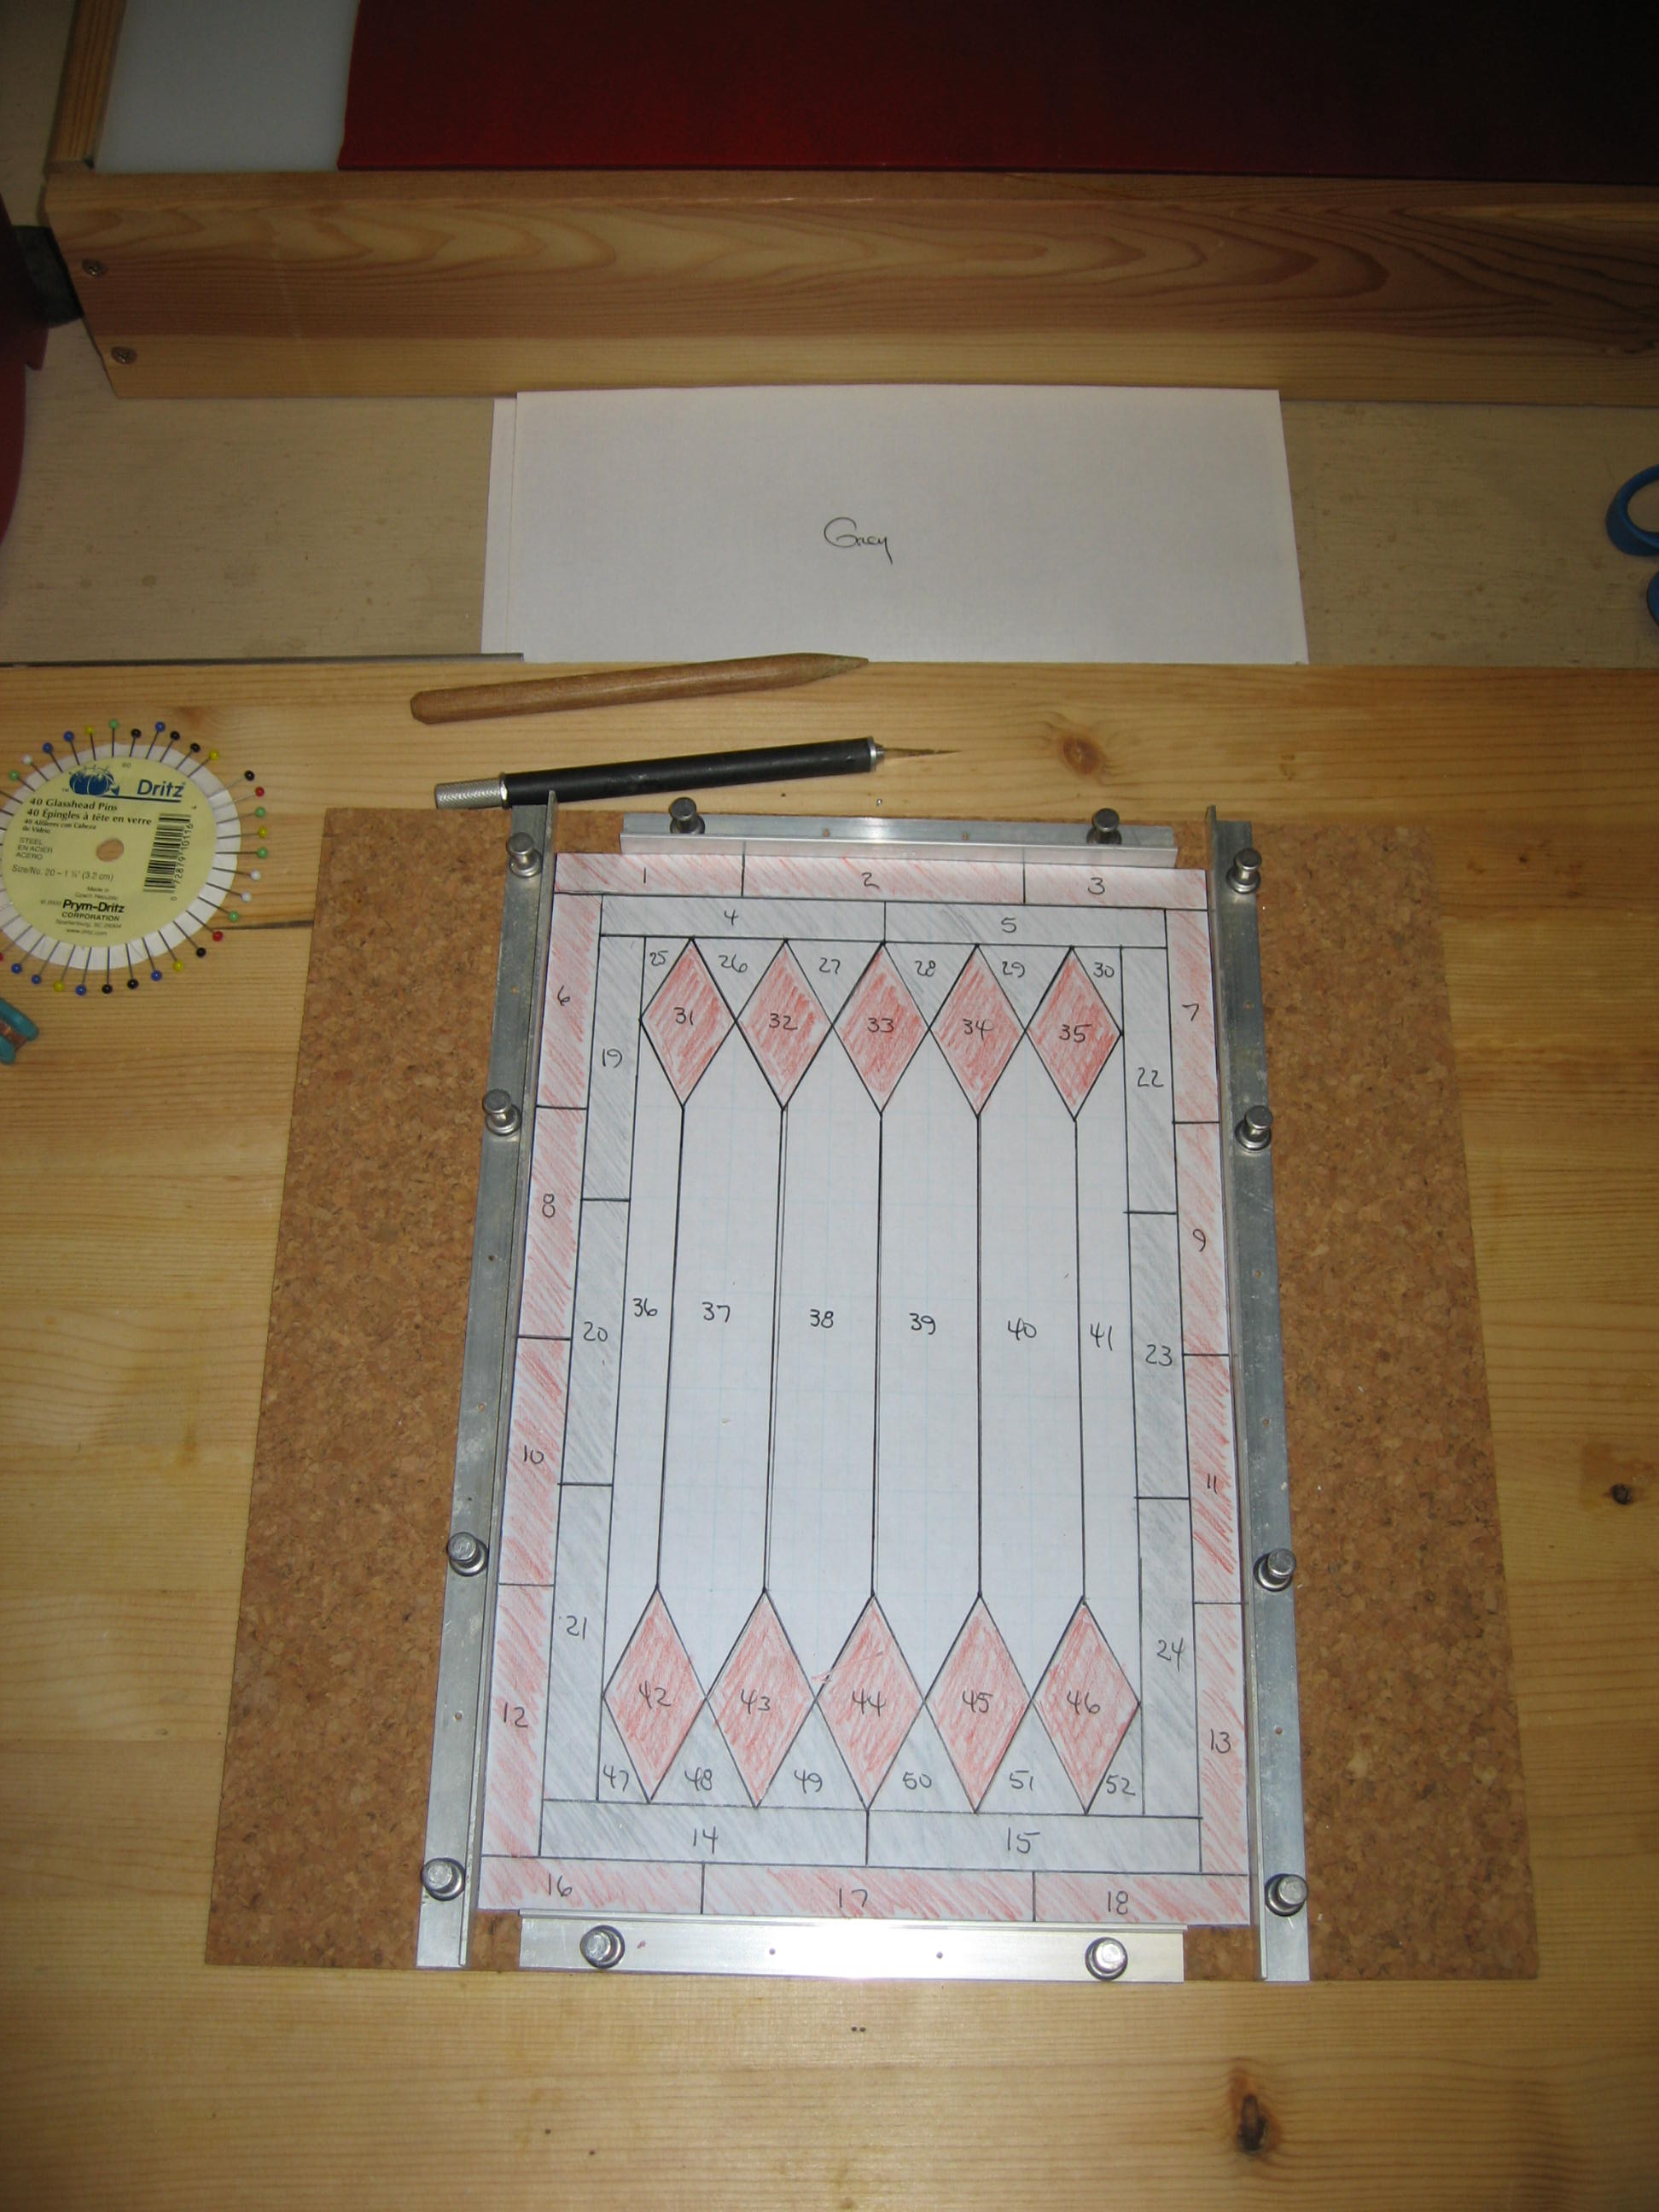
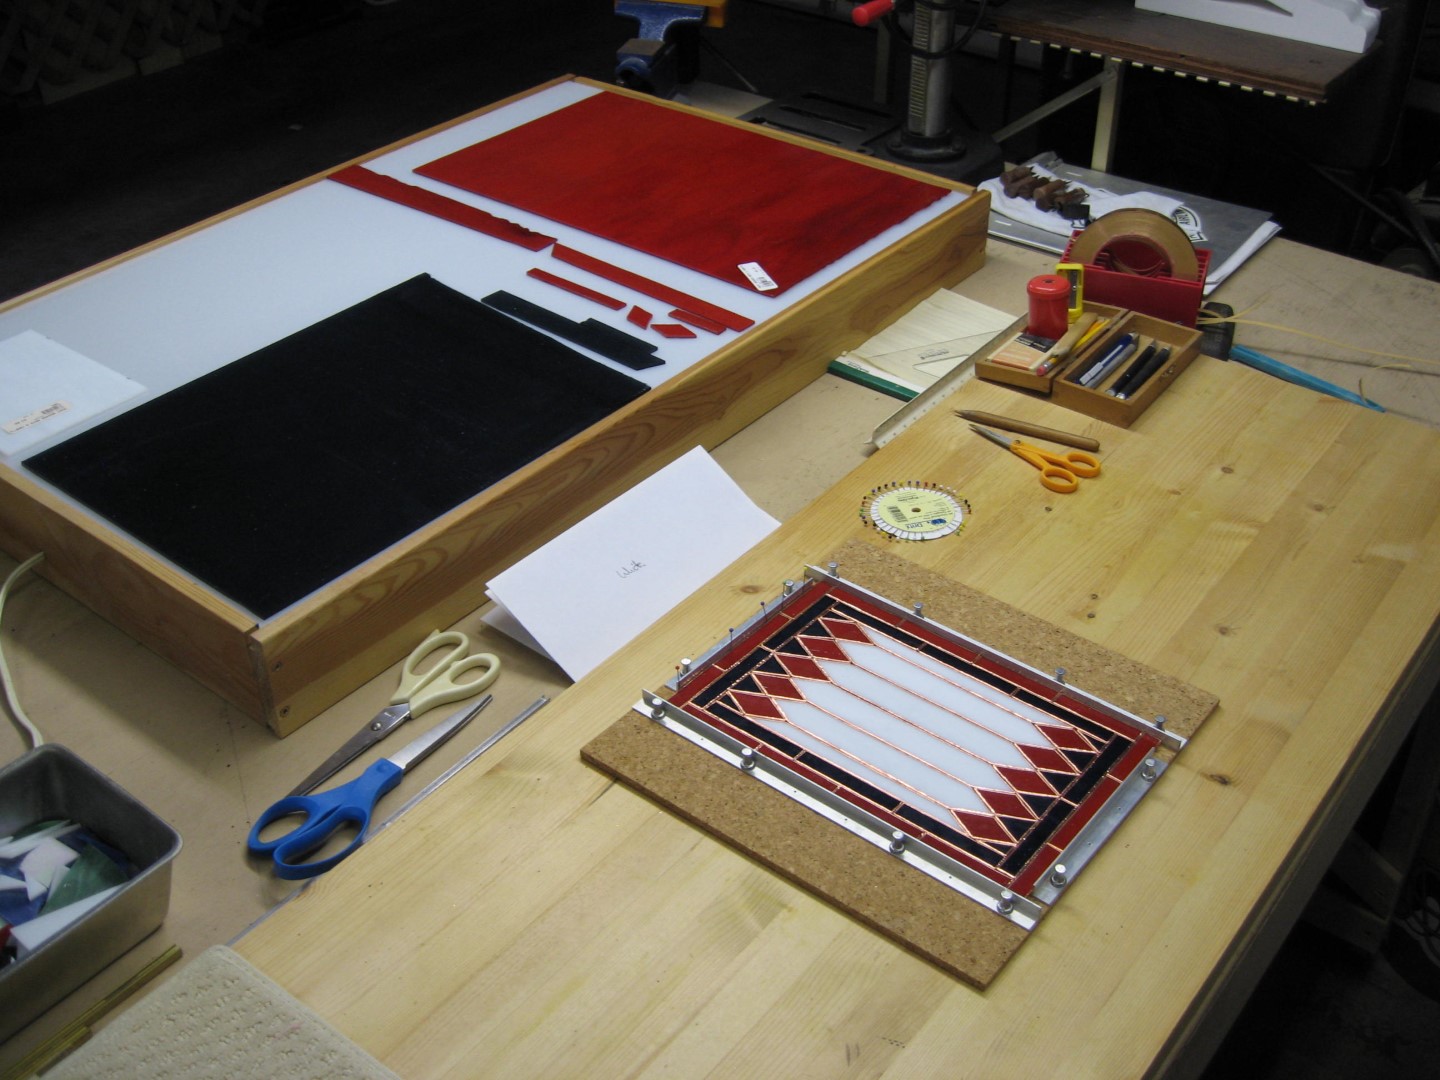
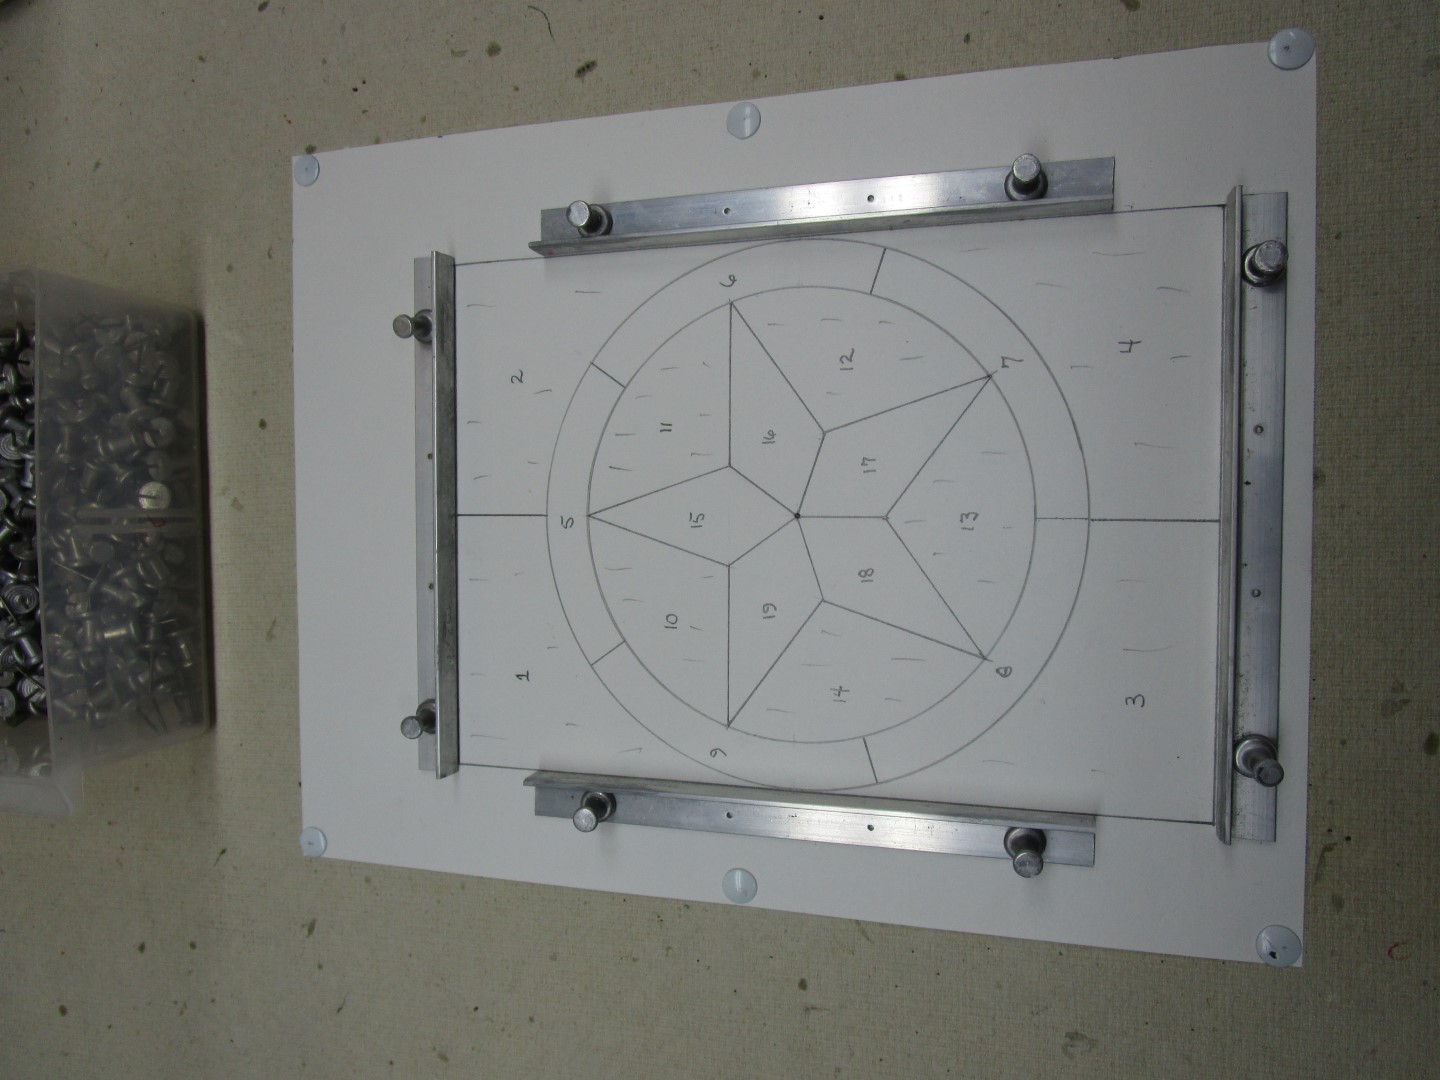
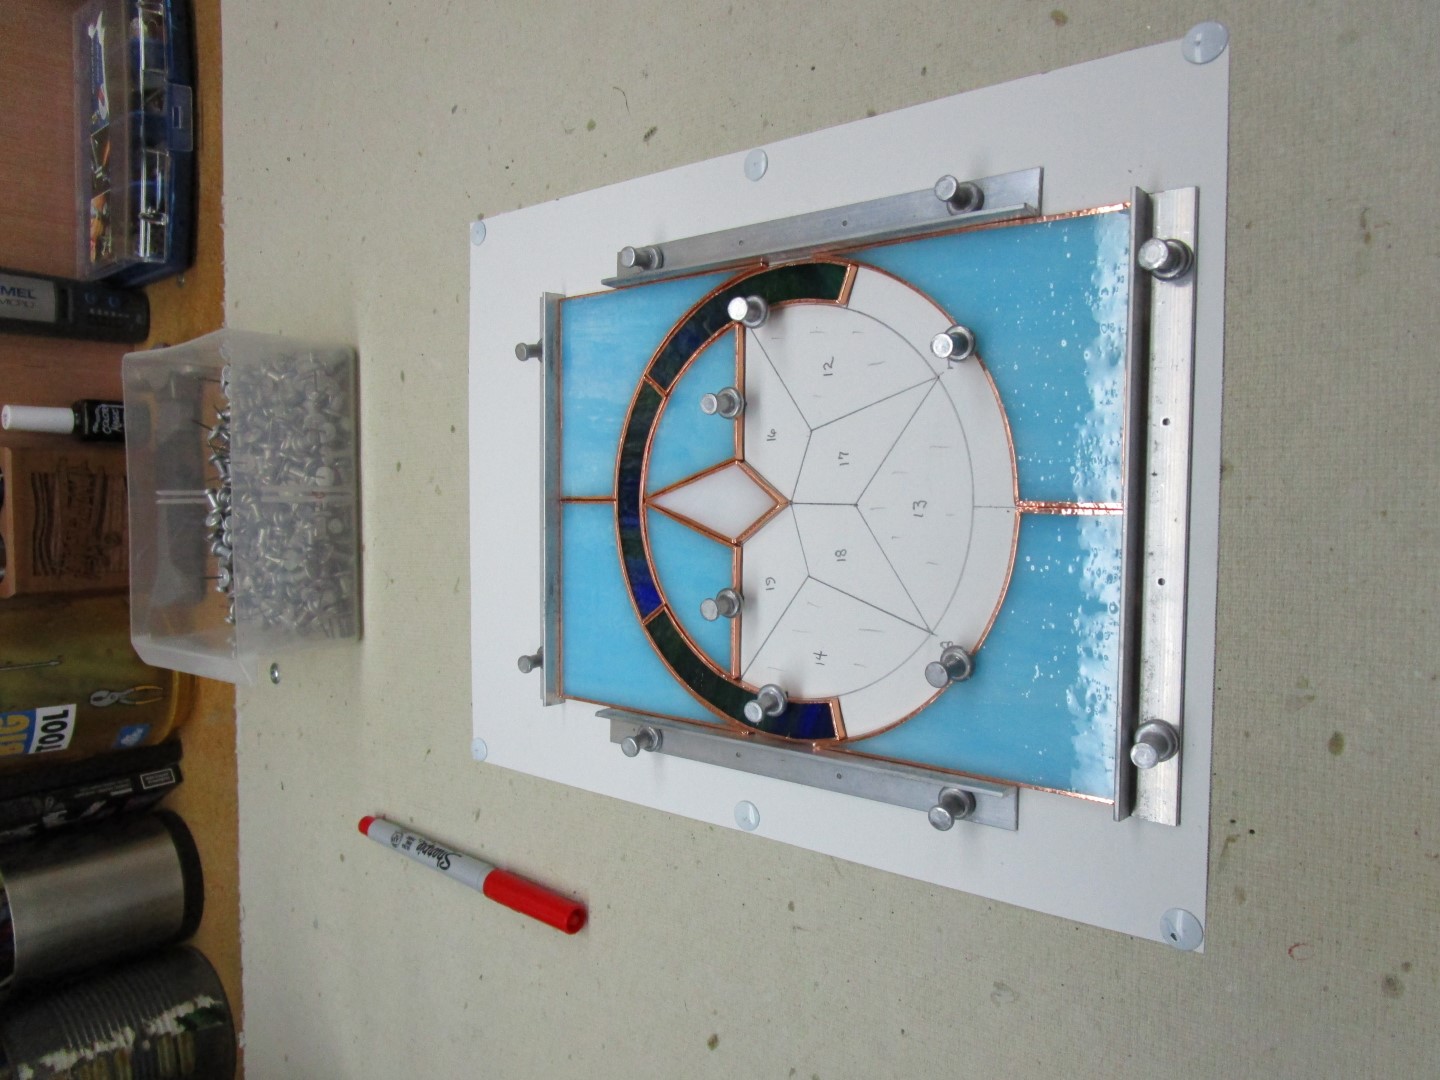
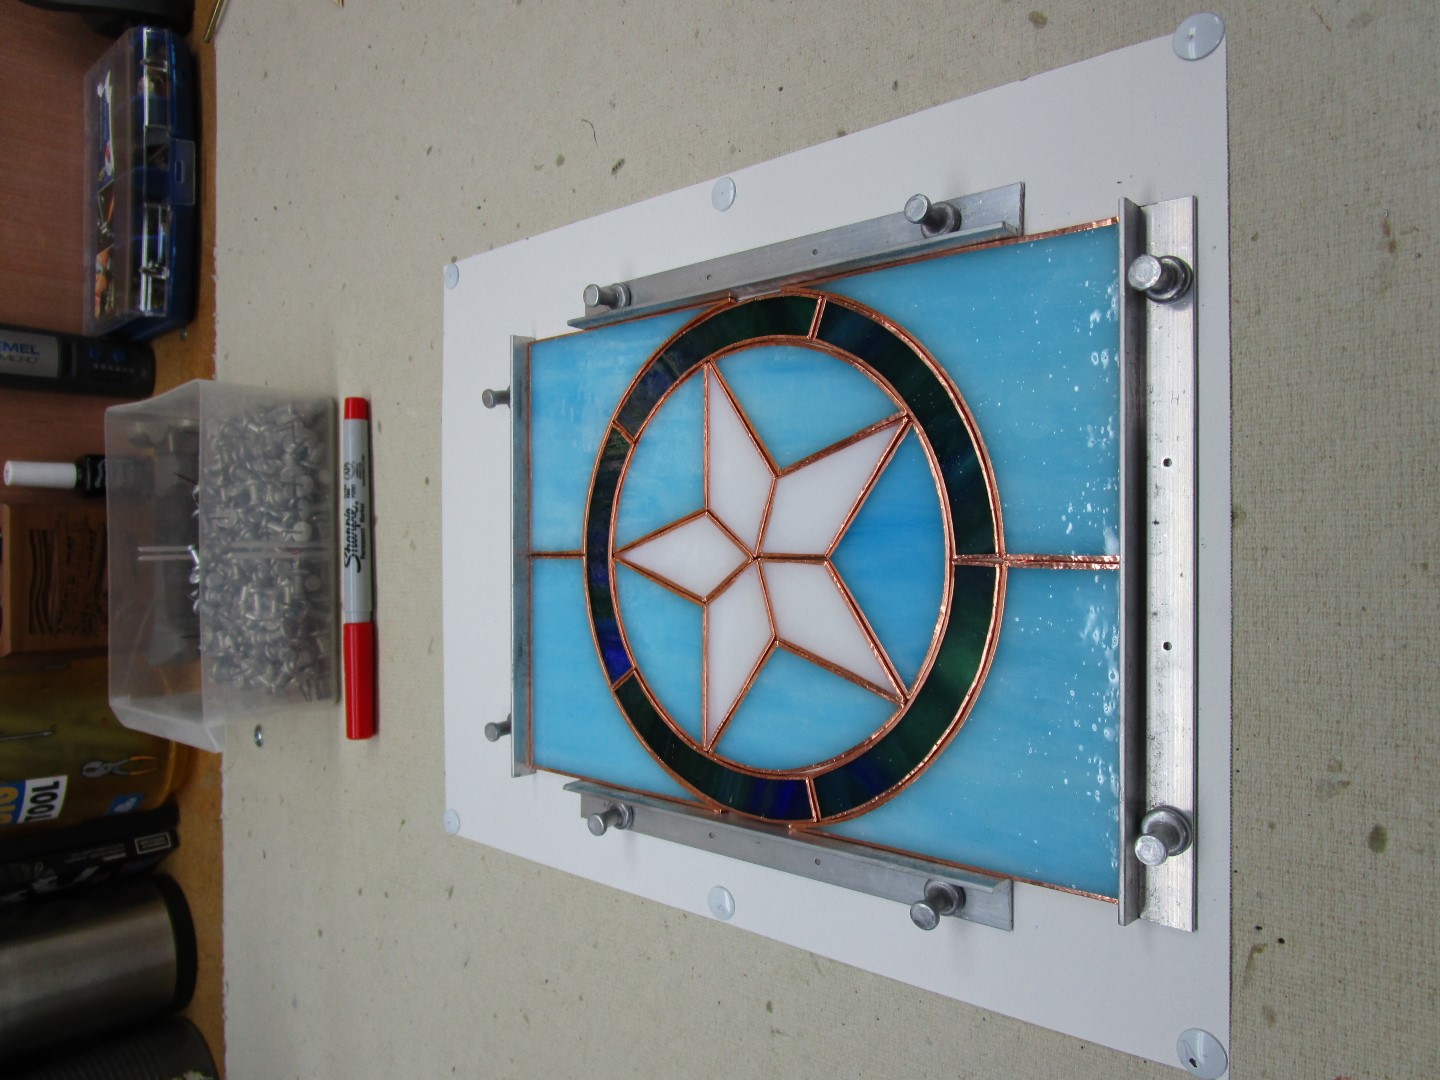
My youngest son, Ryan, has an office set-up in his home, and he has asked me to assemble a Stained Glass panel to fit inside one of the "South" facing windows in his office. The first image below is his input on a recommended design, followed by my 90 piece 28″ x 37″ panel pattern on the workbench, and my color template.
This final posting is as of 17 June 2025. I updated my “Ryan's Office Window Panel Assembly Description which you can view and download using the link provided below.


Ryan's Office Window Panel Pattern.
Final Version of Ryan's Office Window Panel Assembly Description.
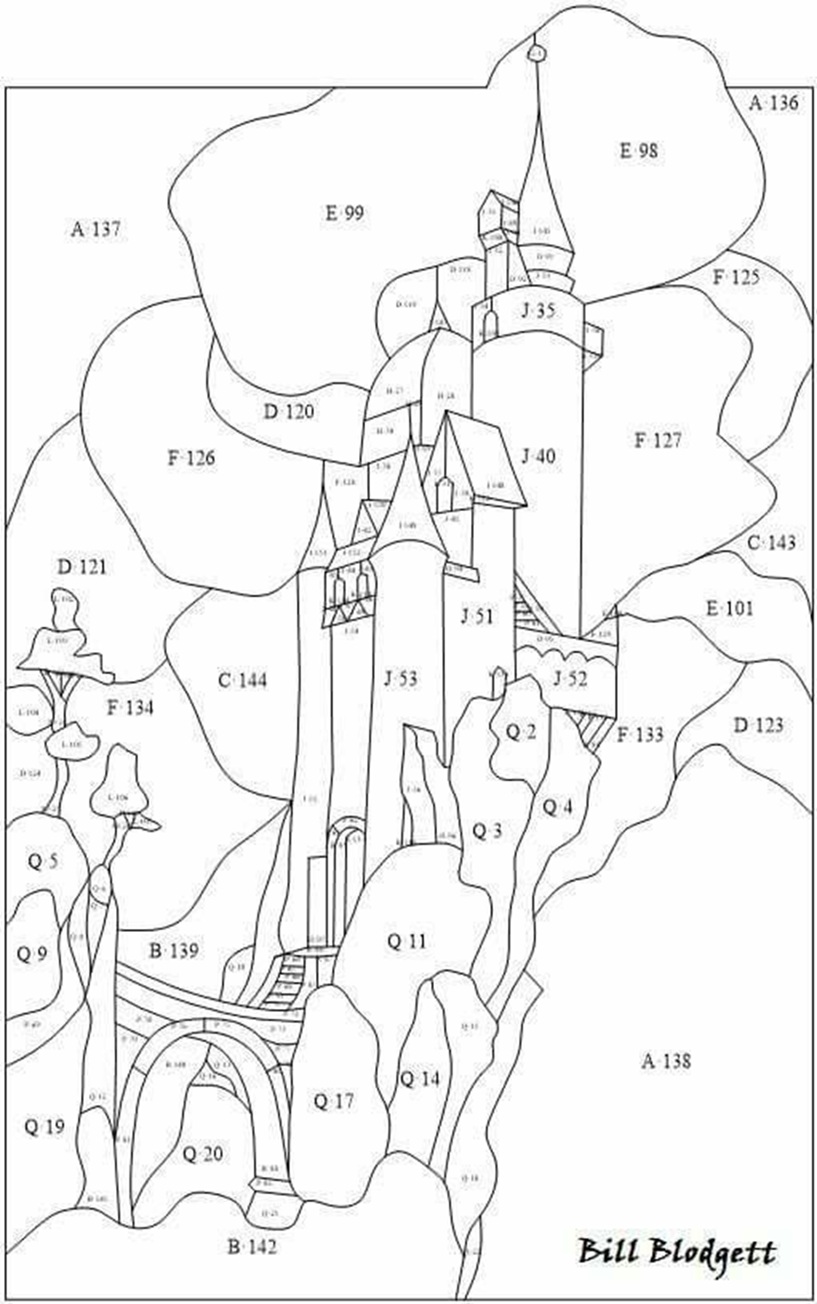
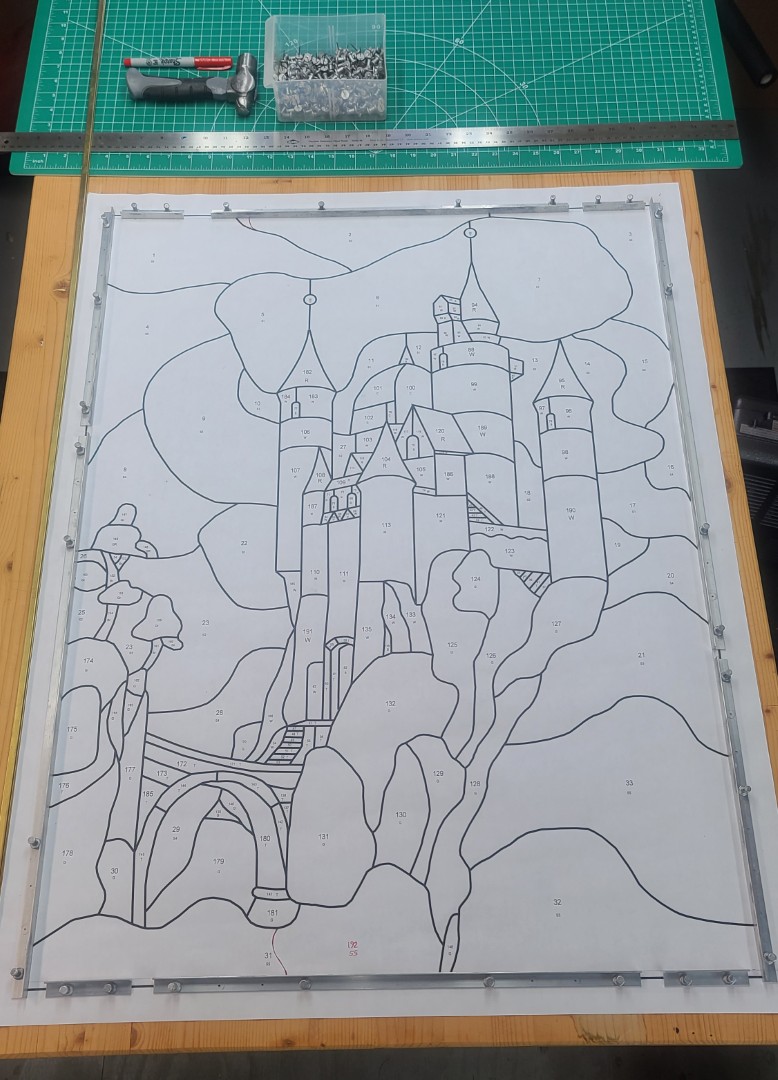
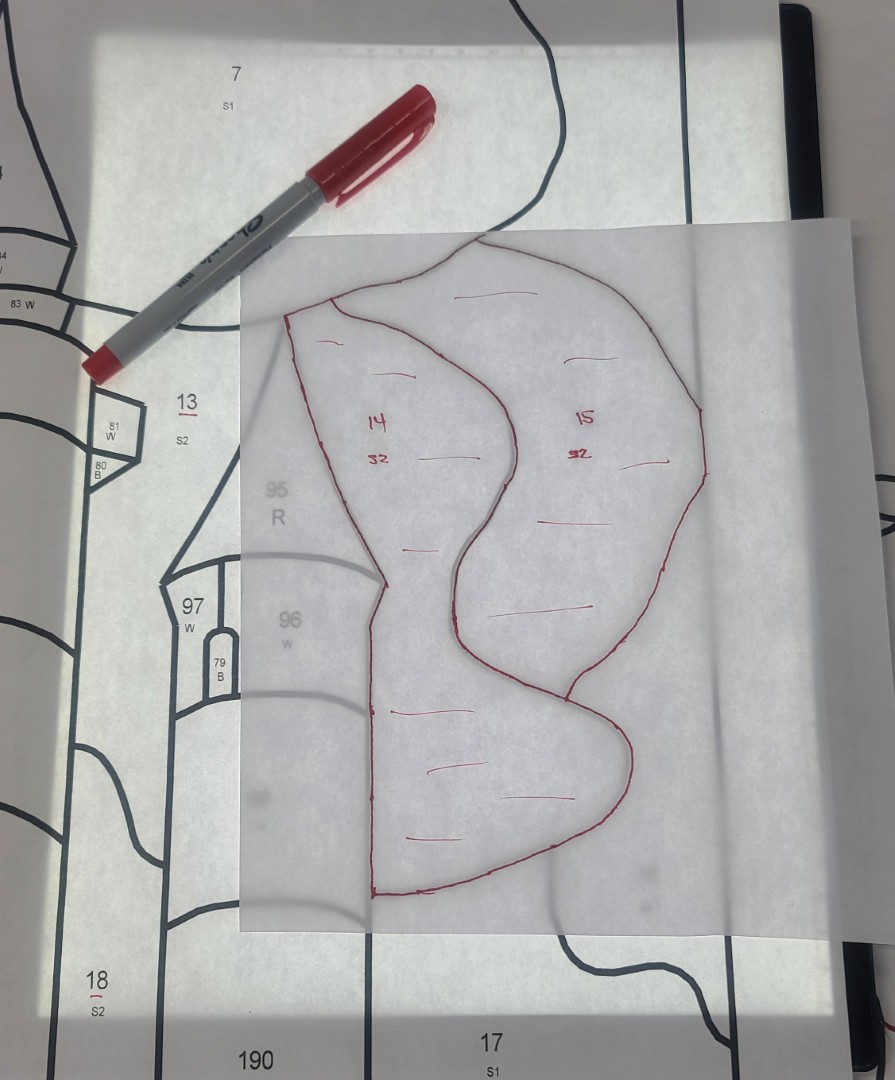
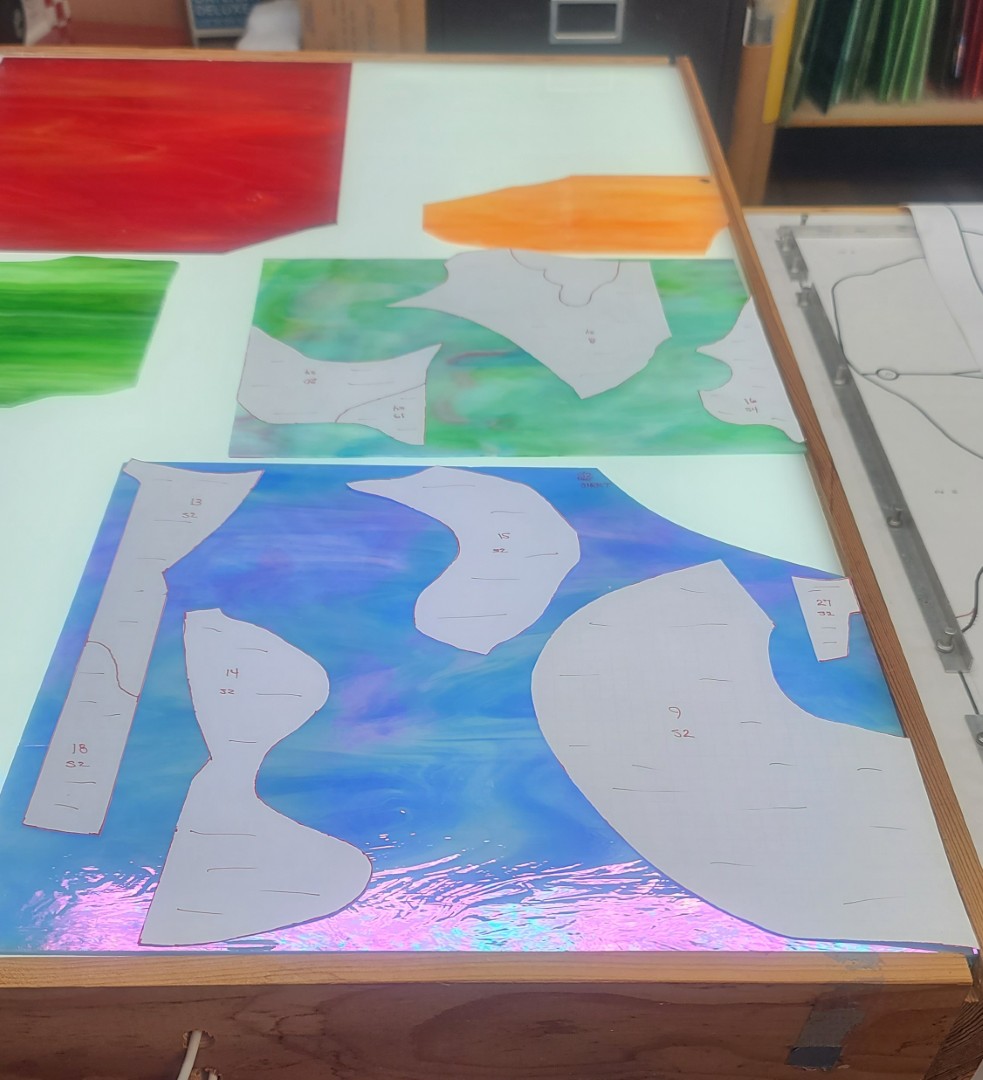
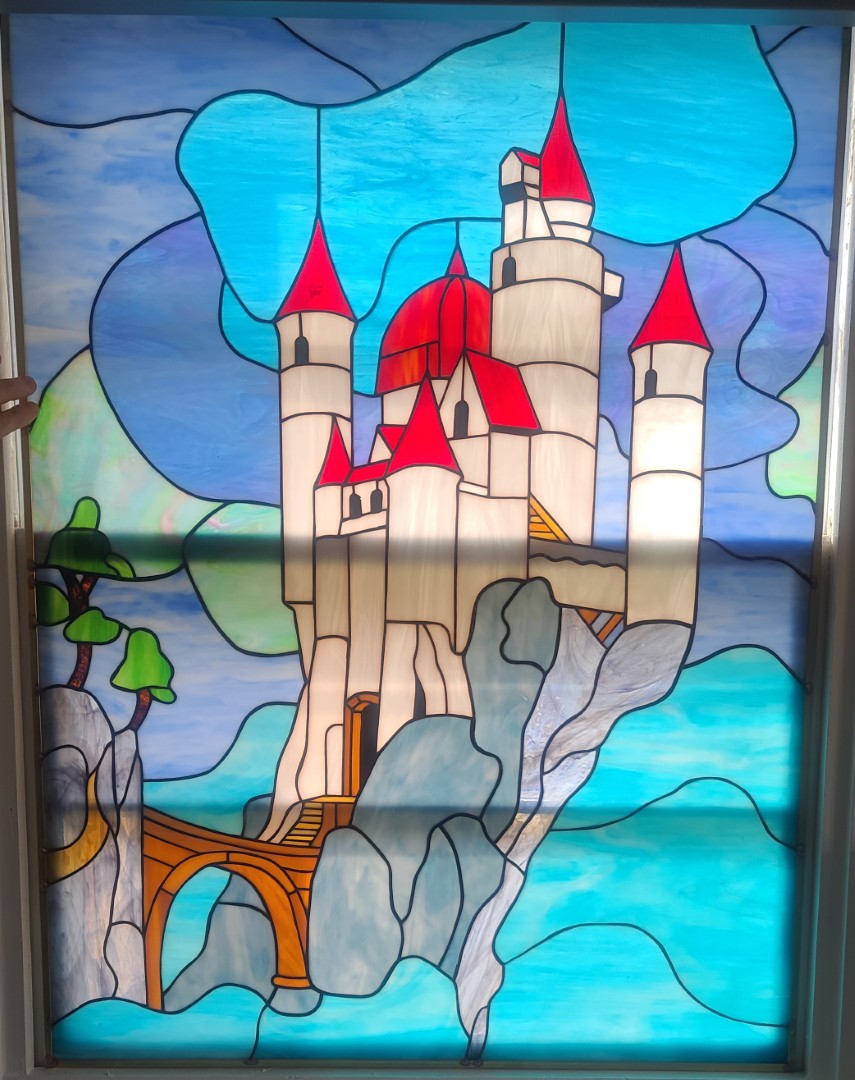
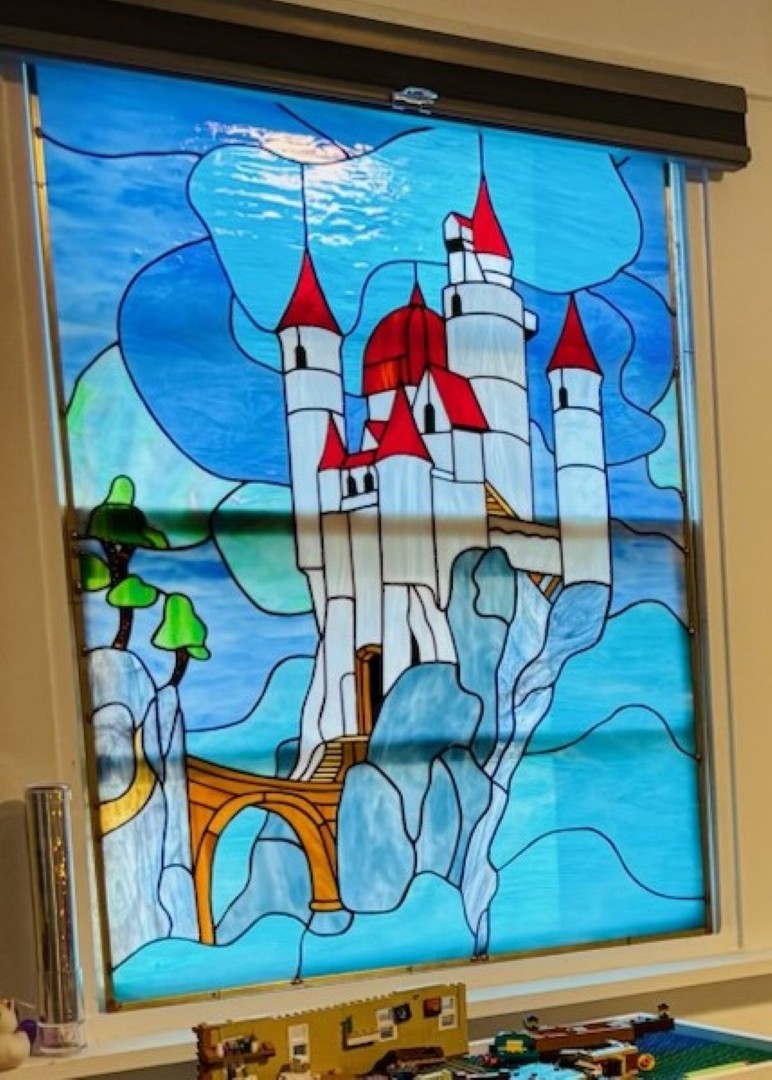
"Fantasy Castle in the Sky"
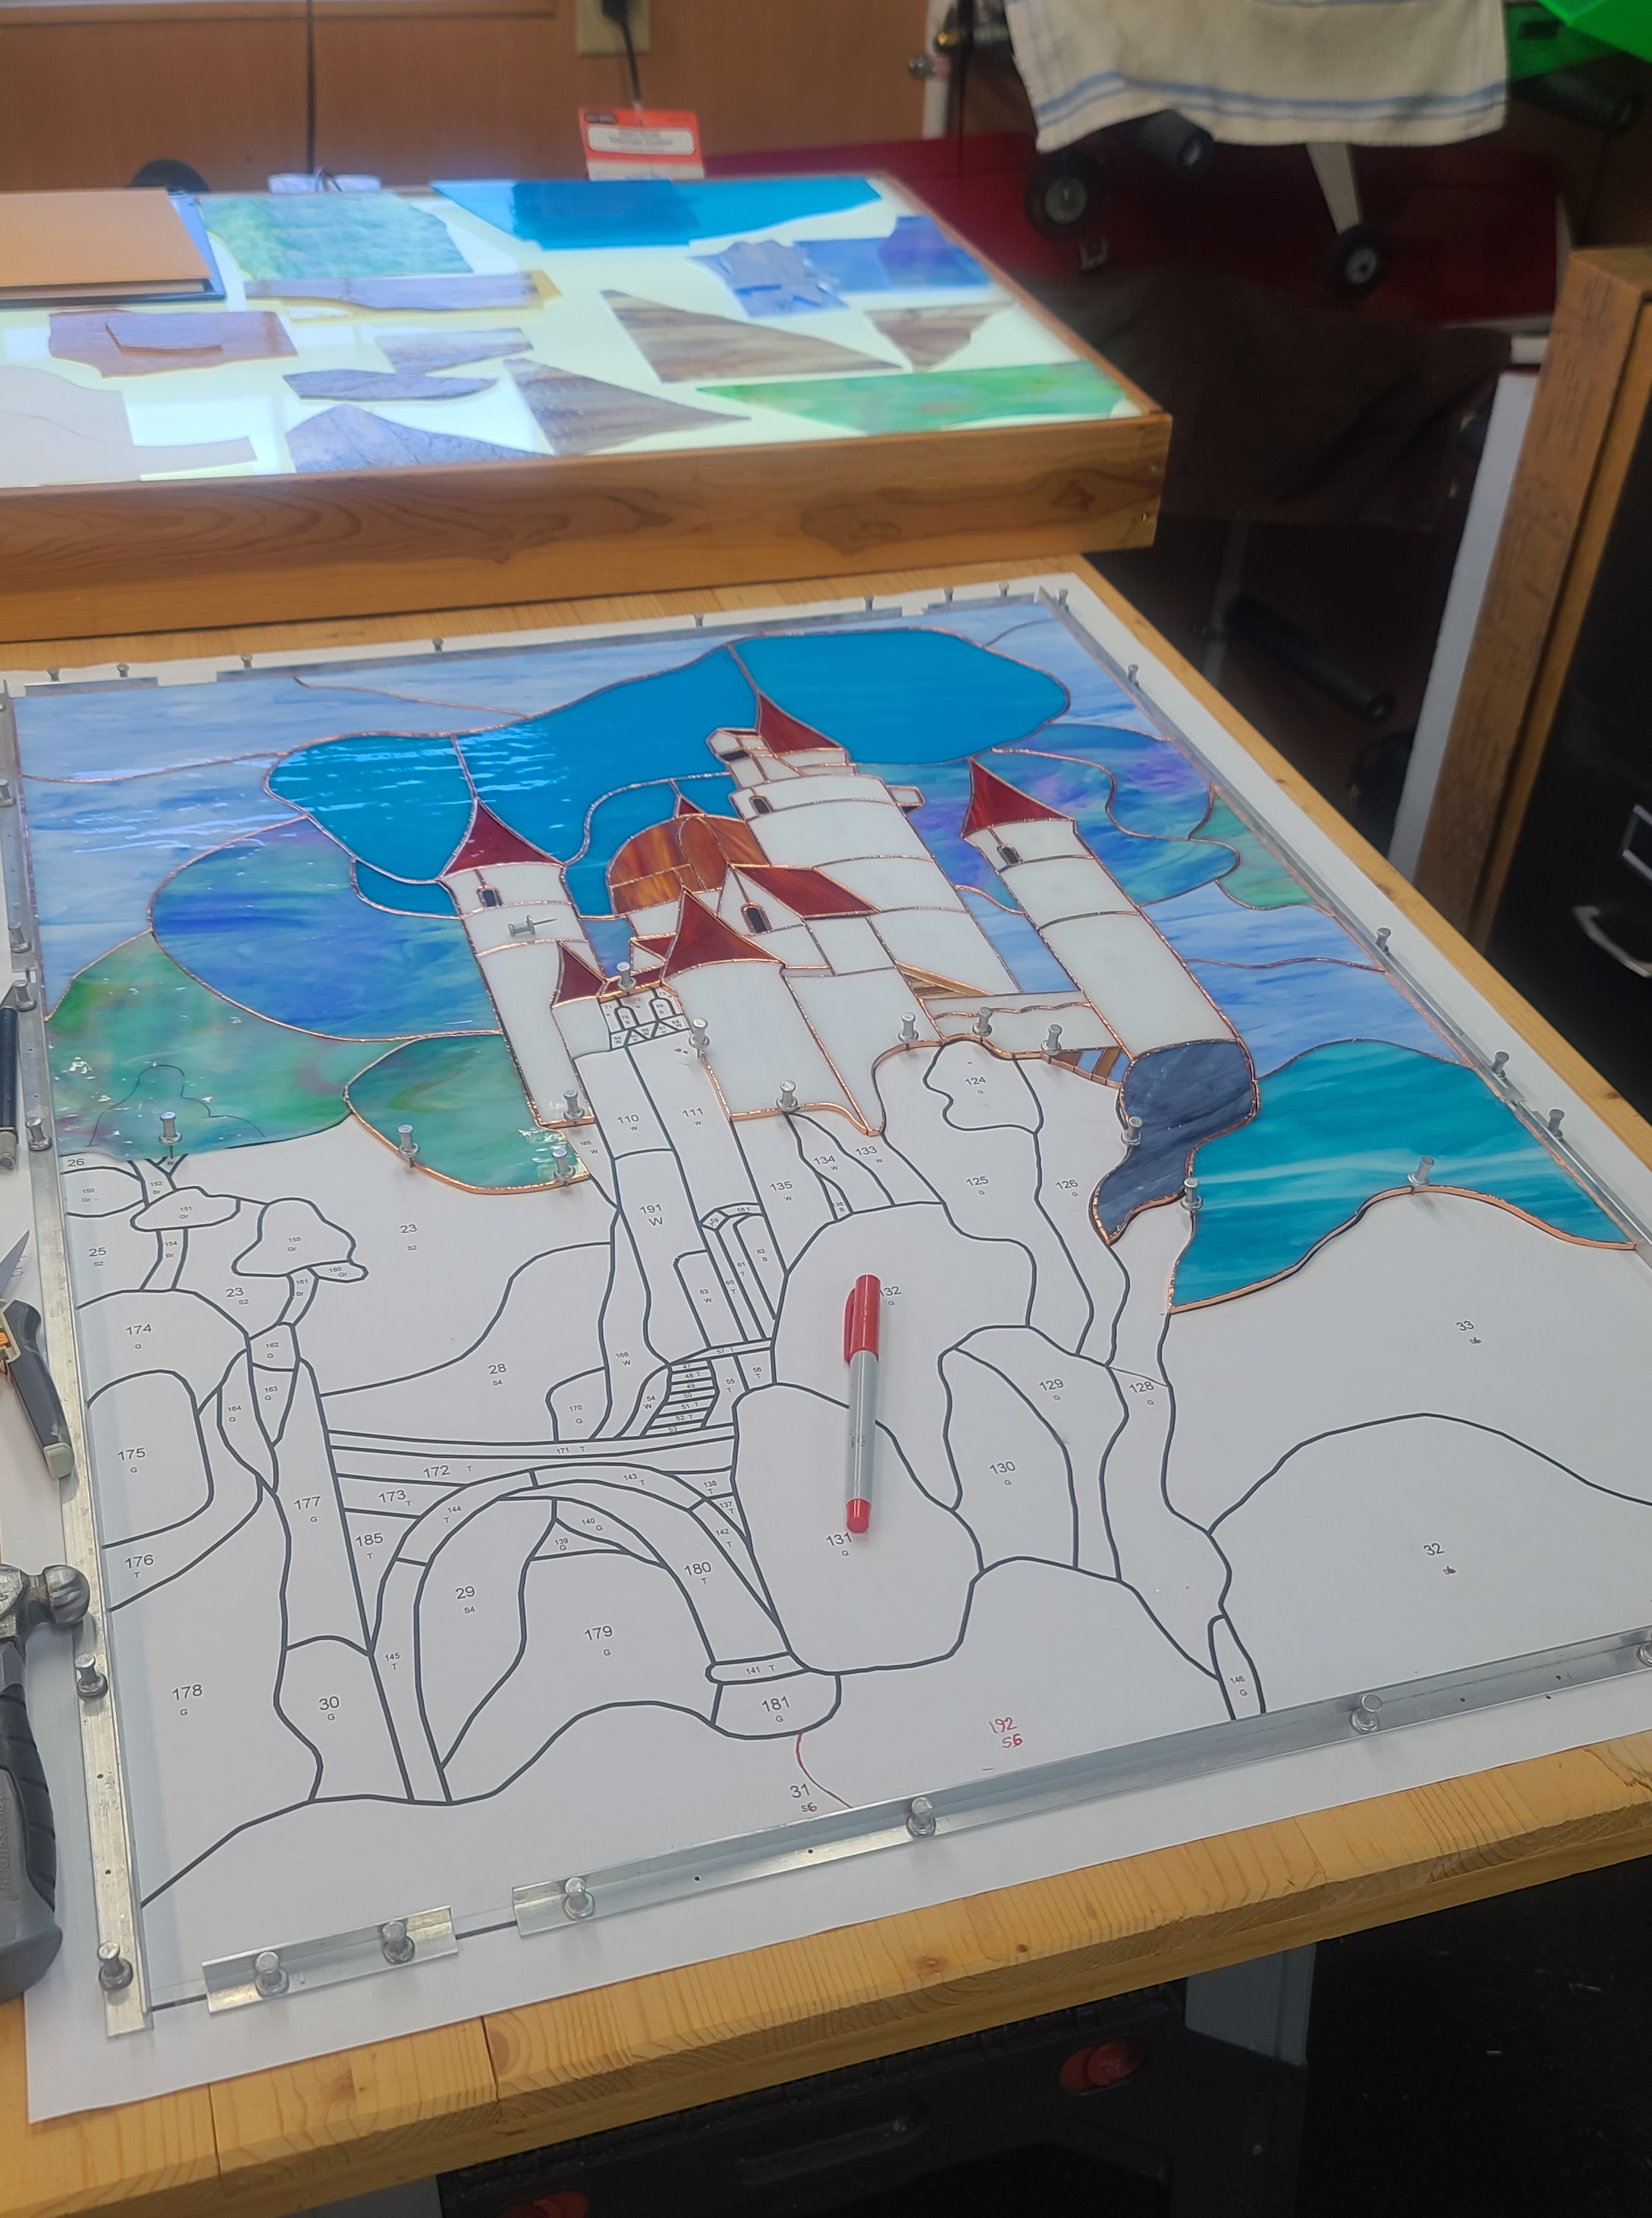
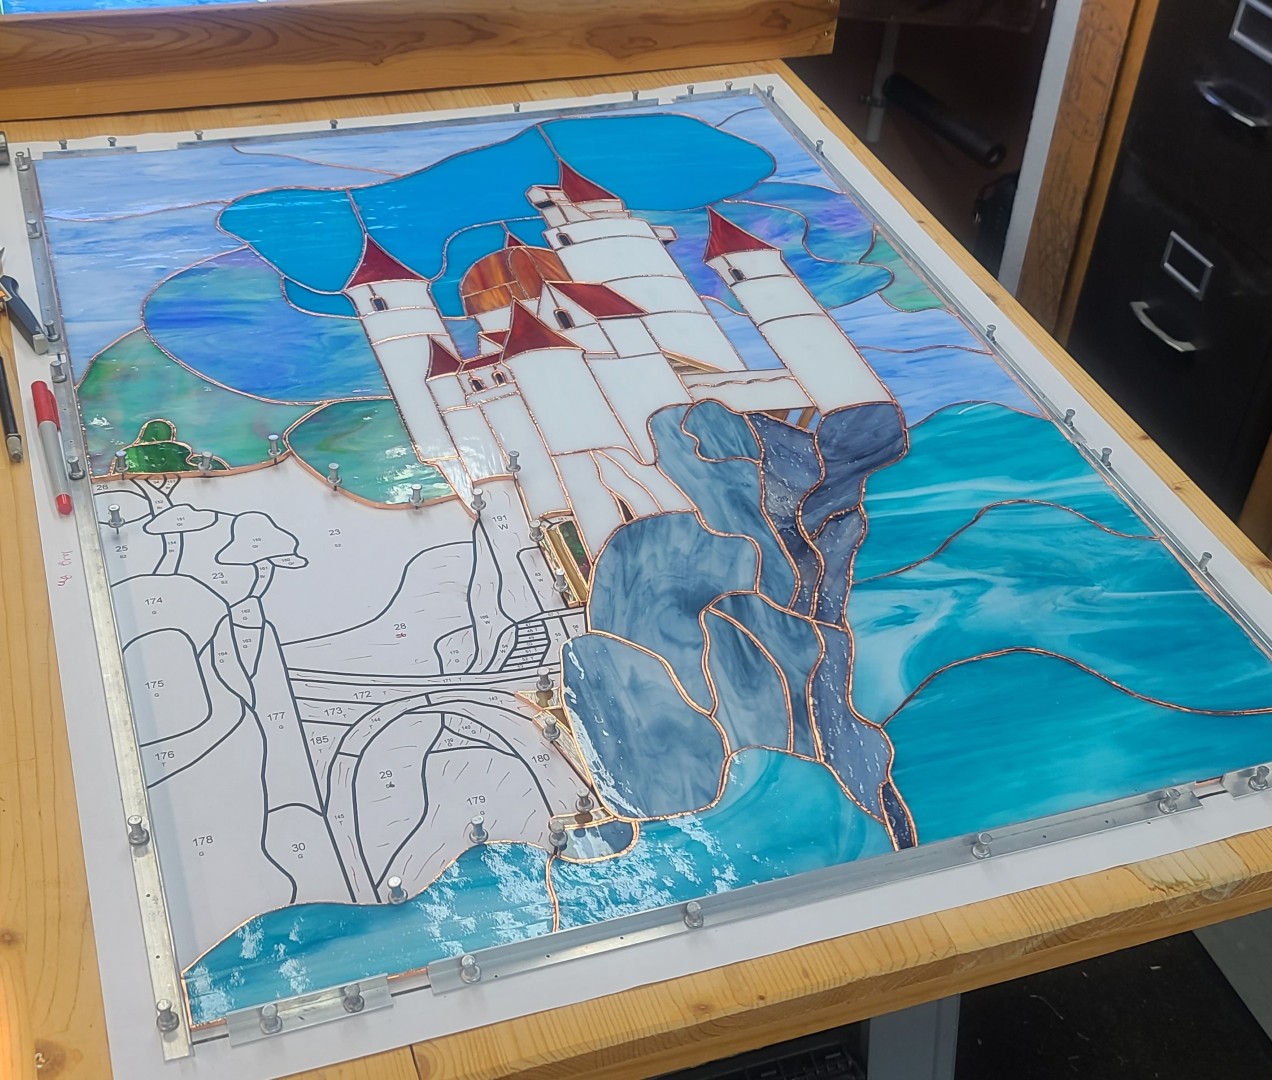
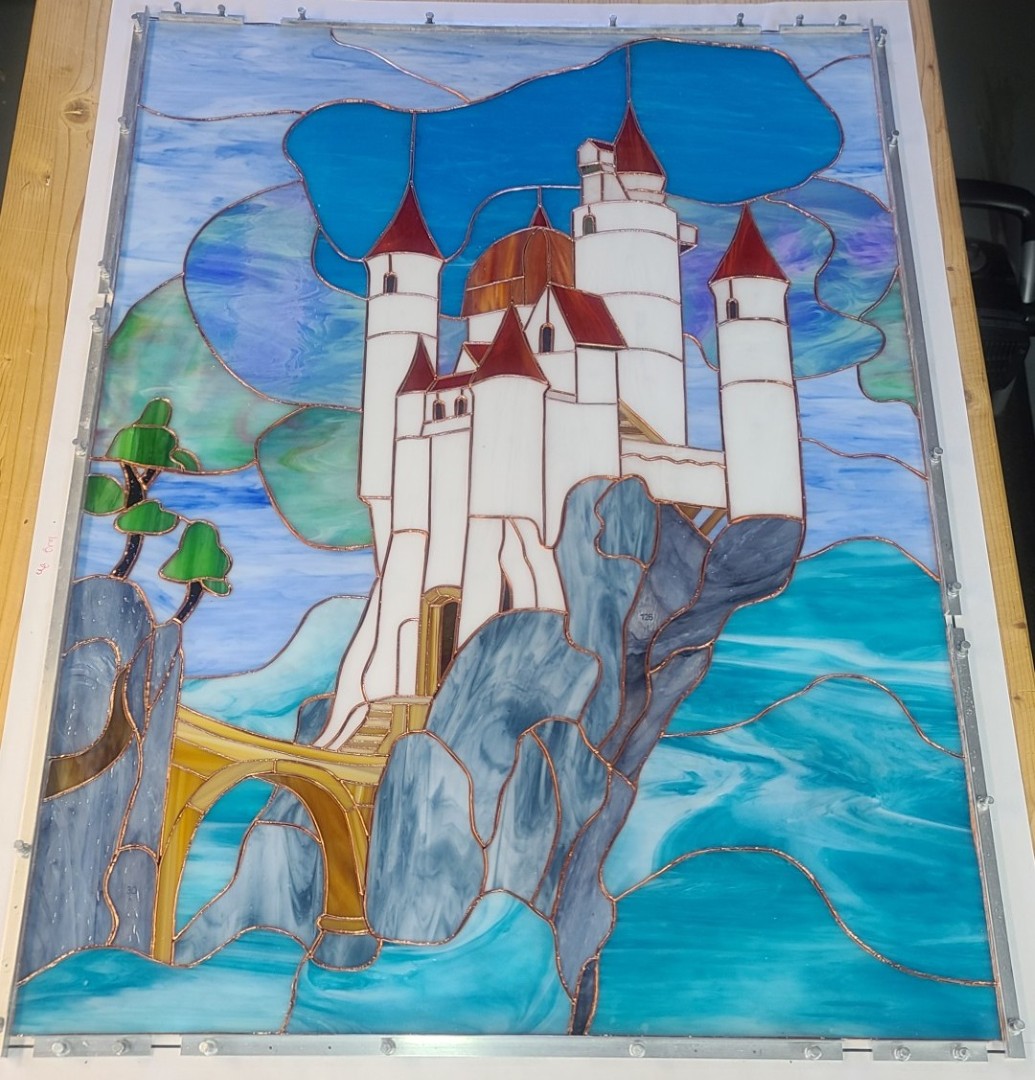
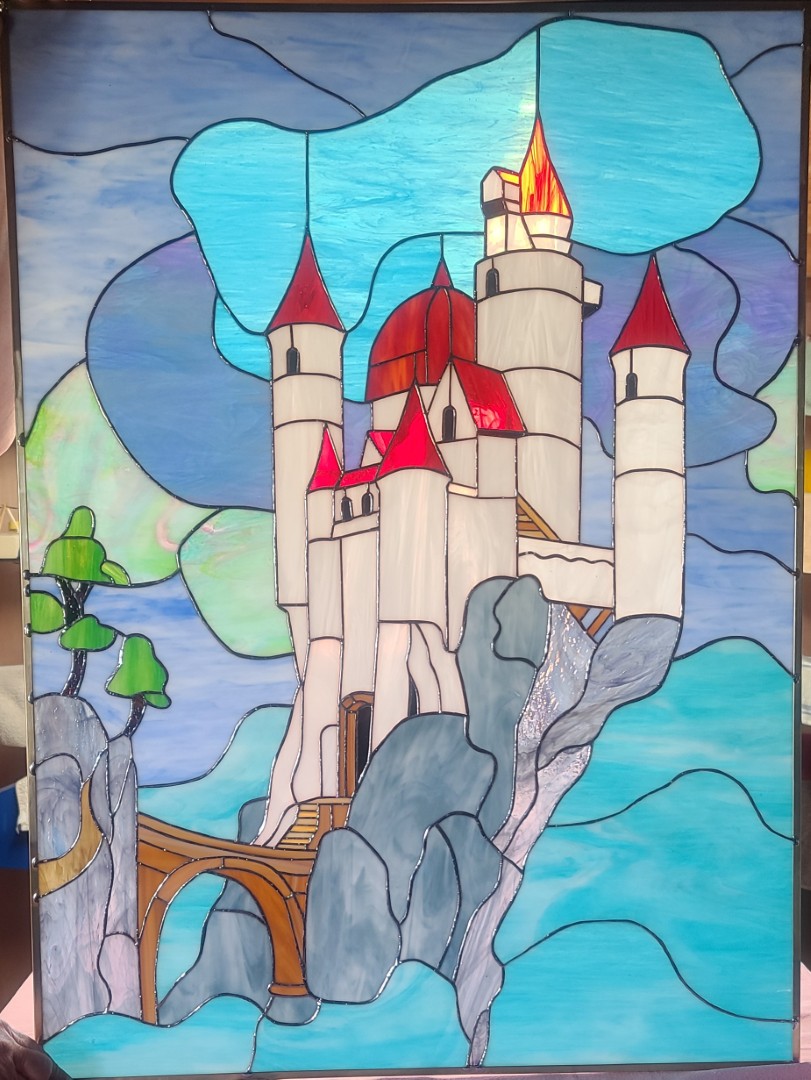
This large panel is a gift to my two Grandchildren, August and Everly, and the 26″x35″ panel has 190+/- individual pieces of copper foiled Stained Glass. It currently sits in a South facing window in their bedroom, and it not only looks real nice but more importantly they both really like it. Another family heirloom finished.
This final posting is as of 10 February 2025 and I updated my “Fantasy Castle in the Sky” Assembly Description which you can view and download using the link provided below.


 ;
;

Final Version of "Fantasy Castle in the Sky" Assembly Description.
"Fantasy Castle in the Sky" Pattern.
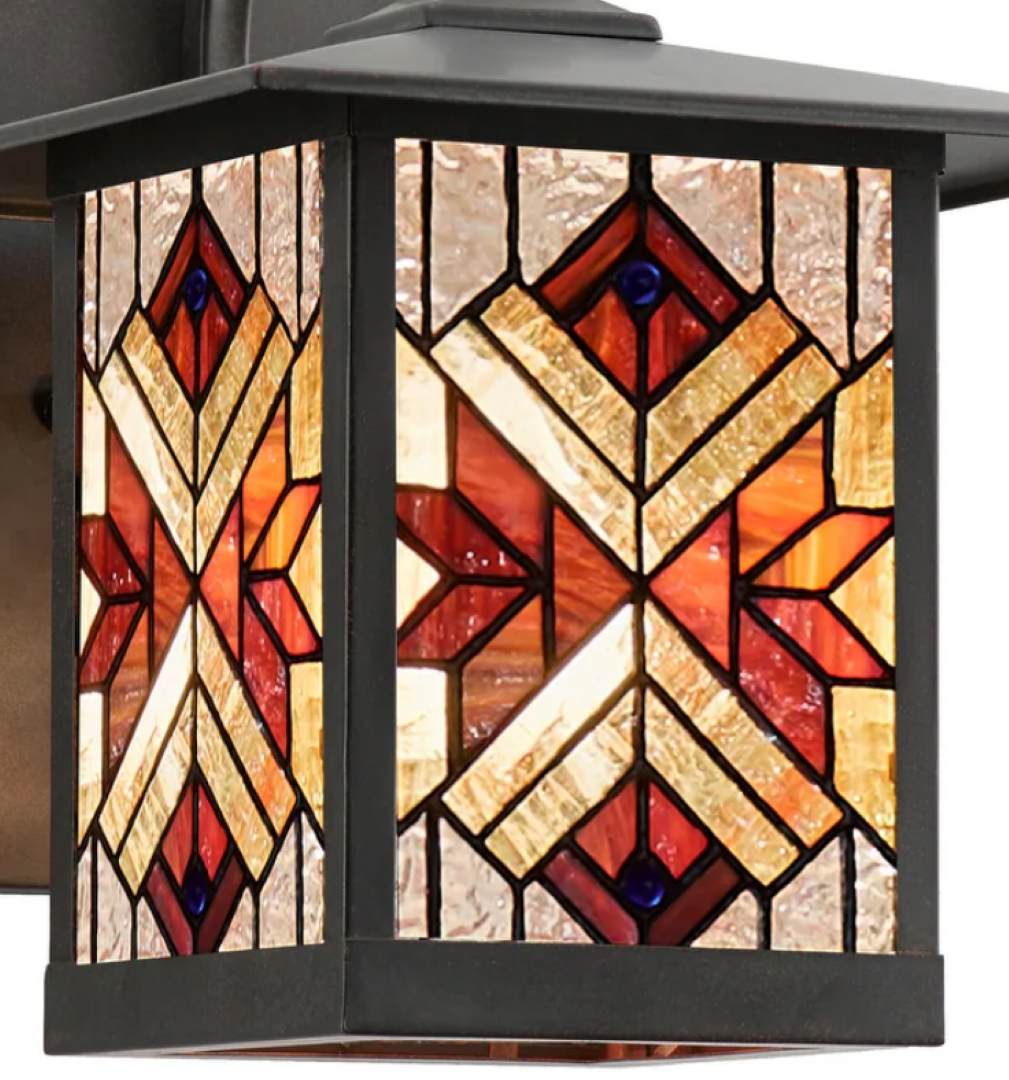
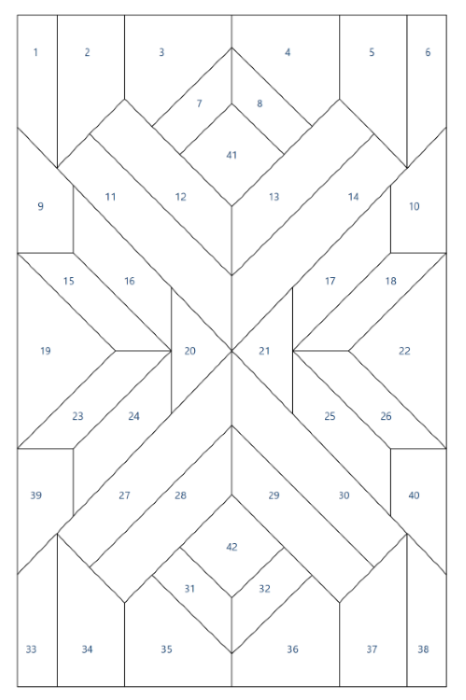
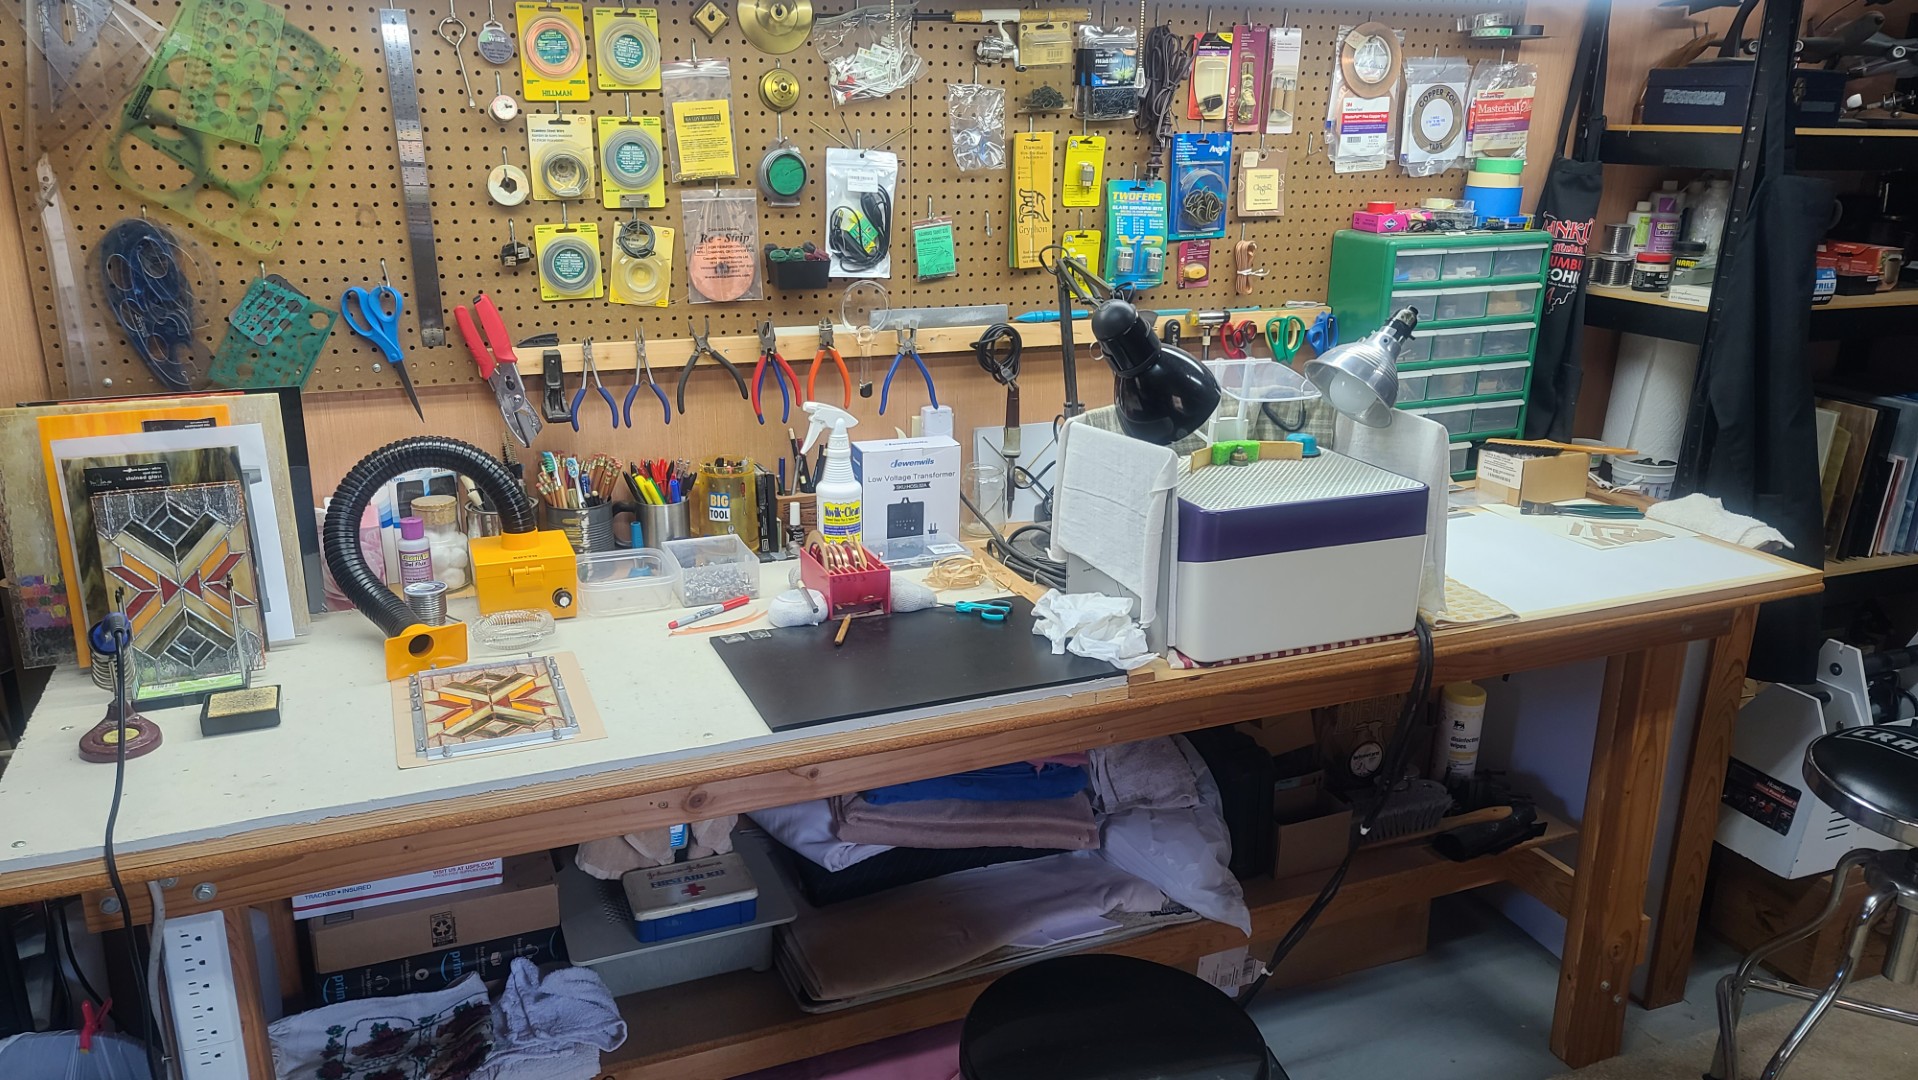
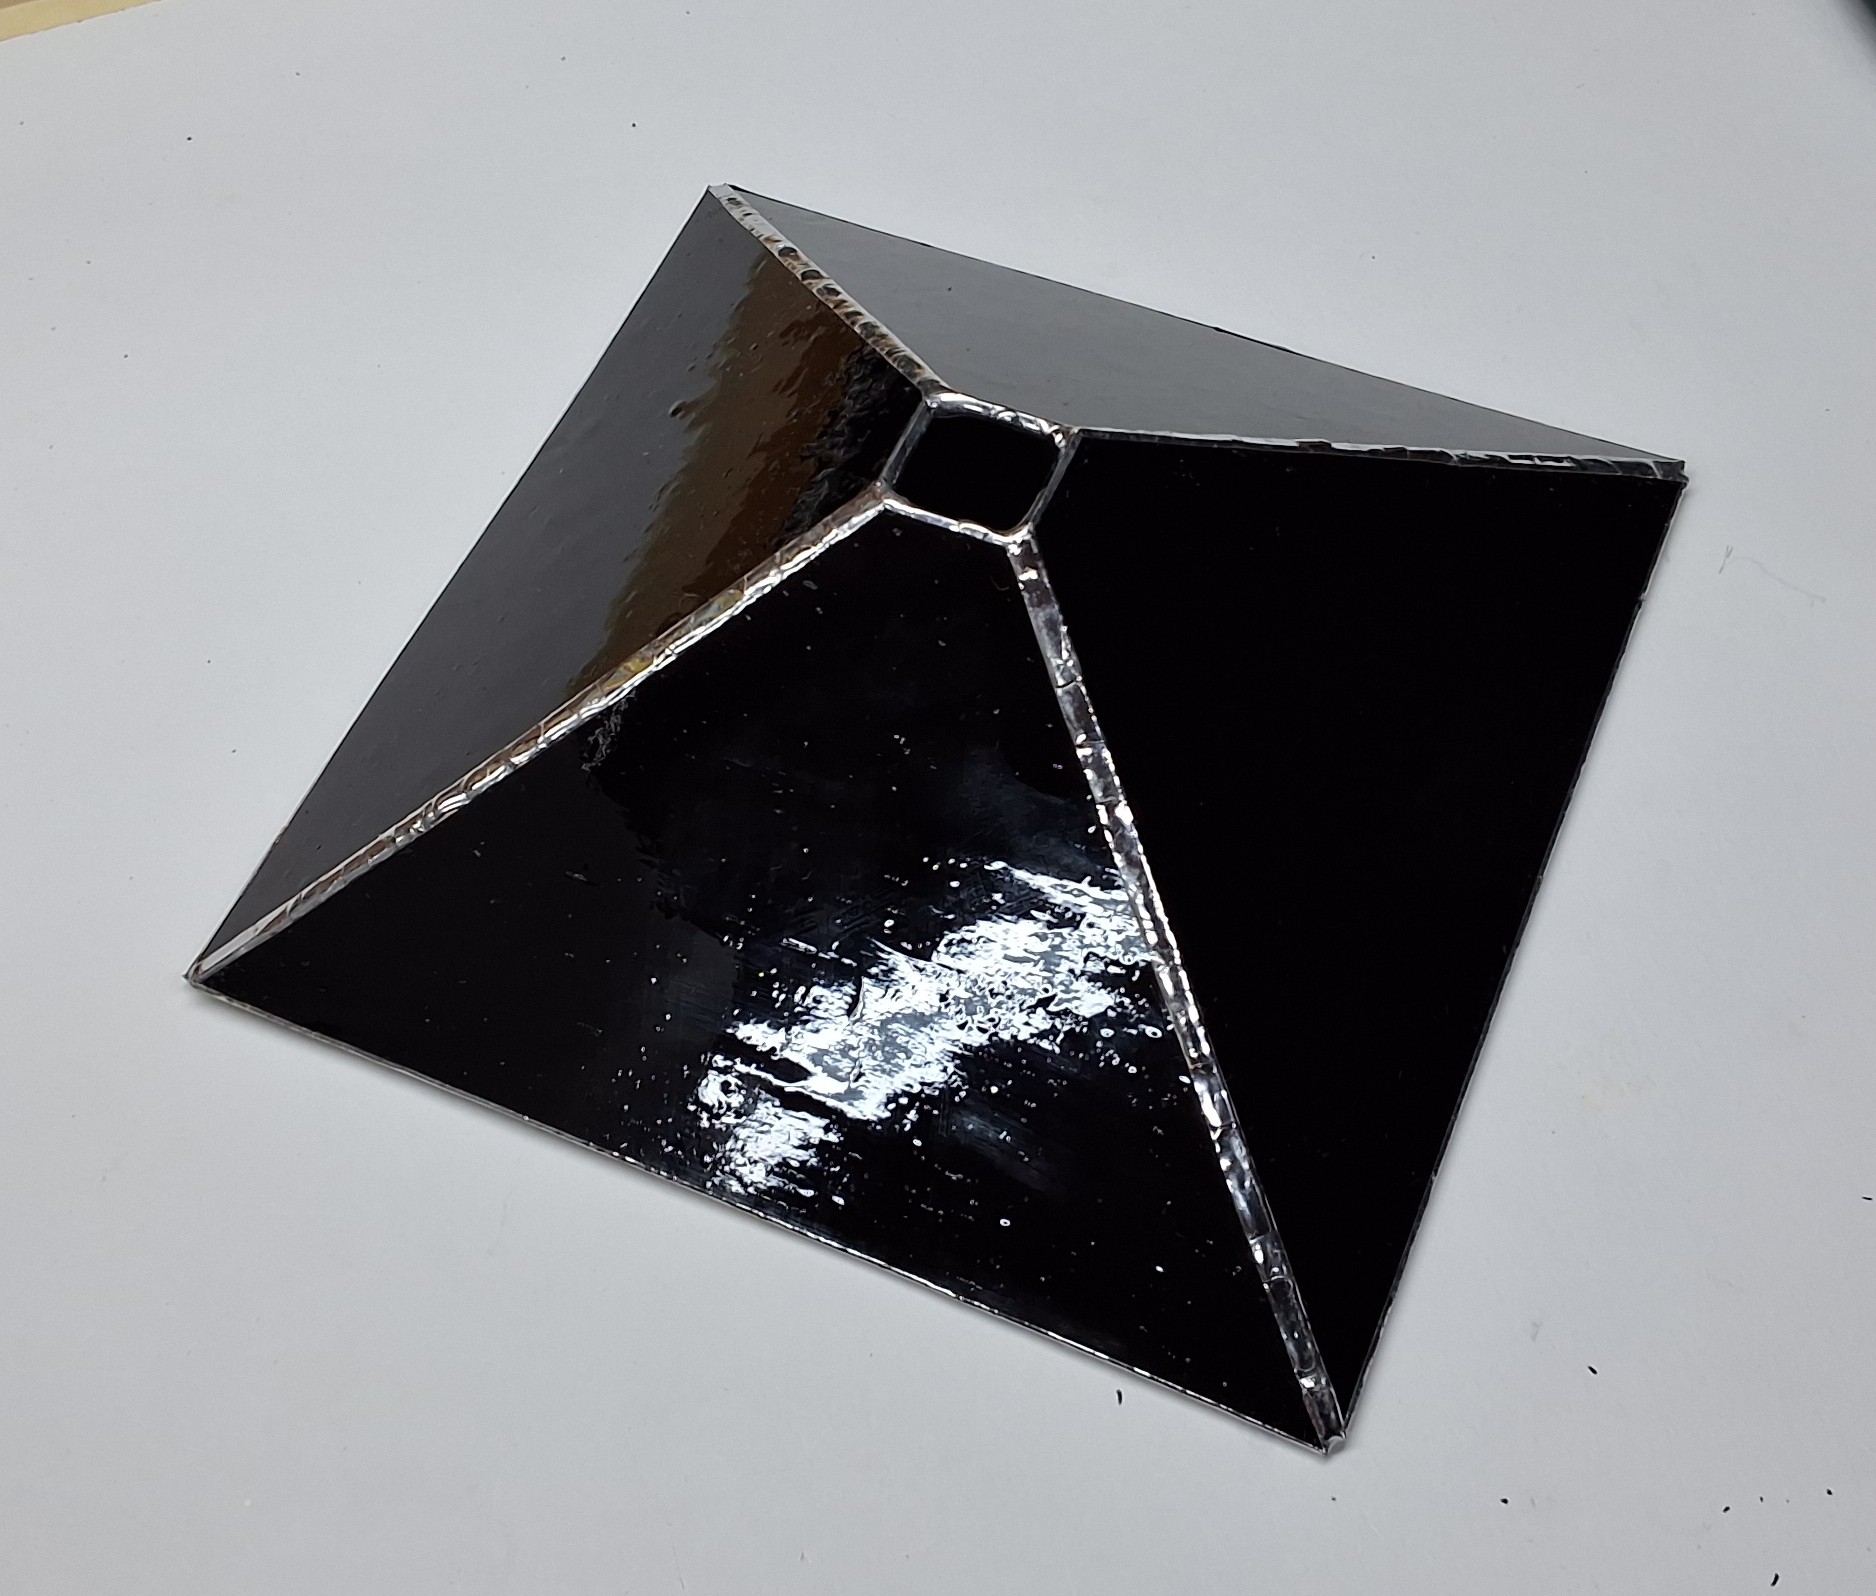
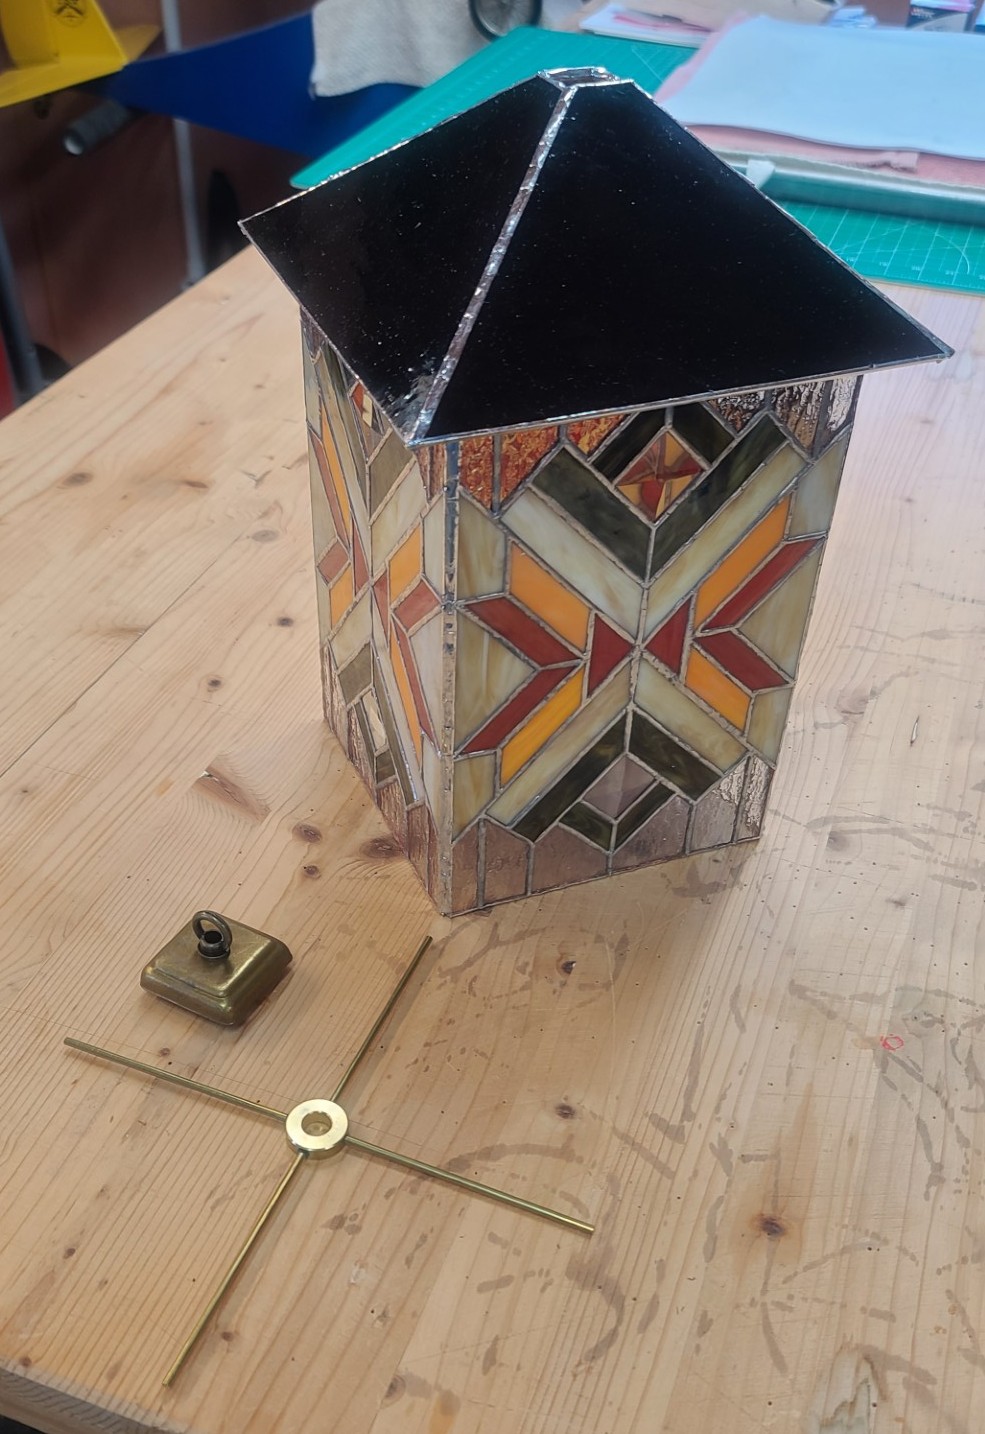
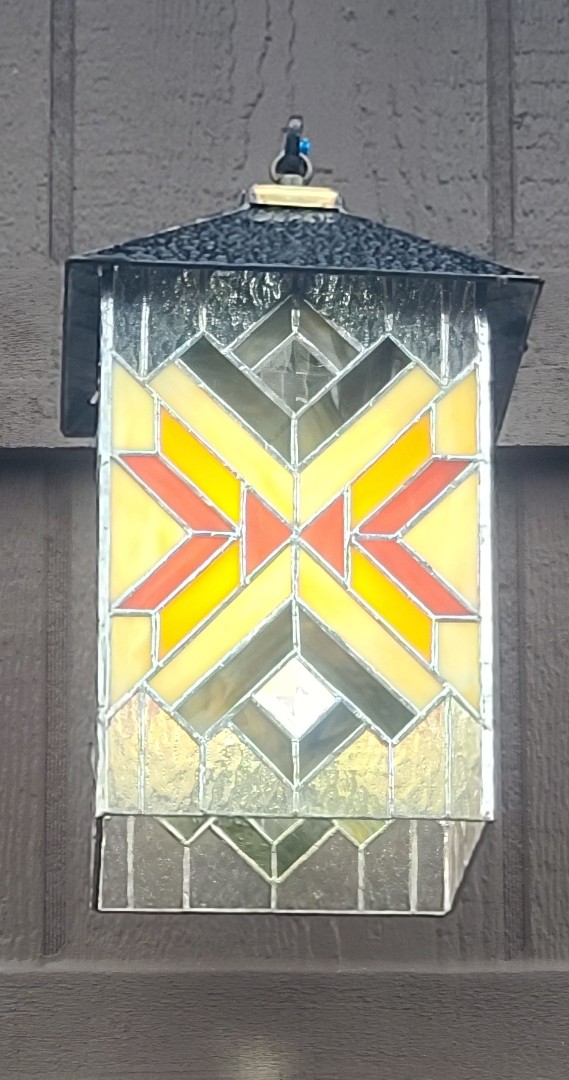
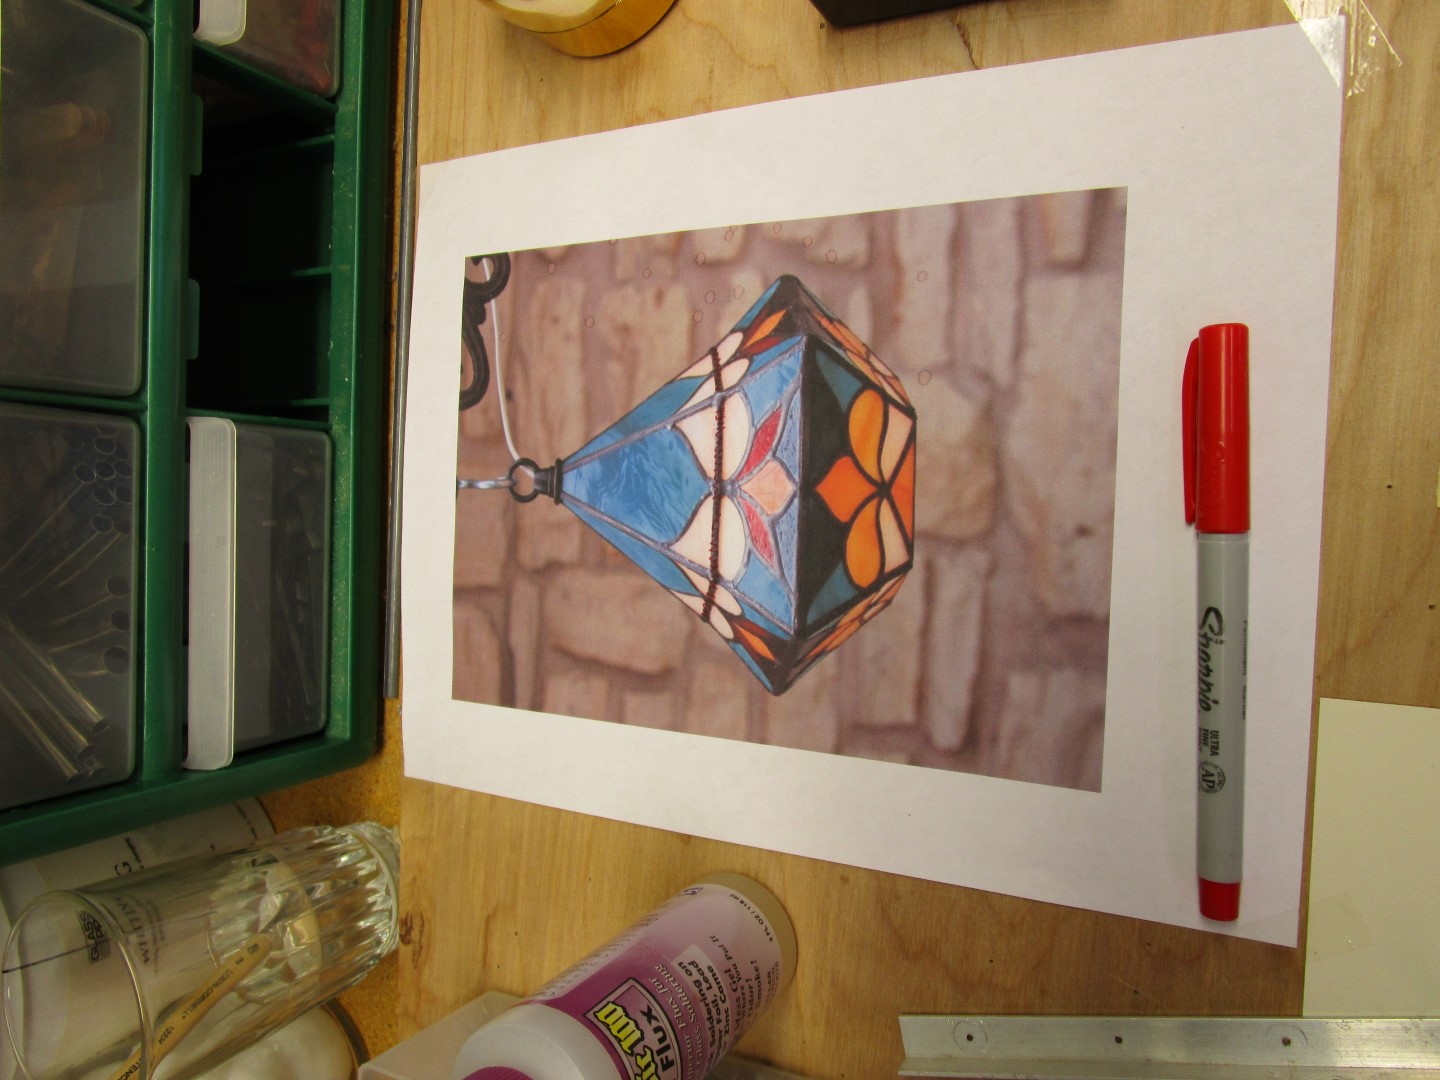
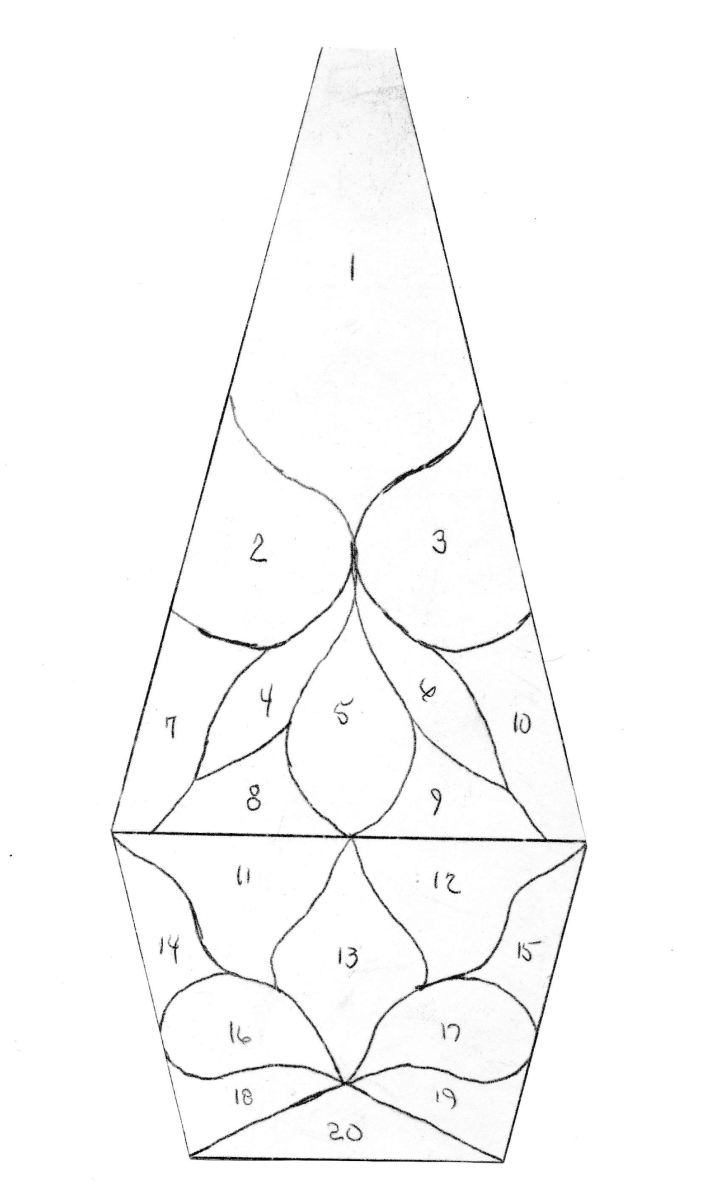
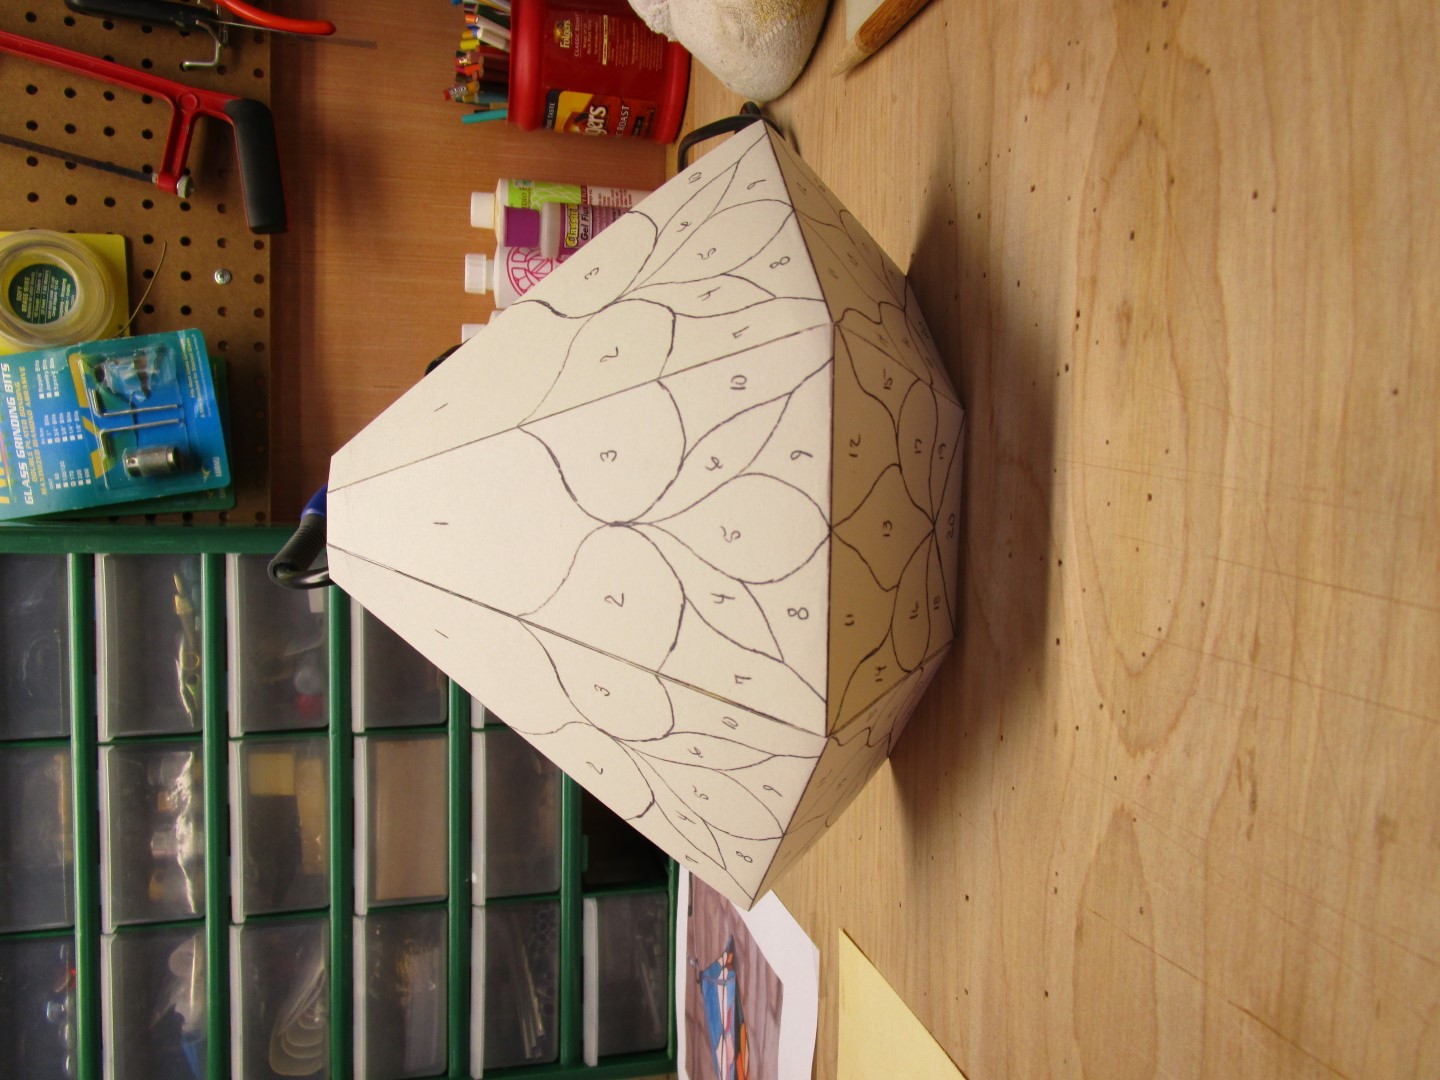
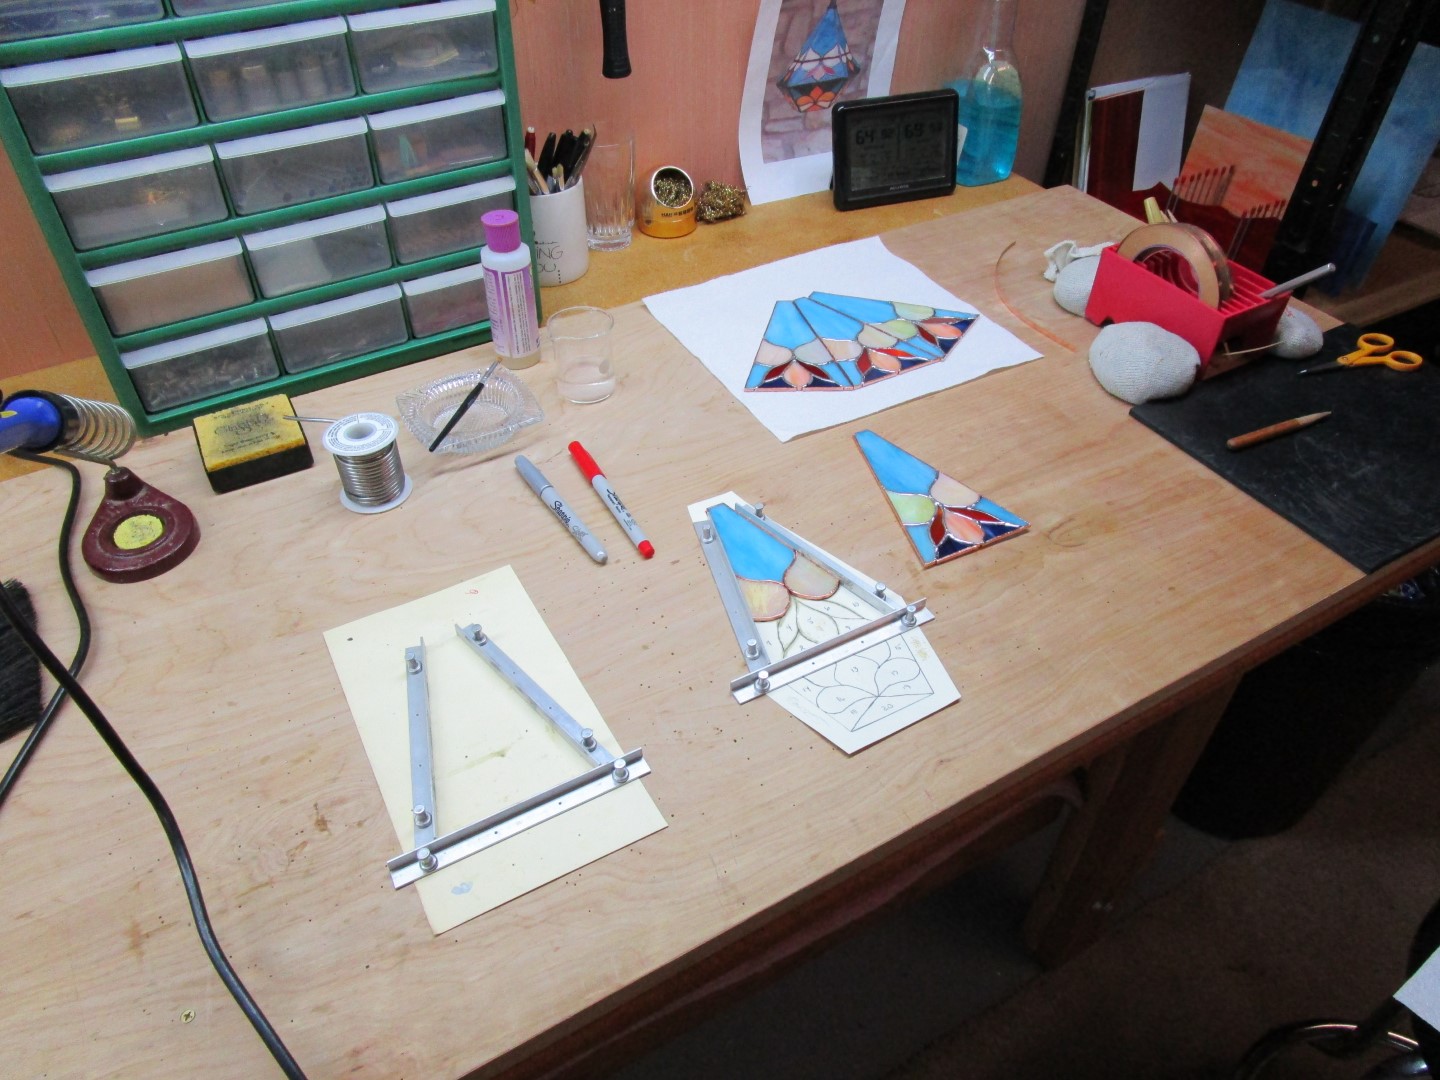
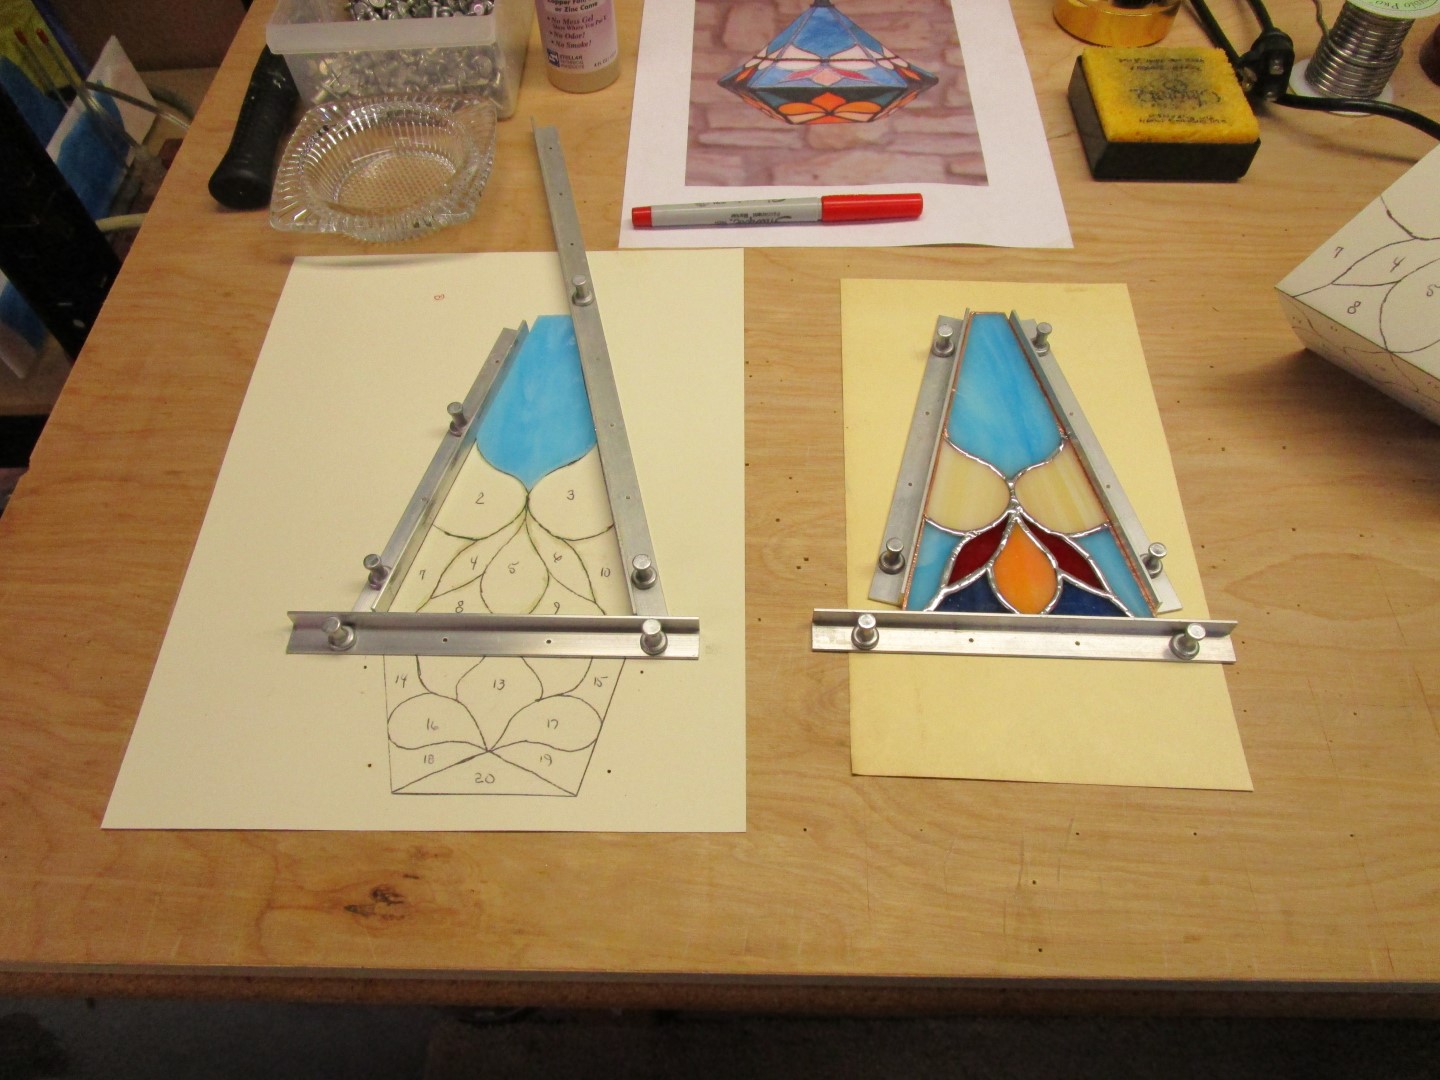
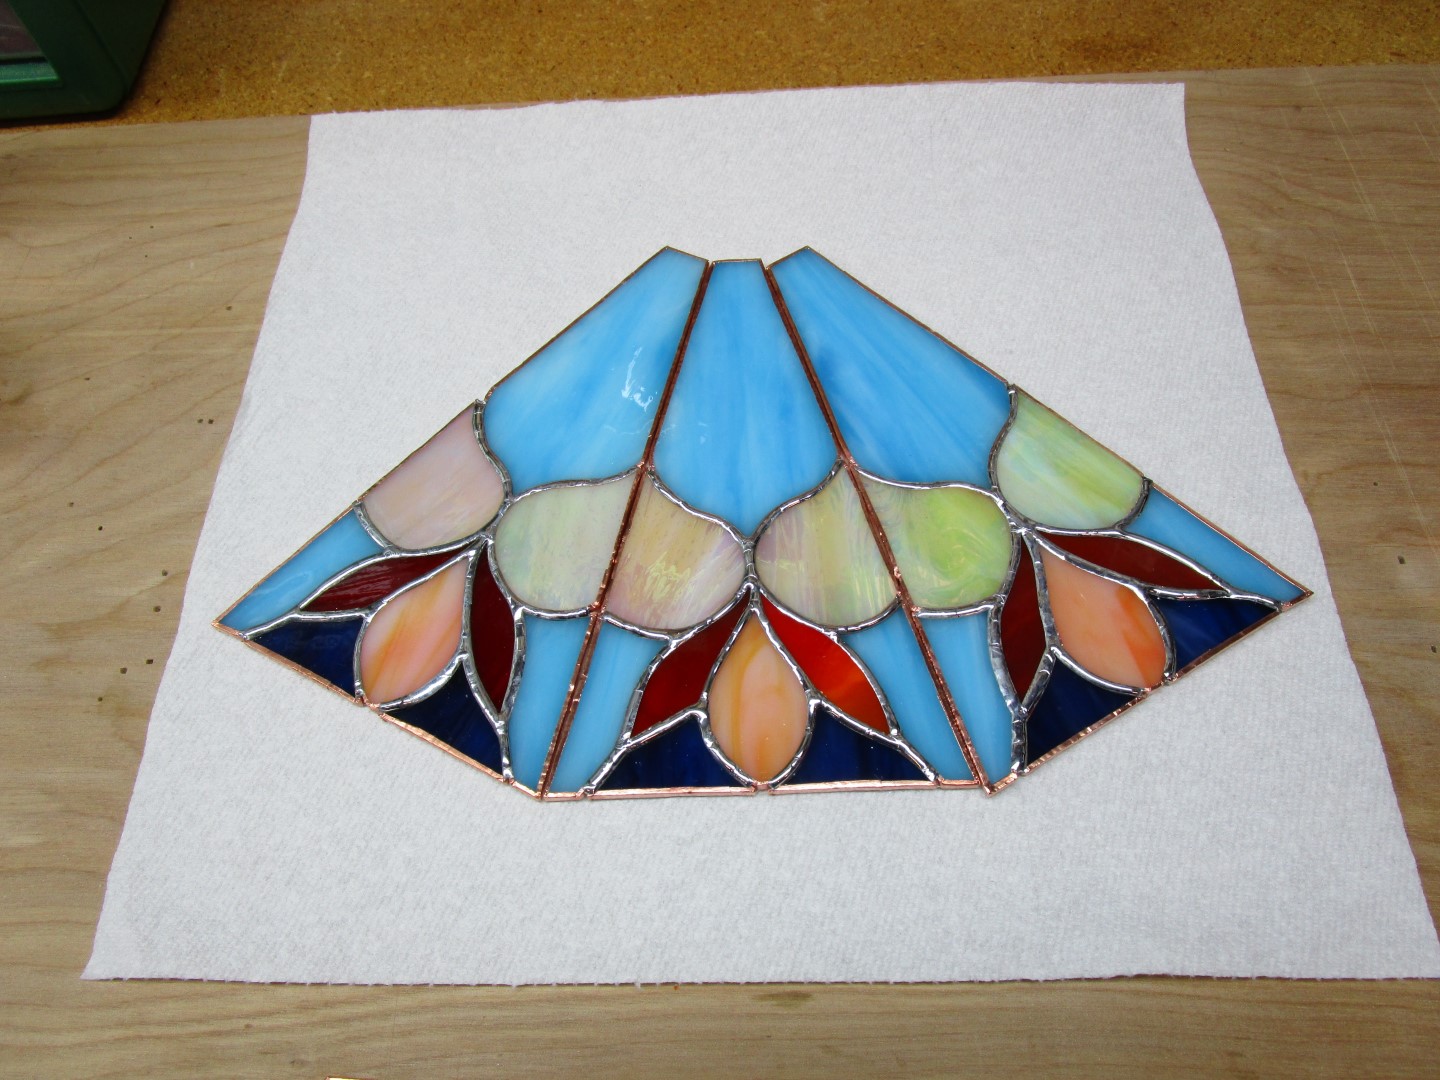
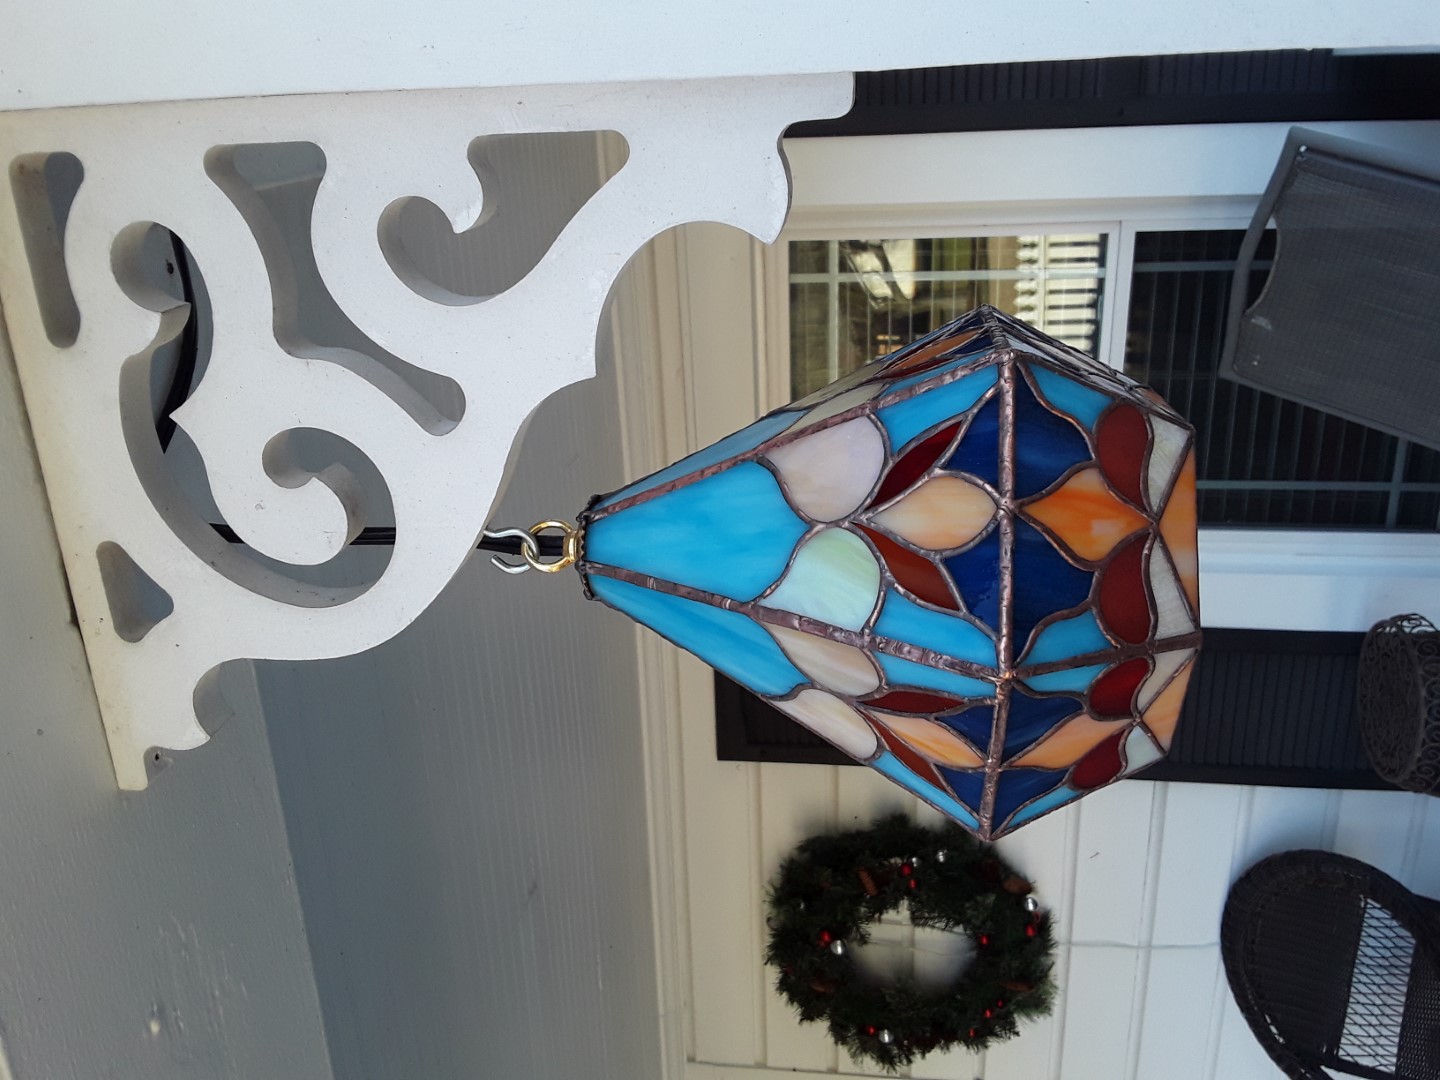
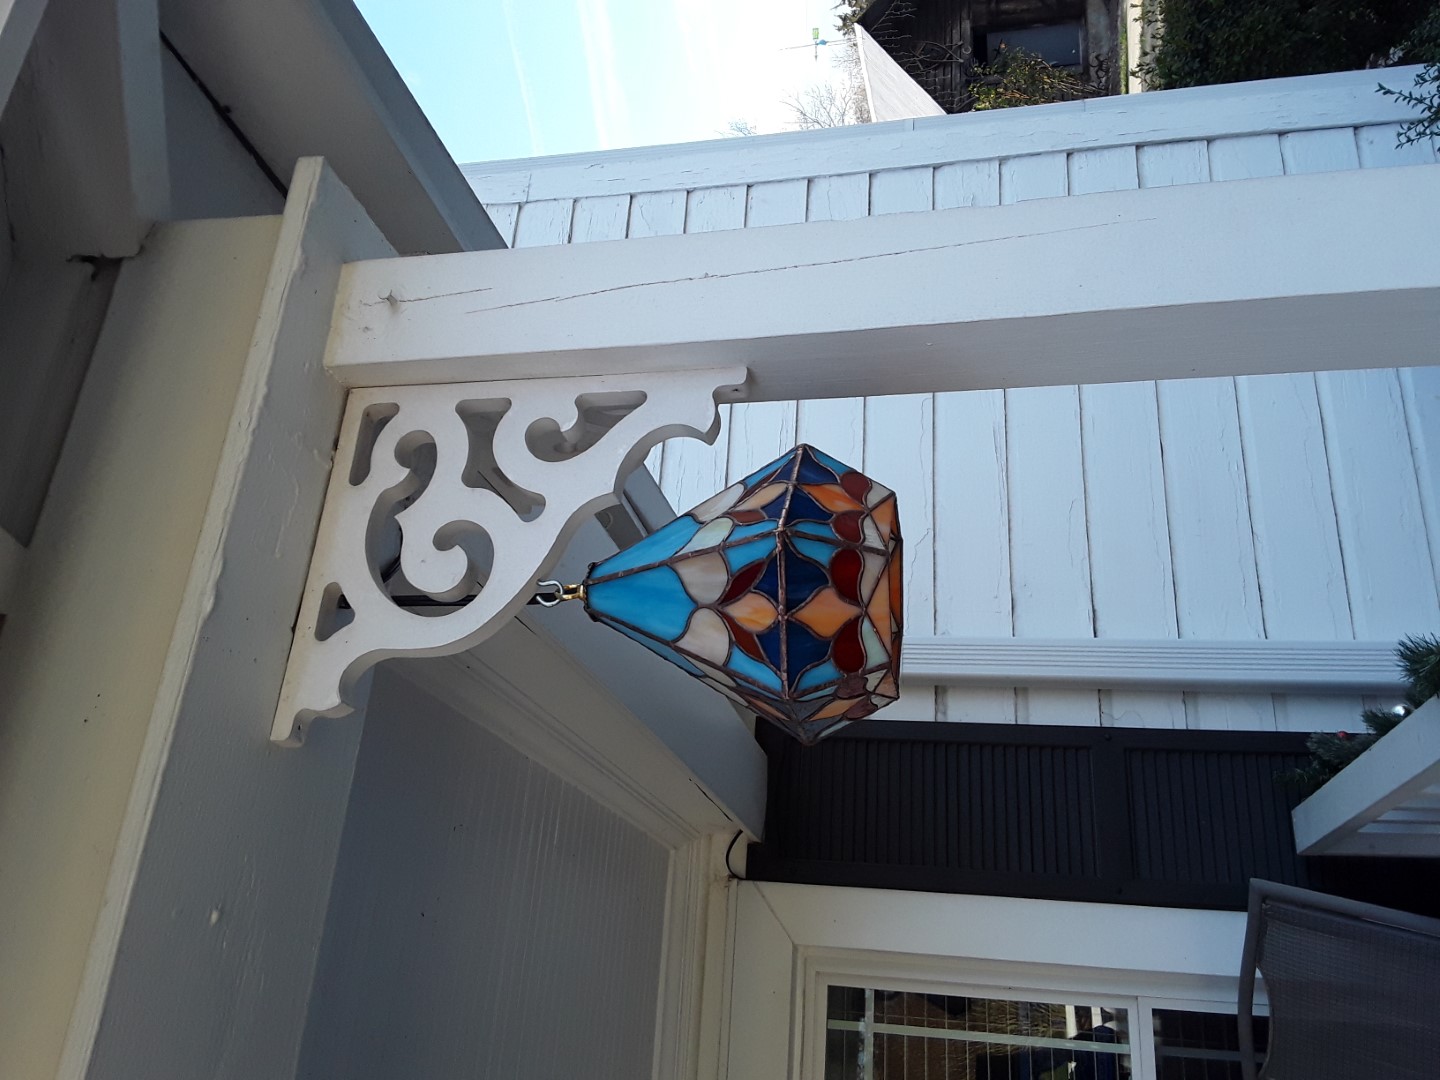
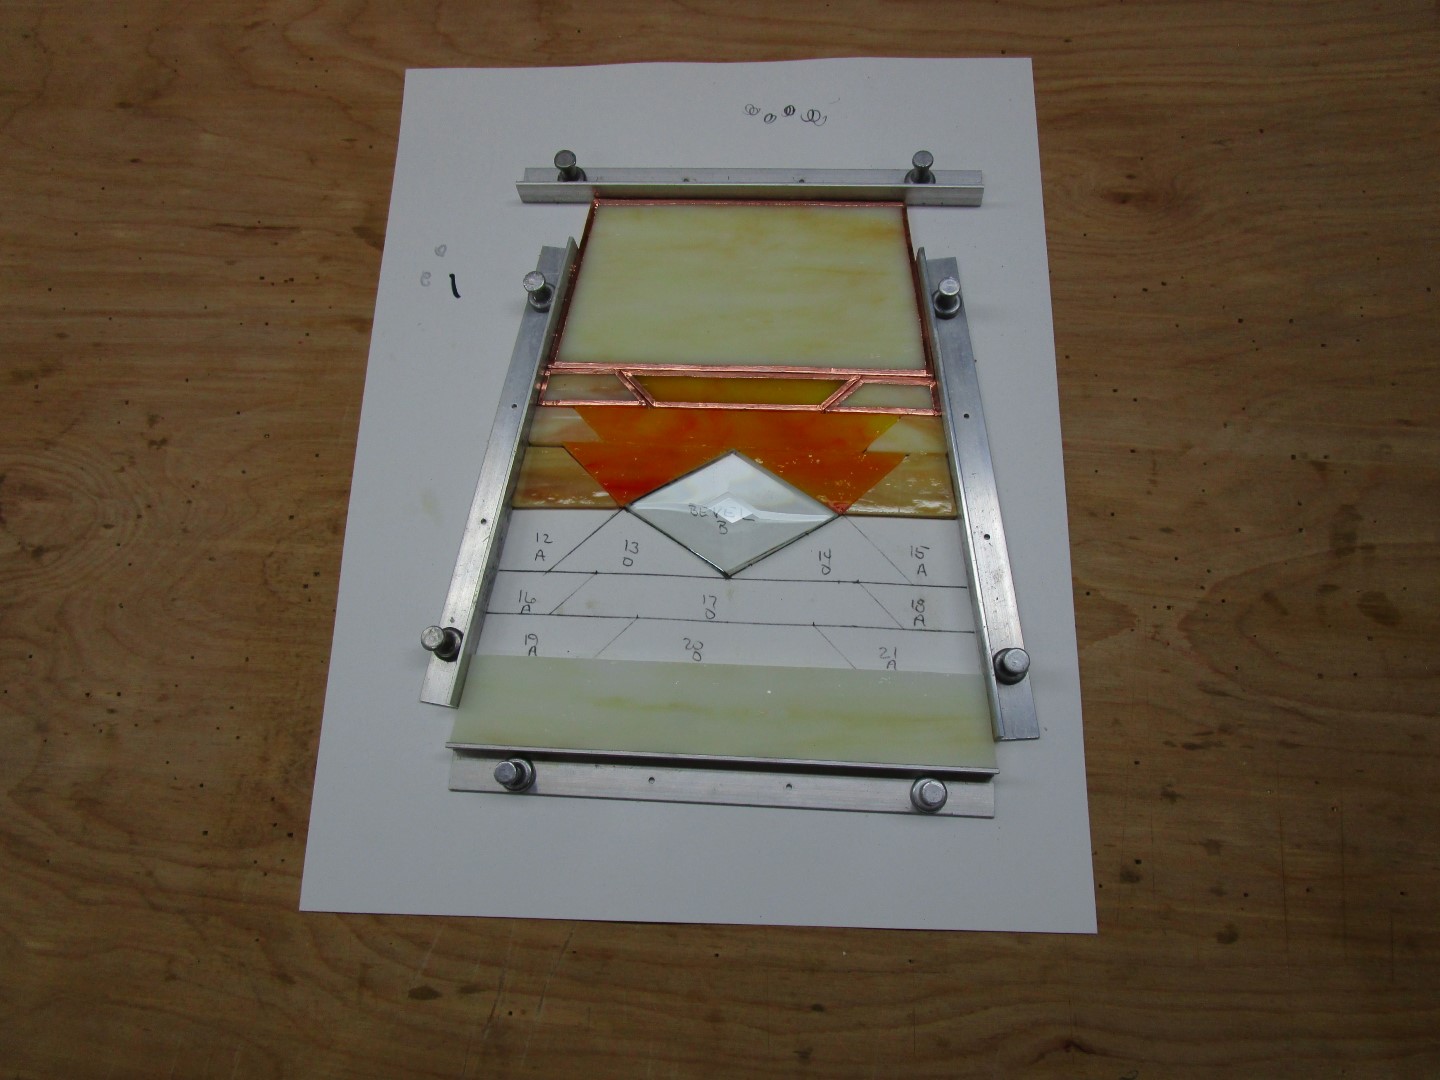
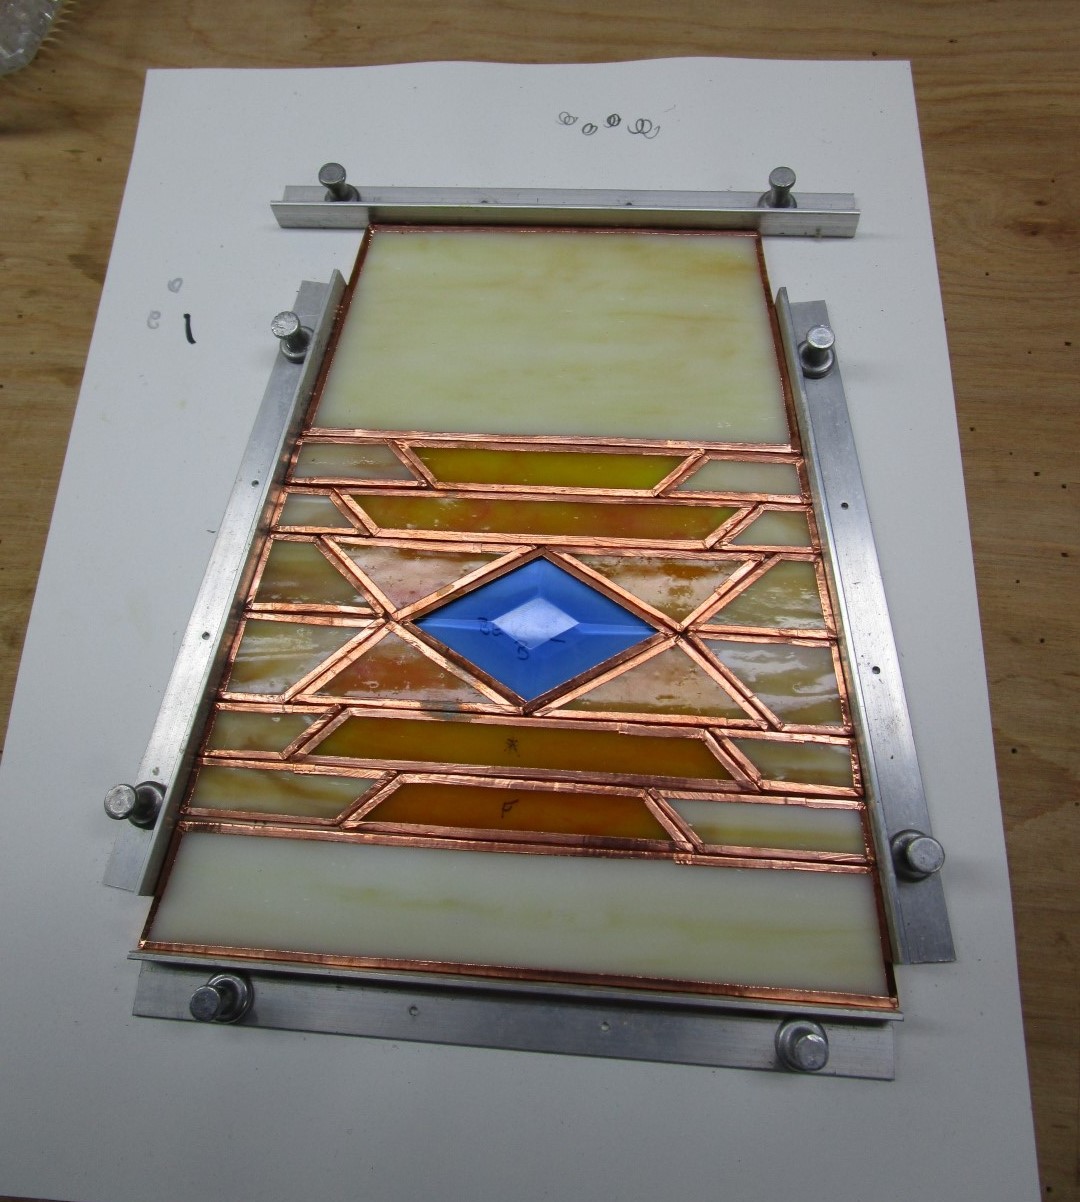
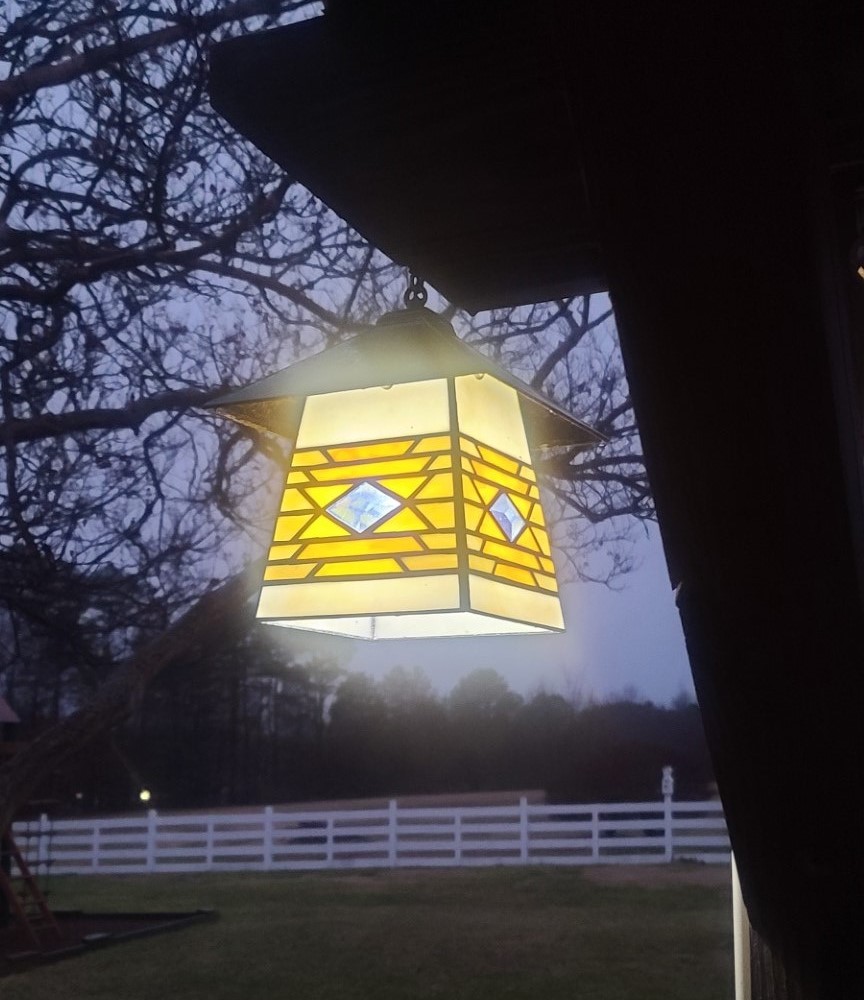
My Workshop Outdoor Lantern
Here is a simple Stained Glass project that you can try. This project is an outdoor hanging lantern that hangs above the entryway of “My Balsa and Glass Workshop.” This final update is as of 10 December 2024 and I updated my Workshop Outdoor Lantern Assembly Description which you can view and download using the link provided below.


Final Version of My Workshop Outdoor Lantern Assembly Description.
My Workshop Outdoor Lantern Pattern.
My First Stained Glass Project
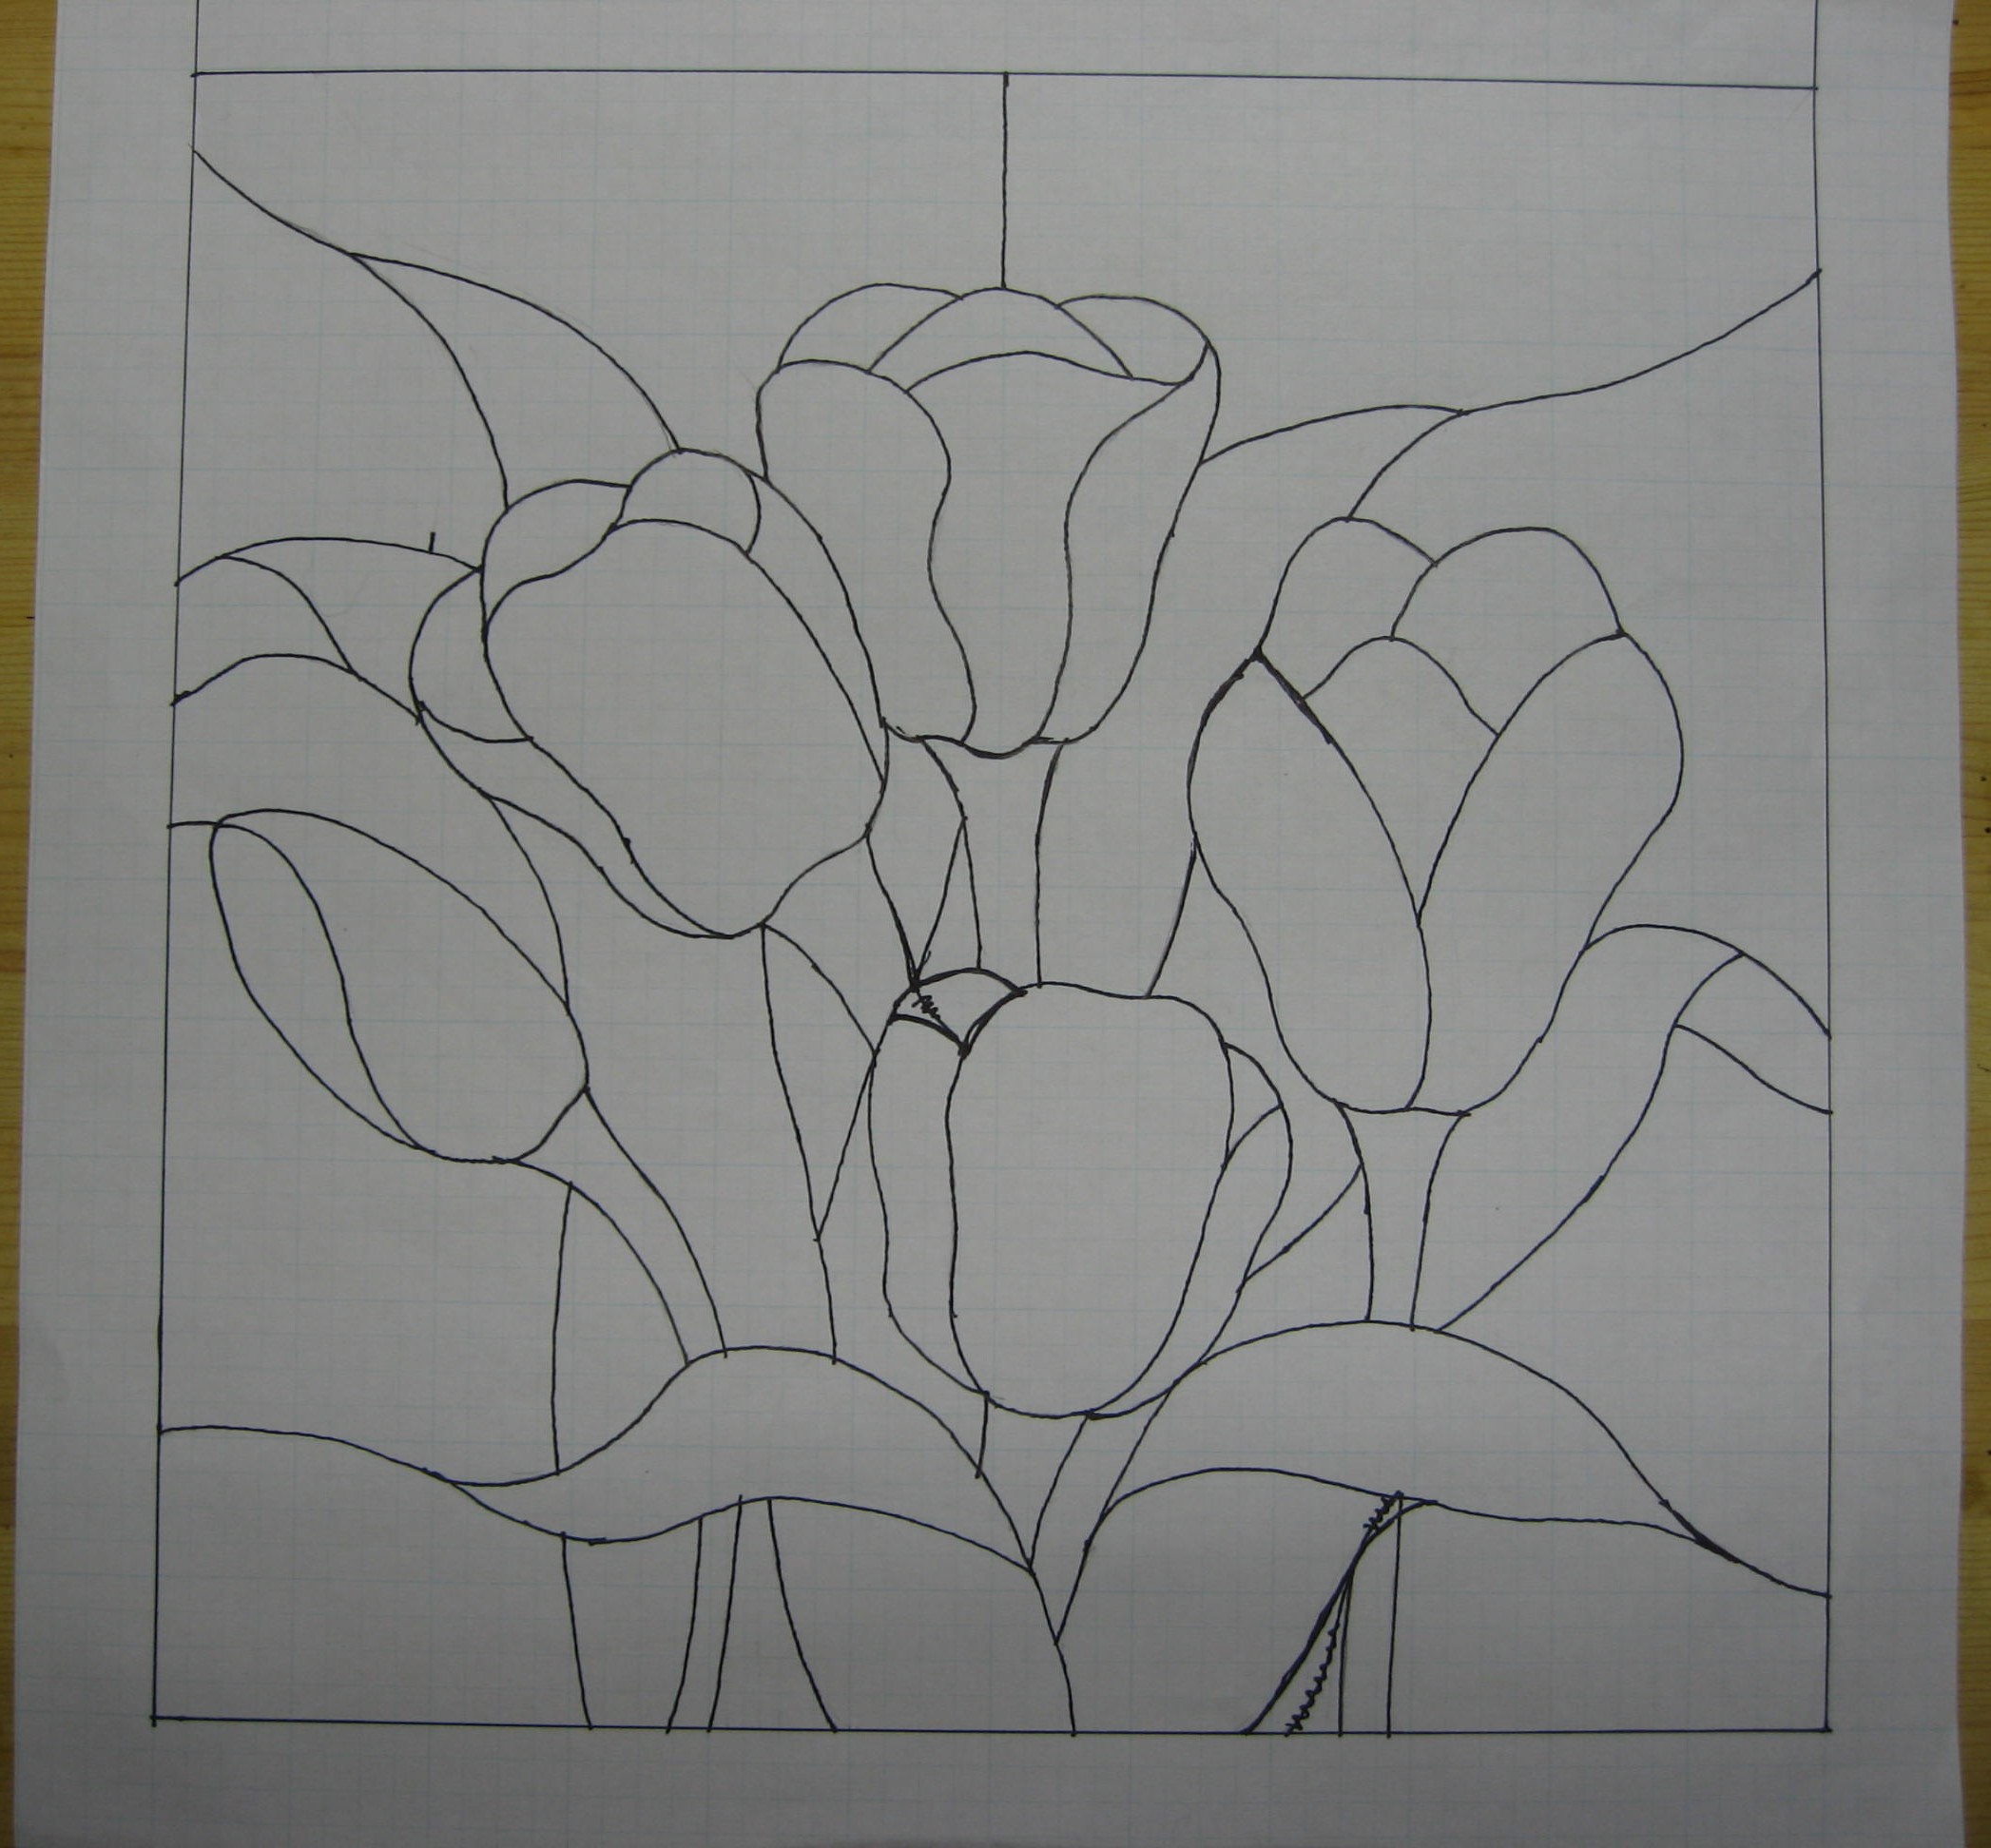
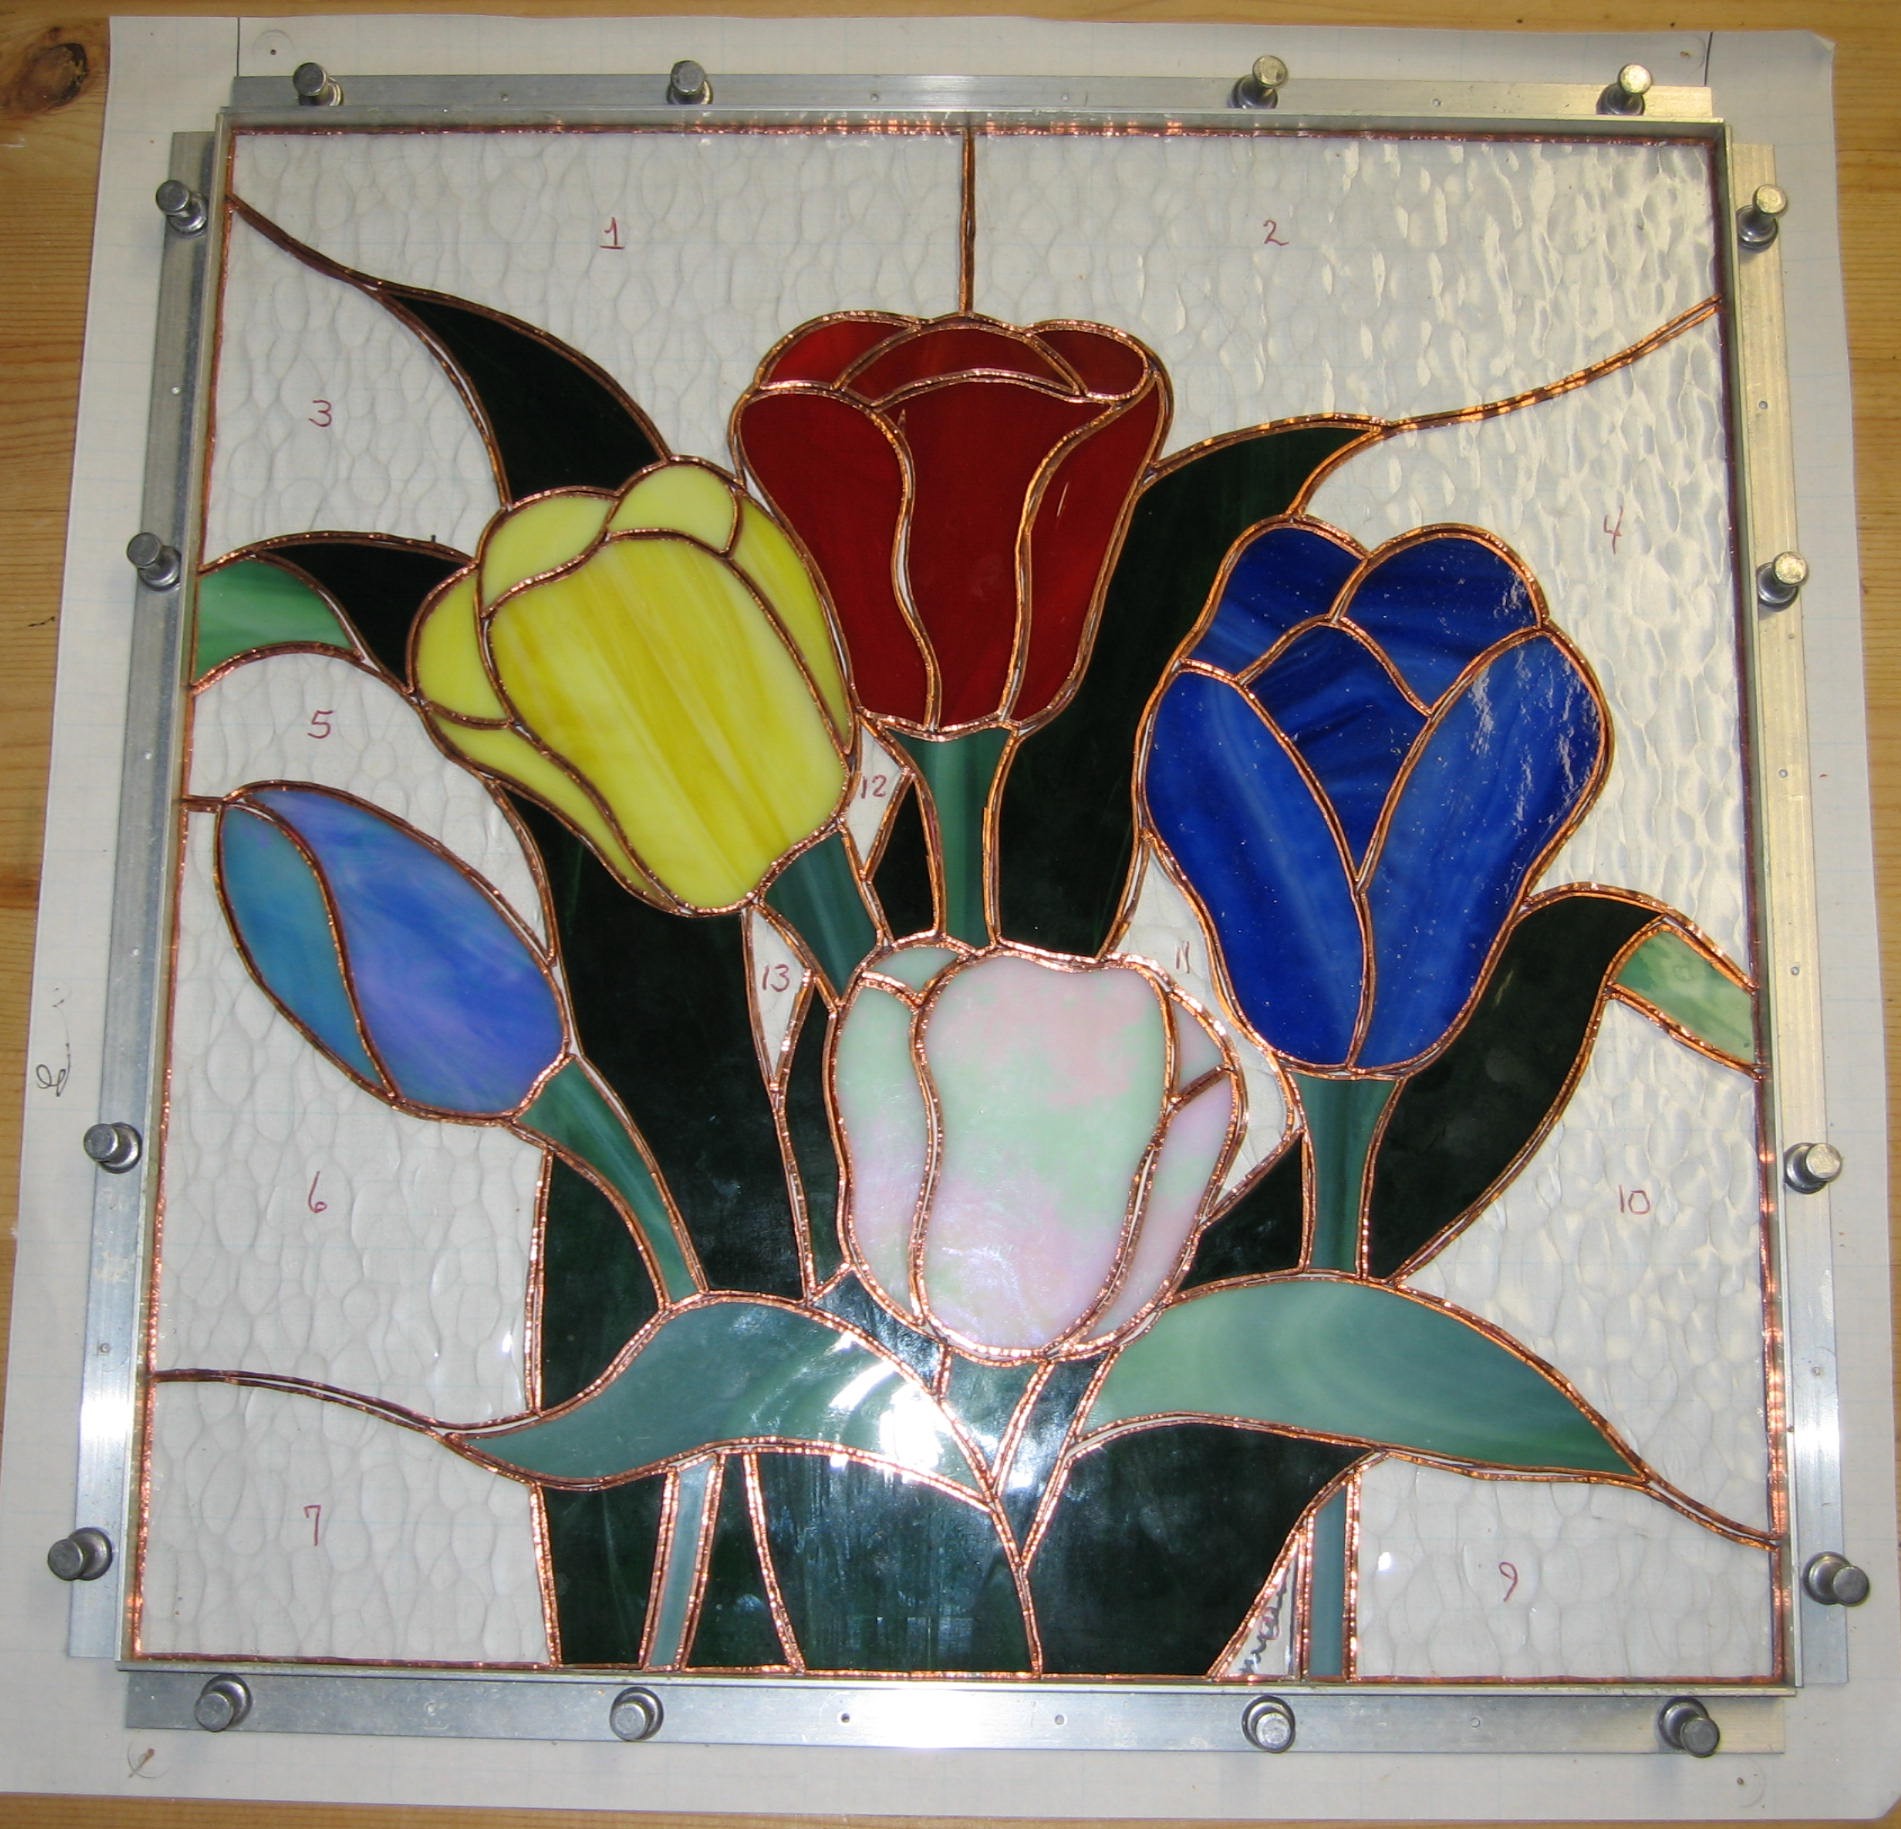
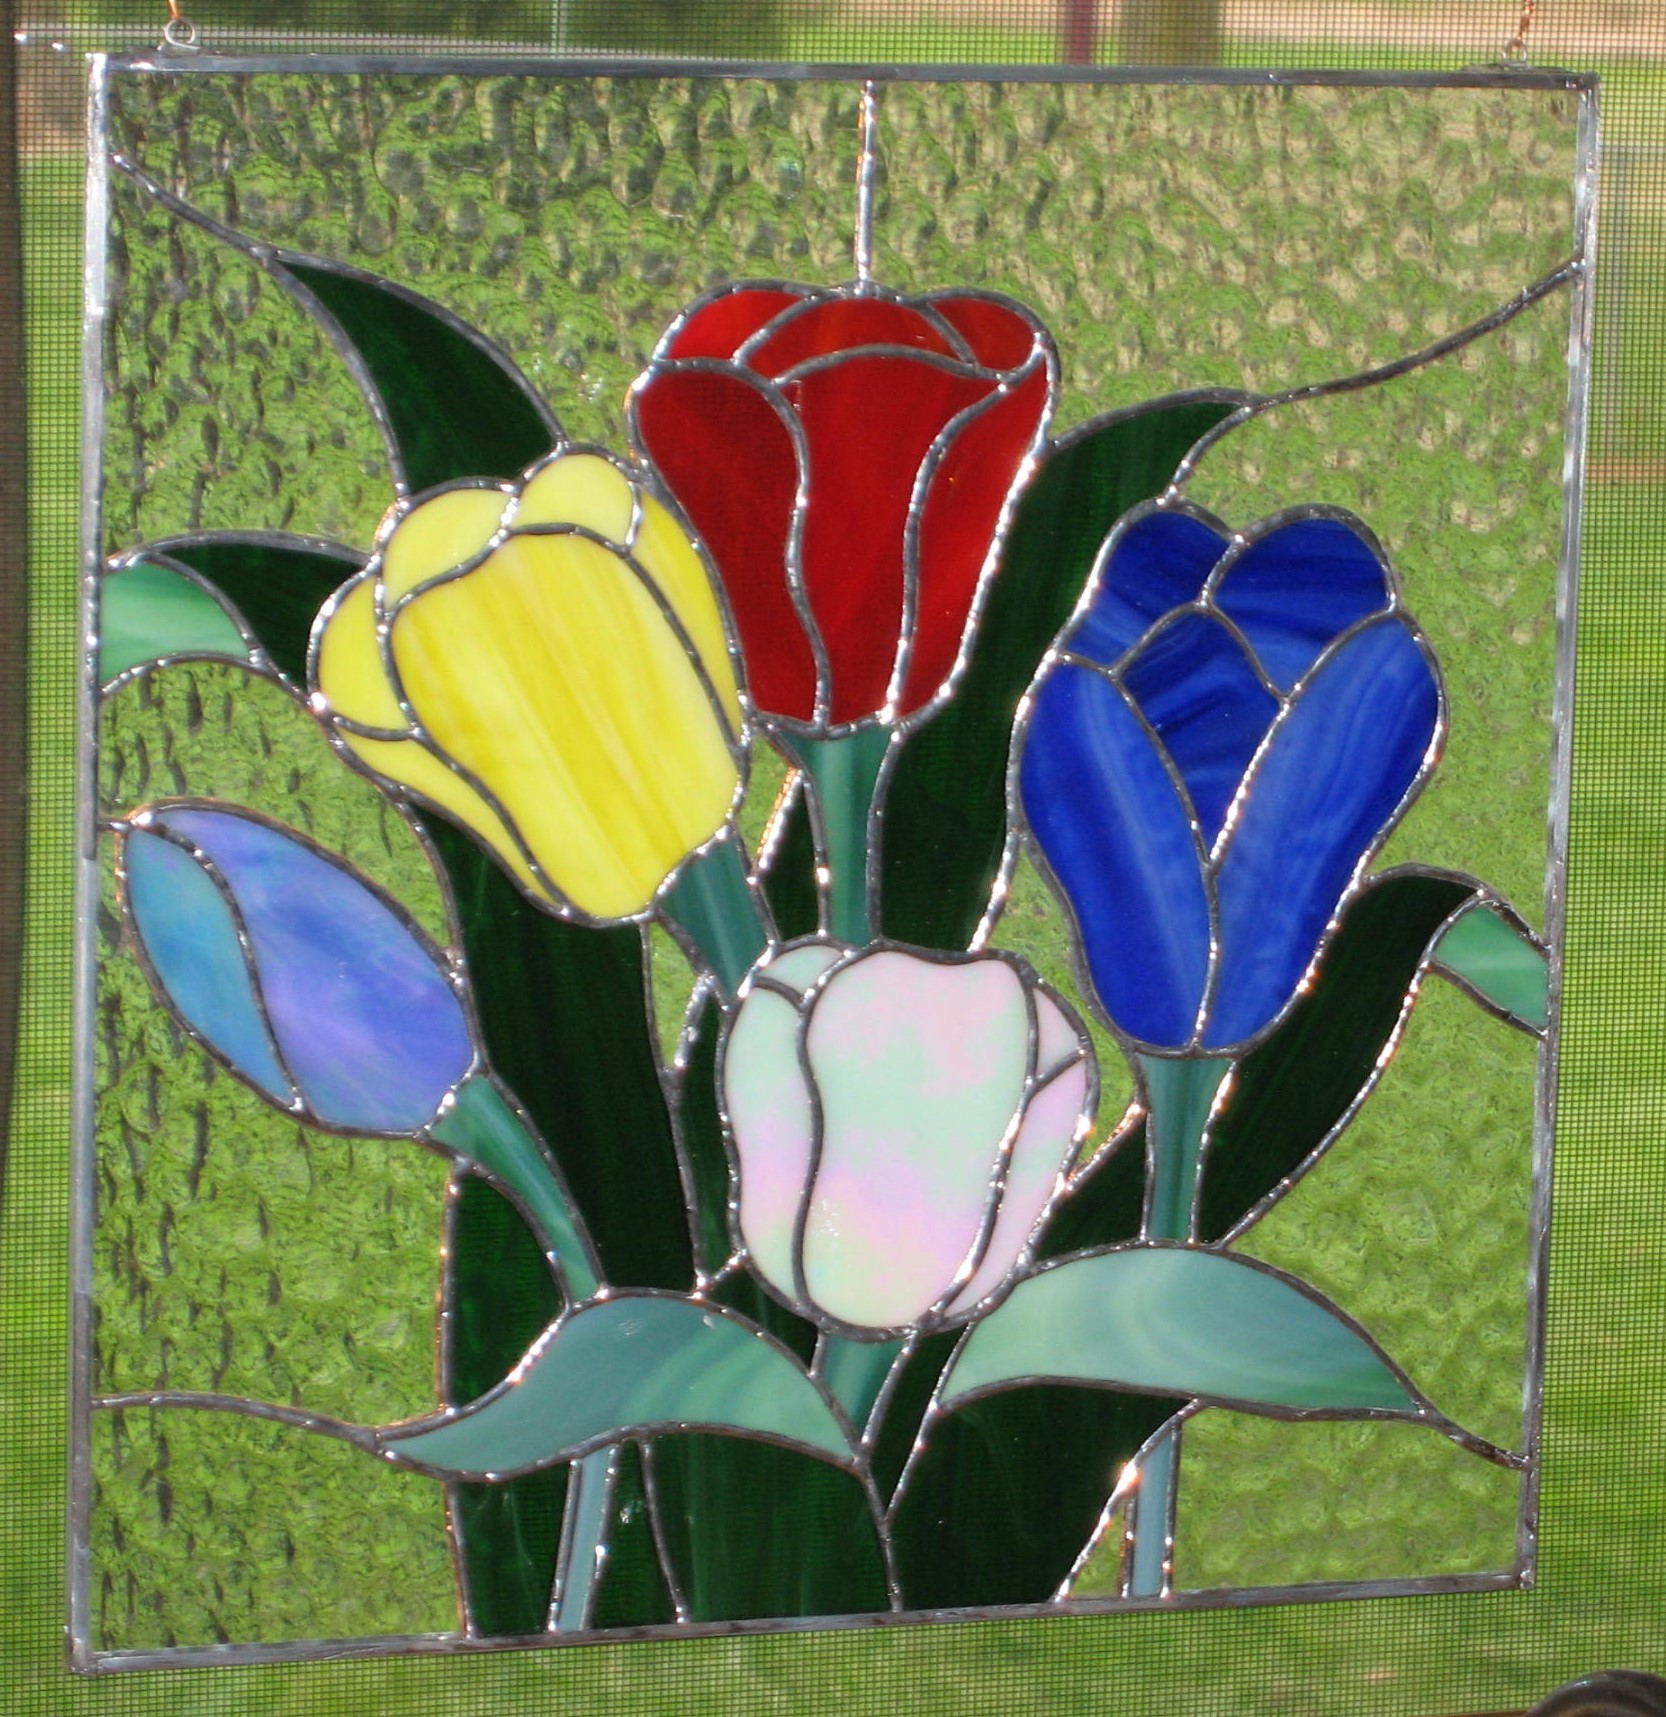
This project was my first attempt at a Stained Glass project, and would make a good starter panel for you to try. Using my hand drawn pattern of a 12″x12″ panel with 62 individual hand cut, ground and copper foiled pieces, all soldered together to produce a magnificent, well I'm getting carried away here. Sorry. Anyway, it did not come out too bad and does actually look like tulips. It now hangs in a small octagon window at the top of the stairway in our North Carolina home.
A Sun and Moon Panel
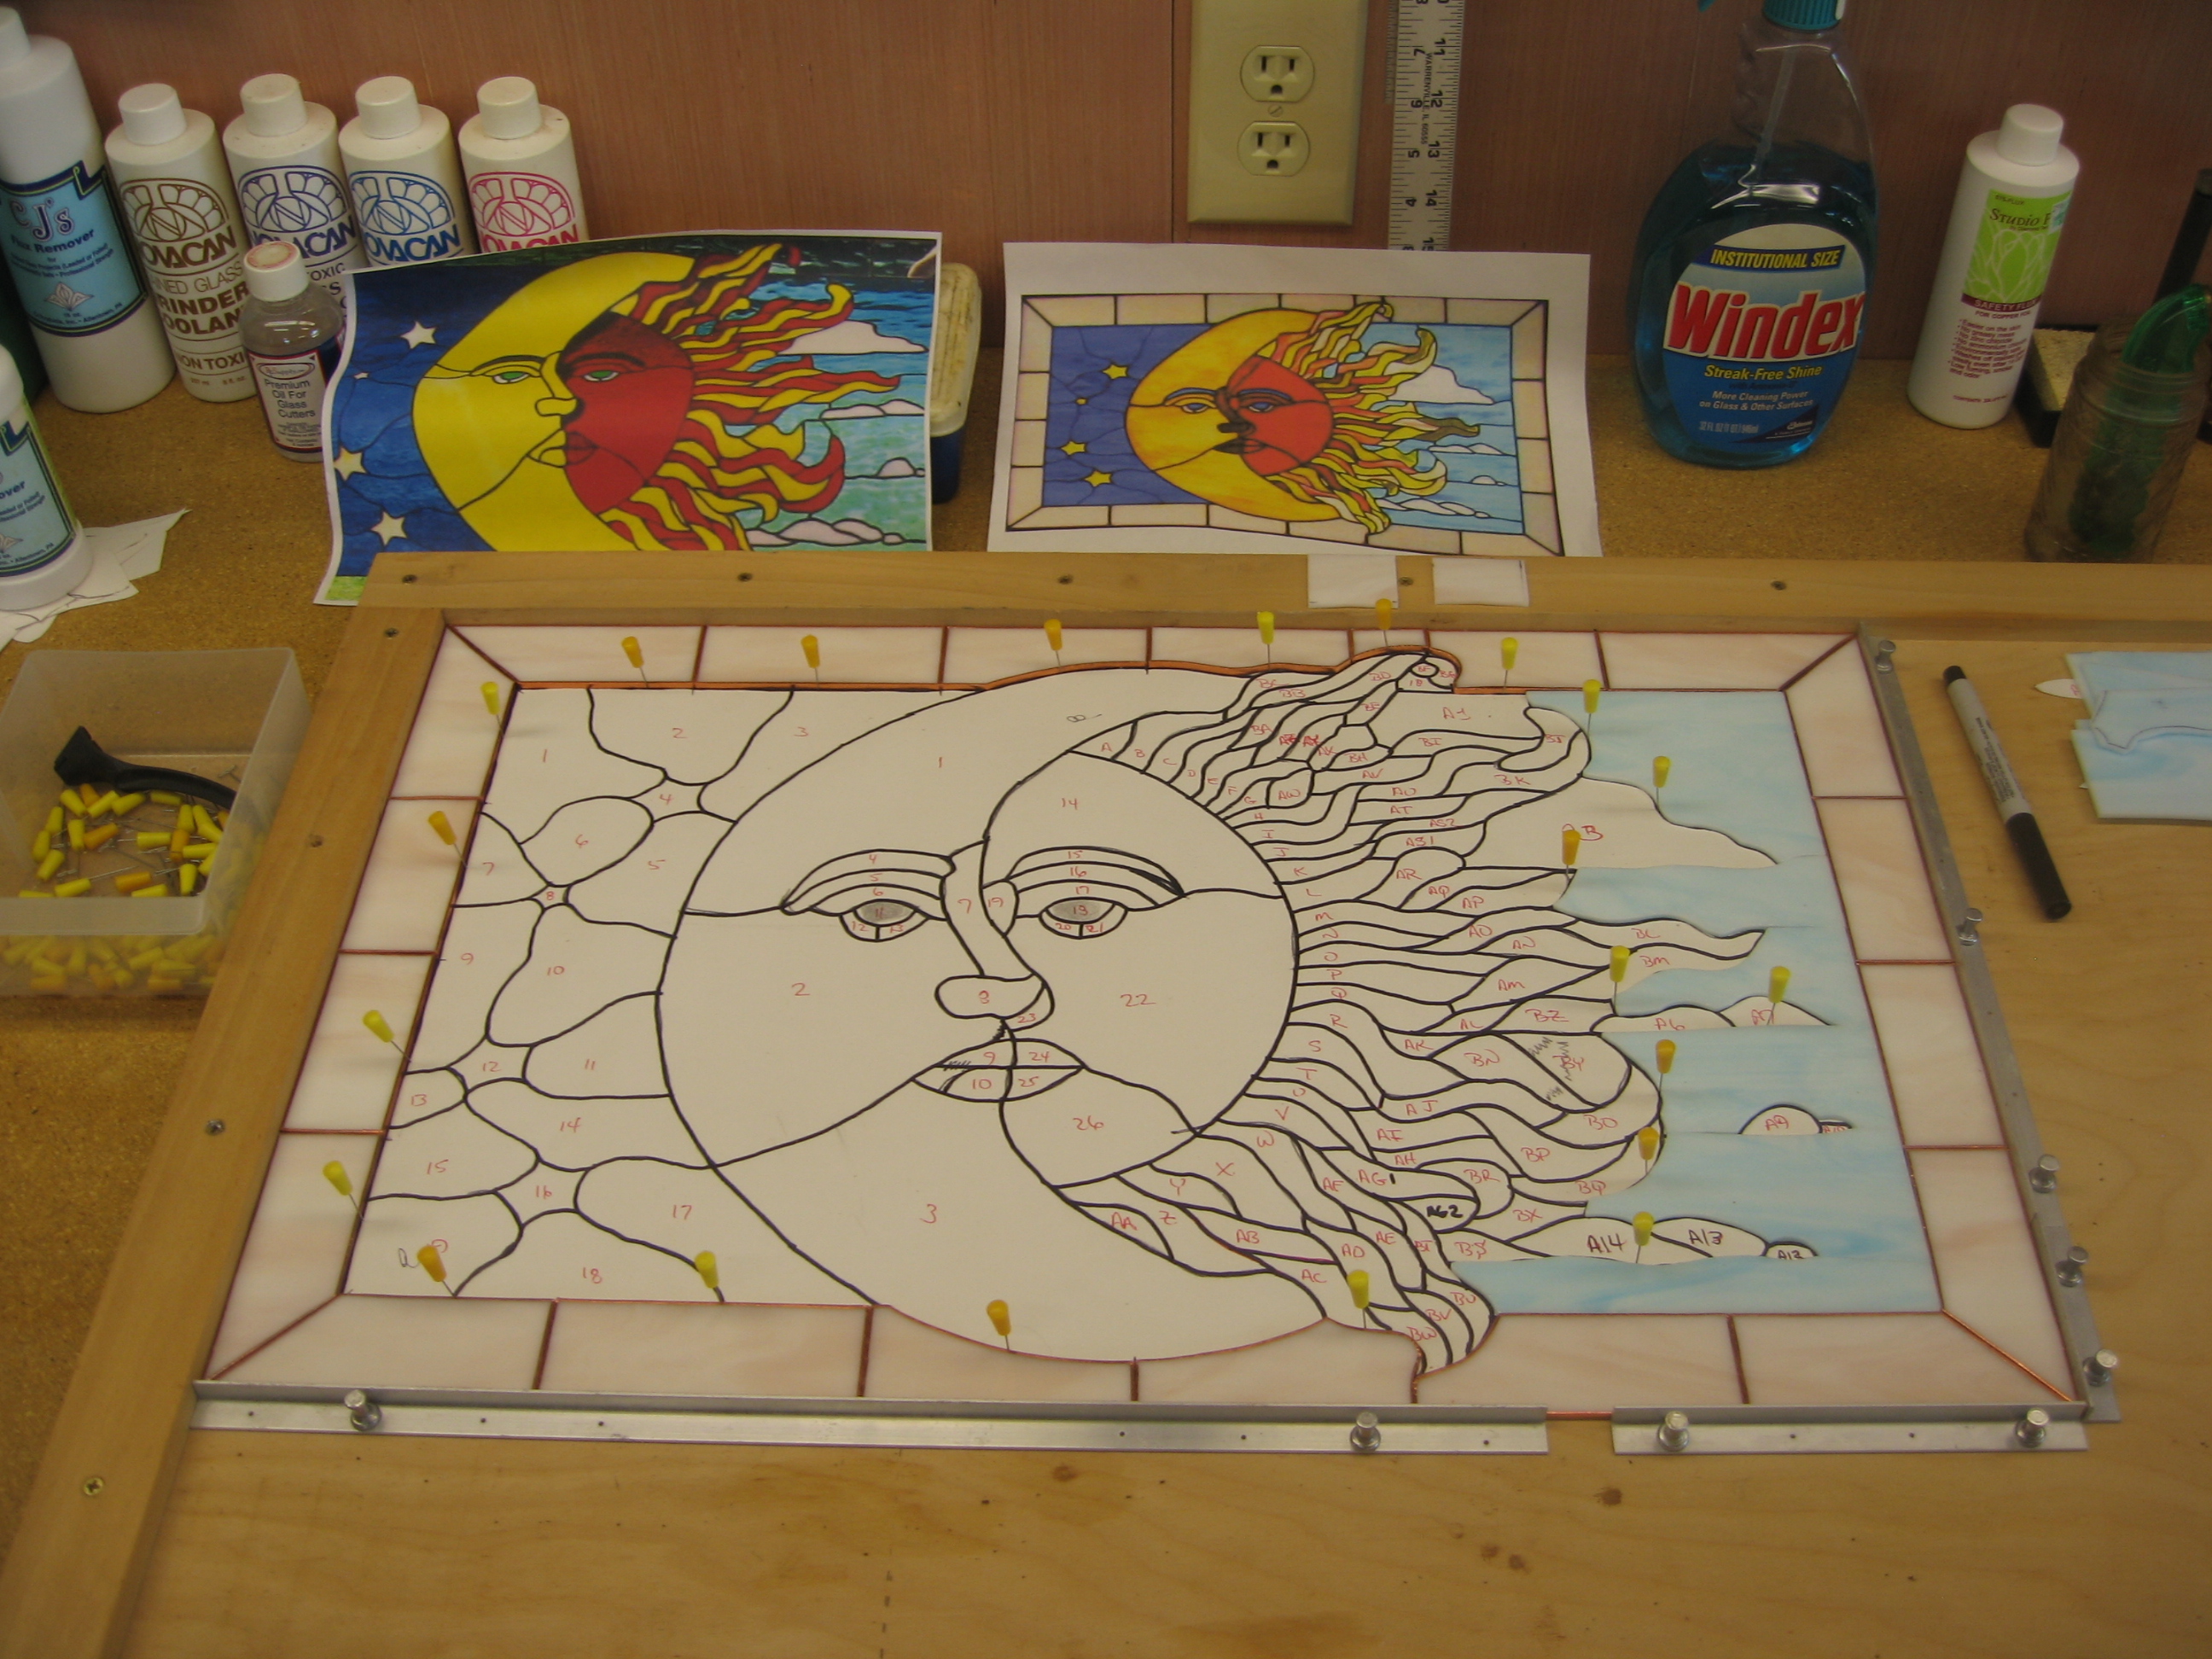
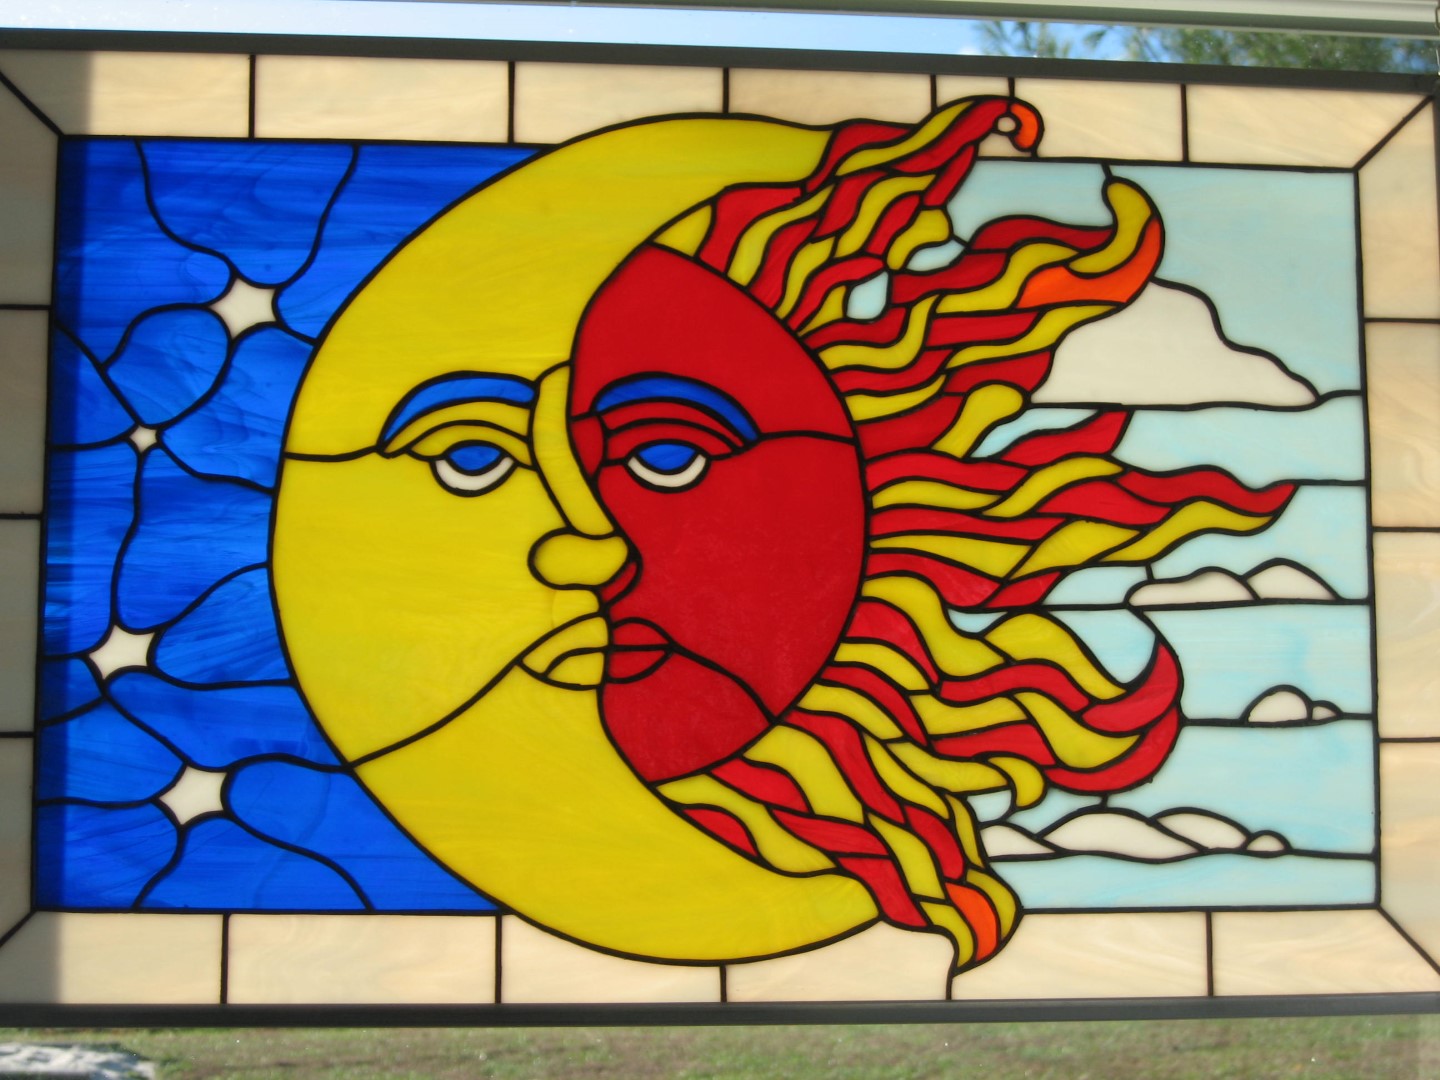
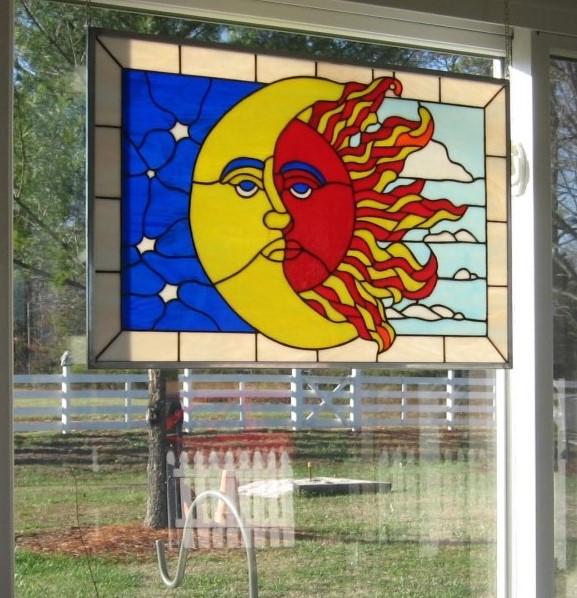
While scanning the web to see if I could find something interesting for a new project, I came across the sun/moon image on the far left. Using it, I generated the pattern in the next image. The 24″x15″ 158 piece panel has a lot of small, curved pieces on the sun side of the panel and is assembled using the copper foil, or “Tiffany” method. All solder joints were colored using black patina and the panel is framed in zinc channel. The image on the far right shows the panel hanging in our sunroom.

My First Lead Came Project
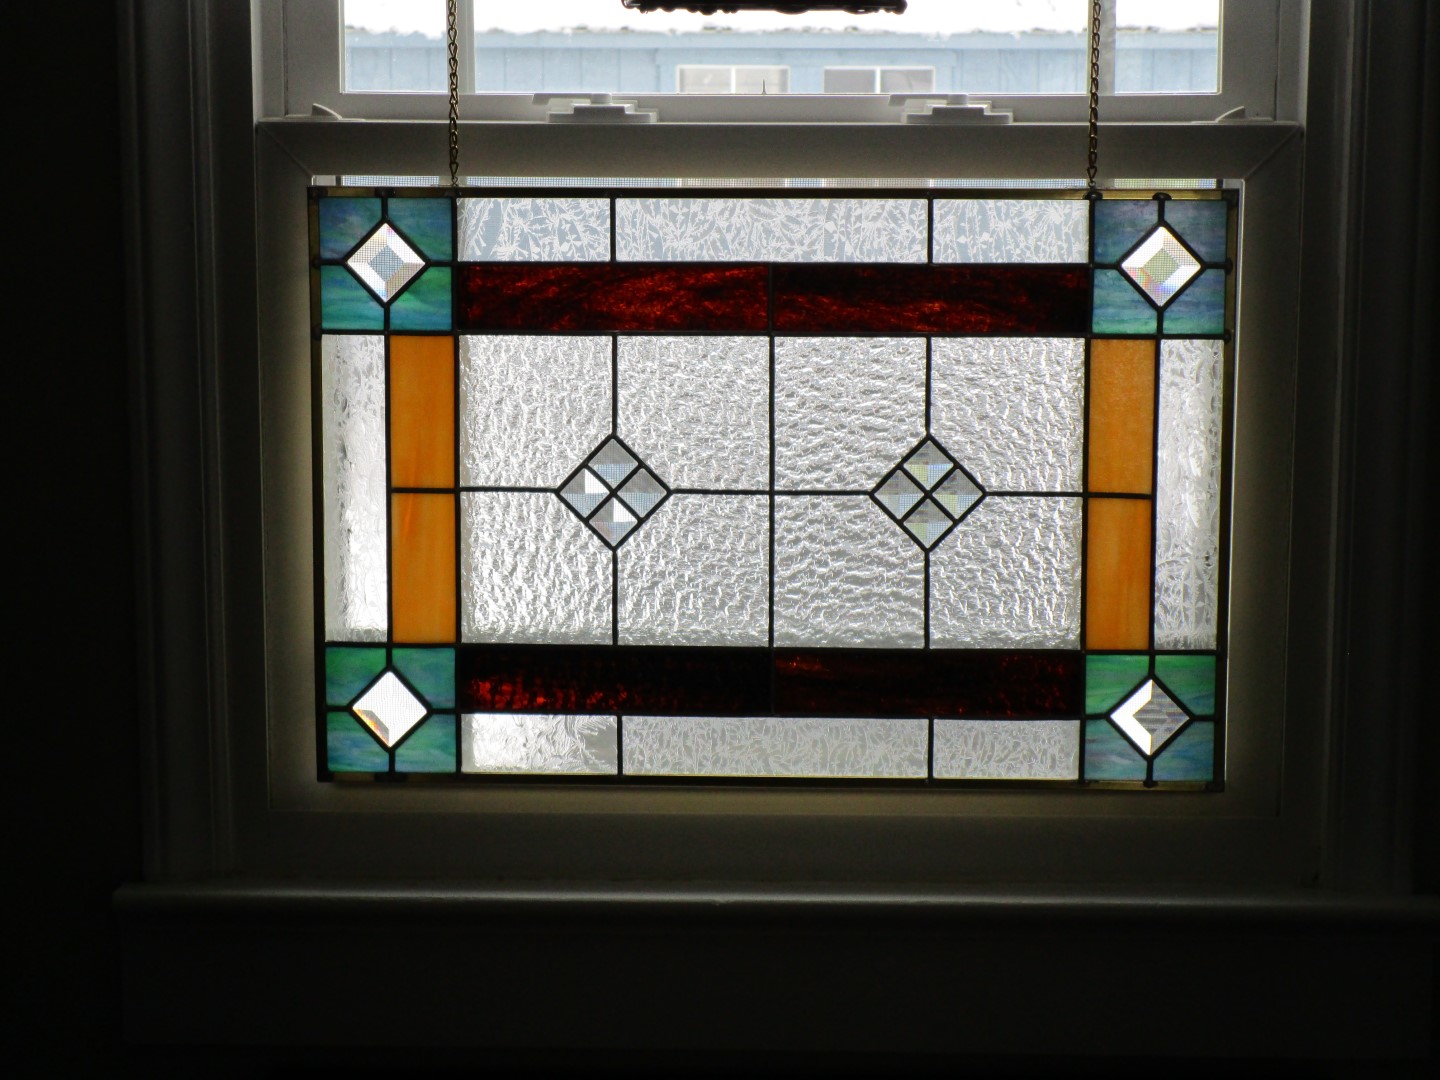
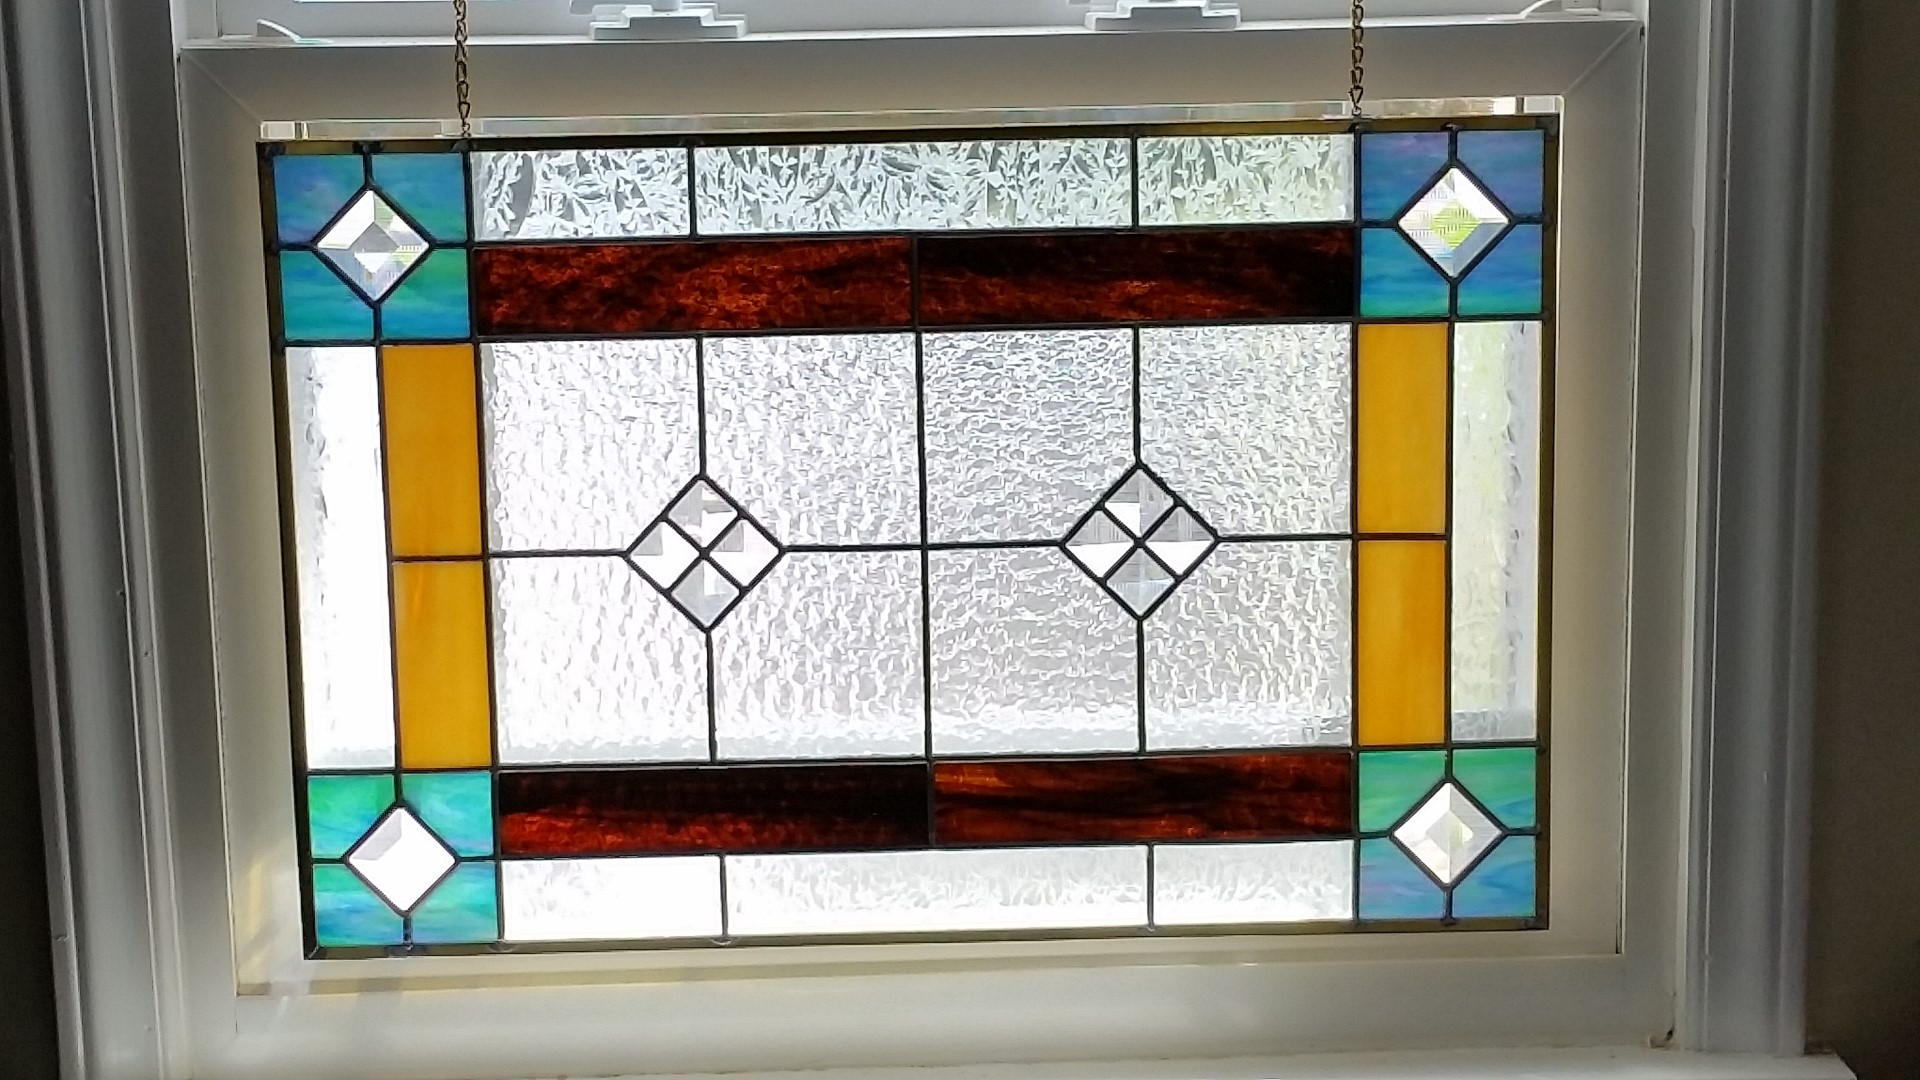
I made this next panel to help provide some privacy in our first floor bathroom without having to pull down a shade. This panel would make a good project for someone just starting to learn how to assemble a panel using the “lead came method.” The 23″x15″ 48 piece pattern is all straight glass cuts, uses simple bevels, and the soldering is minimal. To provide additional strength, I used brass channel to frame the panel. We think the objective was achieved, and also have a nice piece of art hanging in the bathroom window.
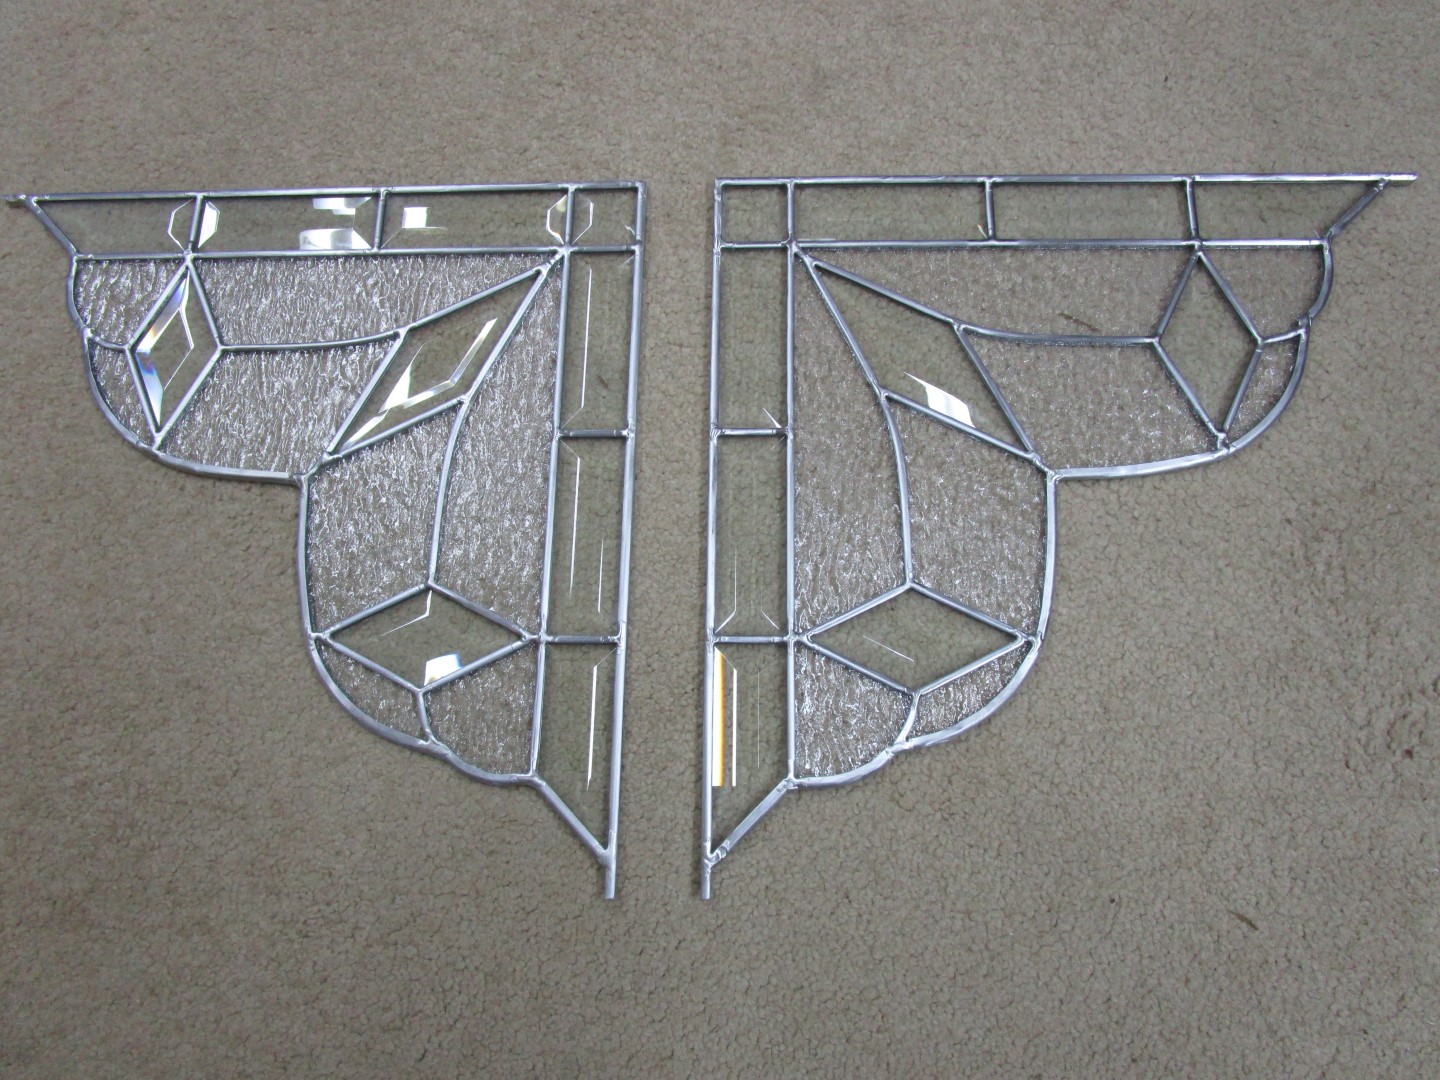
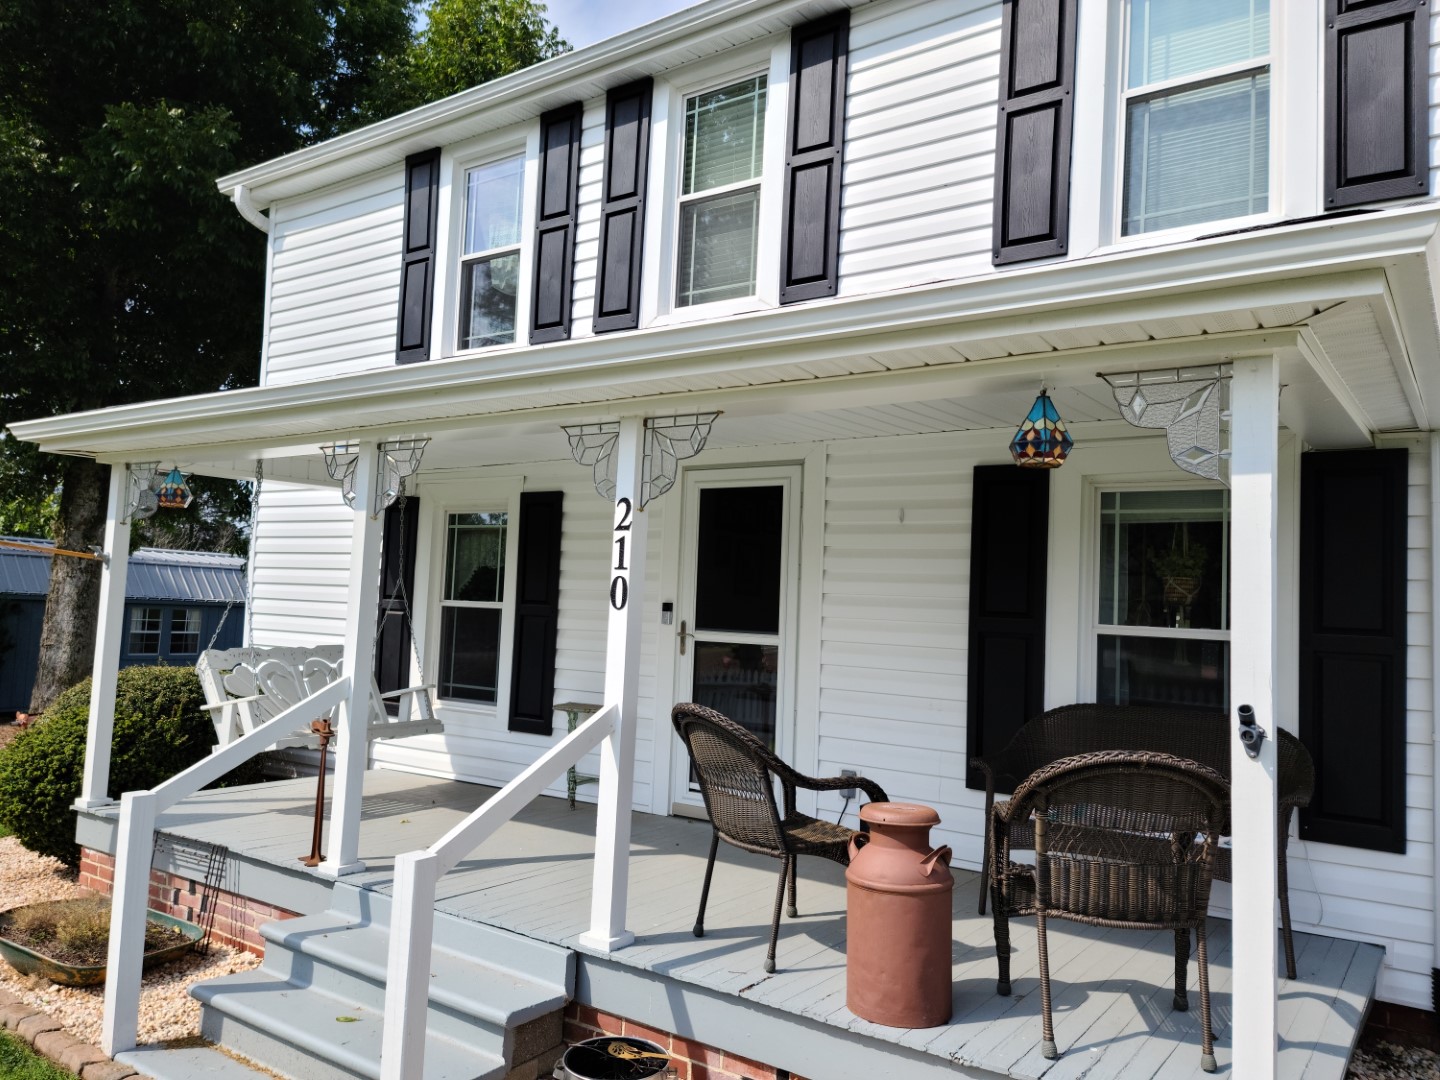
Lead Channel Porch Corners
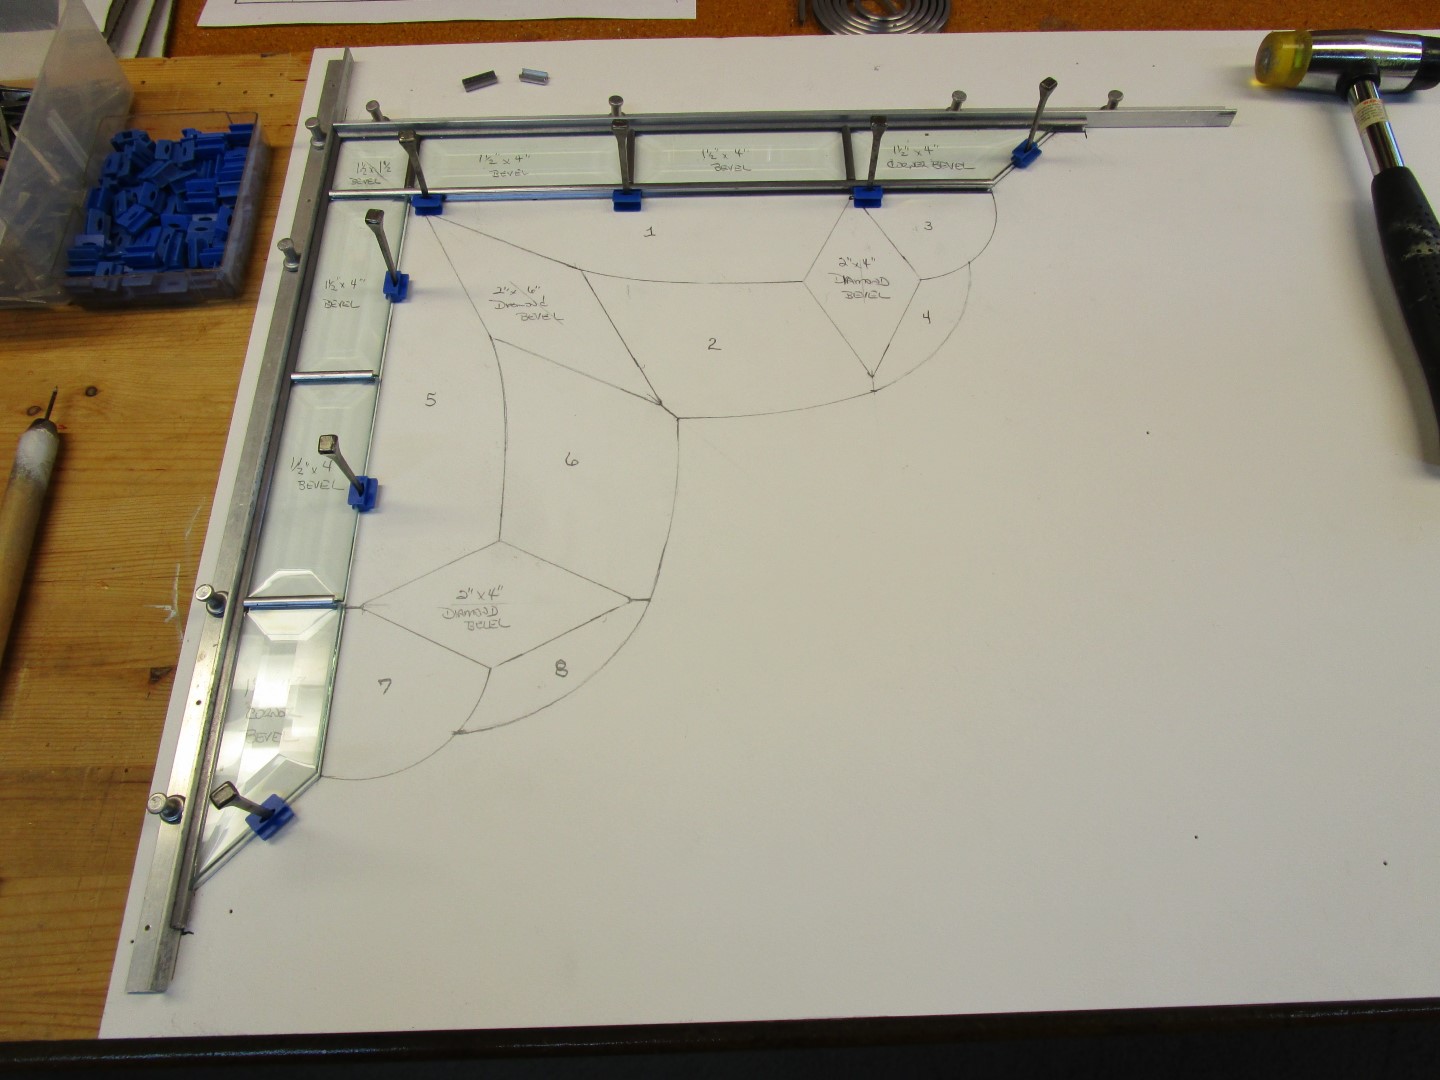
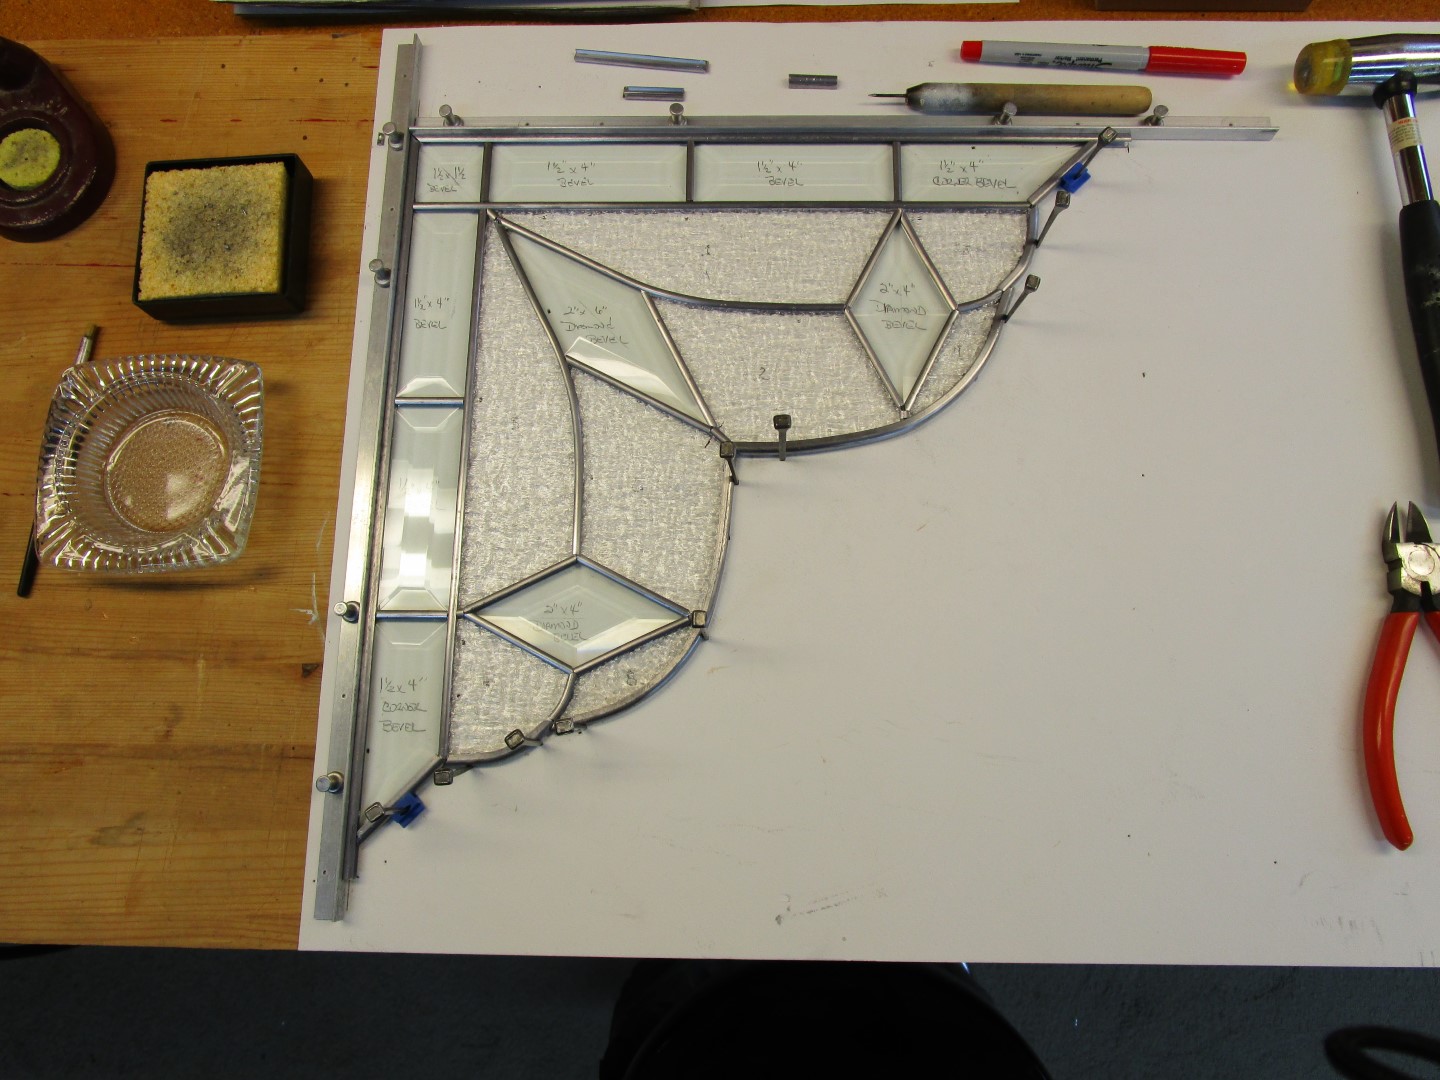
These corner panels are fairly simple and also would make a good project for someone just starting out using the “lead came” method. The hand drawn pattern is very simple and uses several different shapes of clear glass bevels. I used lead came for the strength that is needed for outdoor mounting, and the soldering needed is minimal. Small brass strips were used to secure the resulting 8 panels into the corners of our 1906 home front porch (zoom in on any image using the “Spotlight Box” controls). These are not something you see very often. The Stained Glass lanterns you can see in the far right image will be discussed more shortly.
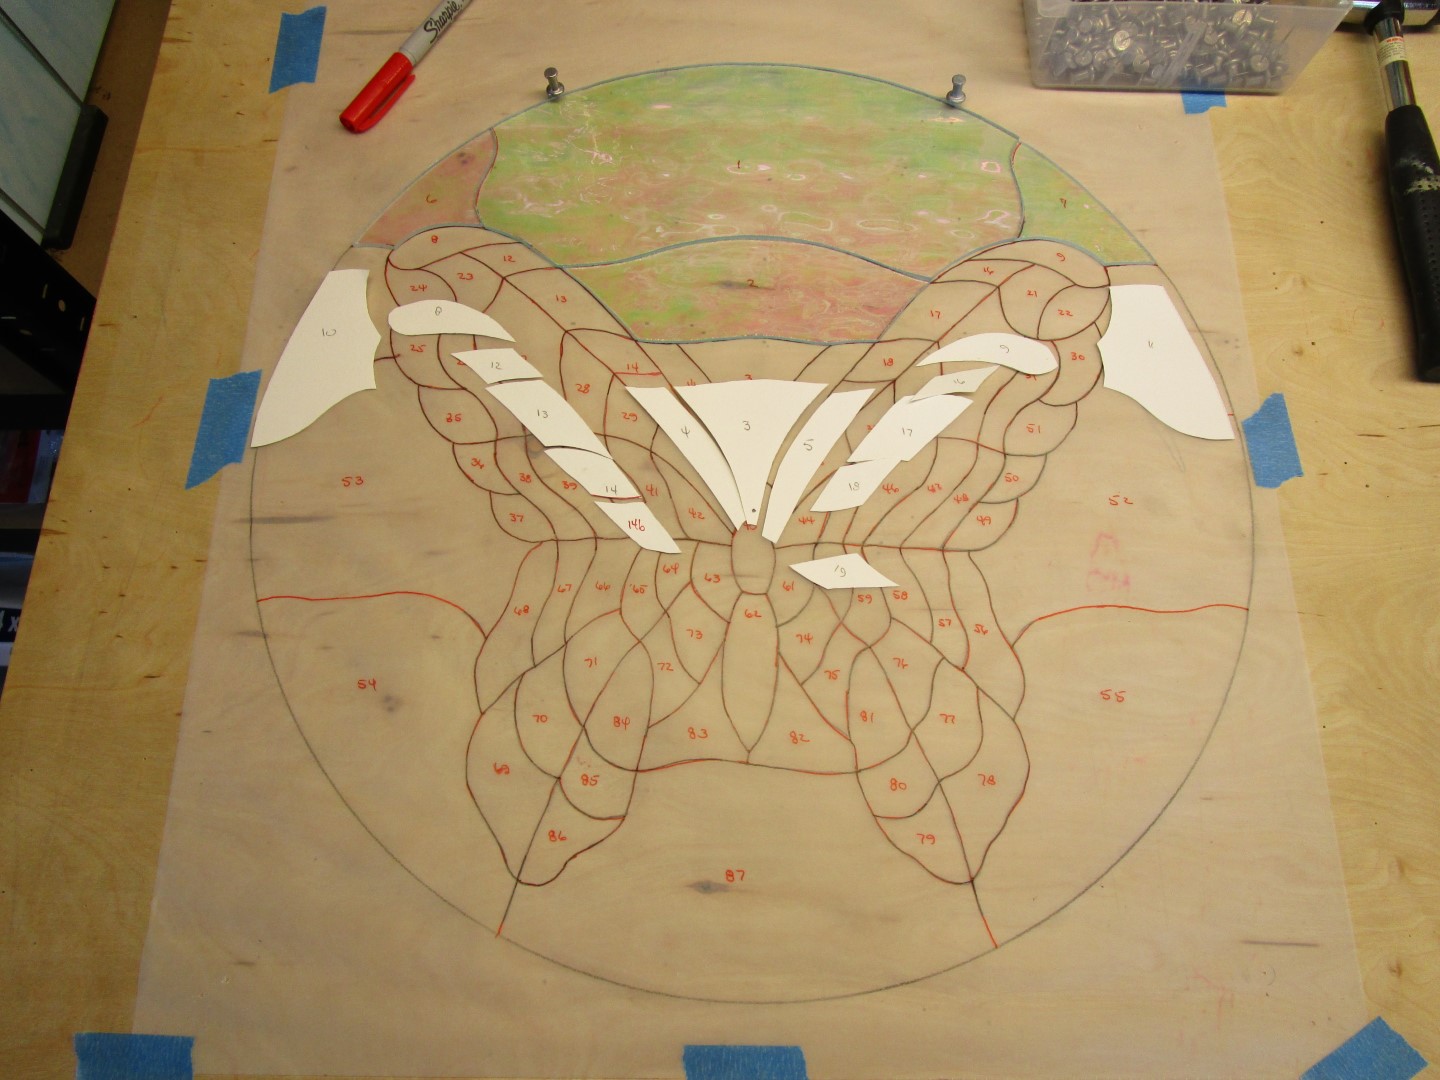
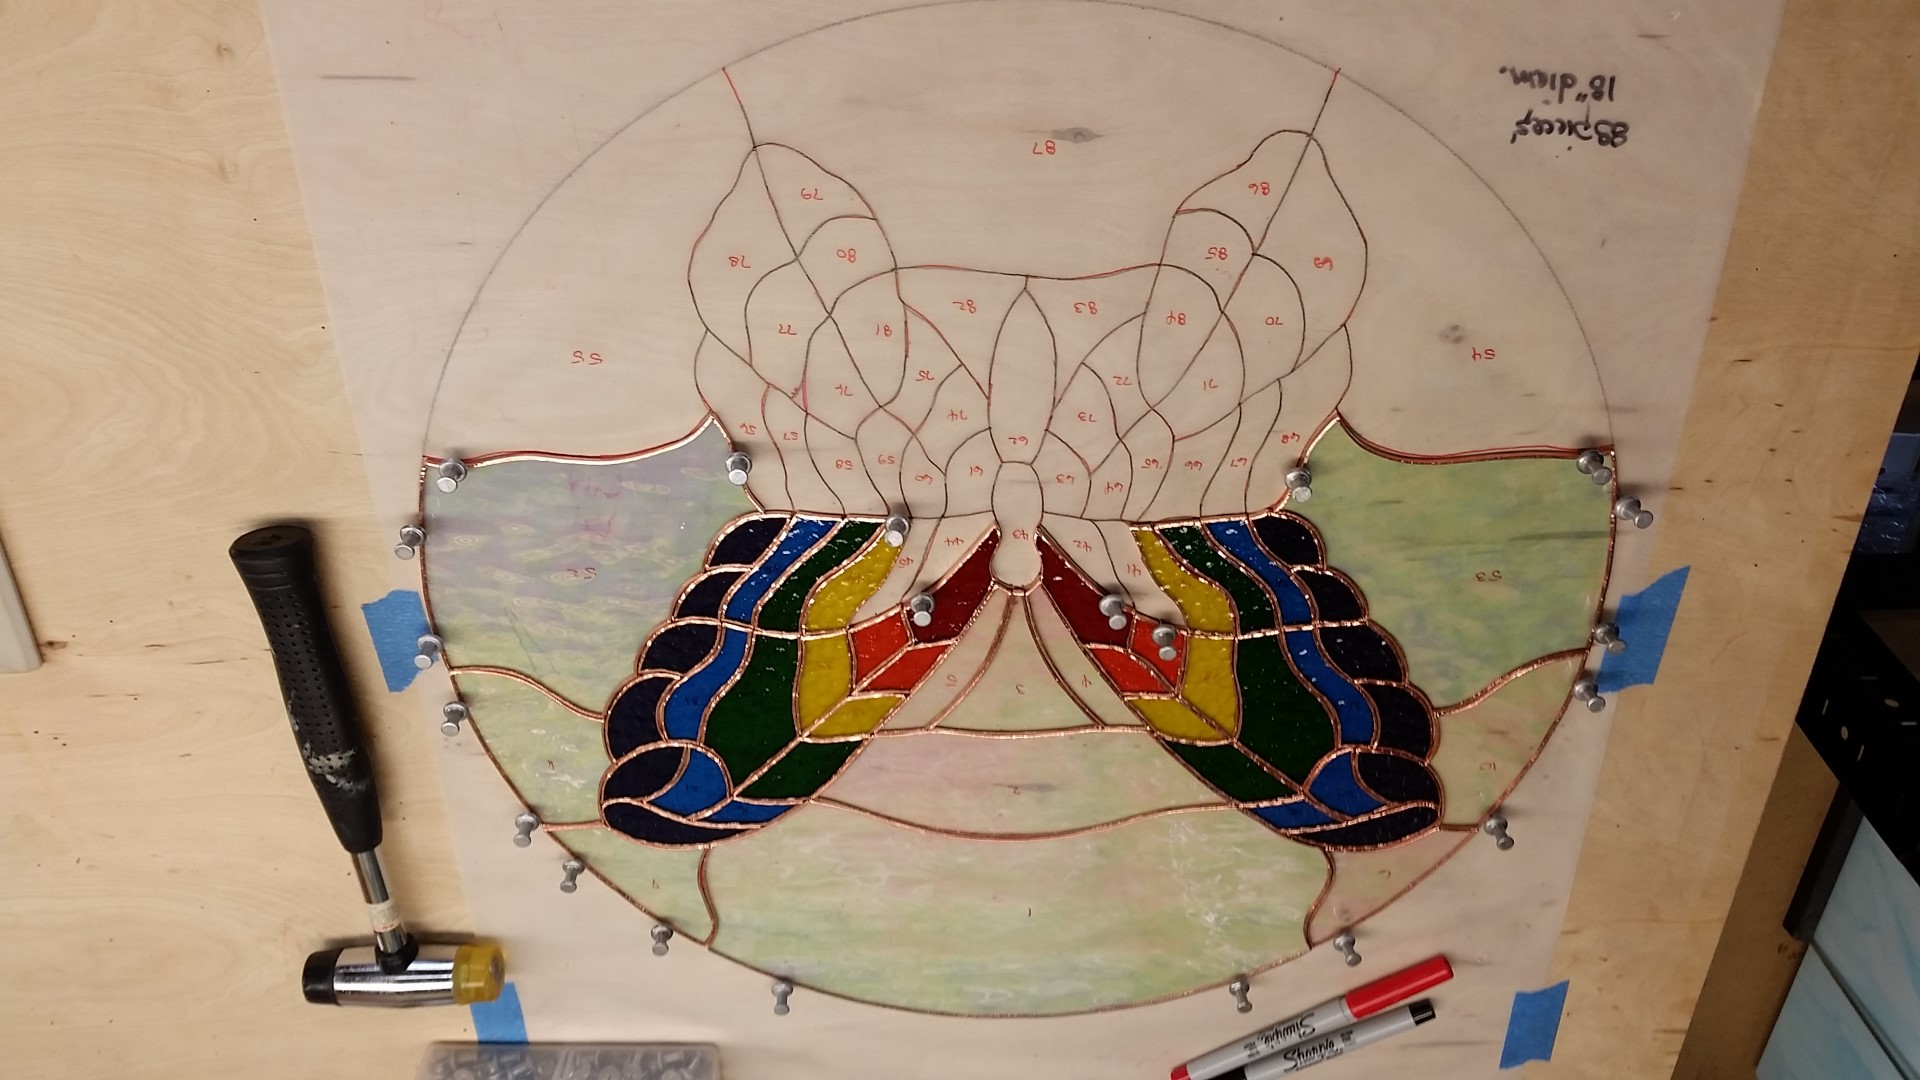
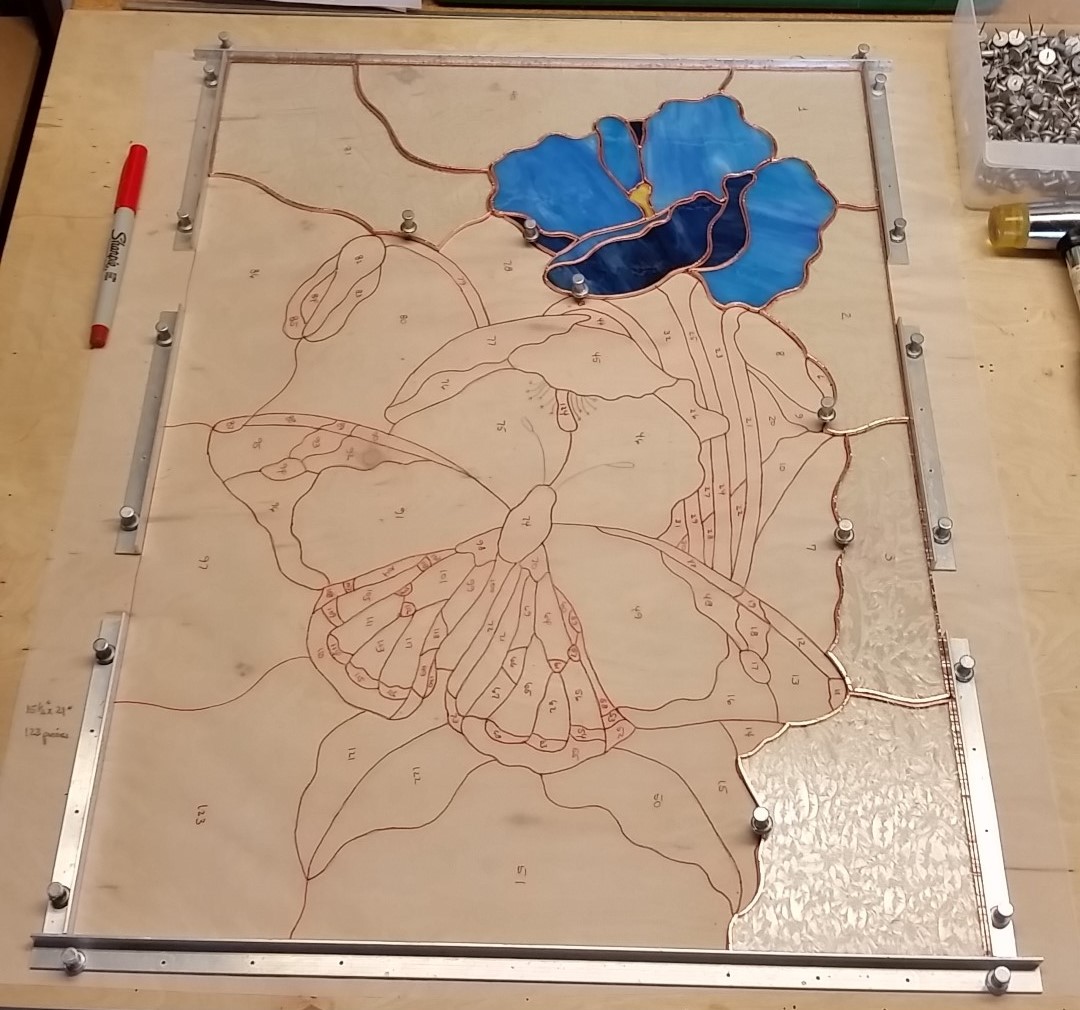
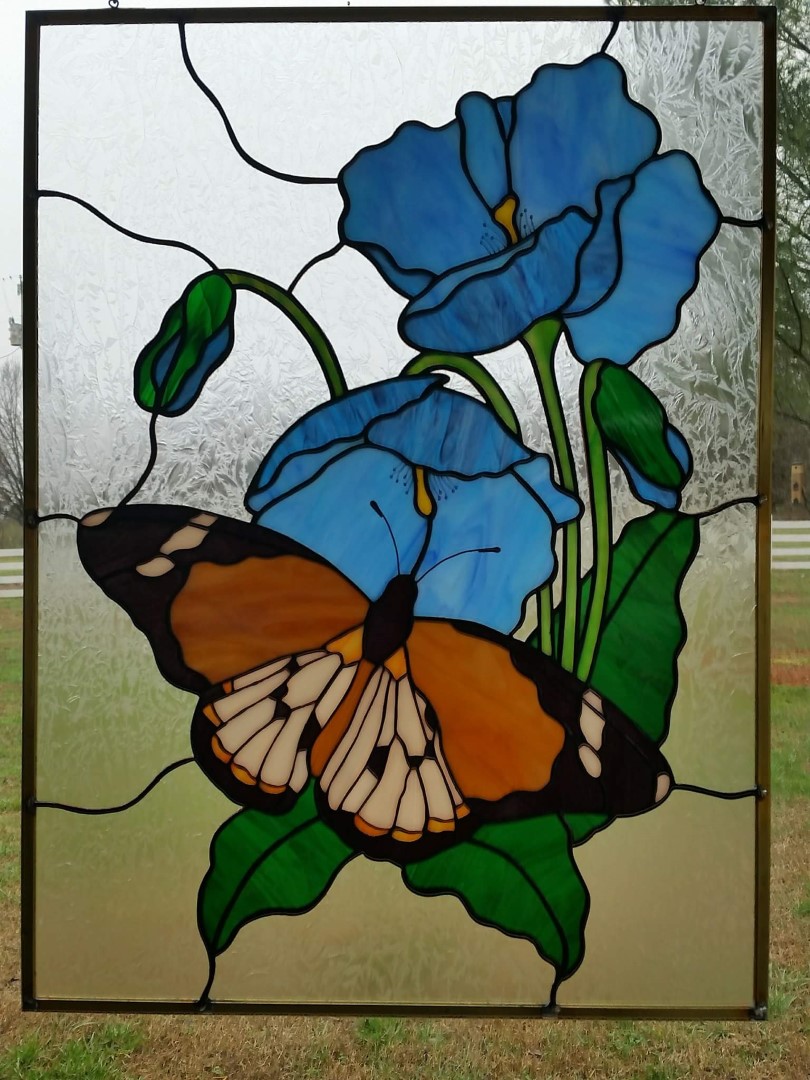
Some Butterfly Panels
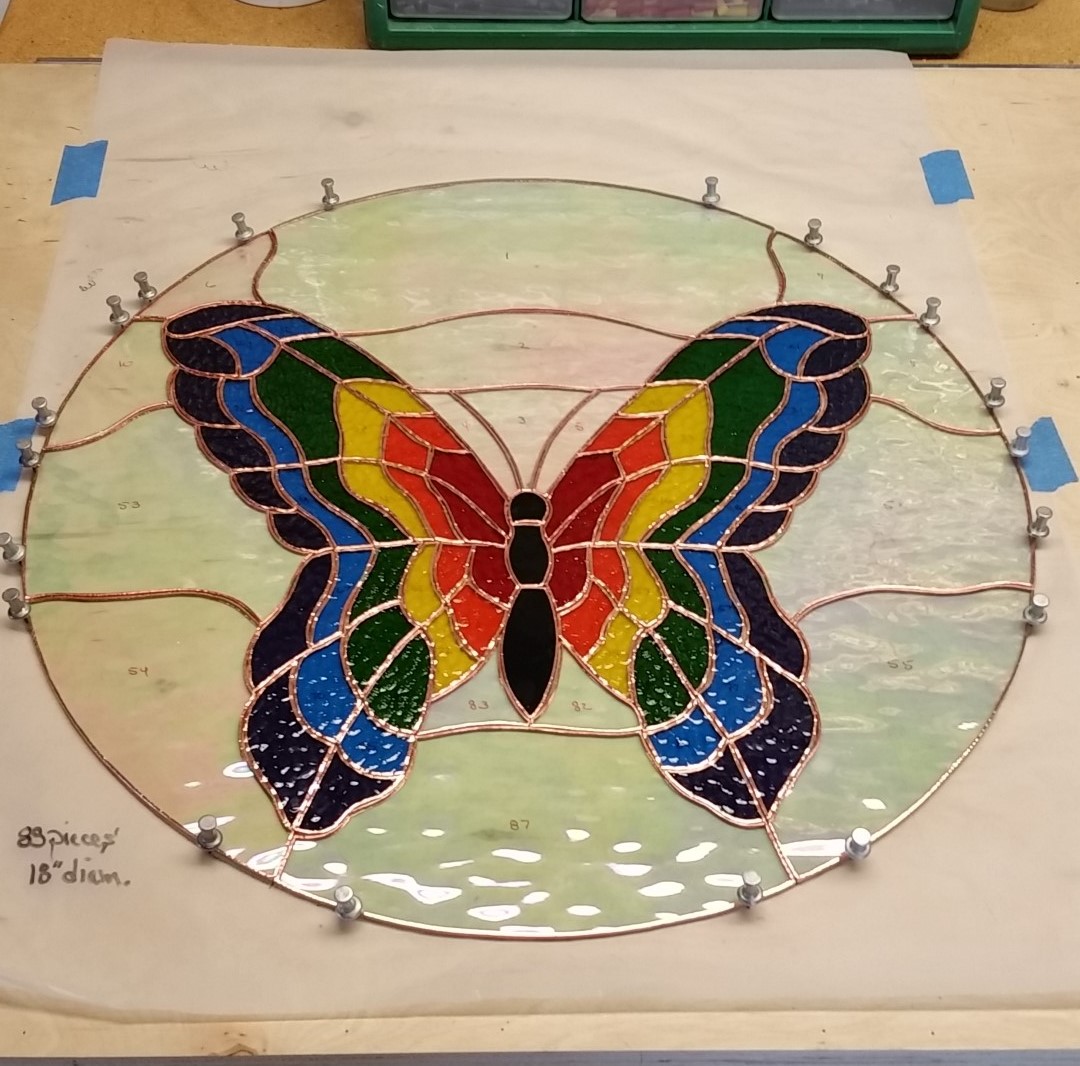
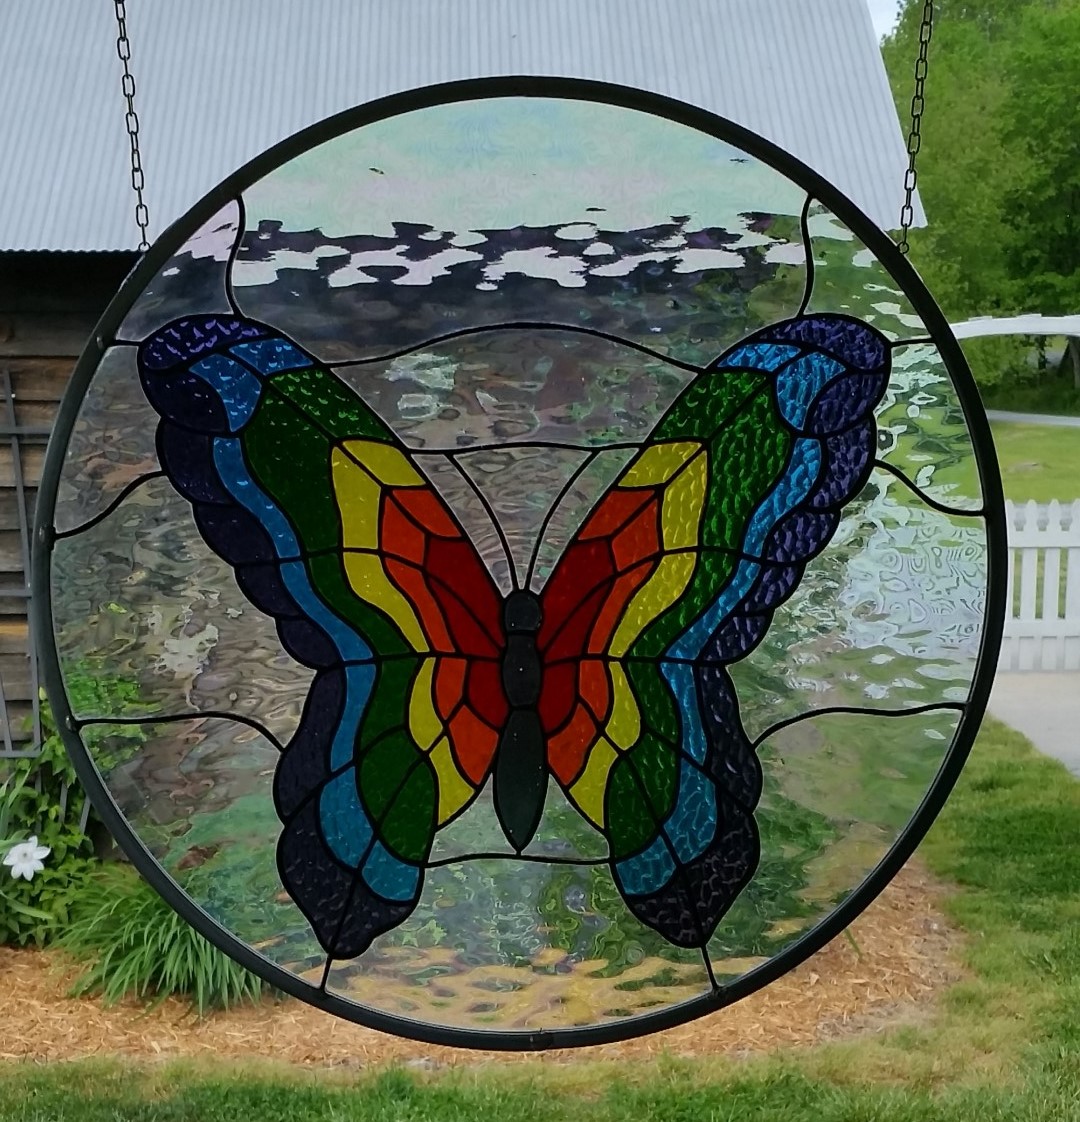
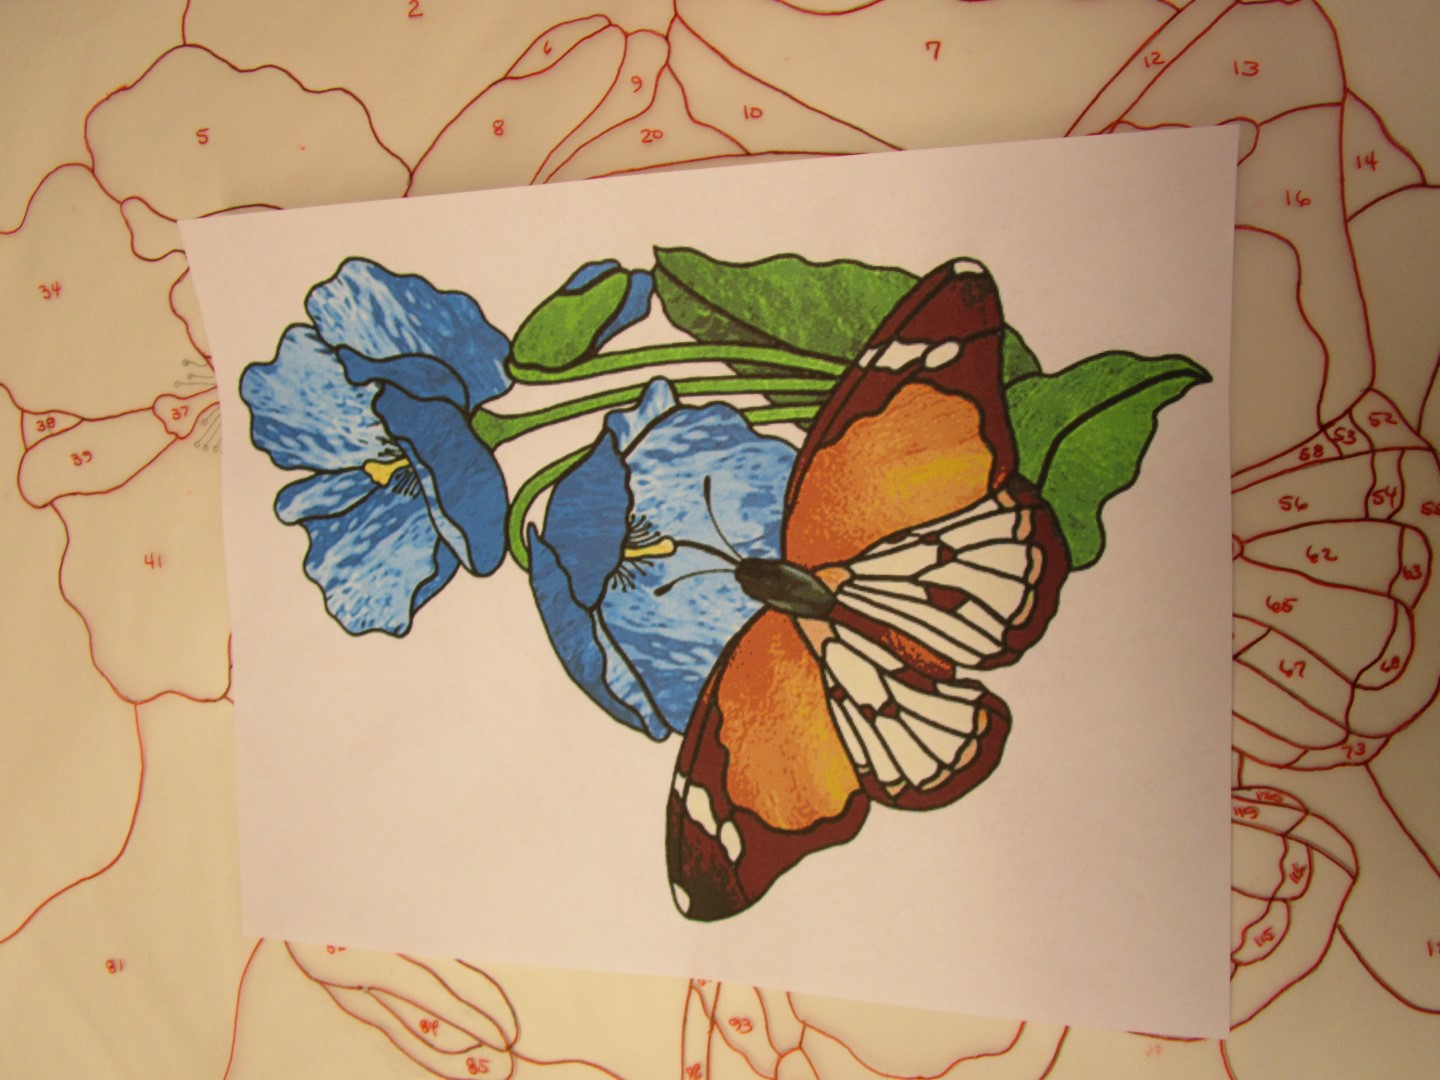
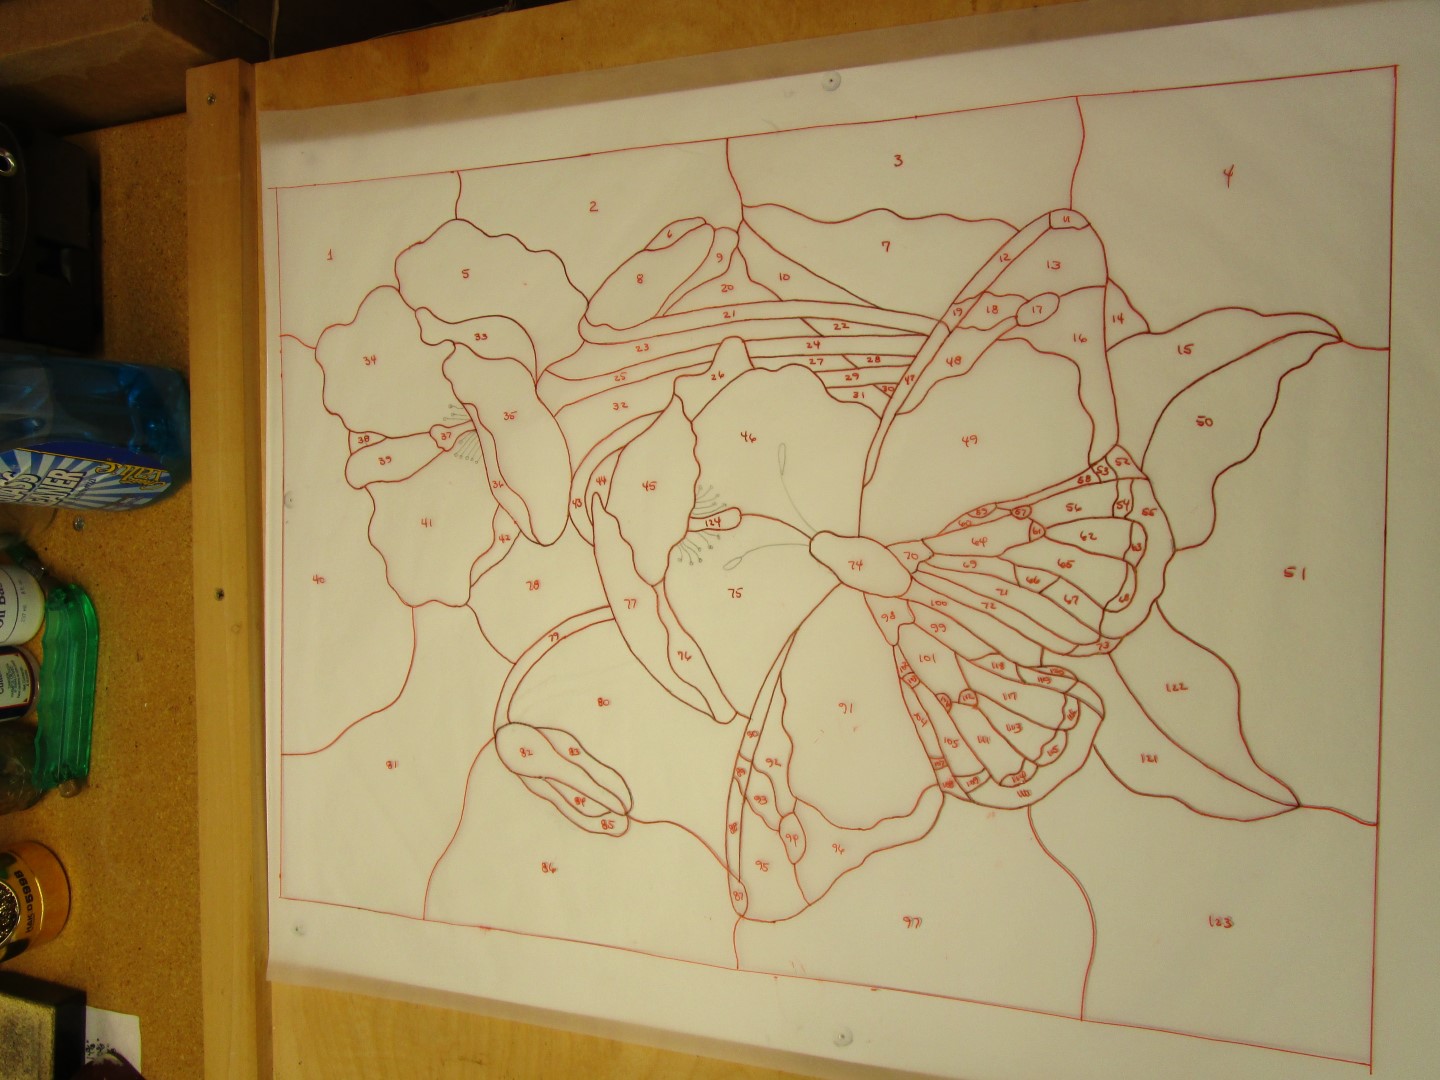
The next two projects are my butterflies. Because of the many small curved glass pieces, these panels are assembled using the copper foil, or “Tiffany” method. For added strength, the 18″ diameter 113 piece circular panel was framed using zinc channel, and the 16″x21″ 122 piece rectangle panel is framed in brass channel. Note - The image on the lower left is what I used as the source of the panel pattern, which I slightly modified for a better balance. Lots of very small glass pieces in this panel, but she came out I think looking great. The “anthers and filaments” in the flowers are drawn by hand using black ink. Both panels are hanging in our sunroom windows.
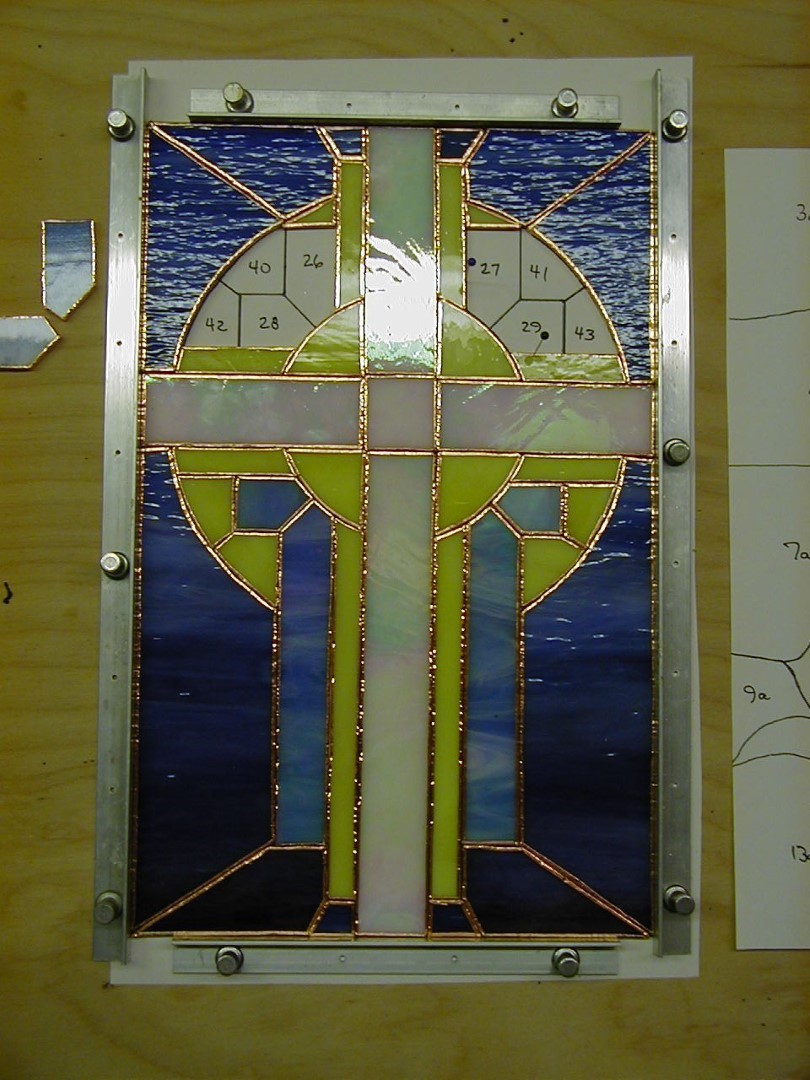
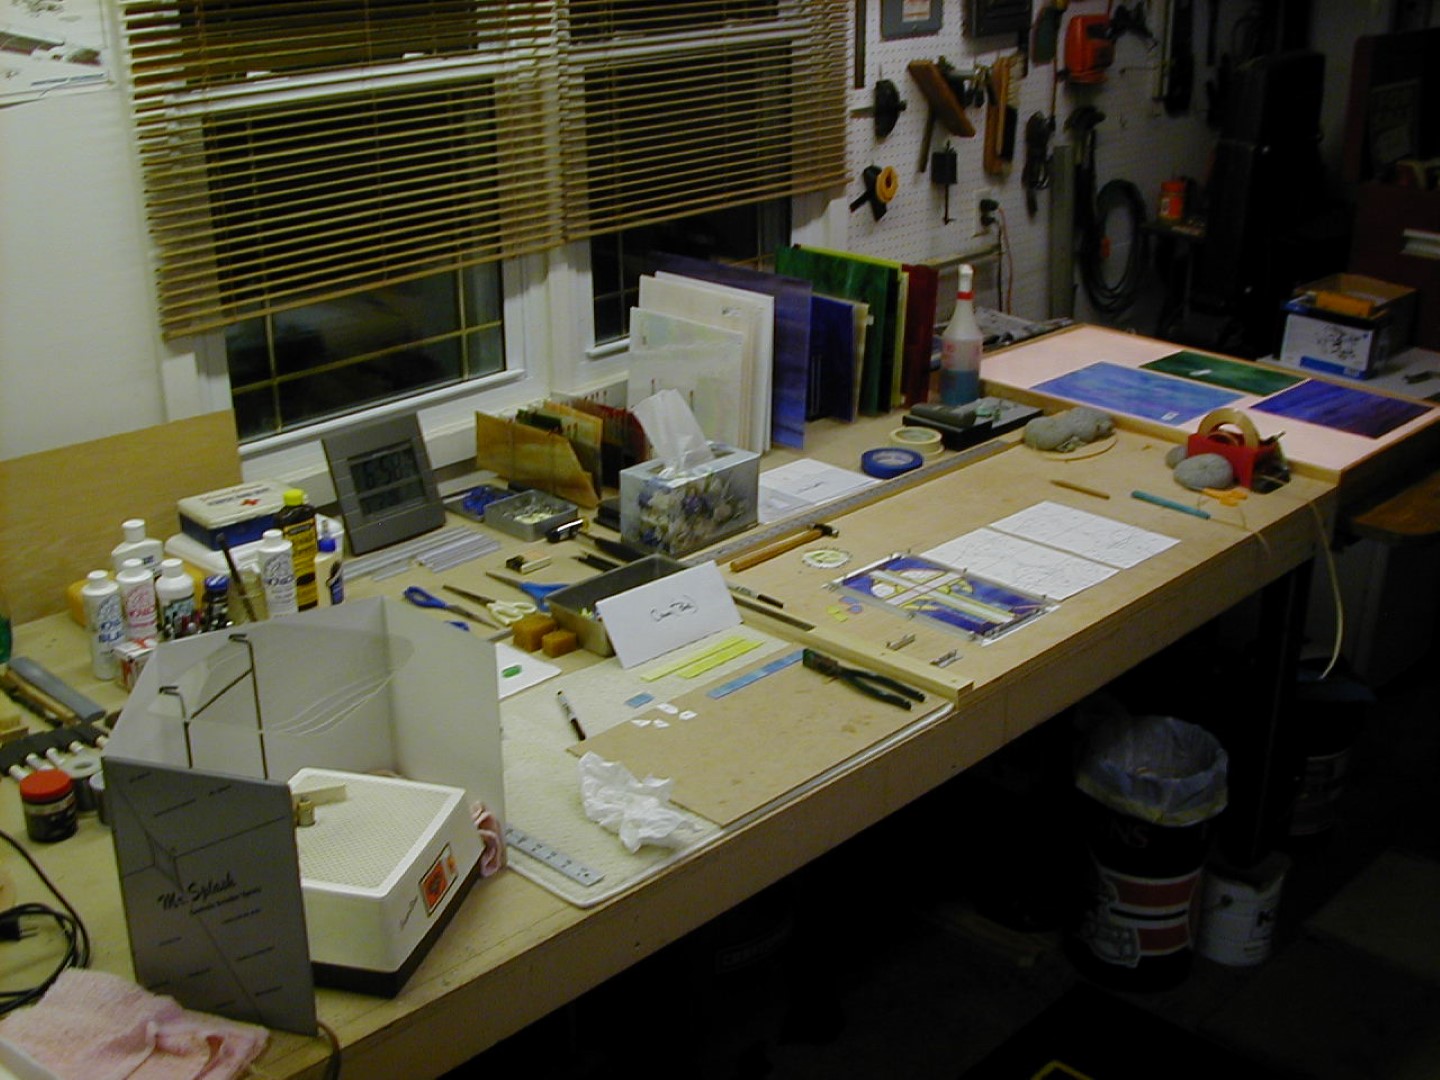
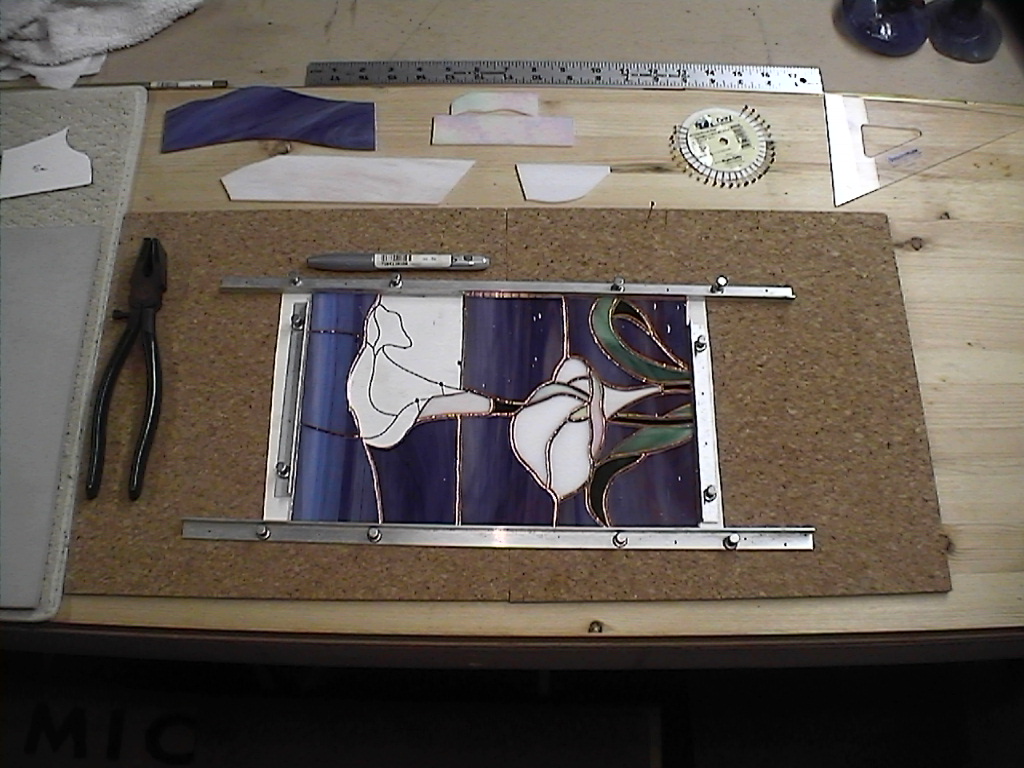
Cross and Lilies Table Lamp
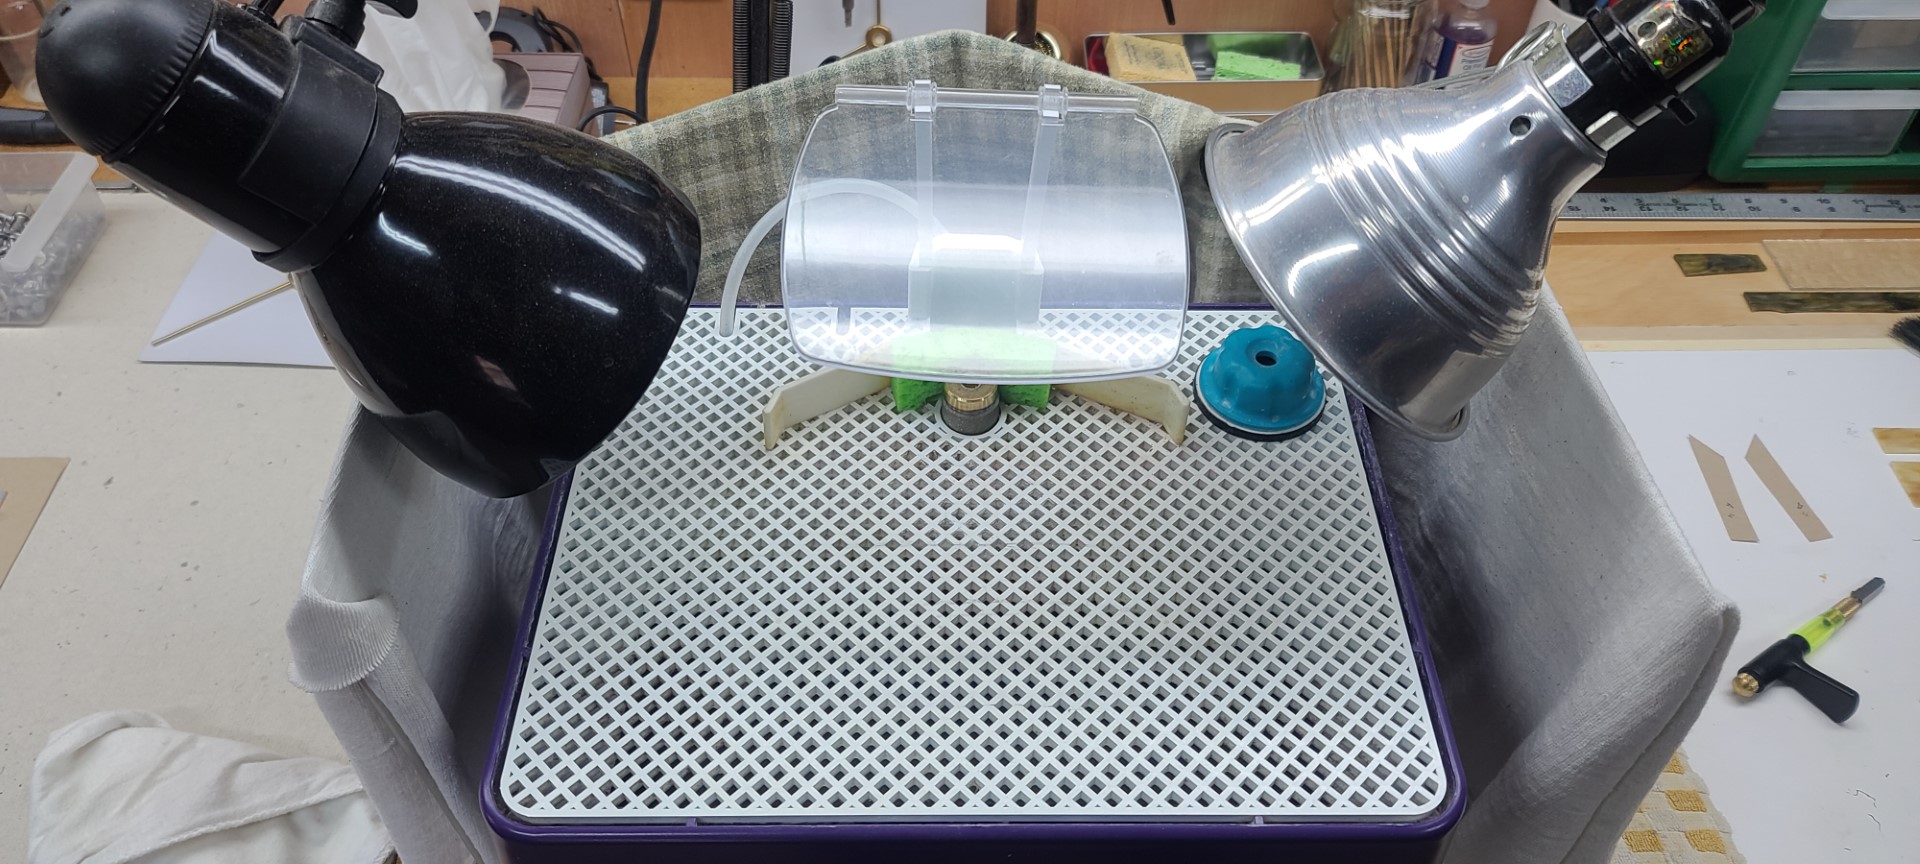
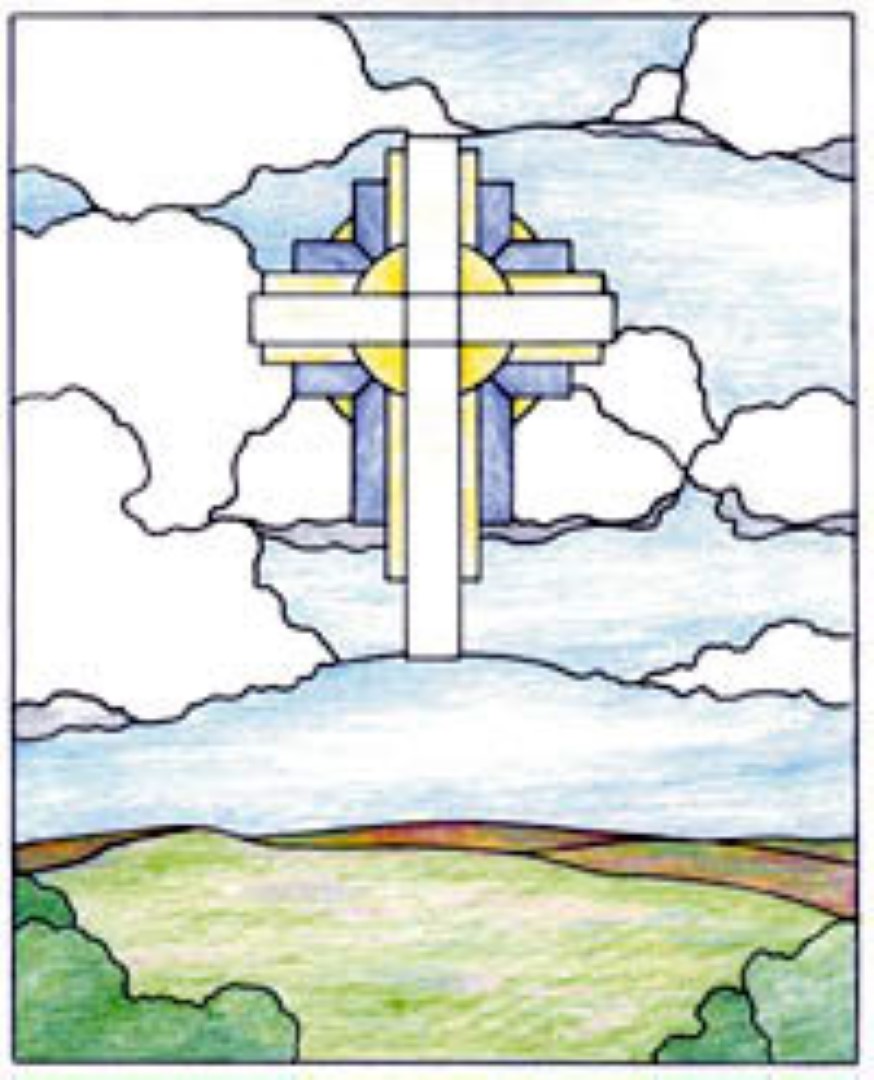
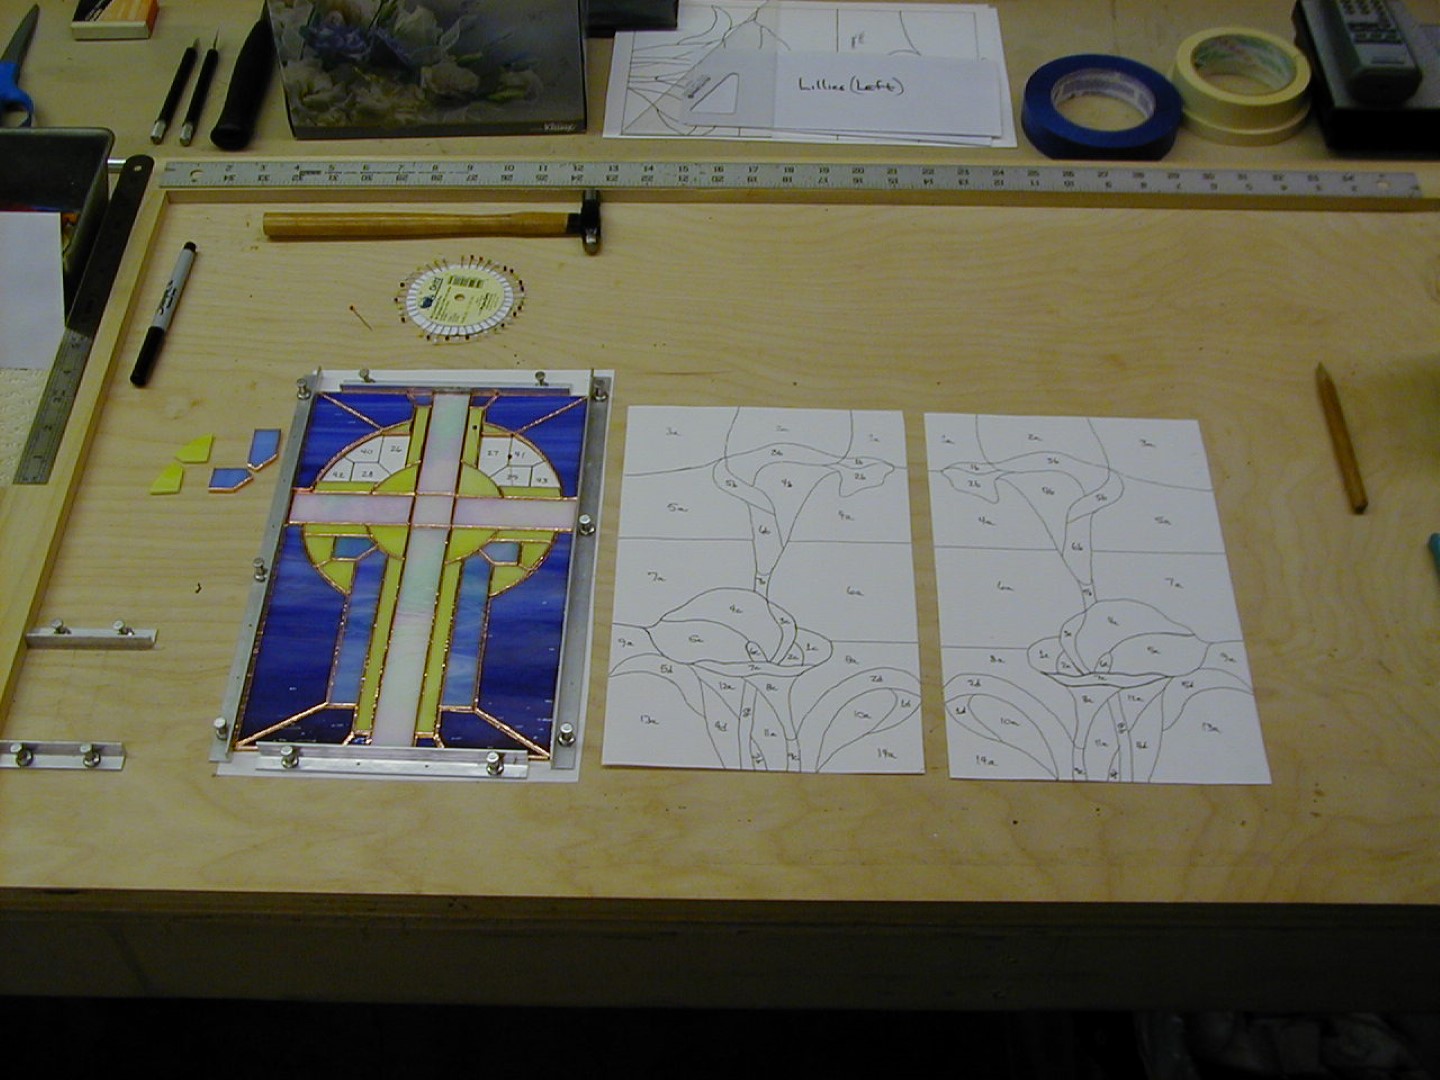
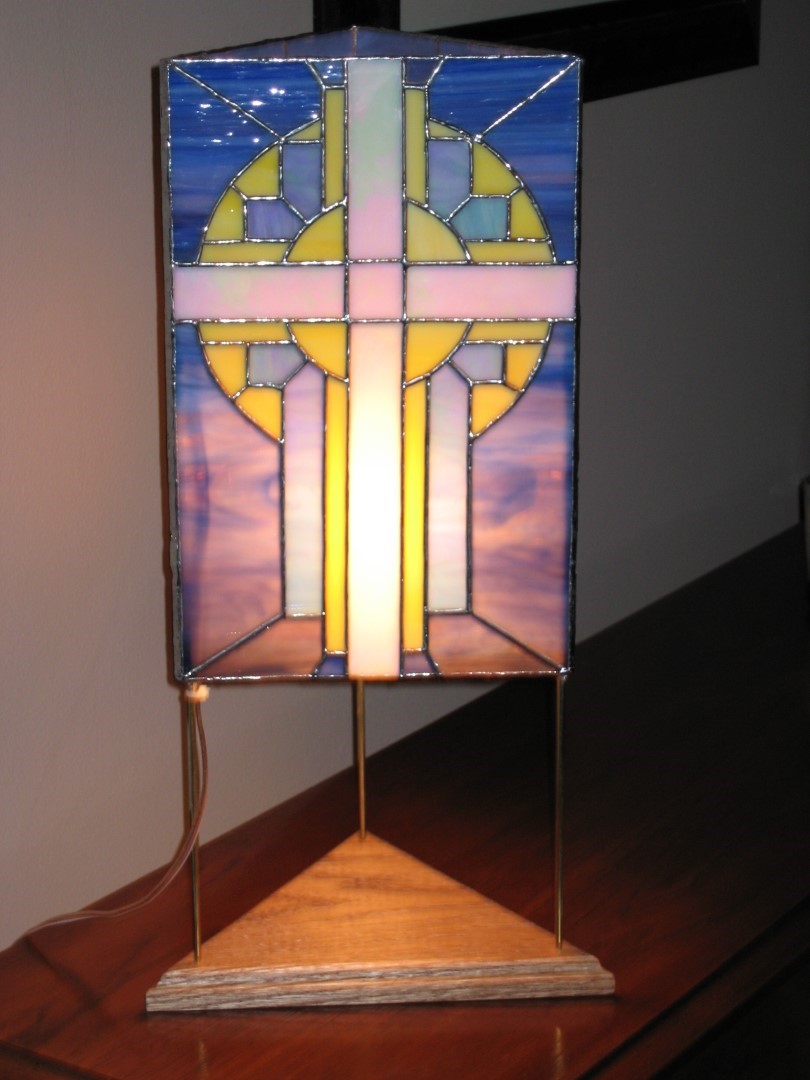
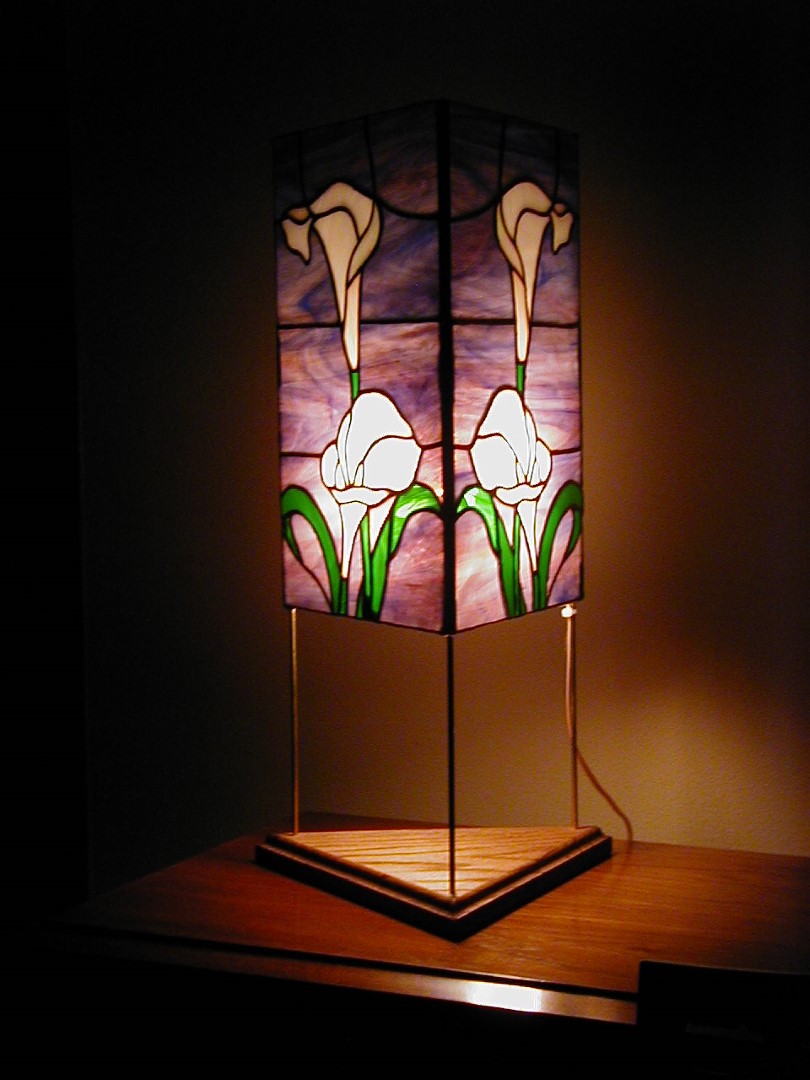
You may want to try your hand at creating a Stained Glass table lamp. My first attempt at a lamp is shown here. Each panel is 7″x11″, and there are 119 pieces total. The two images on the top row left are what I used to draw up my patterns. As you can see in the third image (now is a good time to click on the image to bring up the “Spotlight Box”), the two lily panels are mirror images. The second row shows my first Stained Glass workbench in our garage in Ohio. Note in the upper right of the first image, the light box I built to allow me to easily see what the color and textures in the glass pieces will be when the lamp is turned on. I HIGHLY recommend you get some form of light box if you are going to get serious about making Stained Glass project. This triangular lamp normally sits in the bedroom, but gets pulled out into the living room during the Spring holiday season.

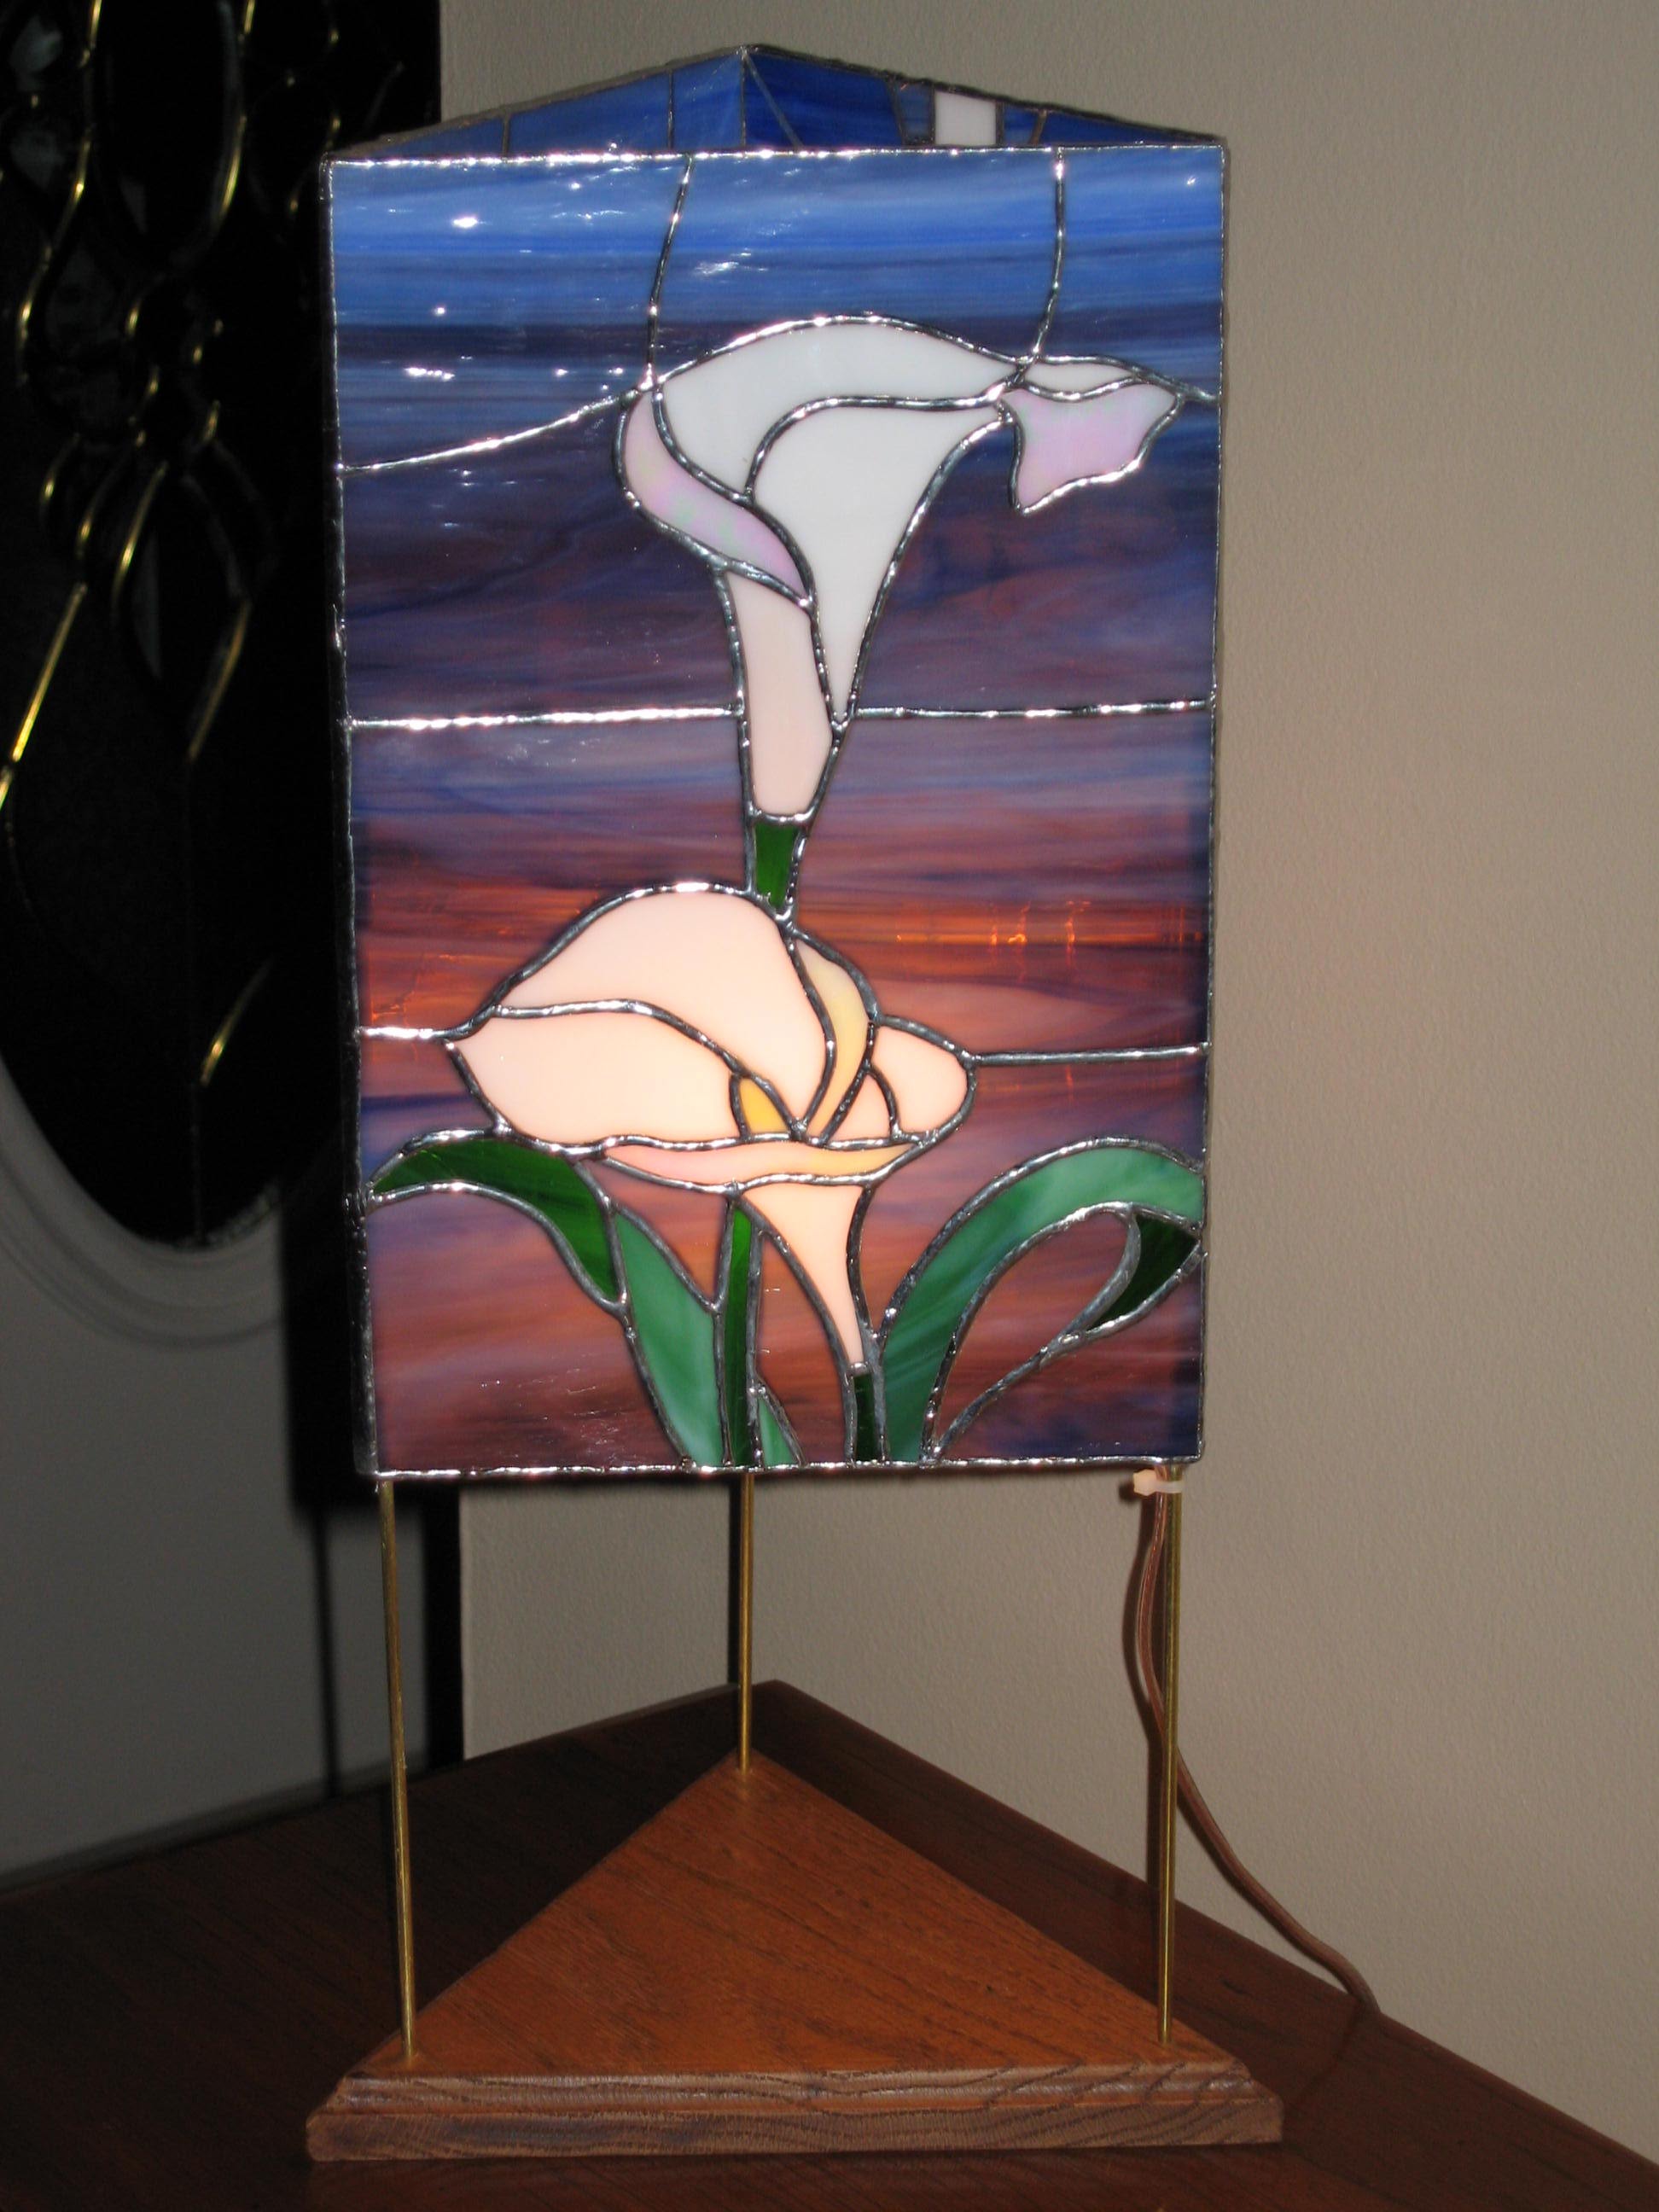

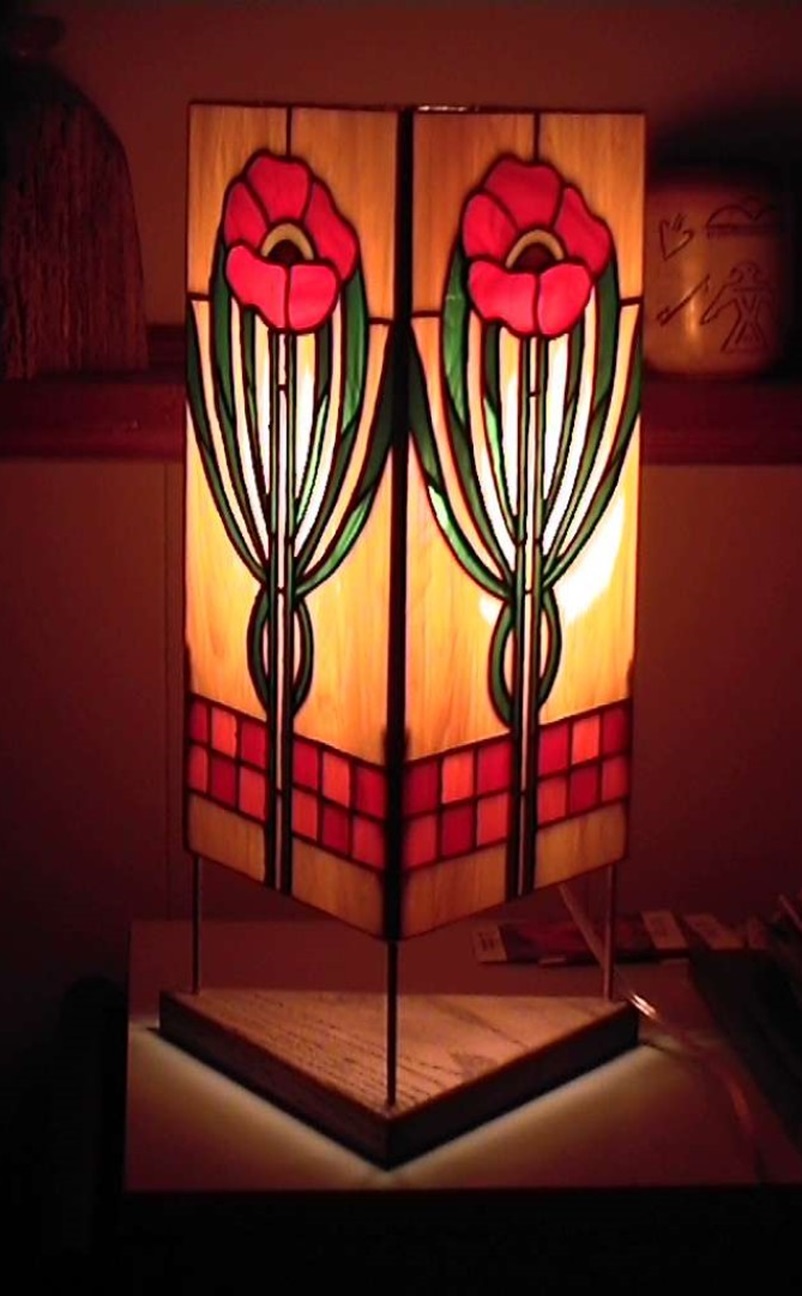
Poppies Table Lamp
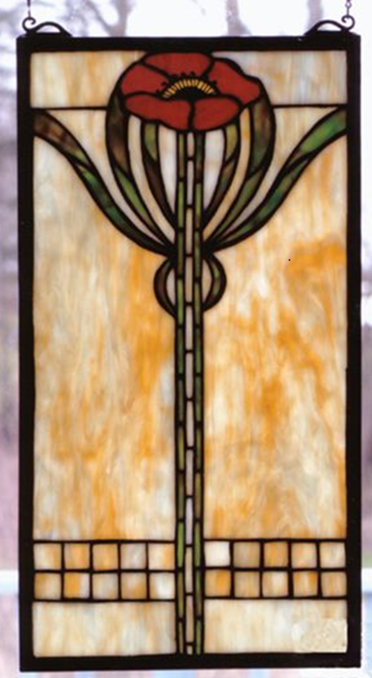
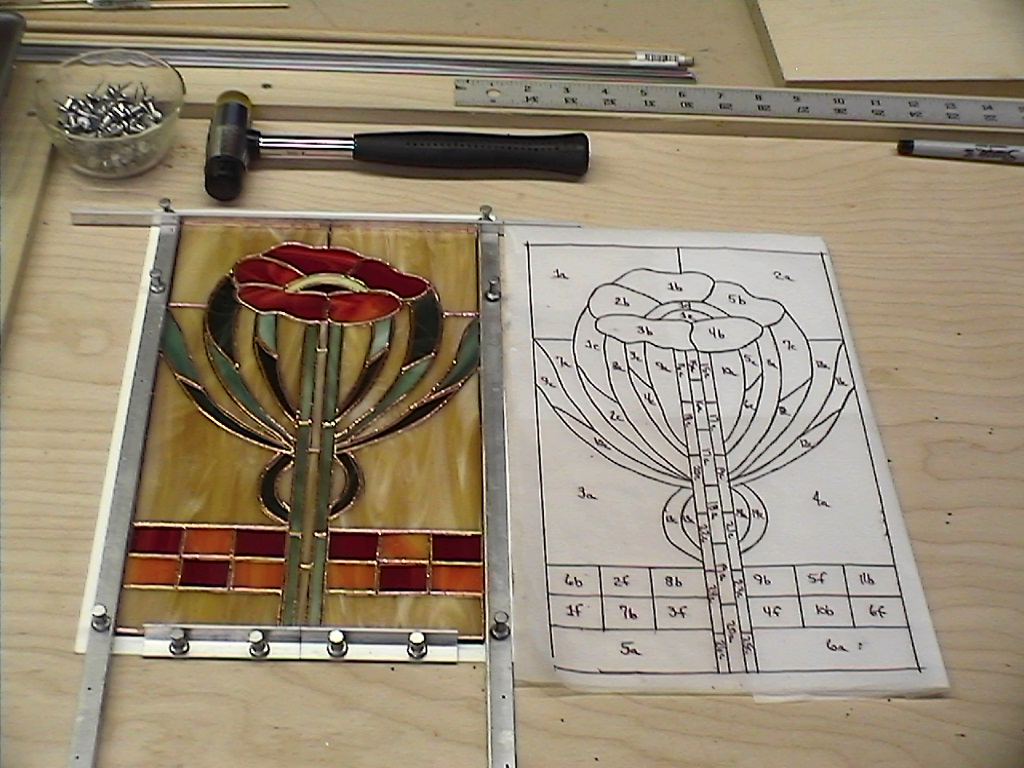
This next lamp was created for a family member. The image on the far left is a panel I found on the internet, from which I drew my lamp pattern. This lamp has three 7″x11″ panels for a total of 145 pieces. Note - All four table lamps in this section are lighted using standard 110 volt lamp hardware and low wattage bulbs.
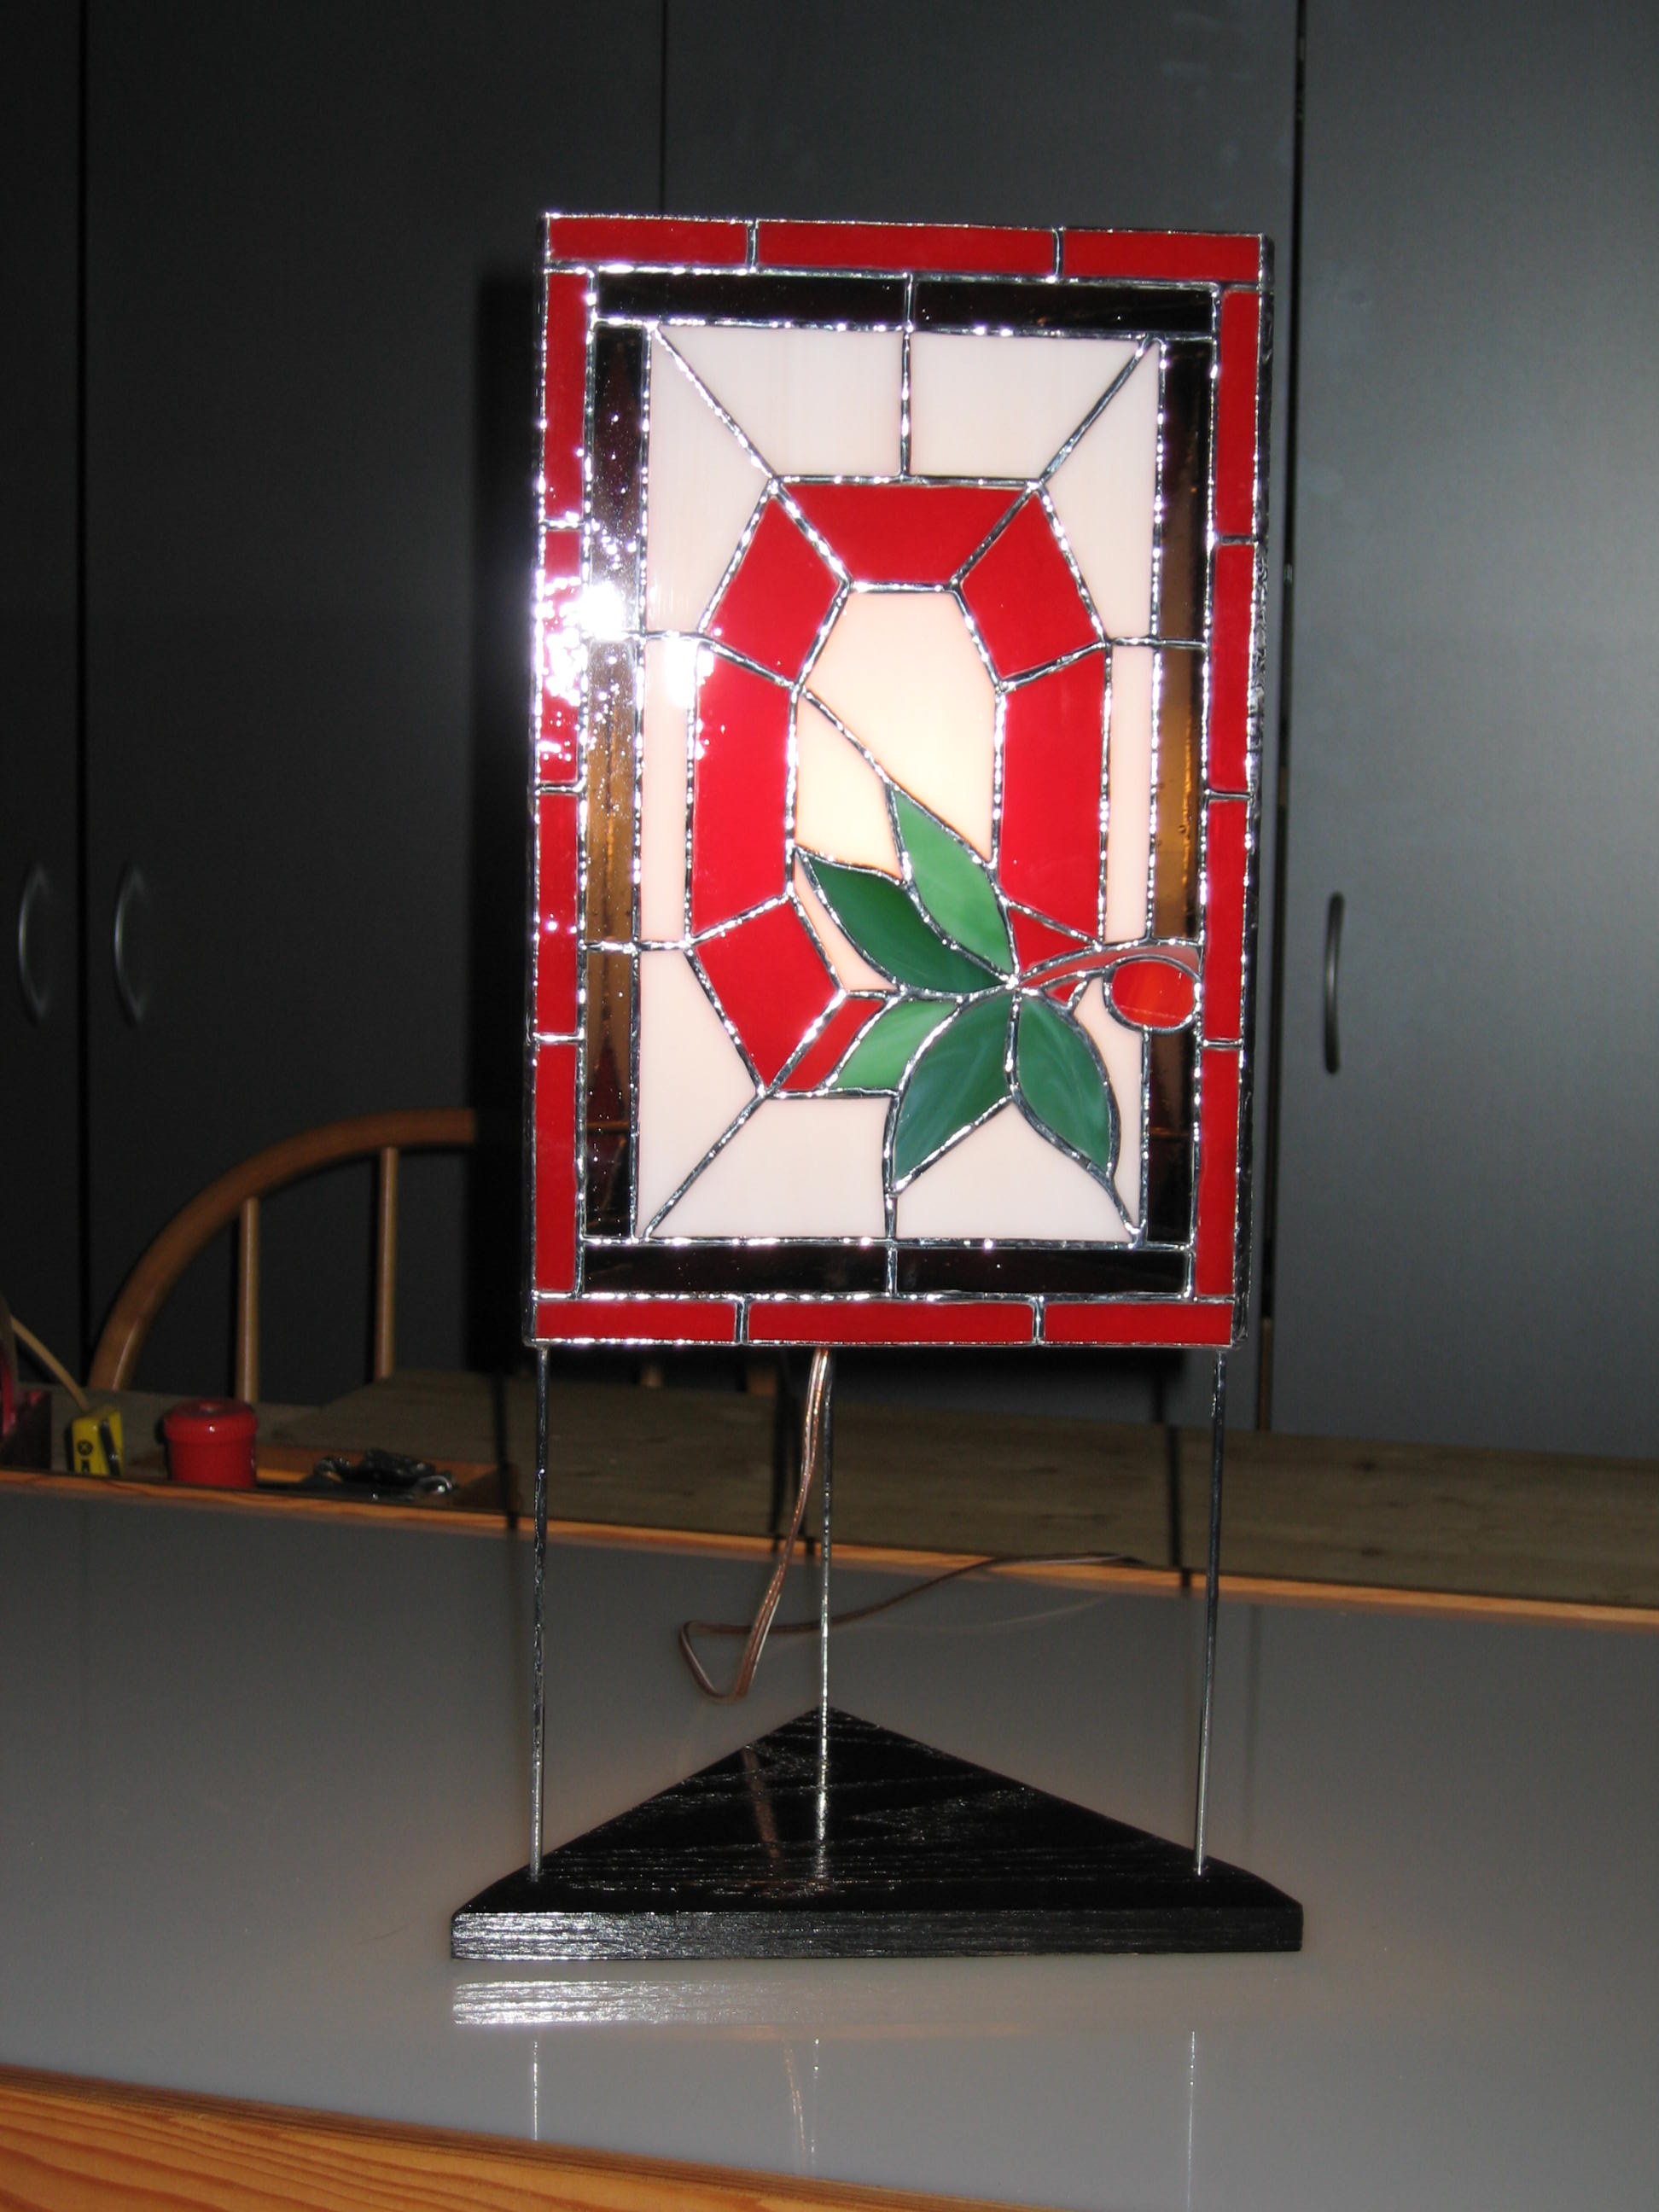
Ohio State University Table Lamp
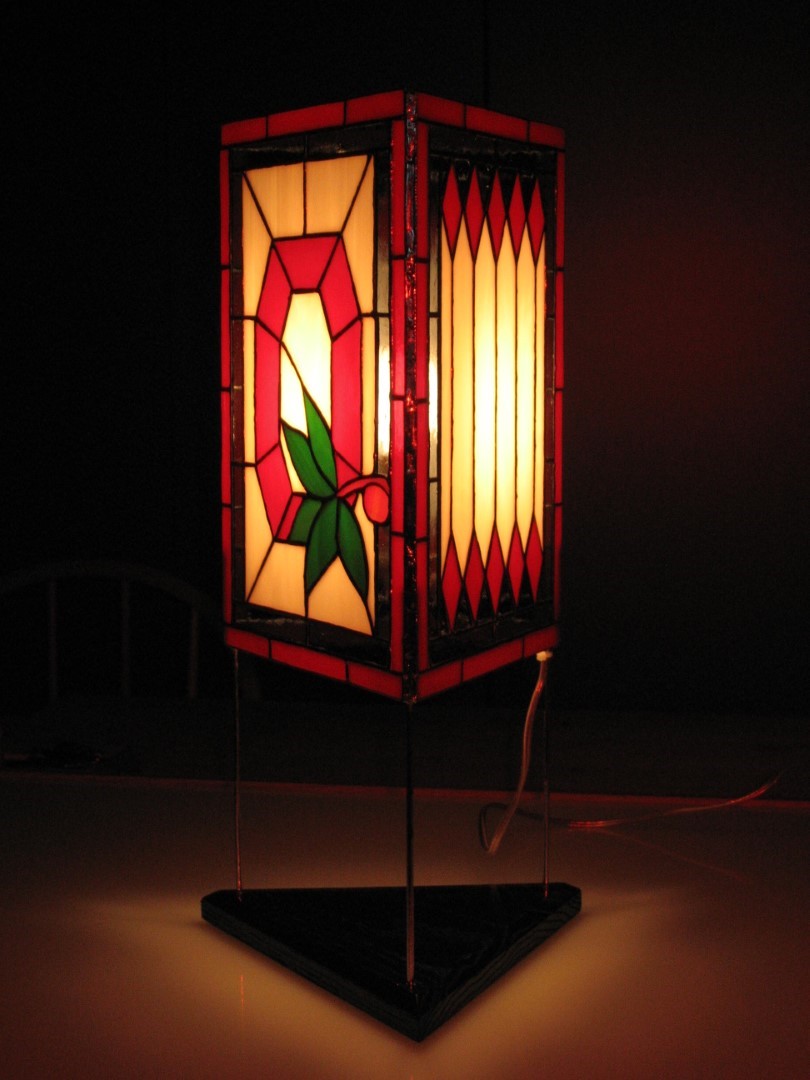
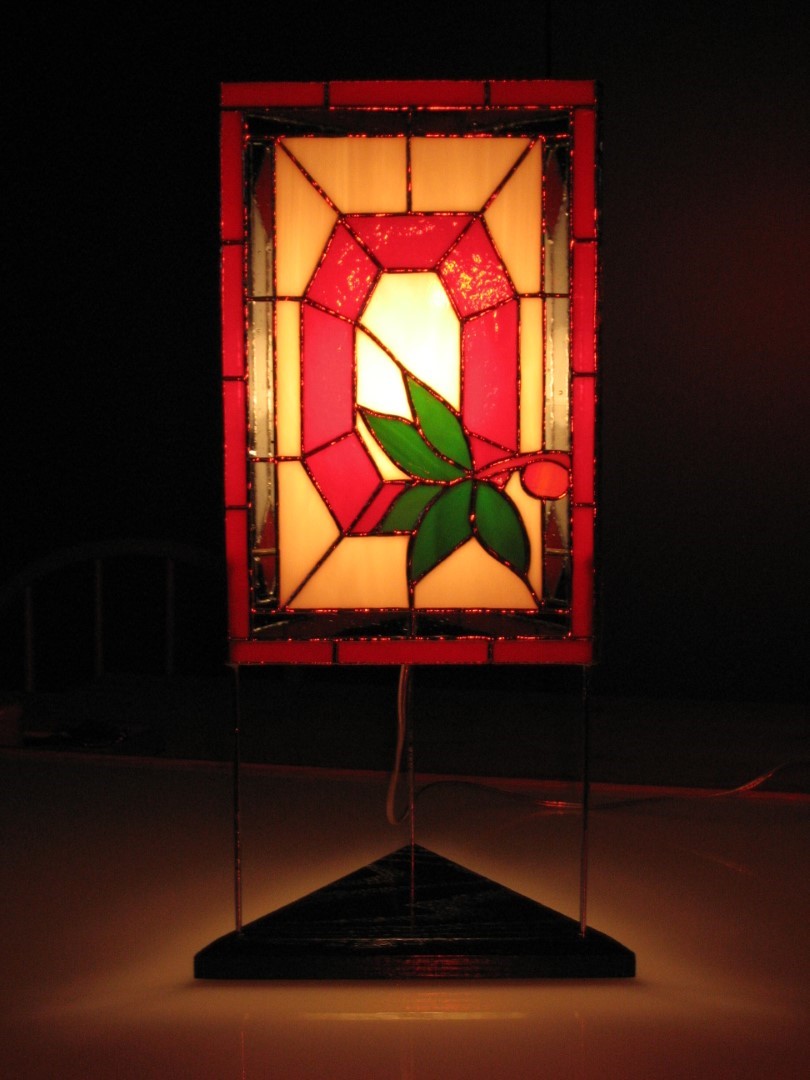
I grew up just South of Ann Arbor MI. so you know what collage football team I watch. Well, my oldest son just happened to marry a good looking lady from OH, which is what drove the theme for this next lamp. It was hard for me to do this project, but I love that lady very much. It was not hard to find a Buckeye image to use for the OSU panel pattern. The pattern for the other two panels was just free handed. Each panel is again 7″x11″ for a total of 162 pieces. They both like it, so that's what counts.
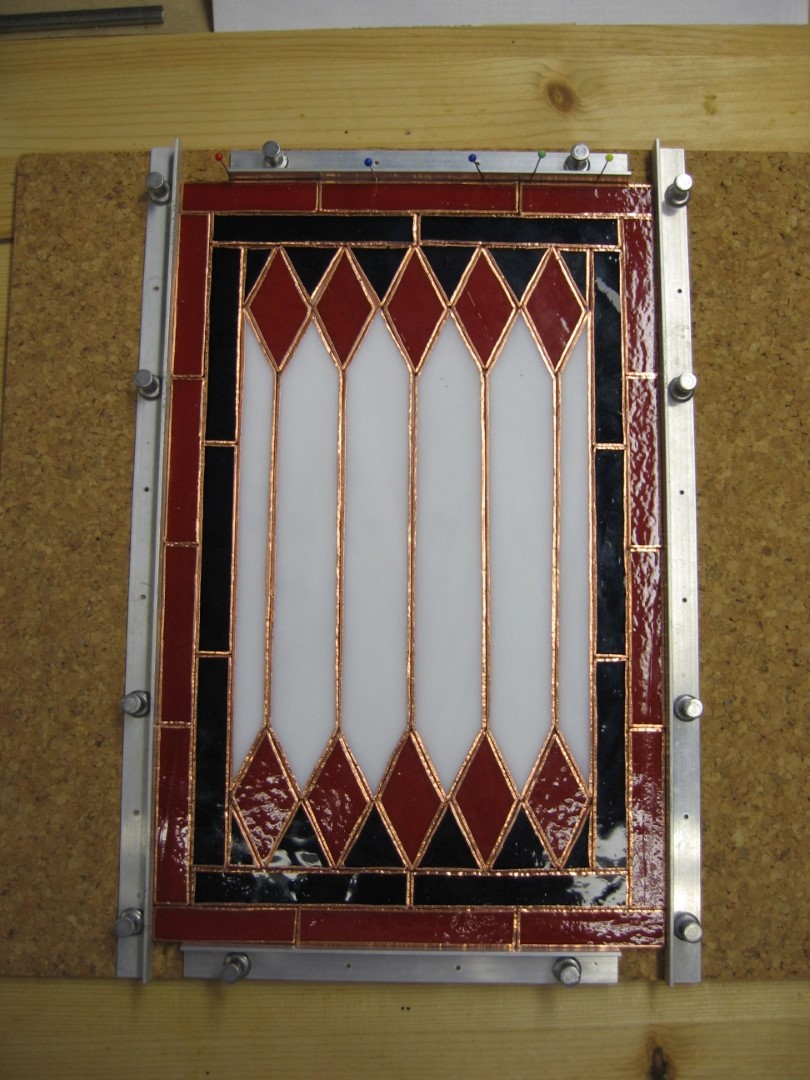
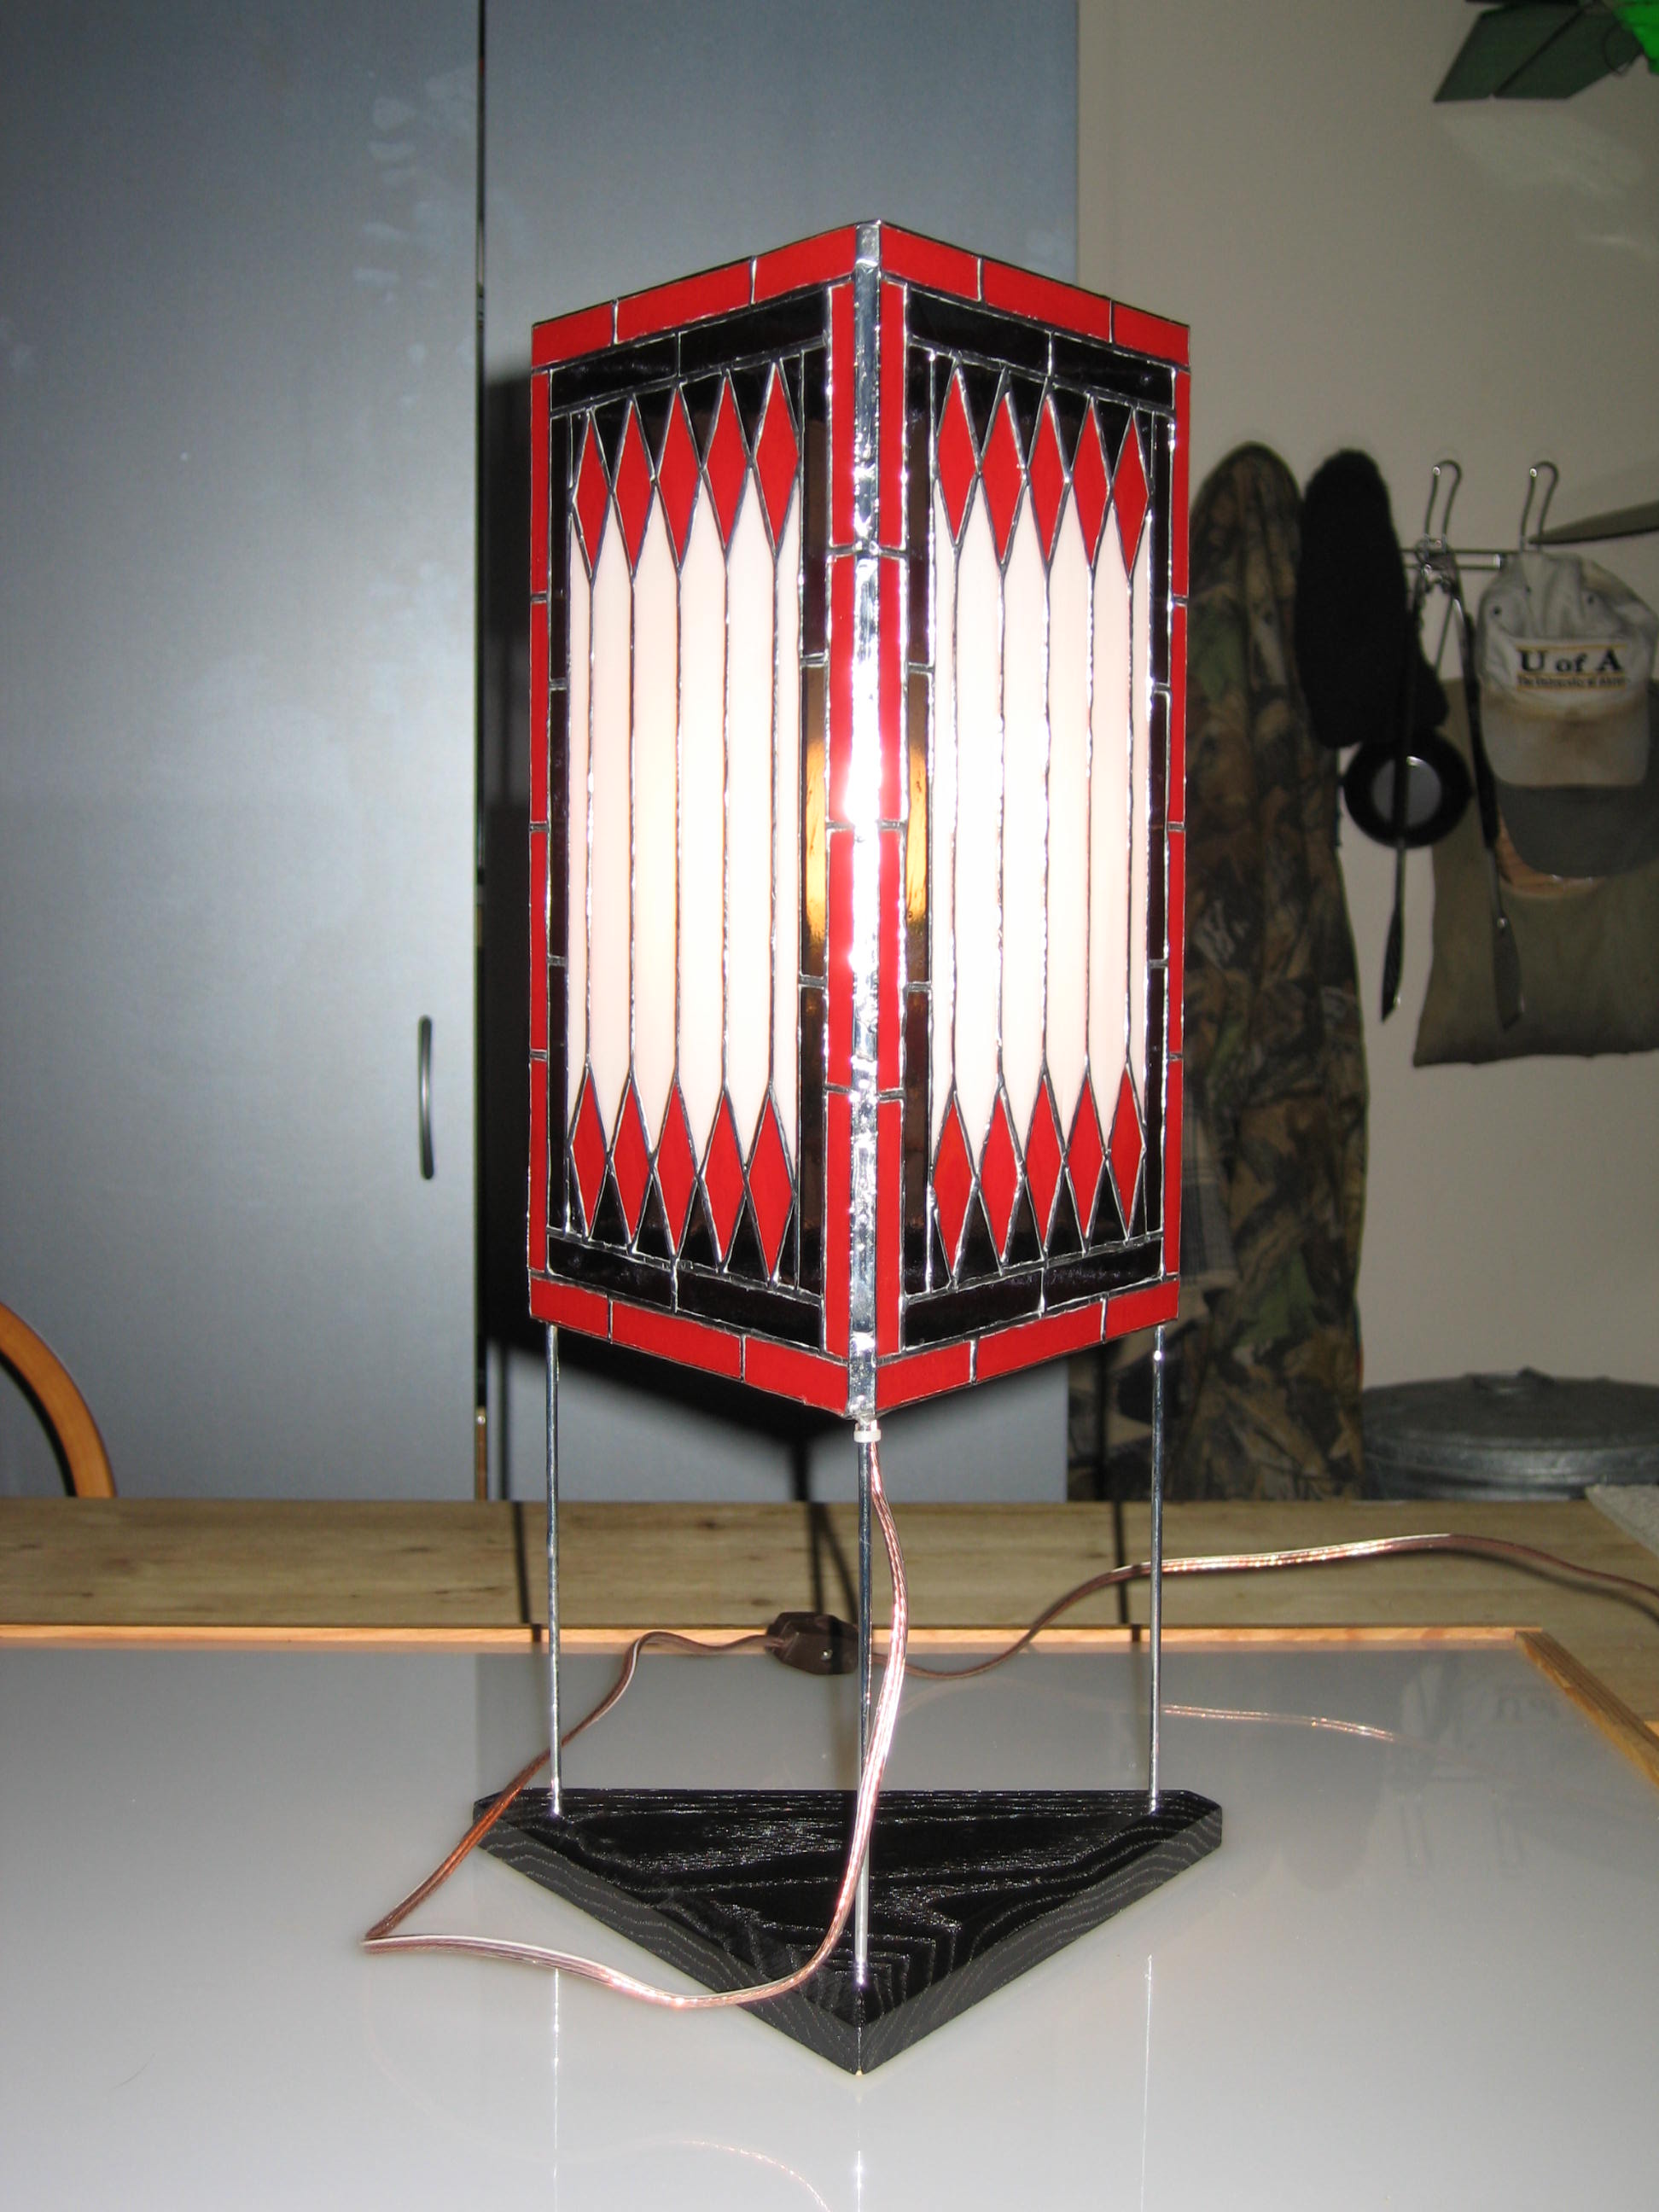
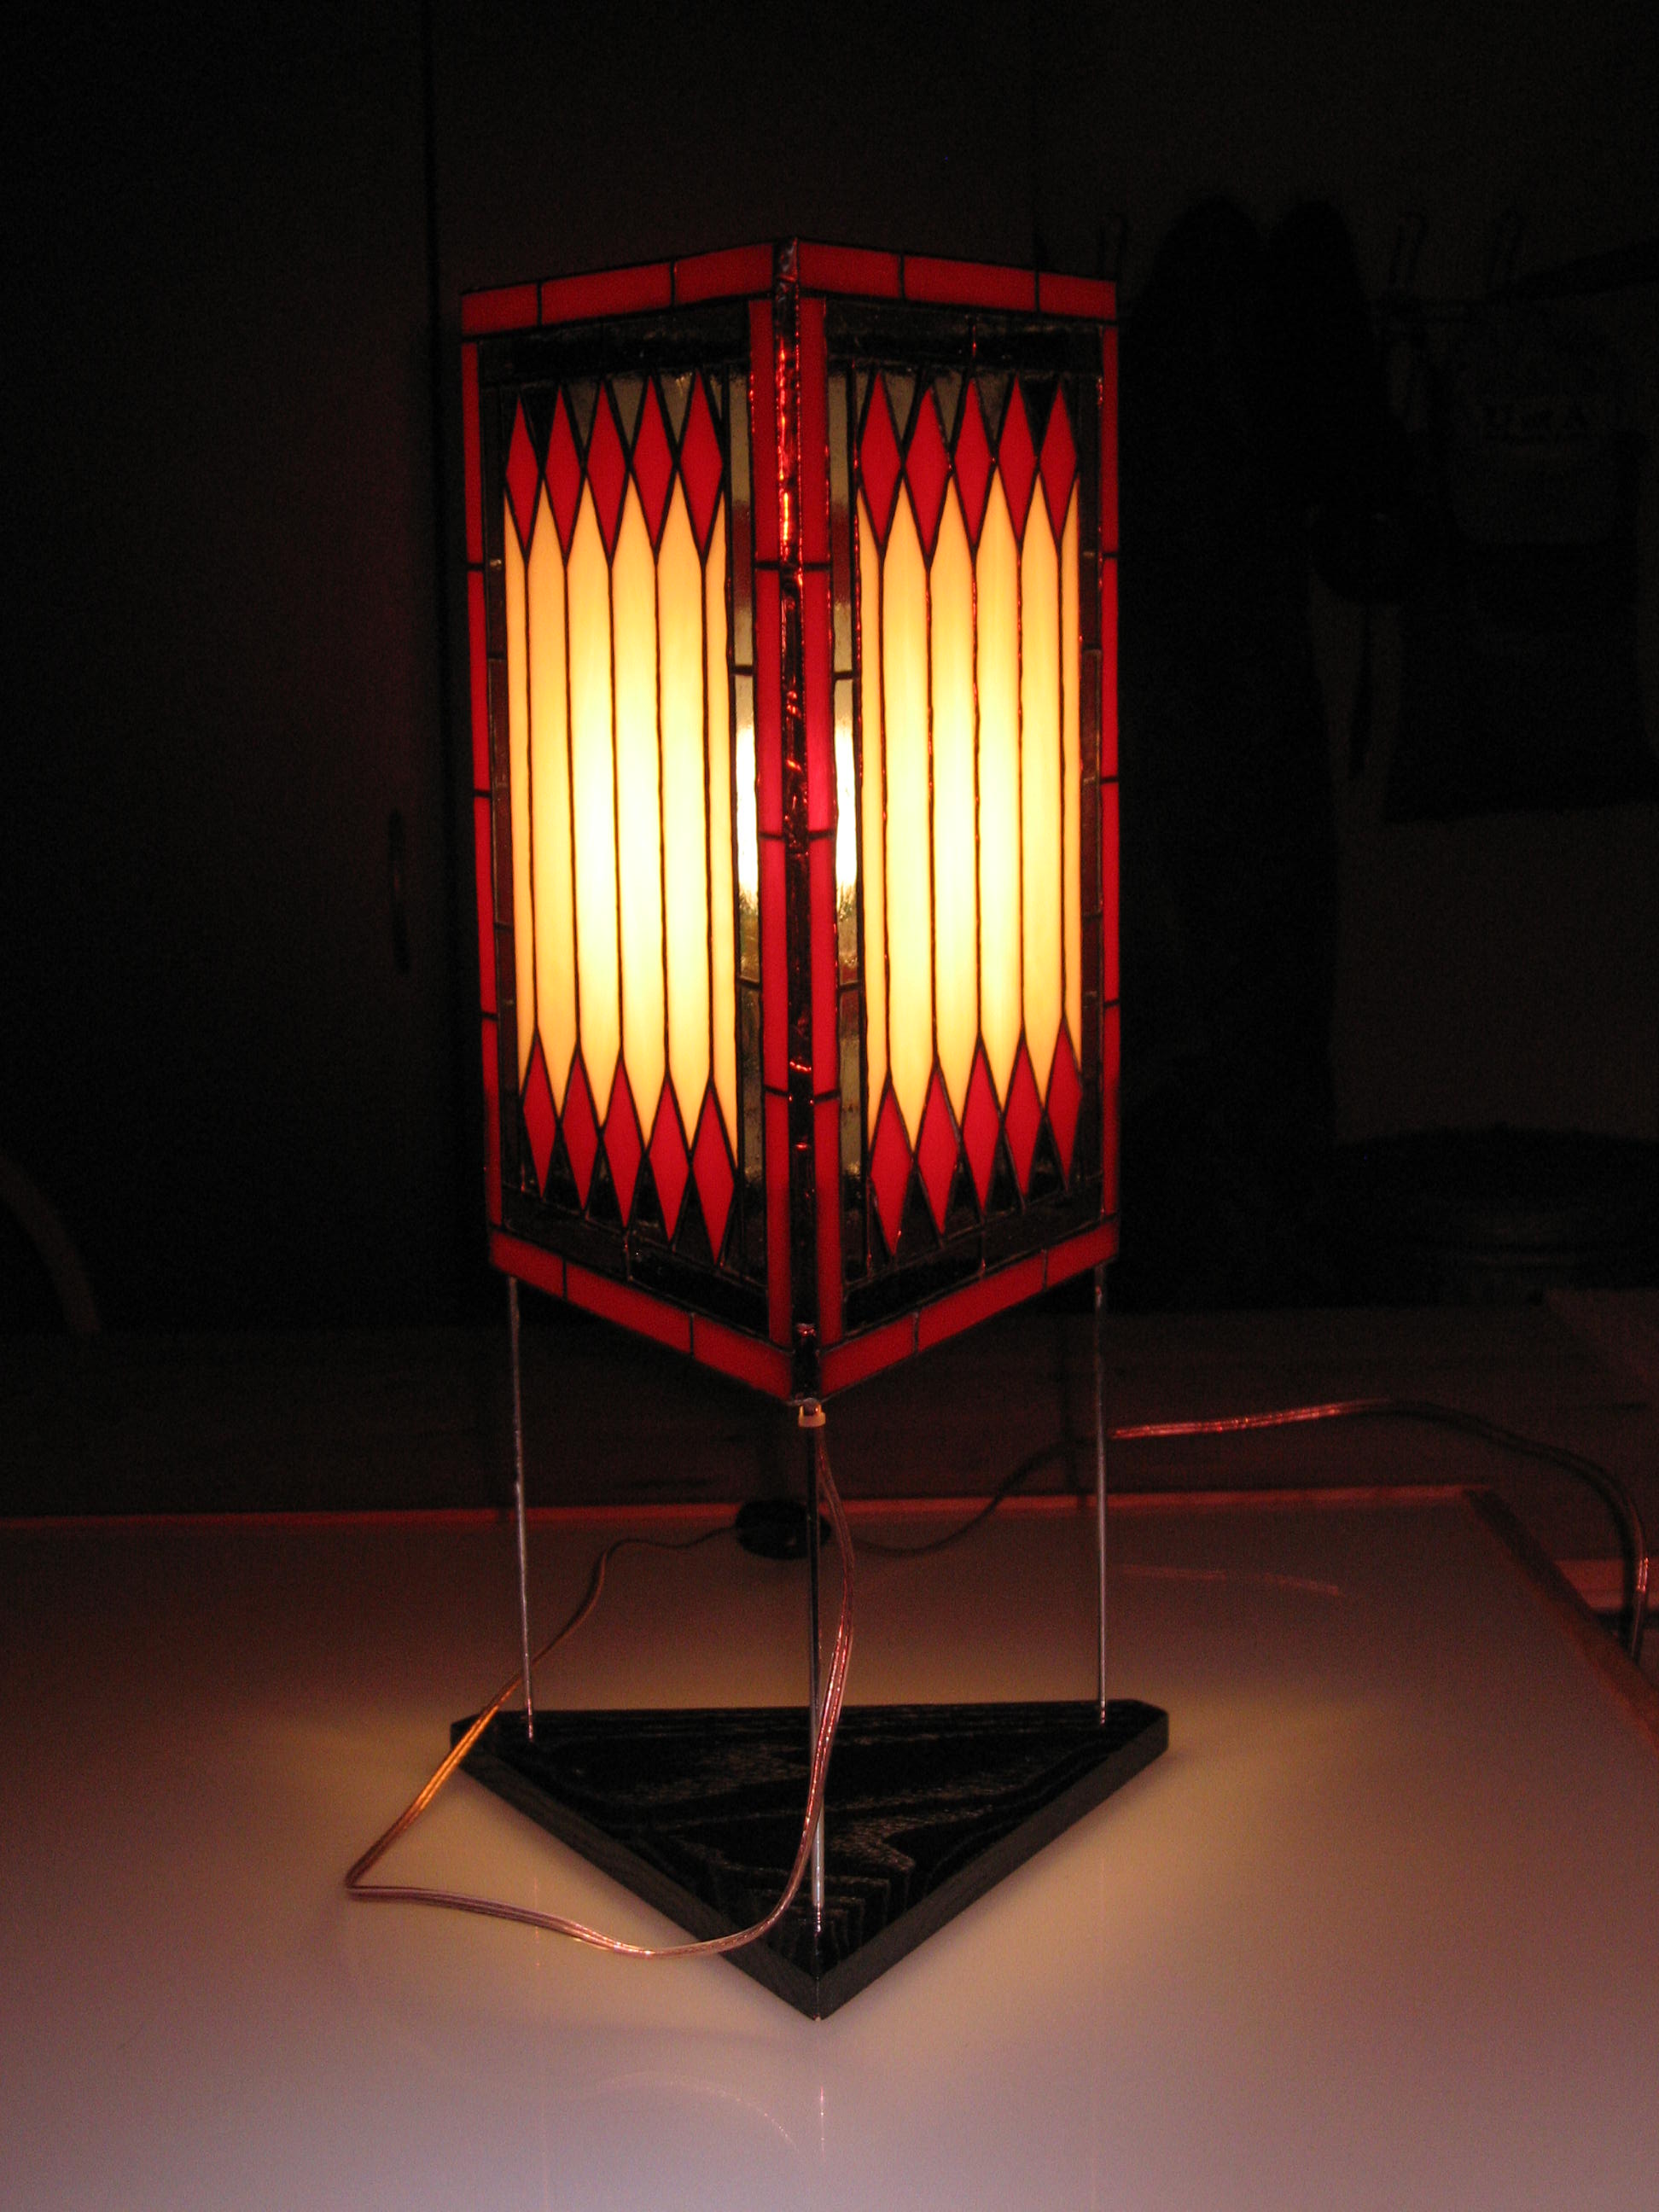
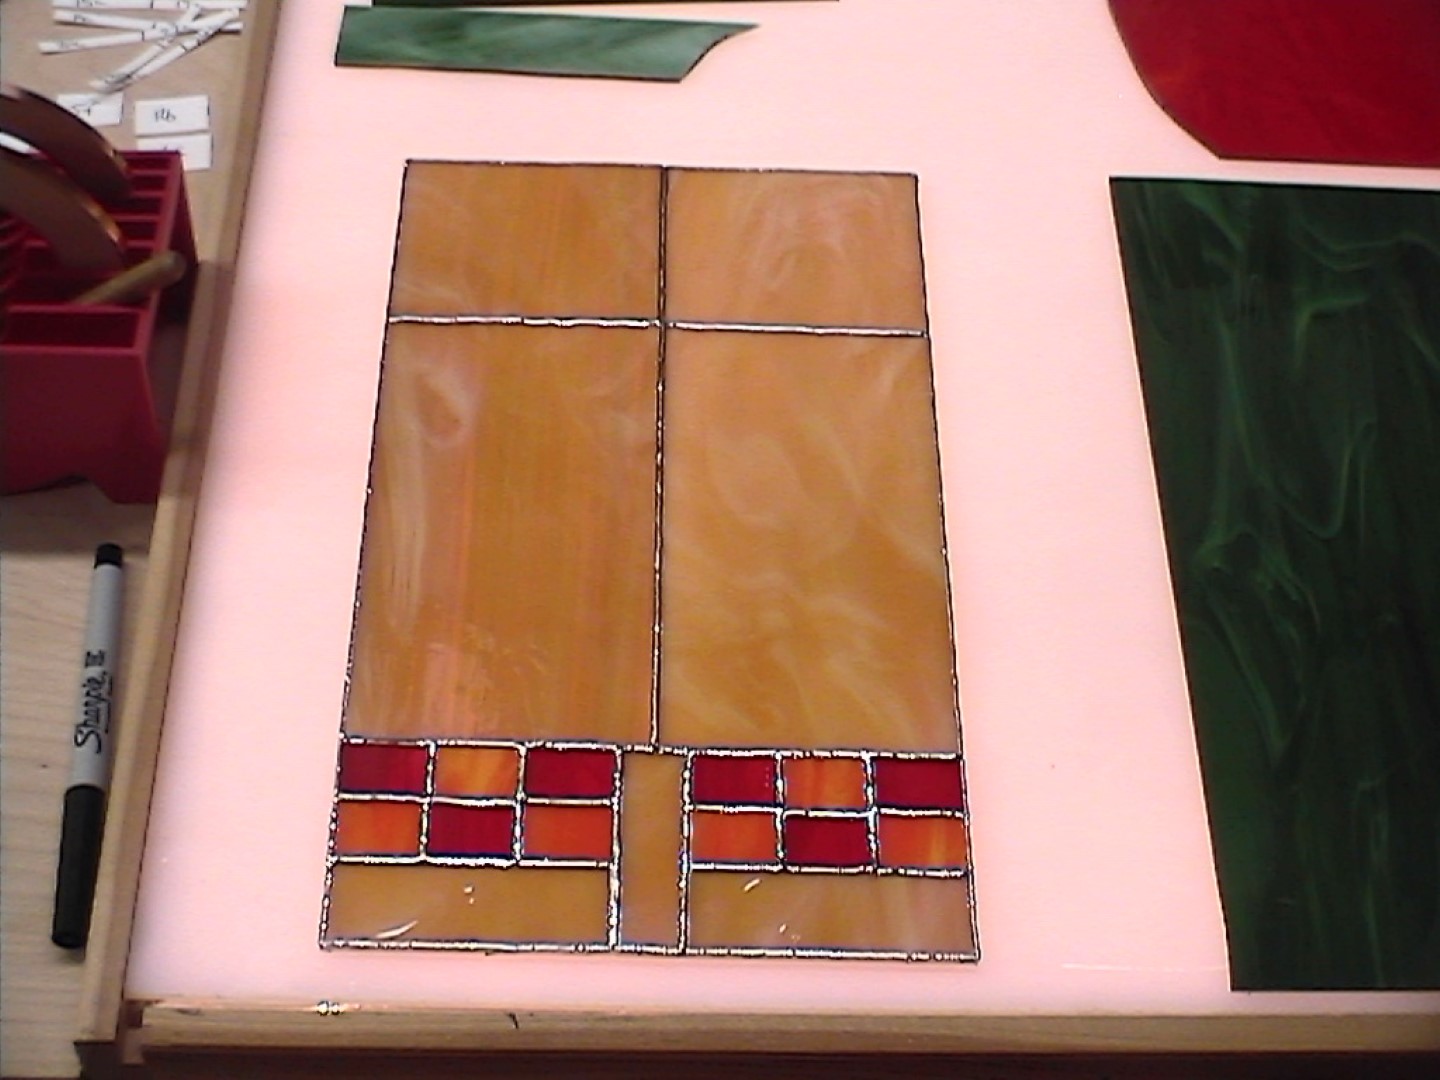
A Four Sided Craftsman Table Lamp
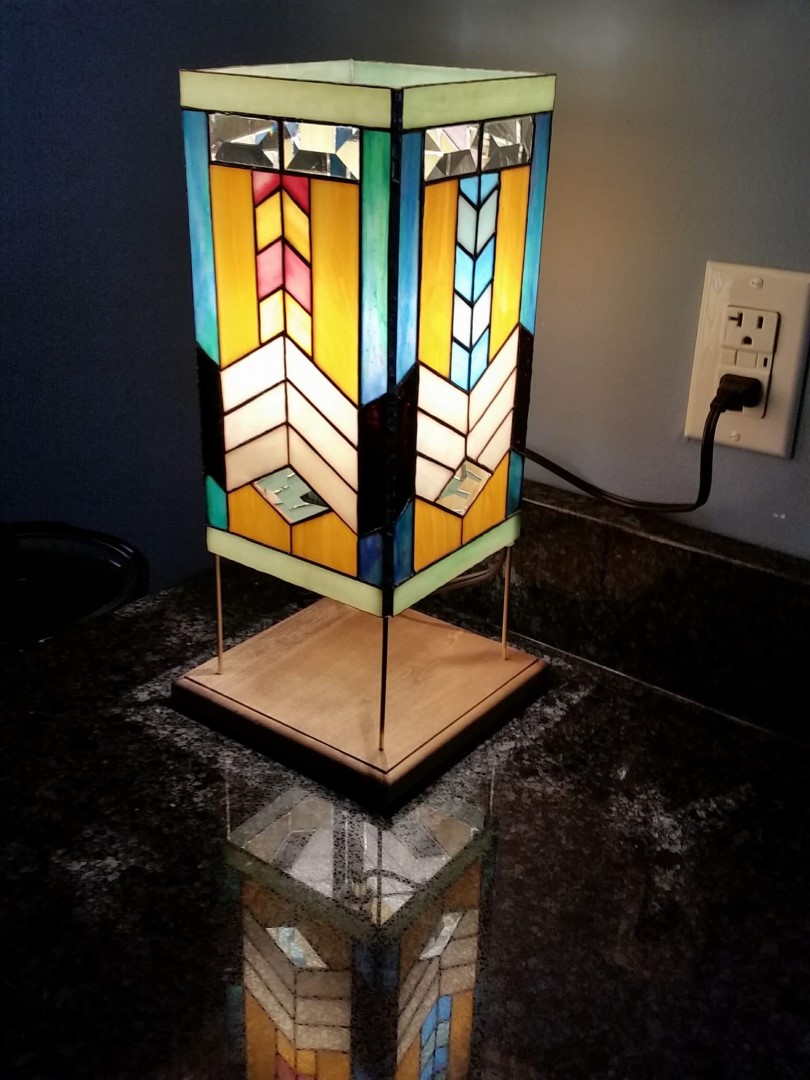
This last table lamp is what they call “Craftsman” style. As you can see from the images, this lamp has four panels, each 5.5″x11″, for a total glass count of 120 pieces. Here I incorporated some bevels into the panels, and the lamp sits on my computer desk where I use it early each morning to work on the development of this website. I think it turned out real nice.

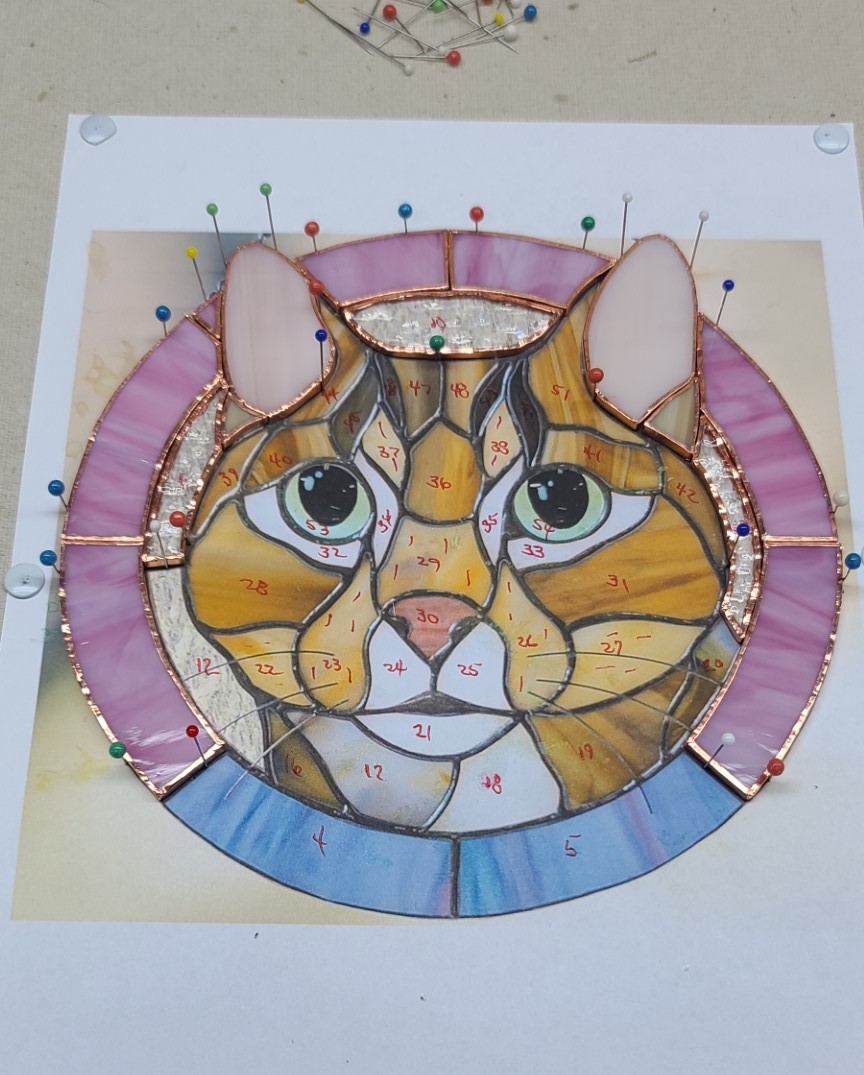
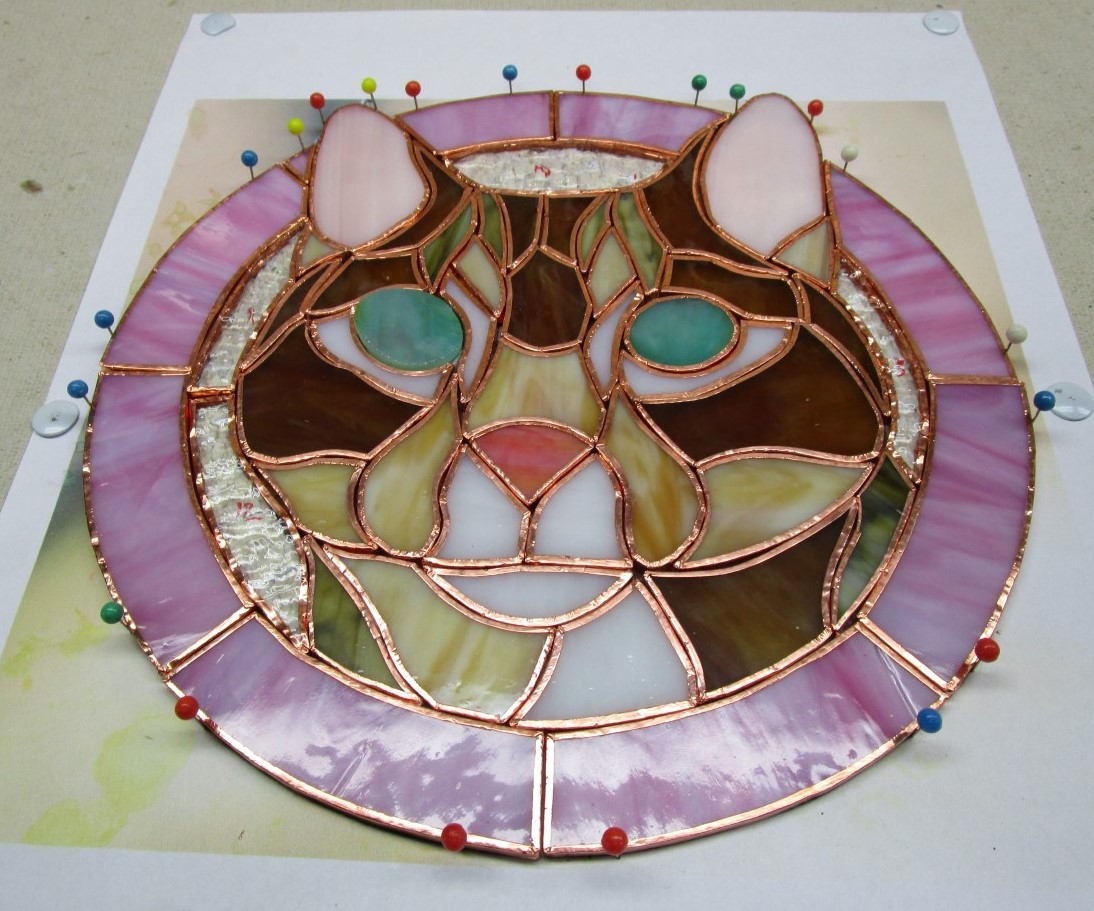
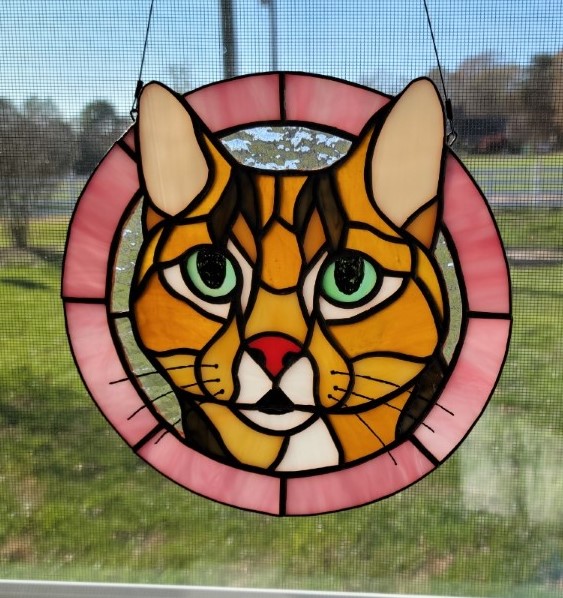
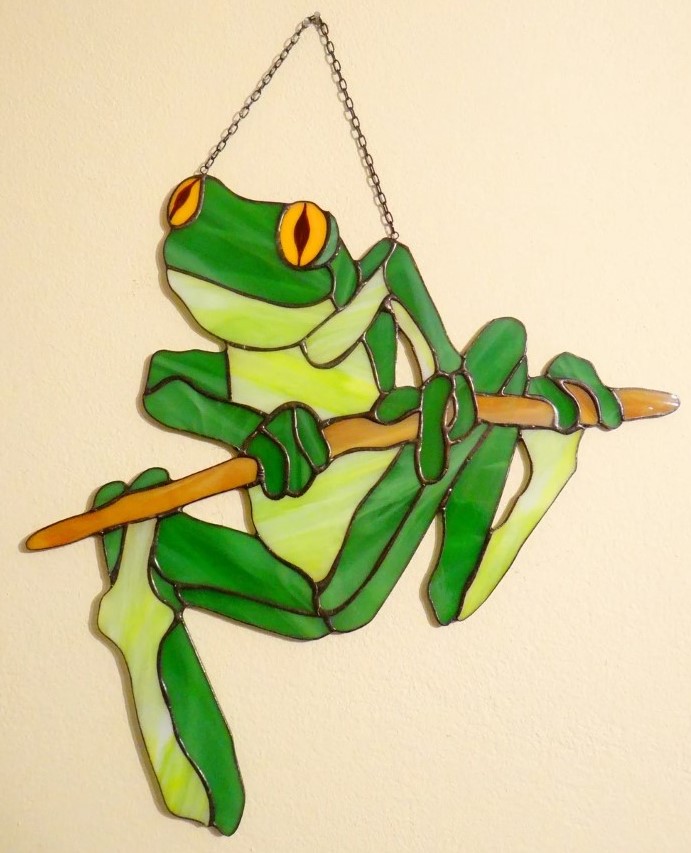
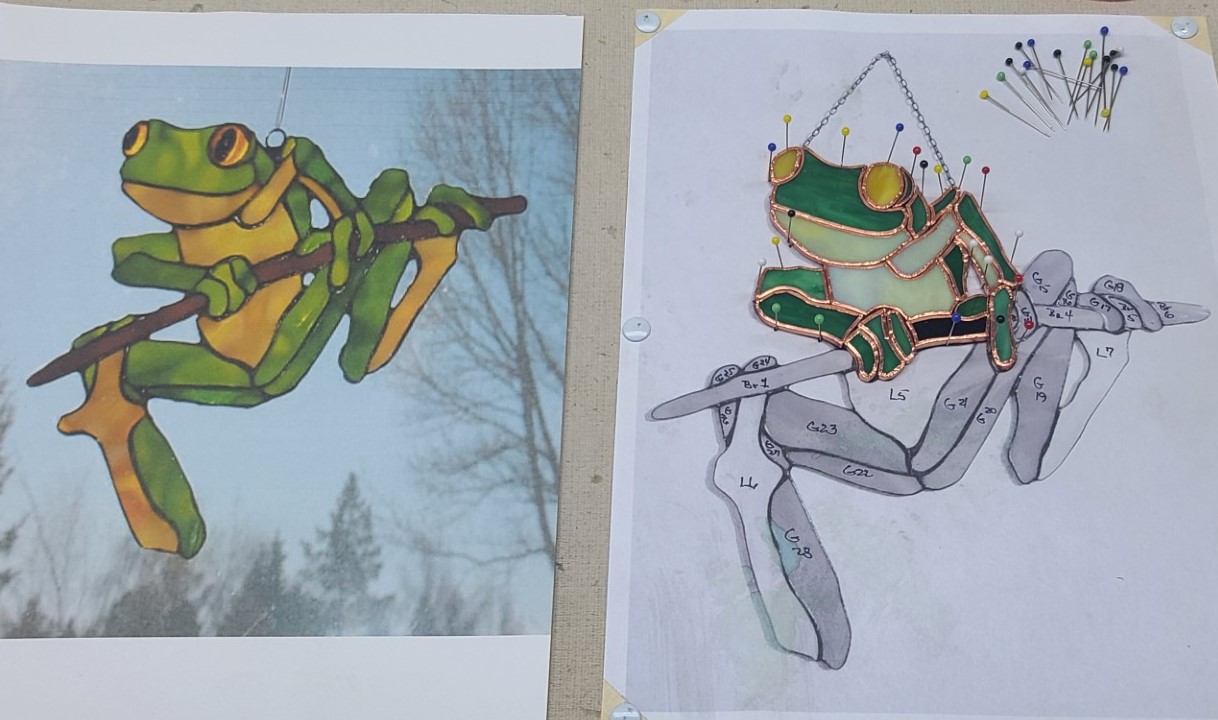
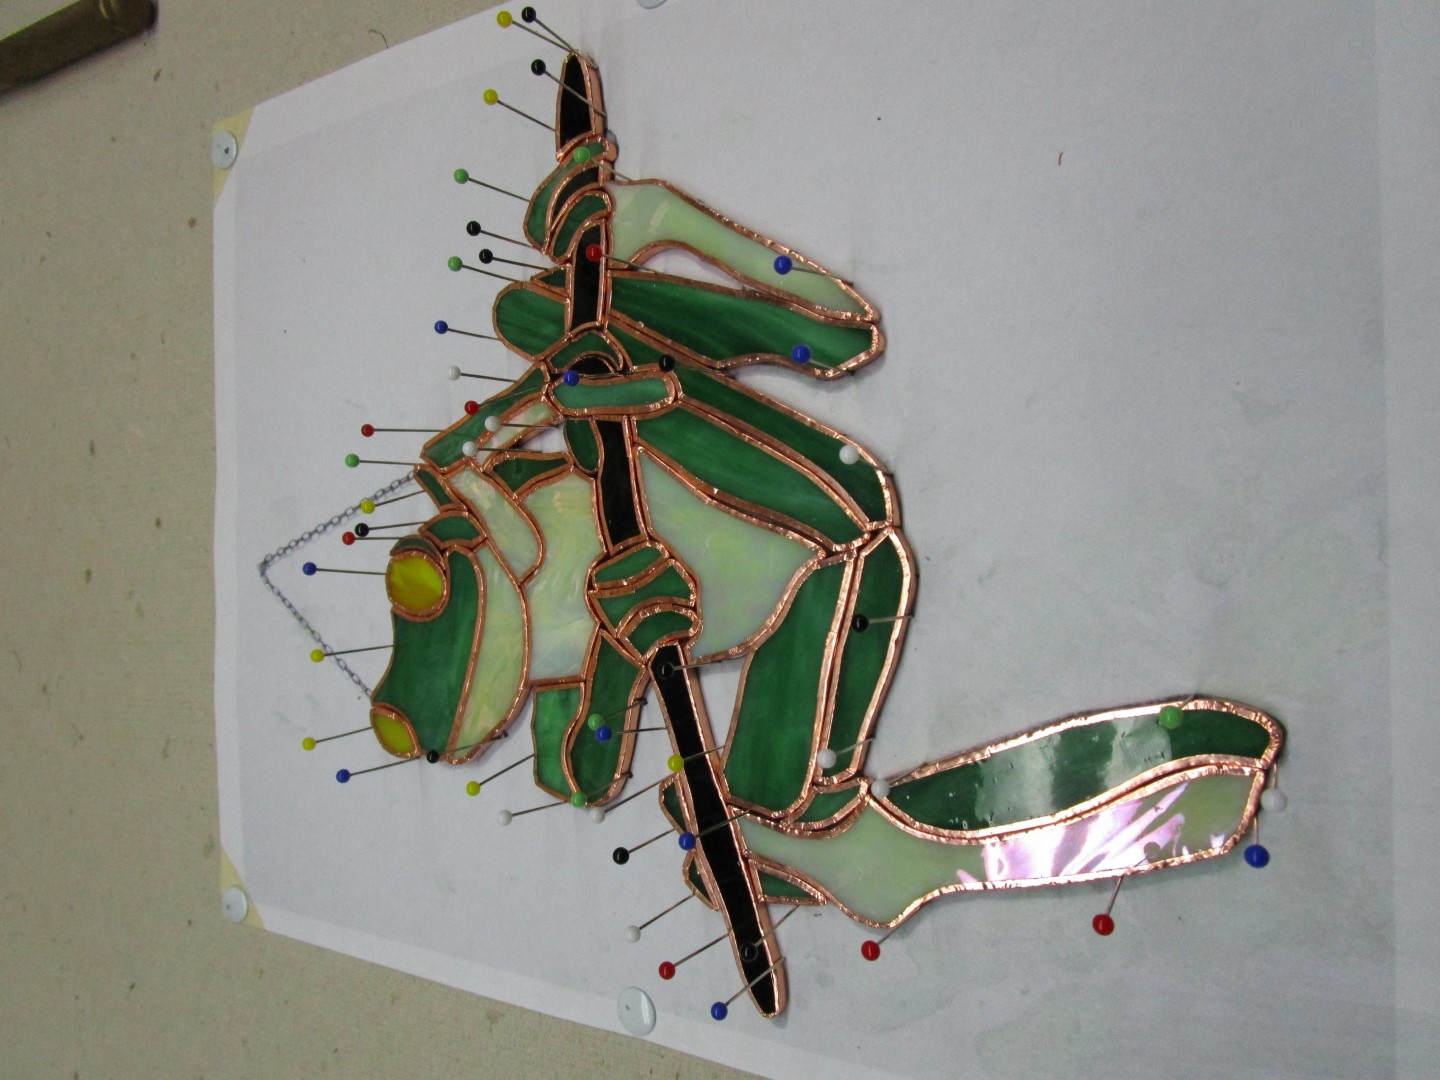
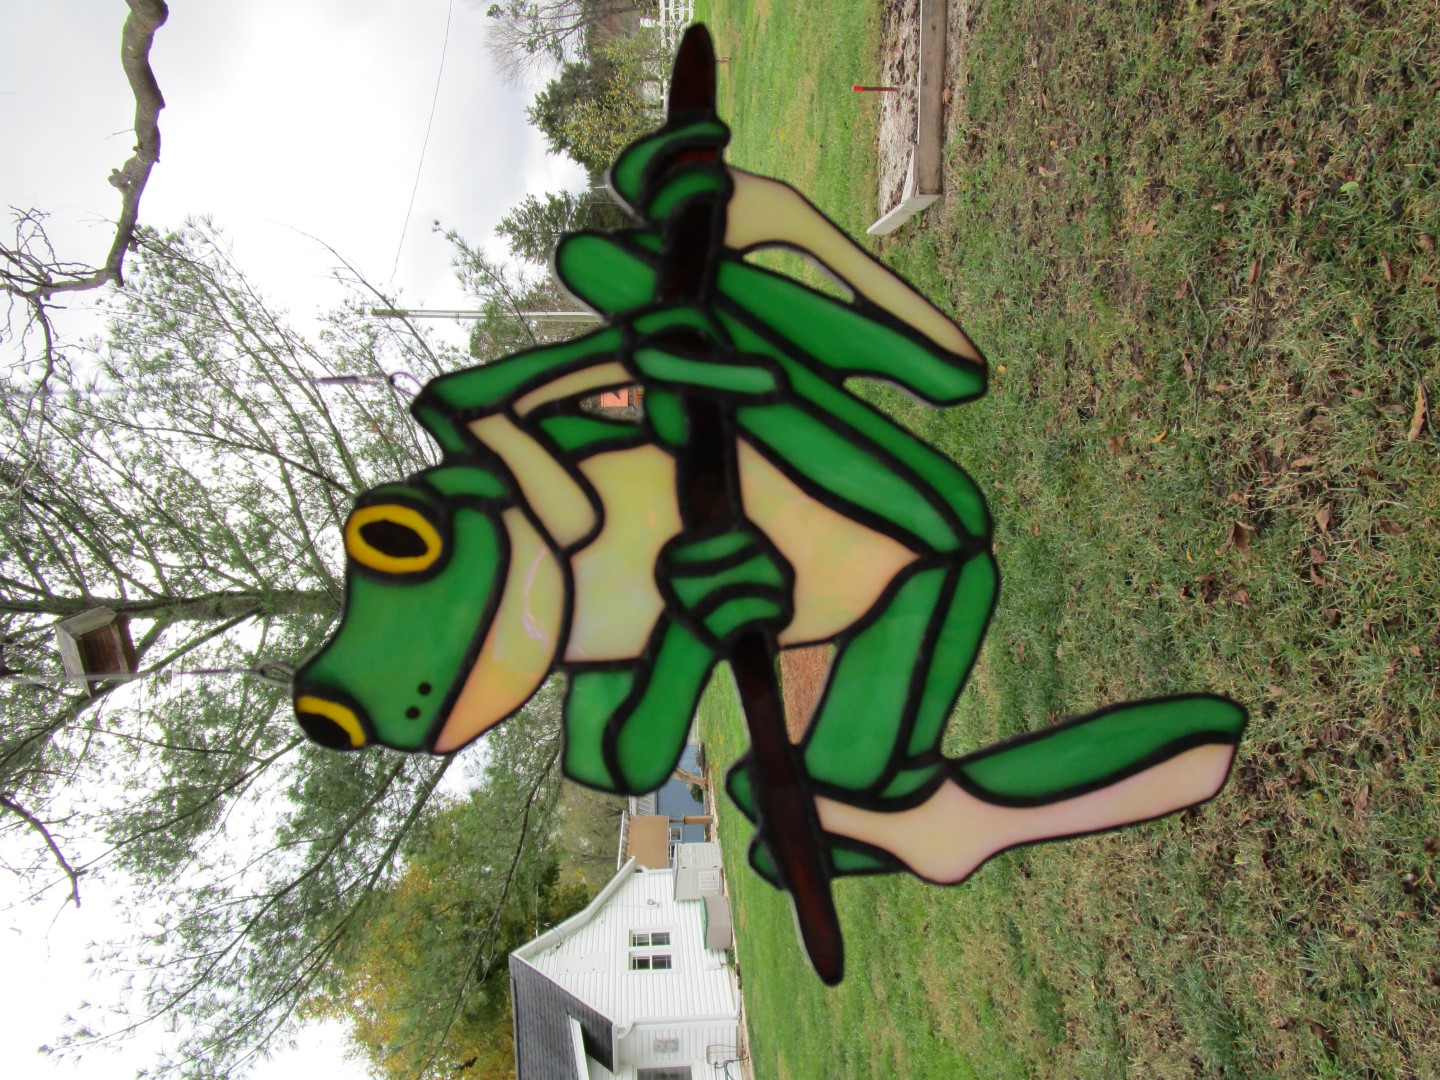
Cat and Tree Frog Sun Catchers
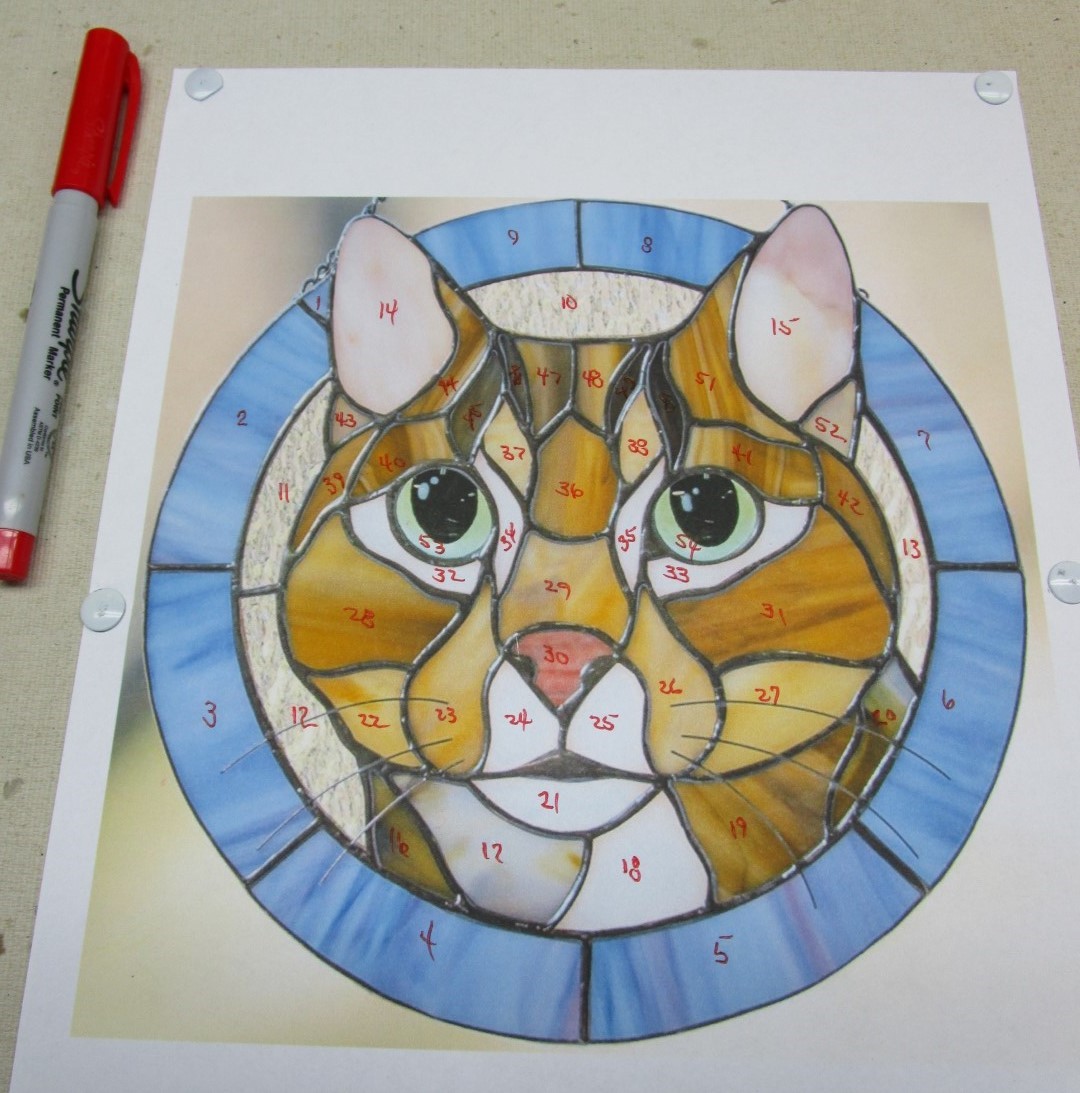
If you cruise the web for Stained Glass projects, one type that pops out are “Sun Catchers.” A couple years back I decided to make a sun catcher for each of my grandchildren. These are small projects, not complex, but will test your skills on grinding and foiling small glass pieces. The patterns are off the web, modified to the size of sun catcher you want, and you press with assembly from there. Some of the very small features (eye pupils, nose openings, whiskers, etc.) are drawn in using black ink. My grandchildren love these and have them hanging in their bedroom windows. I will let you guess which one was for who.
Hummingbird Panels
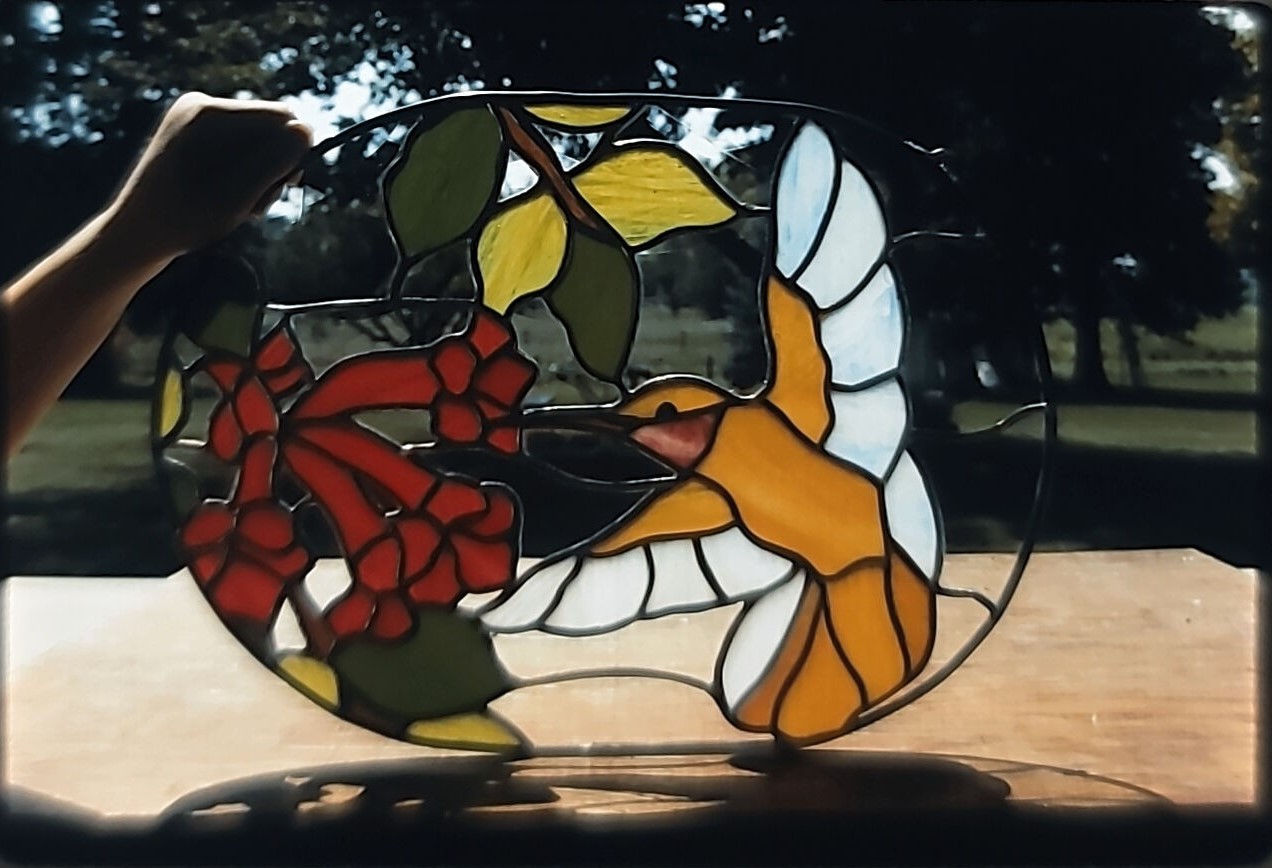
How about some hummingbird panels. My second Stained Glass project was the first image on the far left and is currently hanging in the kitchen window of my youngest sons home. It is a simple design using a small number of larger sized glass pieces. The frame is rounded lead came.
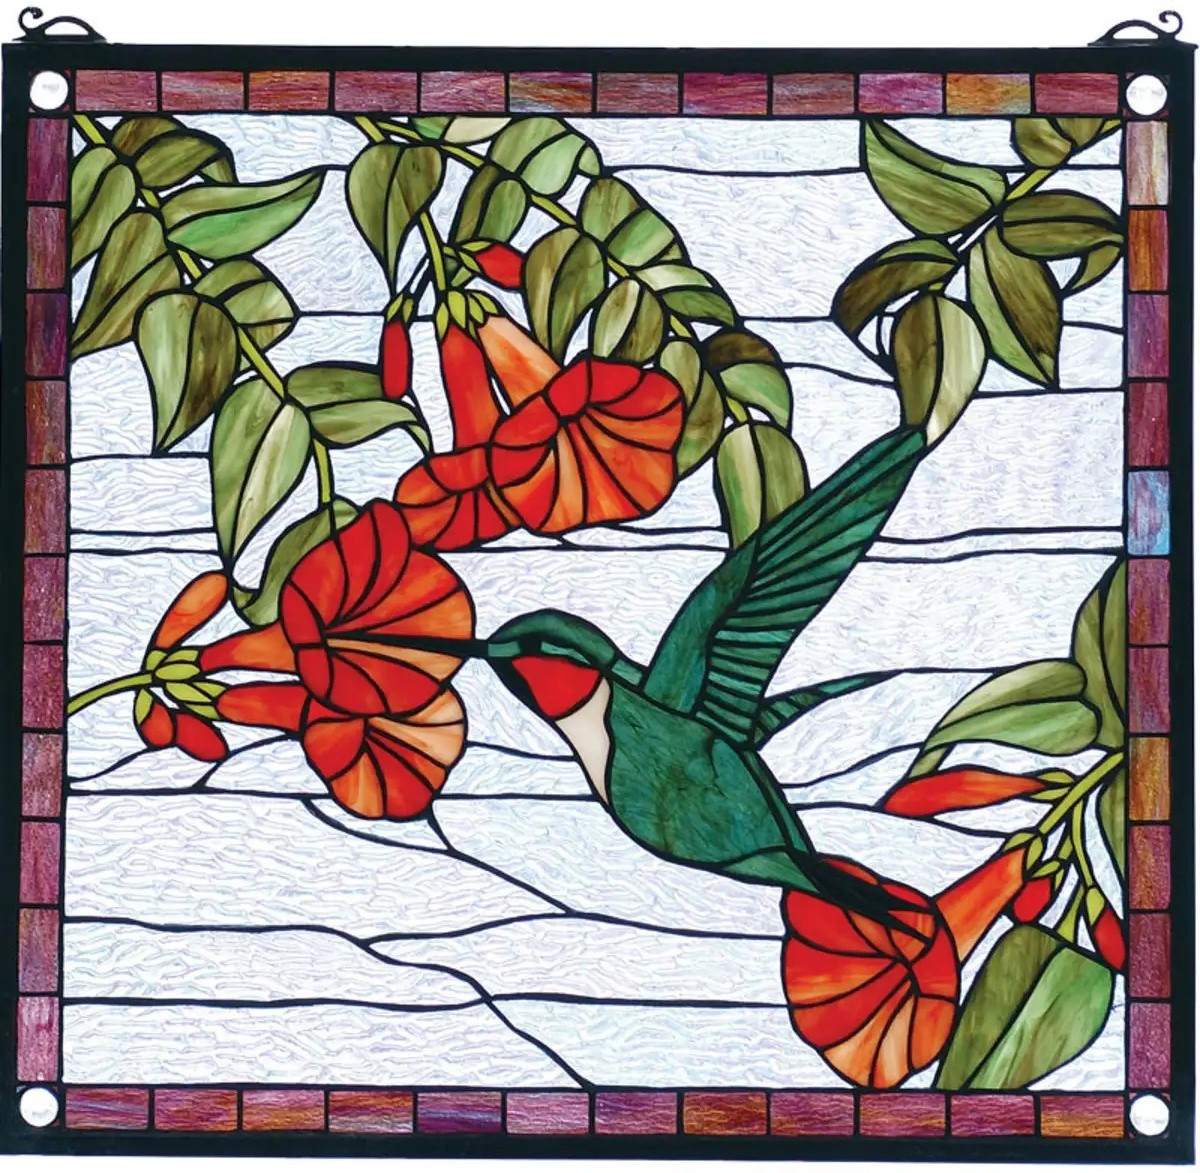
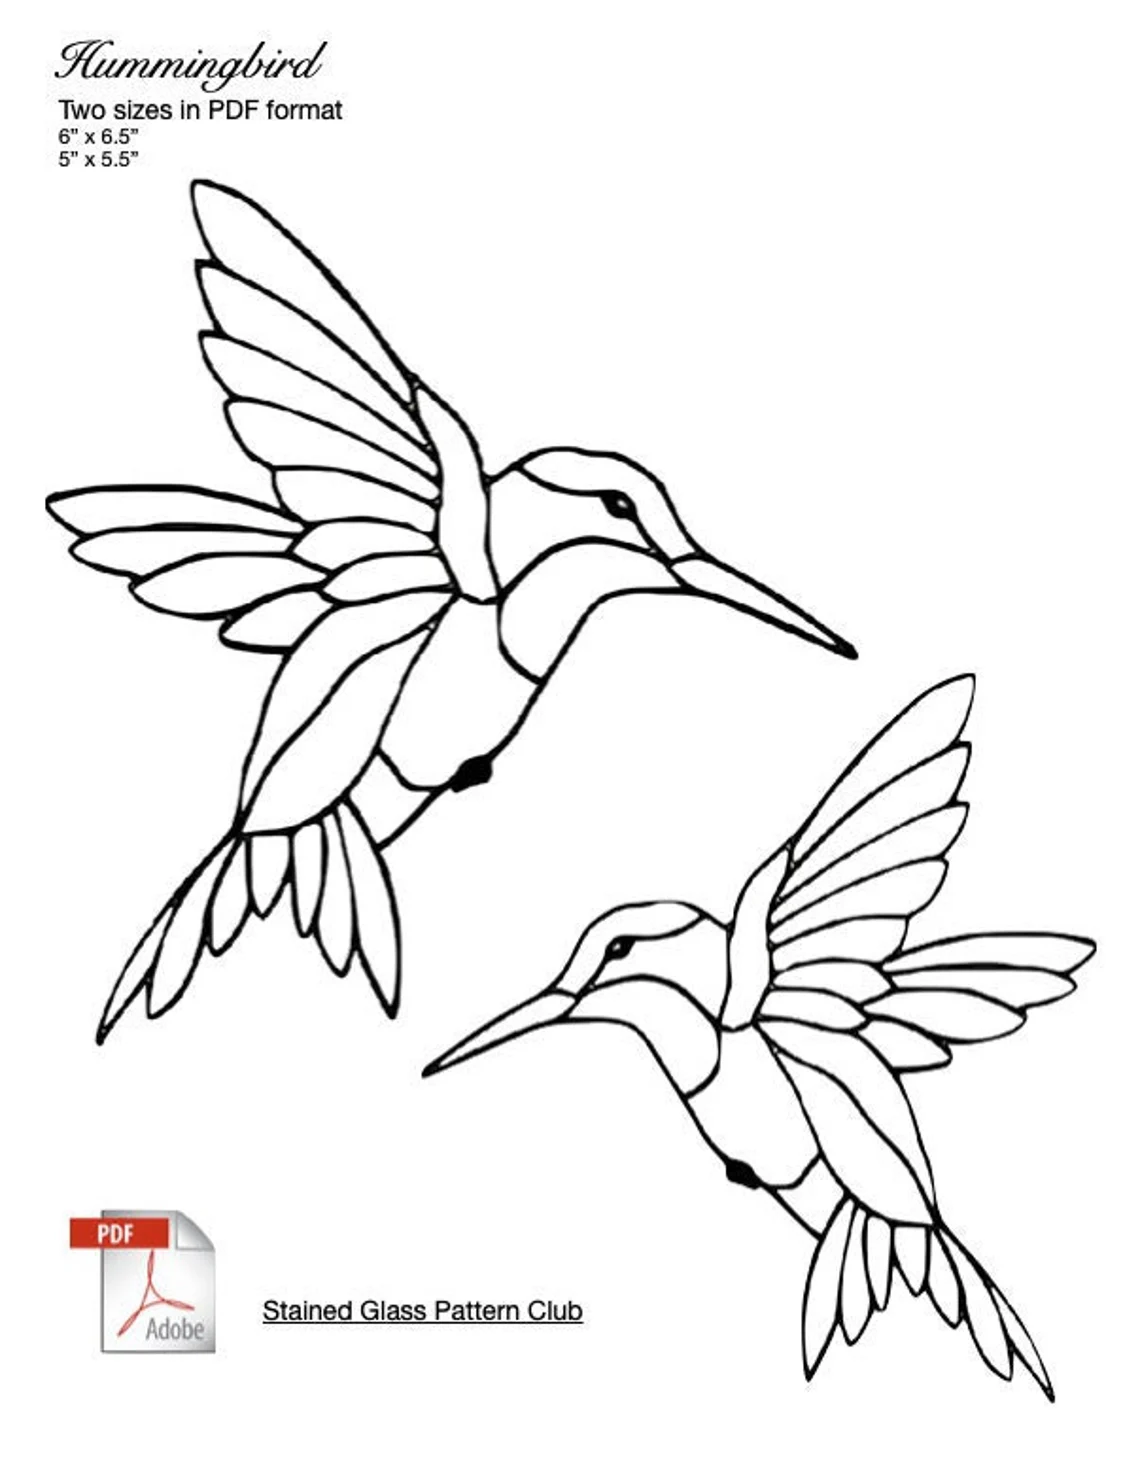
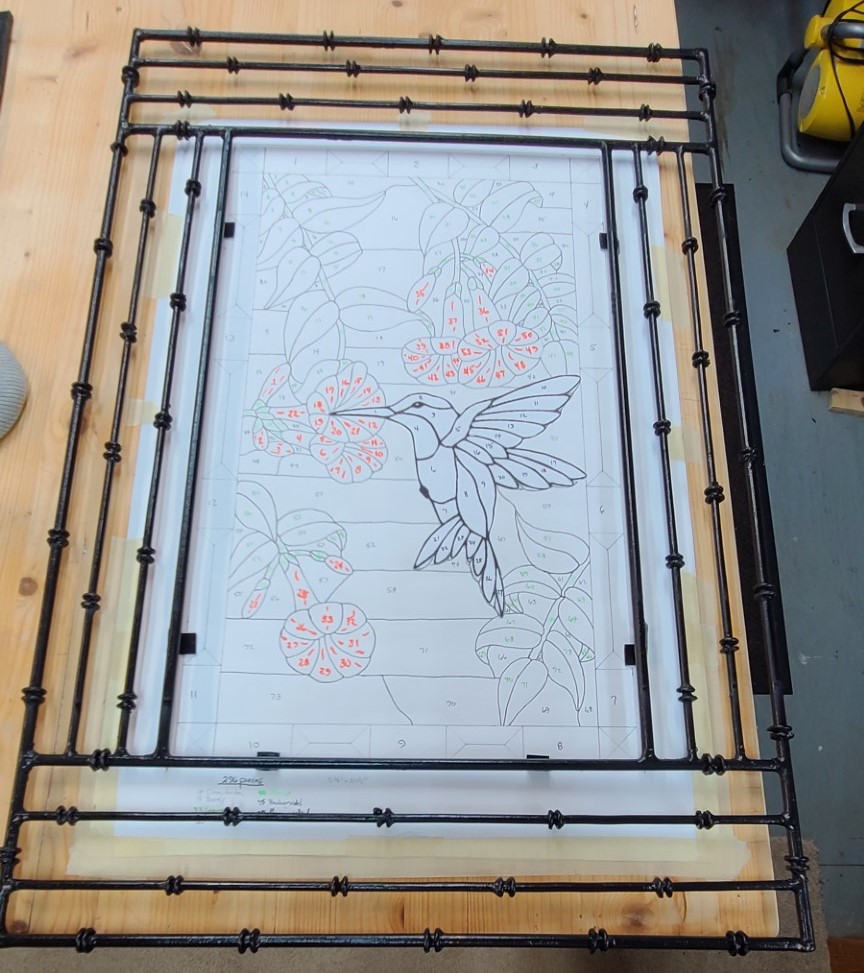
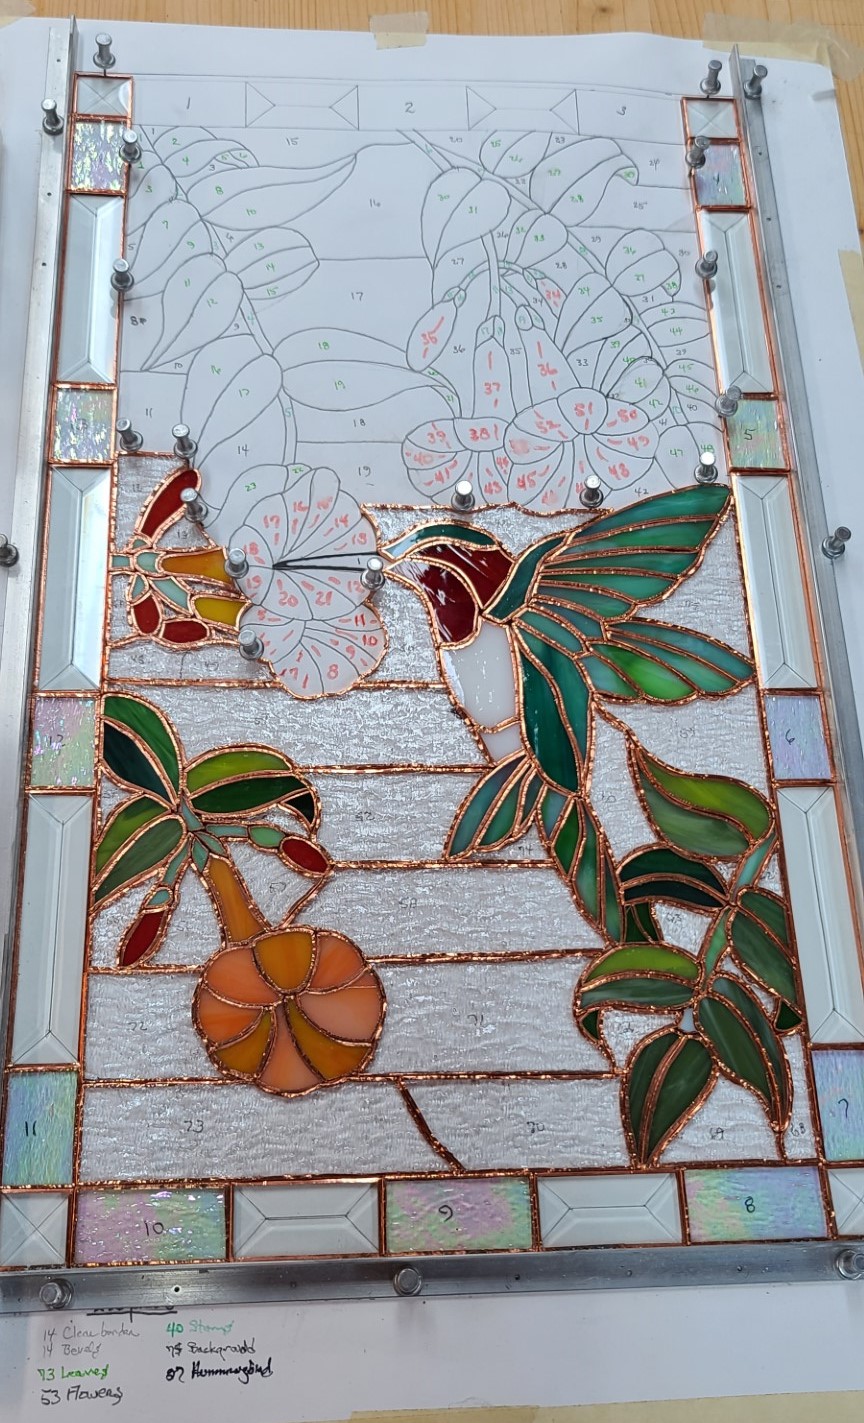
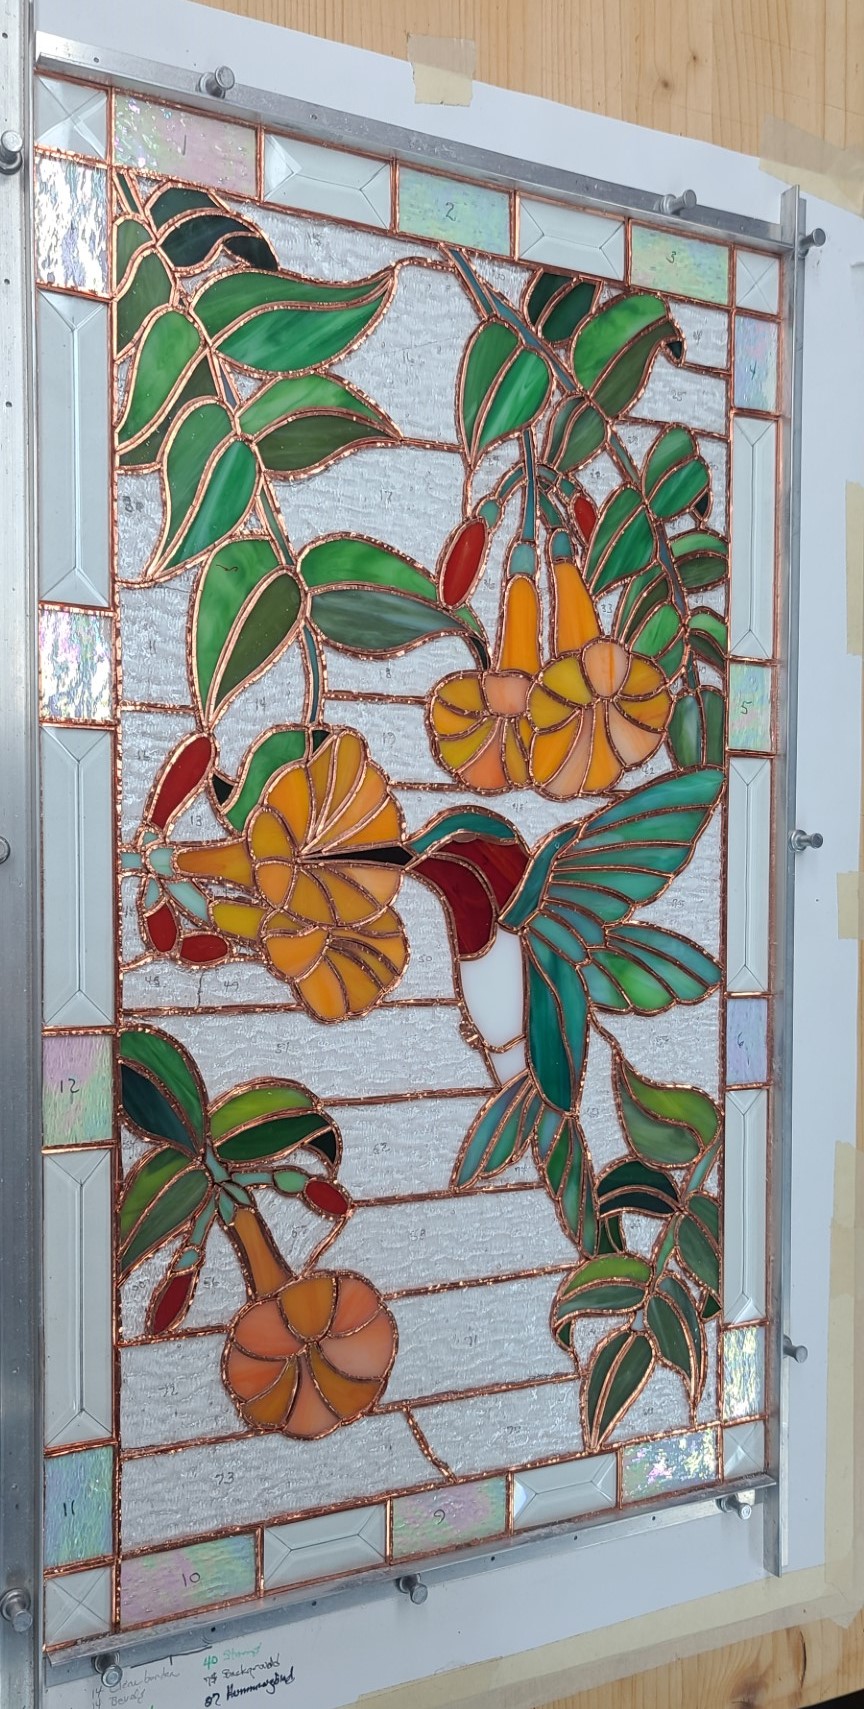
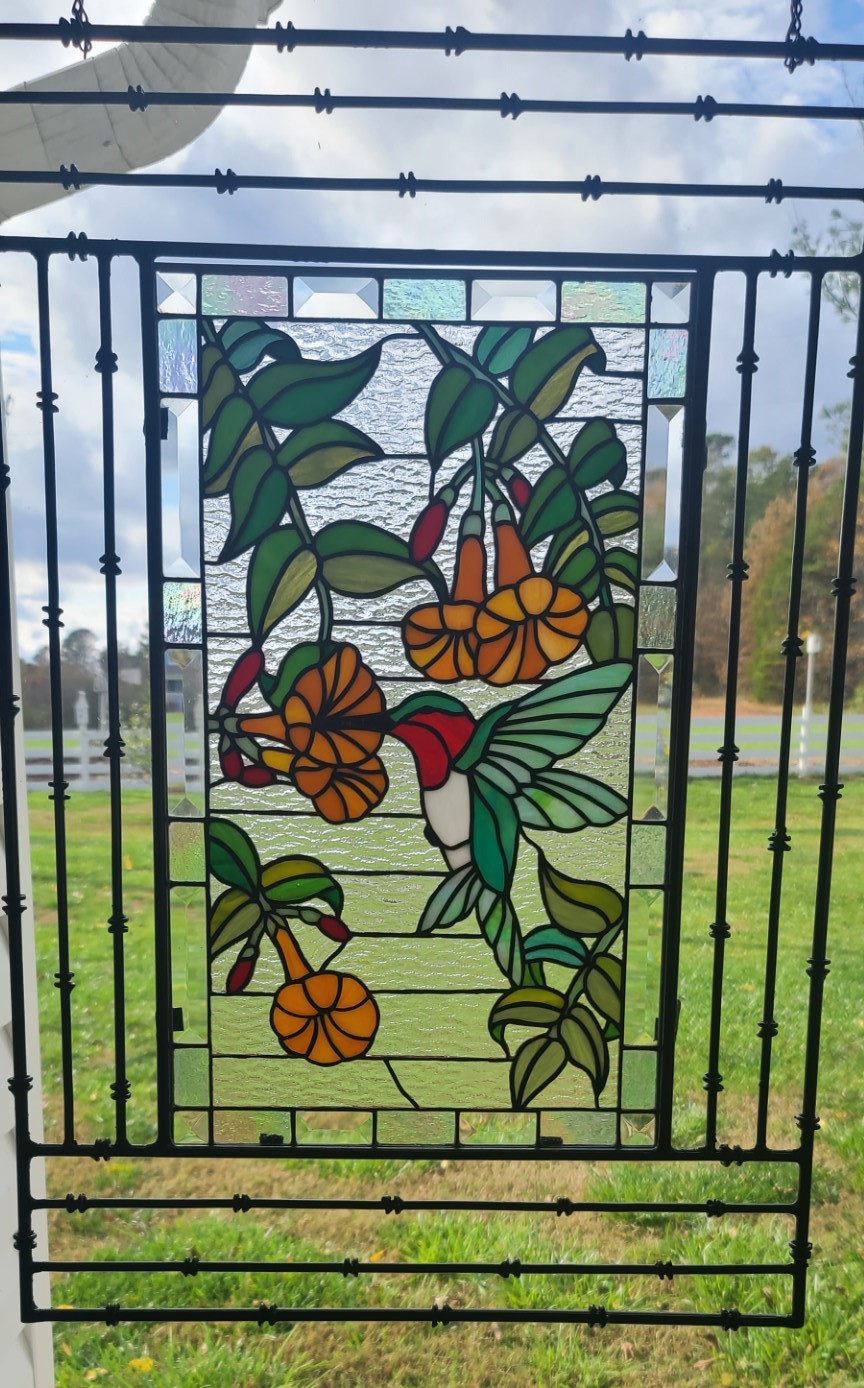
Many years later I decided to do something with an old metal frame my wife had sitting around outside of our home. So, I once again searched the web for some ideas on a hummingbird project. I found a panel I liked, except for the hummingbird. I found a different hummingbird and substituted it into my pattern. The resulting 12″x20″ 296 piece rectangle panel was placed inside the old metal frame, and now hangs in our sunroom.
Our Spring Yard Flowers Panel
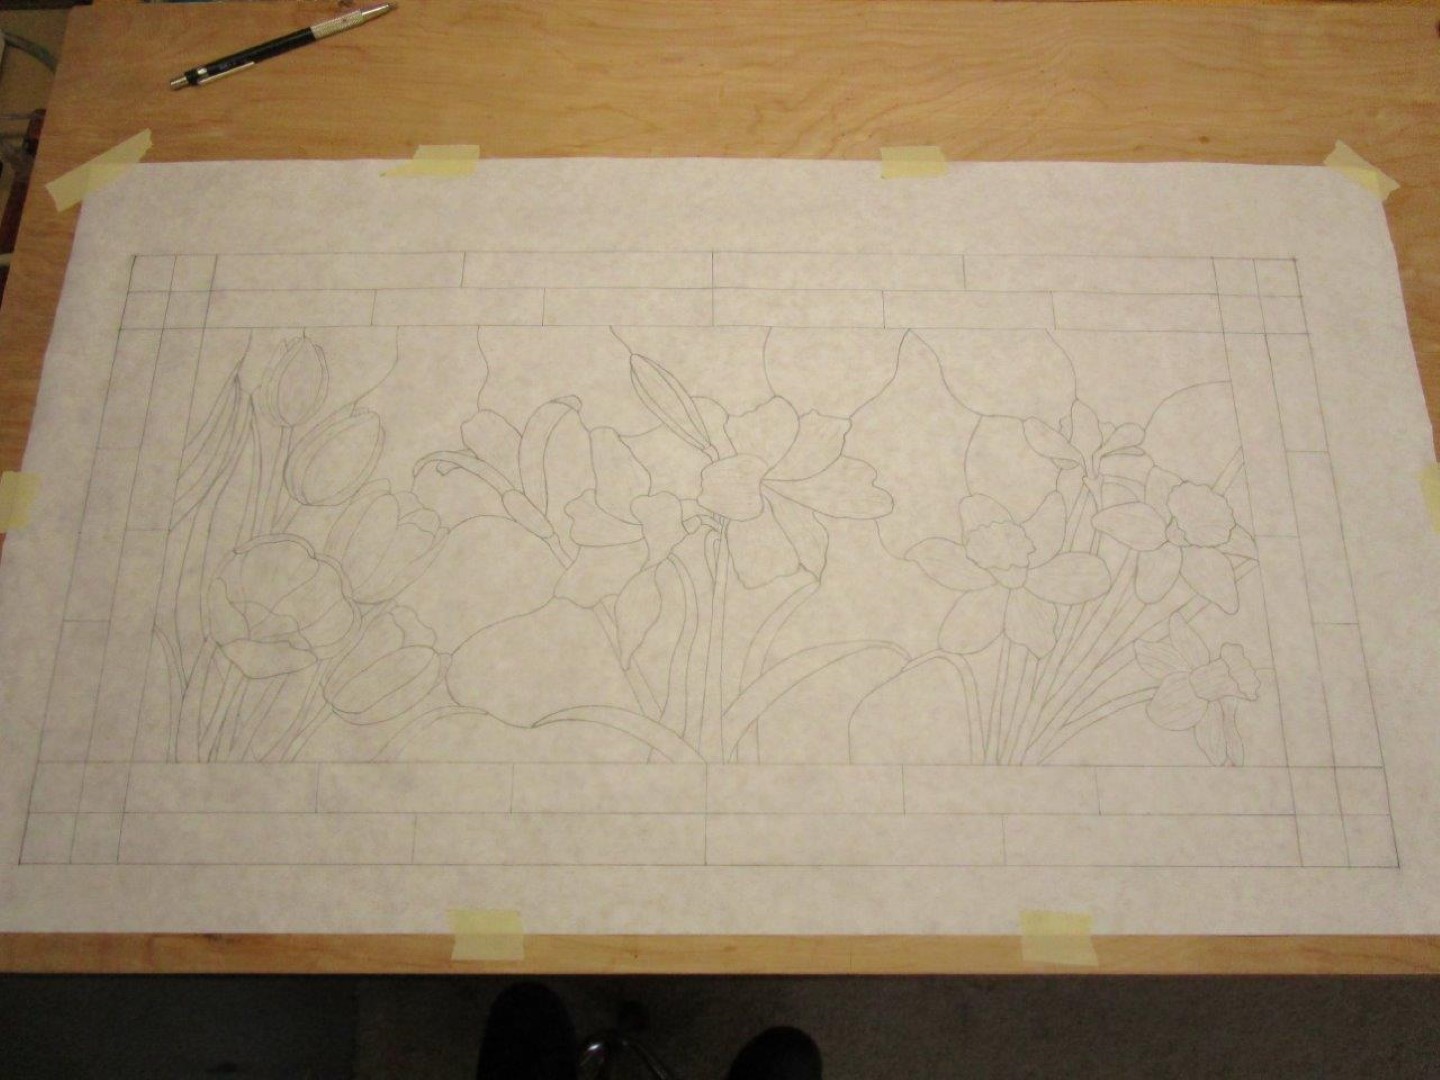
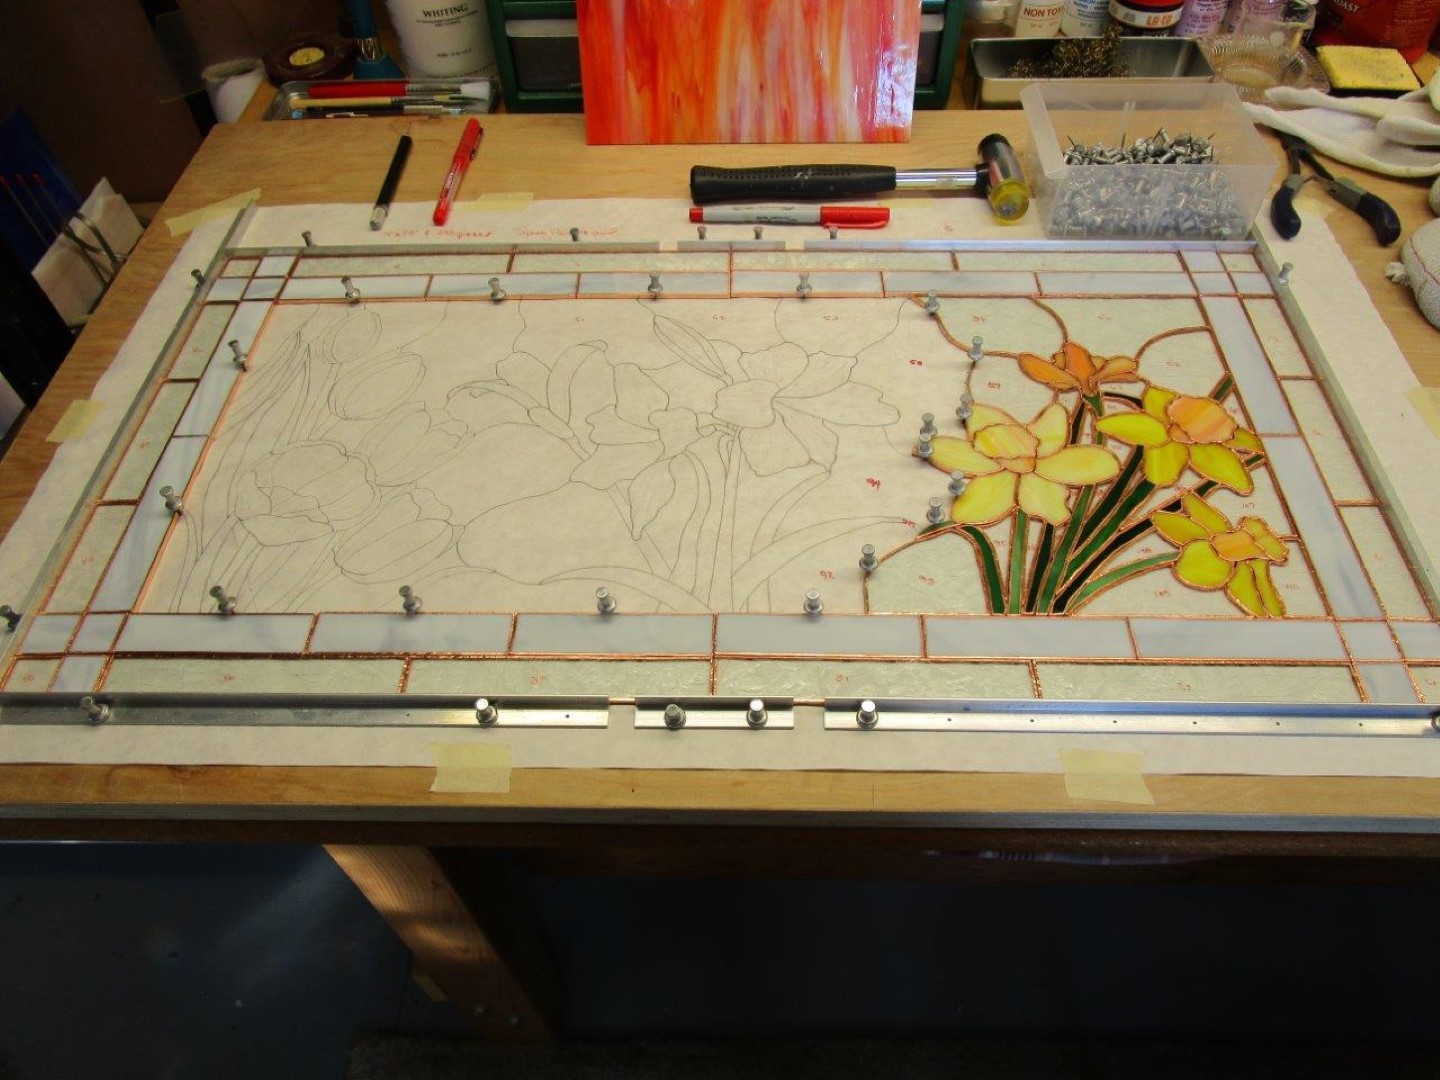
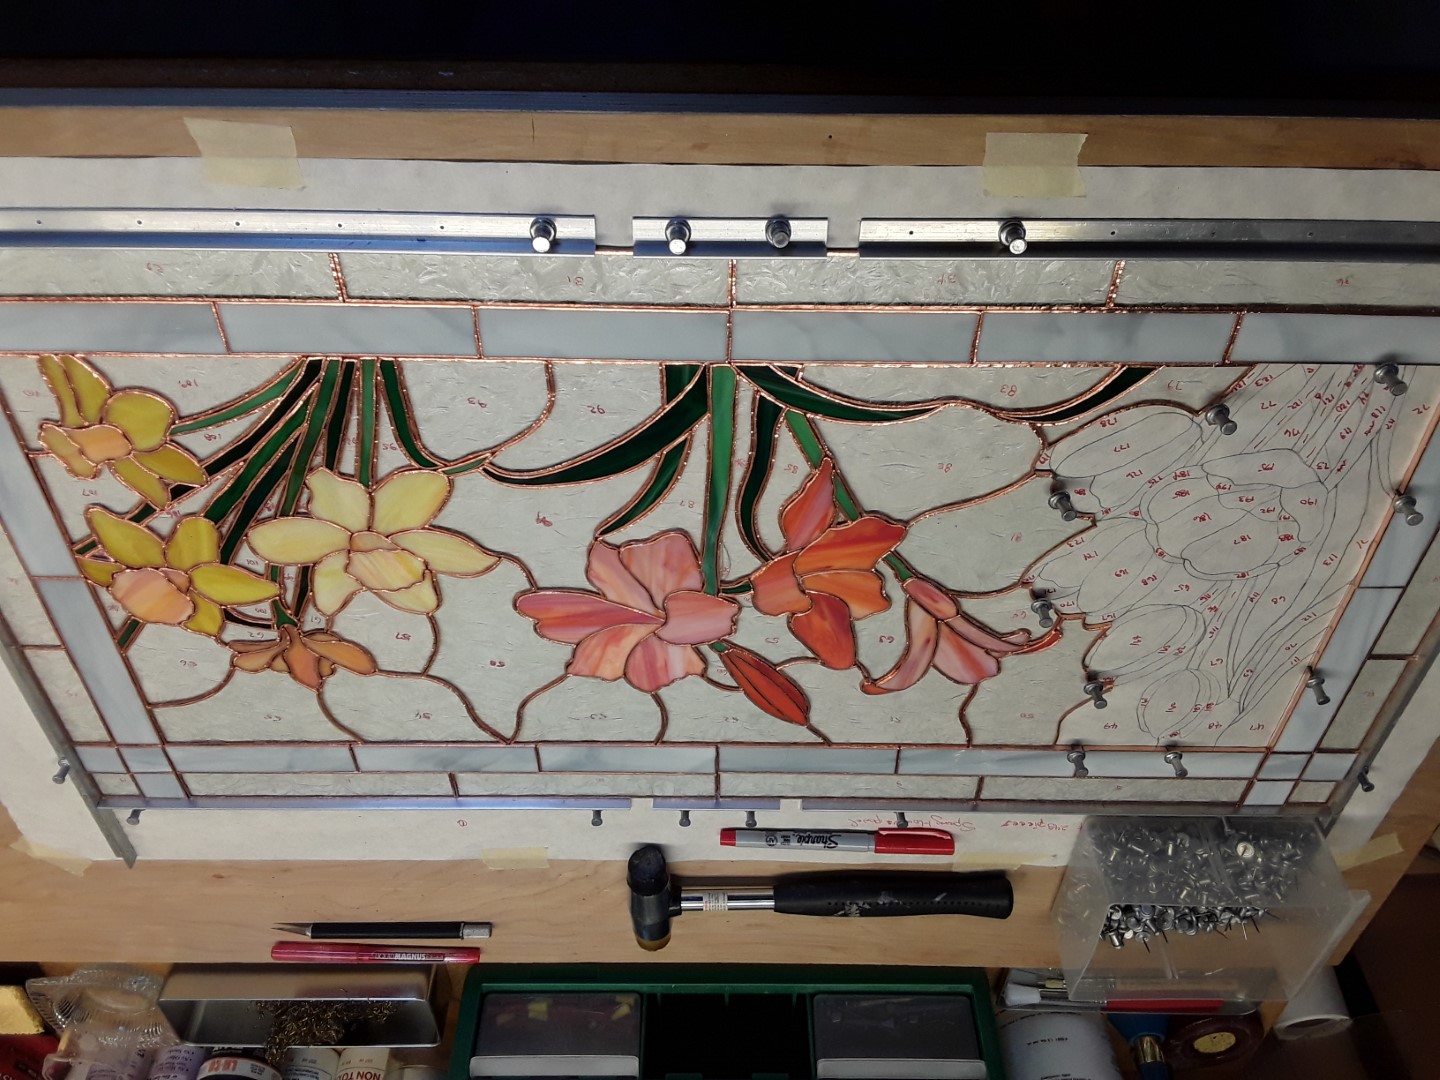
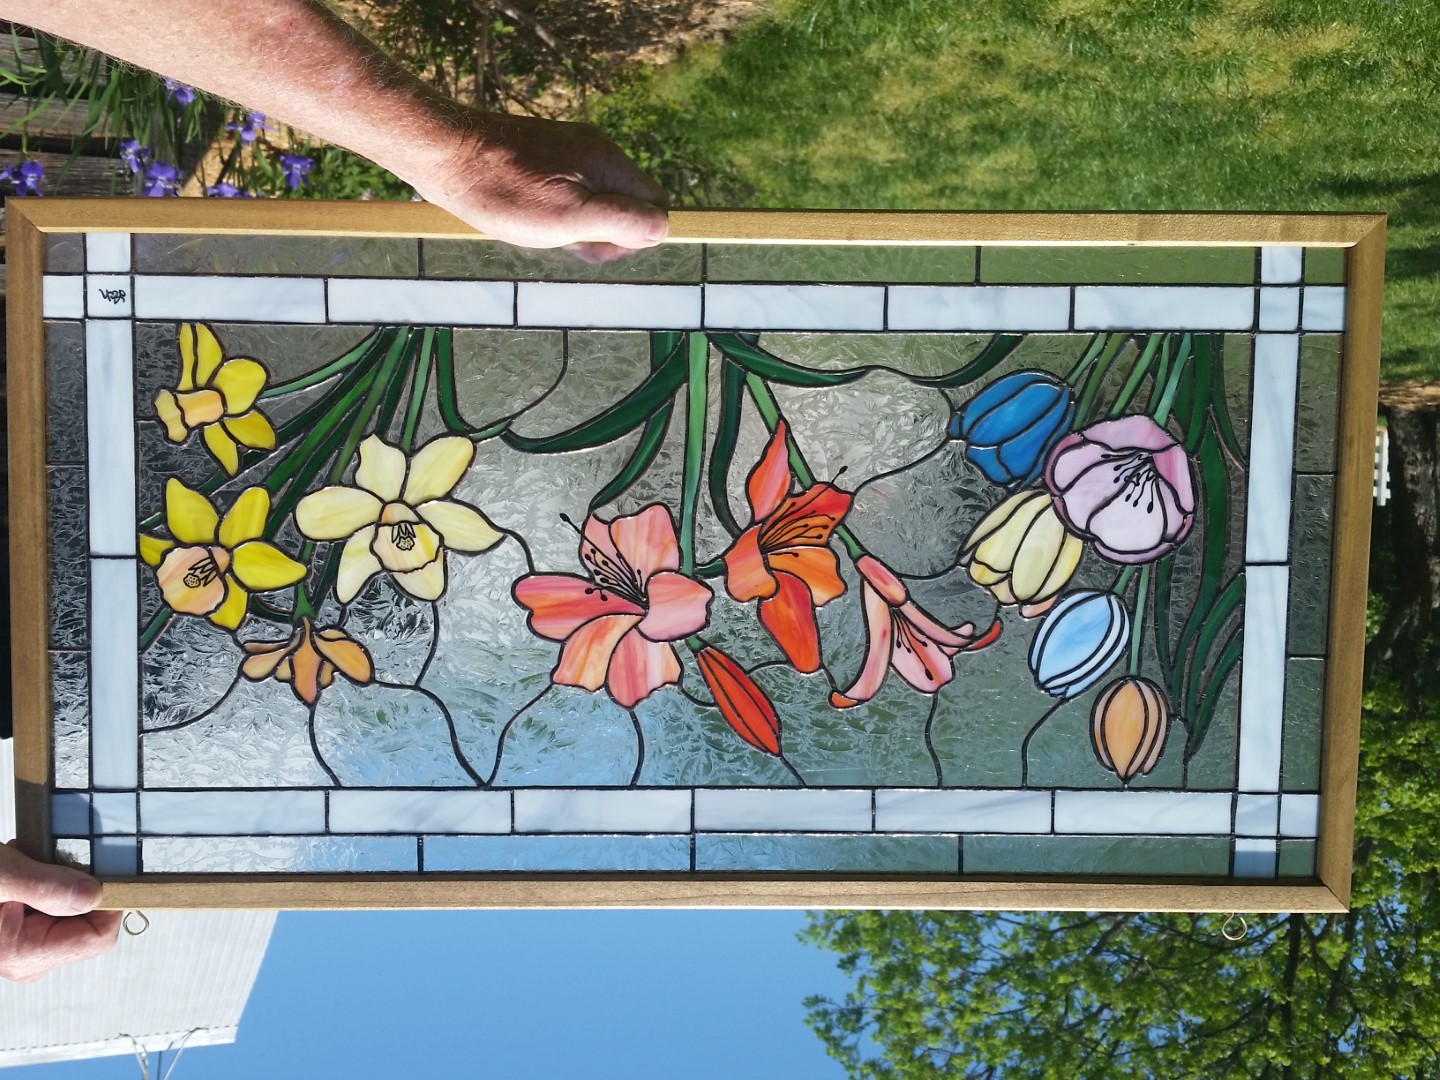
Lets take a look at some larger projects. Once you have some glass cutting/grinding/foiling and soldering experience under your belt, you should try you hand at a larger Stained Glass project. My wife and I love flowers, and we have several kinds in our yard. This next panel is titled “Our Spring Yard Flowers.” The pattern was assembled from several coloring book pages of the flowers we wanted to use. The three pages were integrated into a single larger panel along with some changes to provide a better overall balance. The result is the 28″x14″ 248 piece panel shown below. All solder joints were colored using black patina for lead. This is one of my panels that is mounted in a hand made wooden frame.
Our Spring Yard Flowers Panel Pattern.
Three Sunflowers Panel
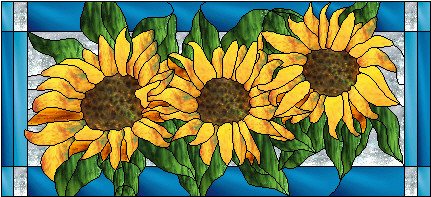
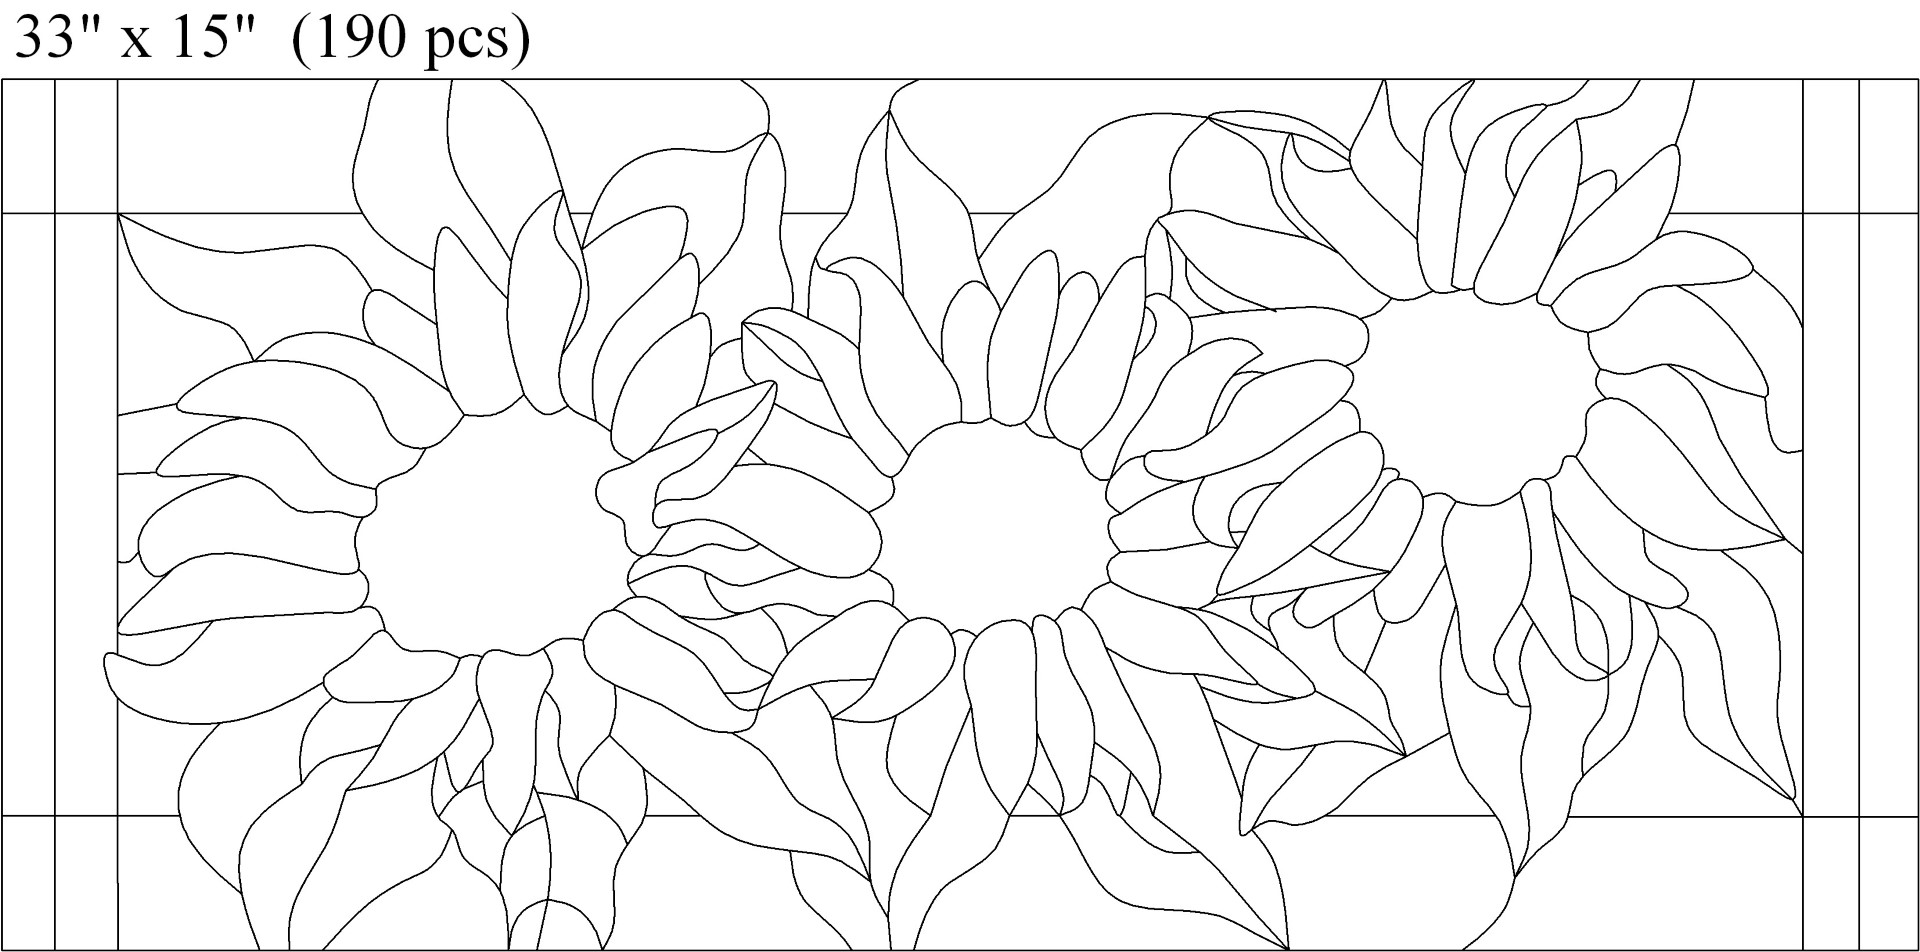
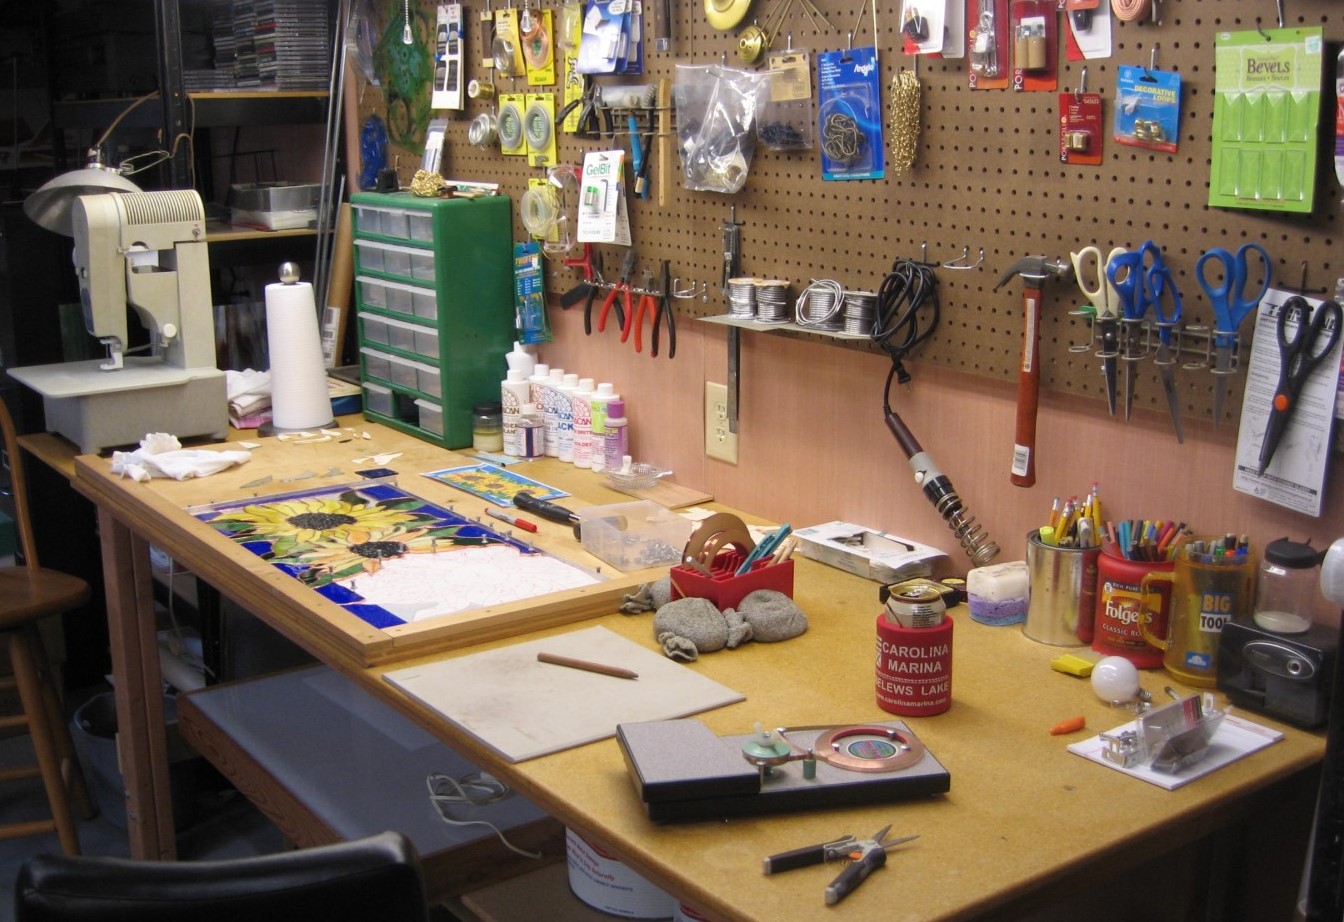
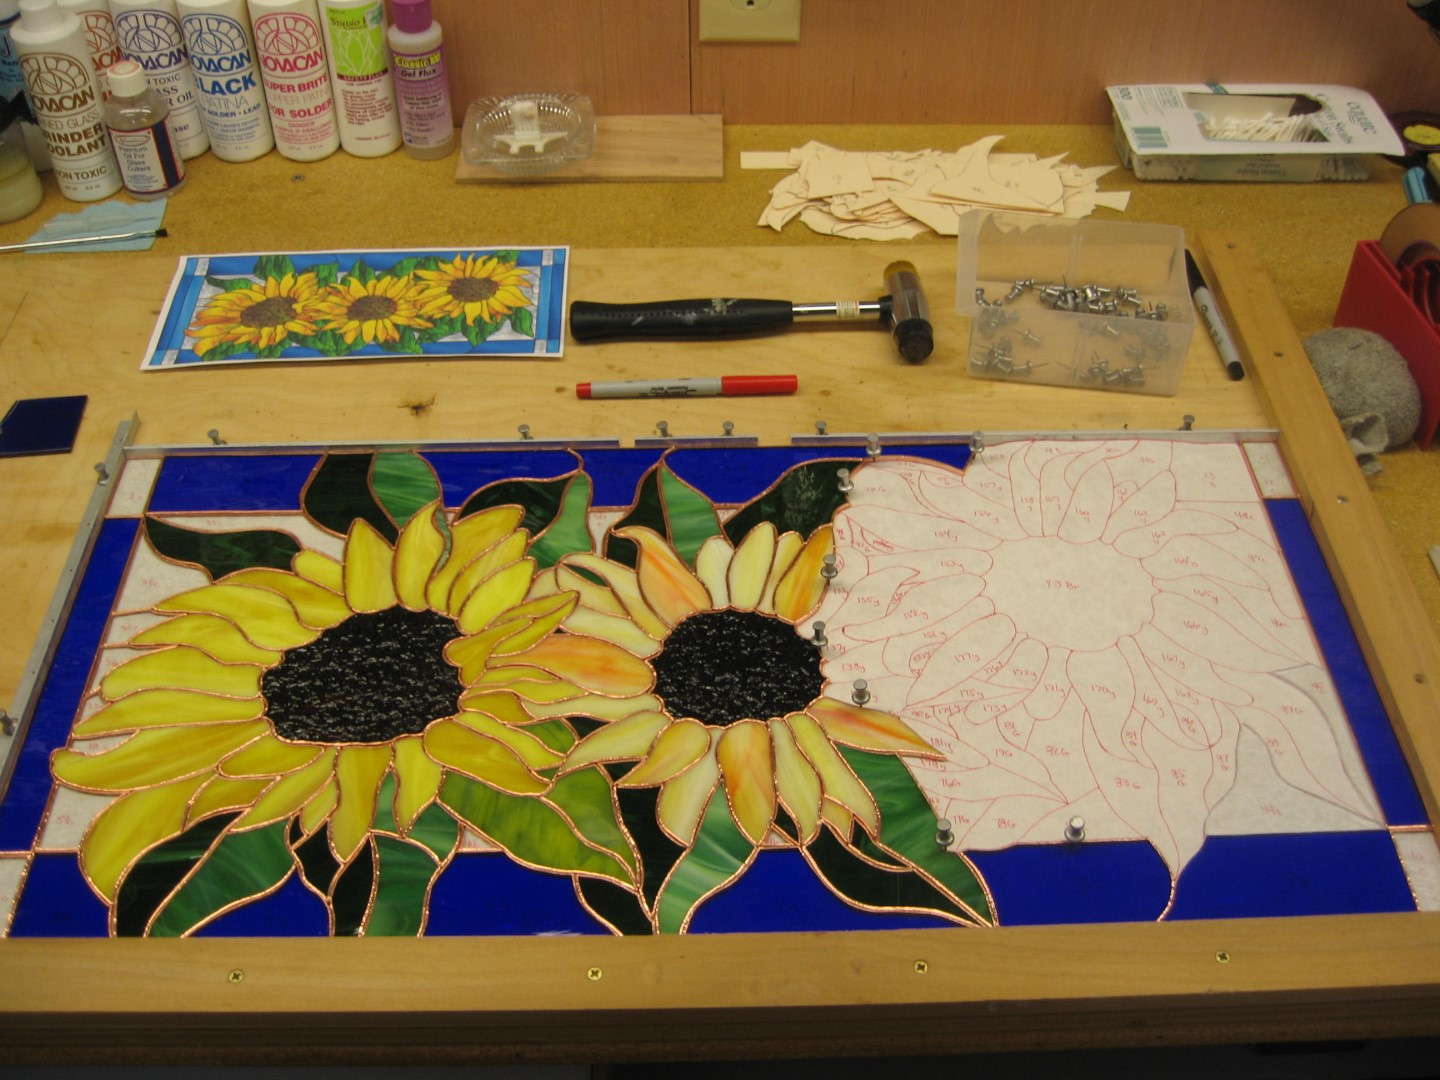
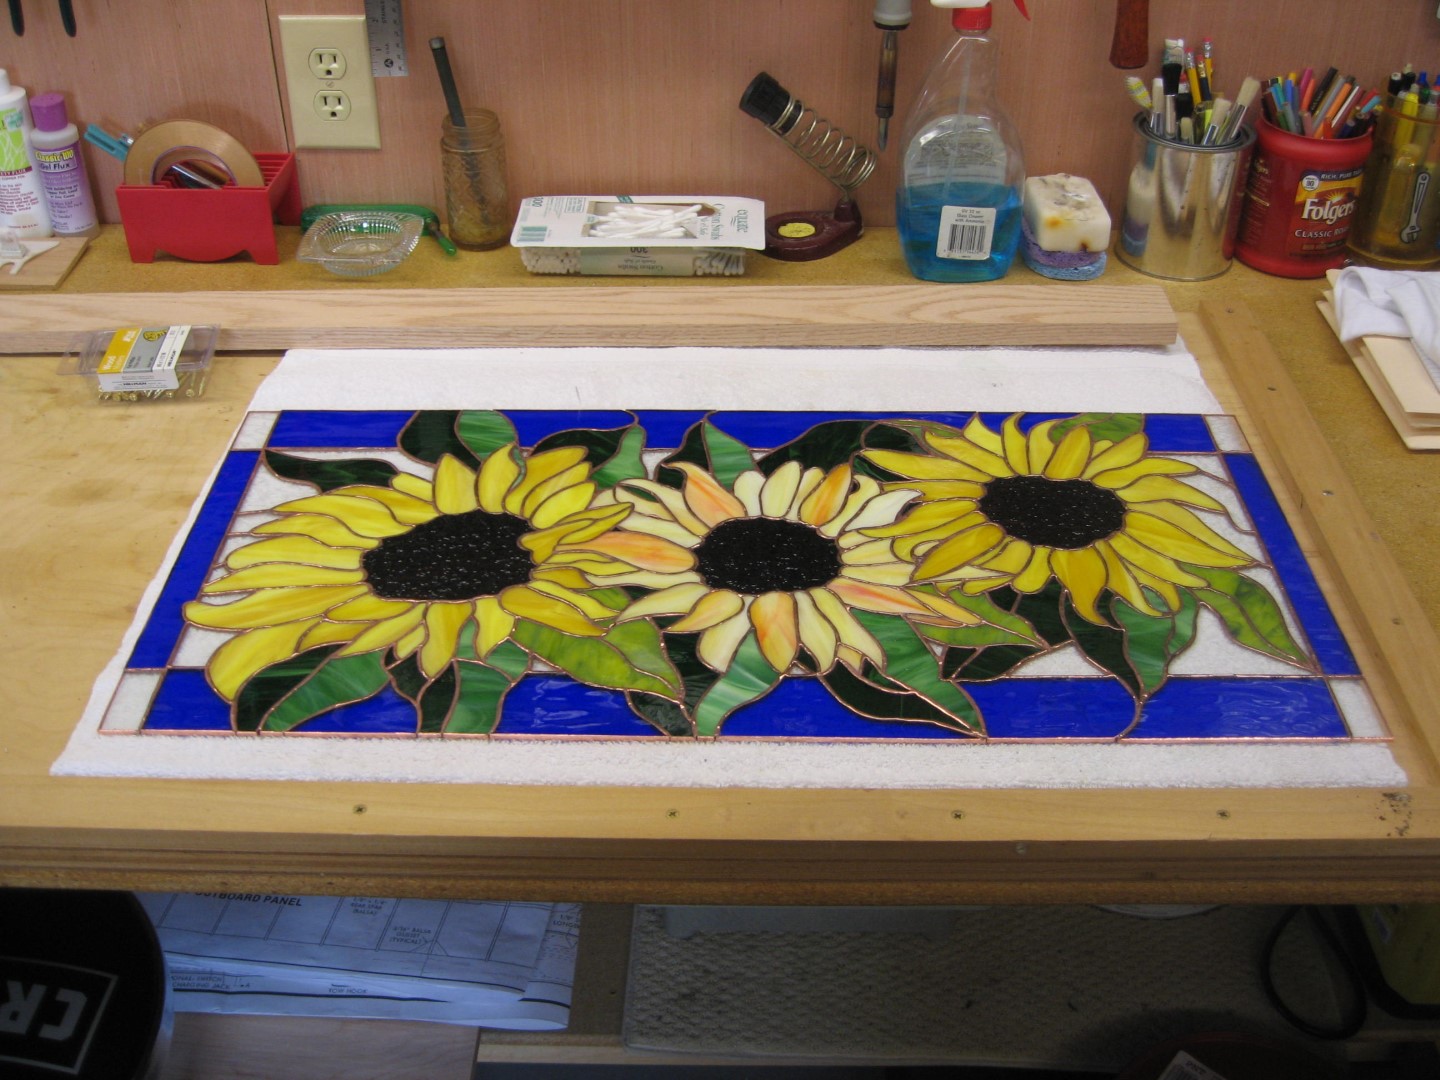
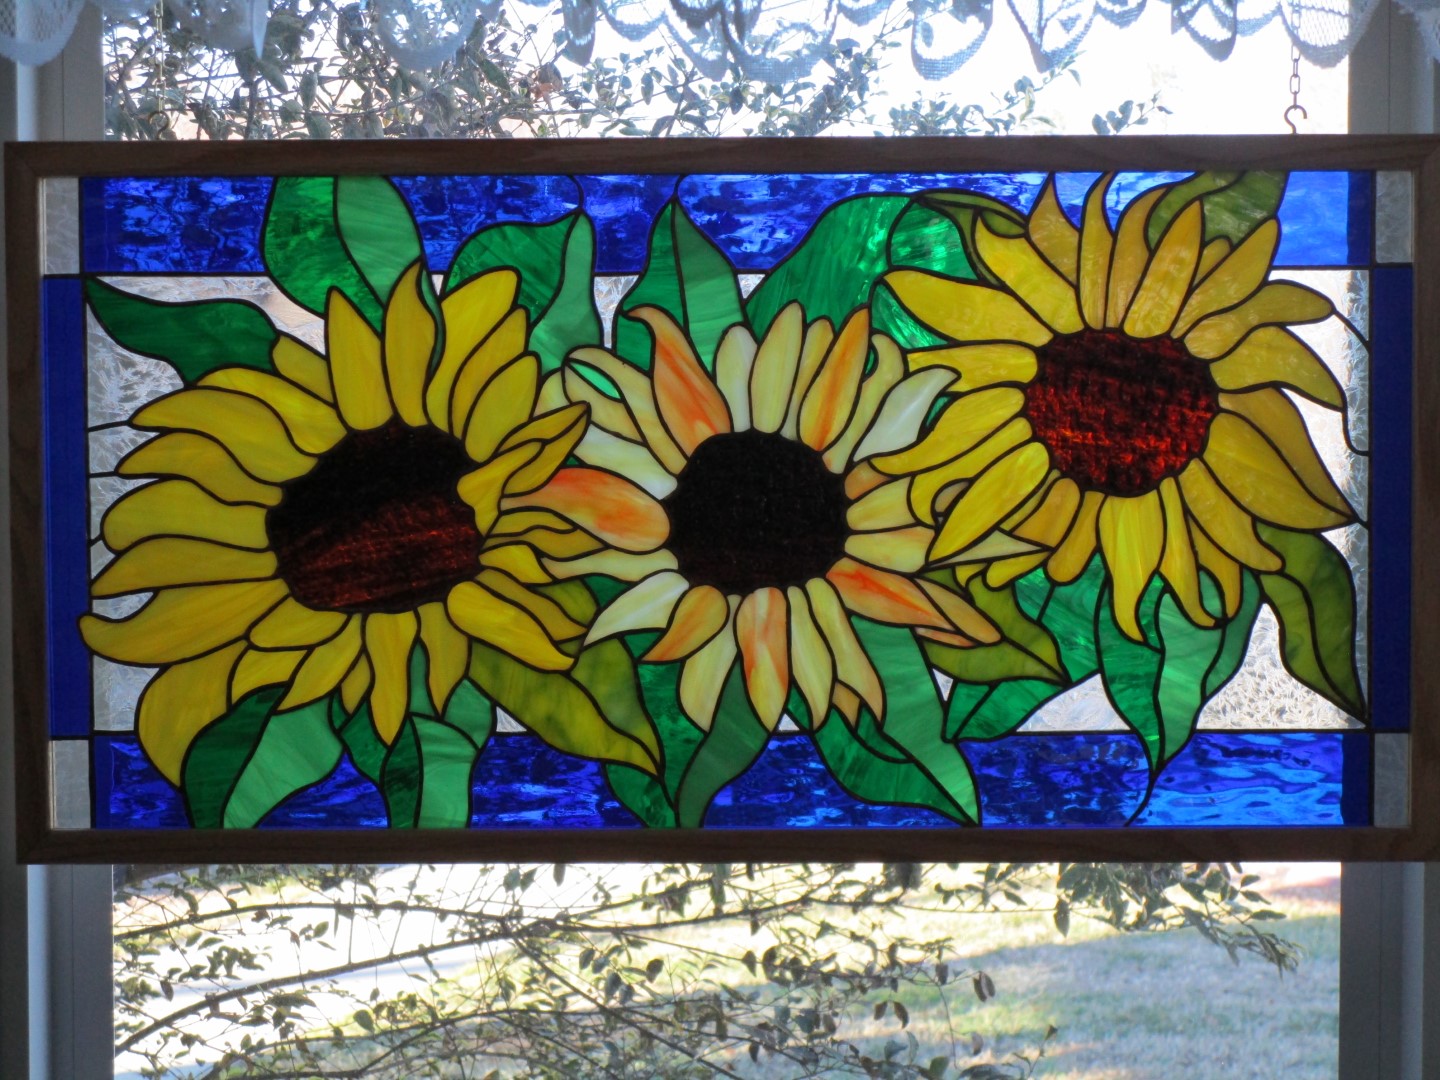
I try to plant sunflowers each year at one end of our garden so in the fall we can bring them into our home. The other way is to just make another Stained Glass project. The first image on the top left was used to establish the glass colors and as indicated on the top middle line pattern image, this is a 33″x15″ 190 piece panel. The solder joints were colored using copper patina for lead, and is also mounted in a wooden frame. It currently is hanging (bottom far right image) in our sunroom.
A Winter Lighthouse Scene Panel
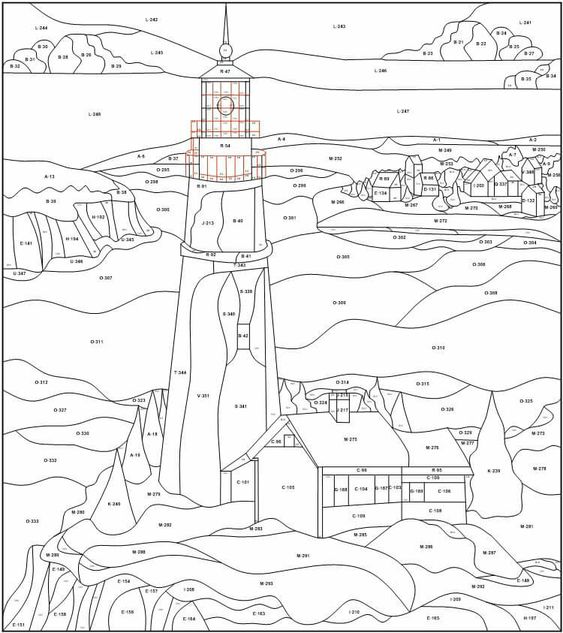
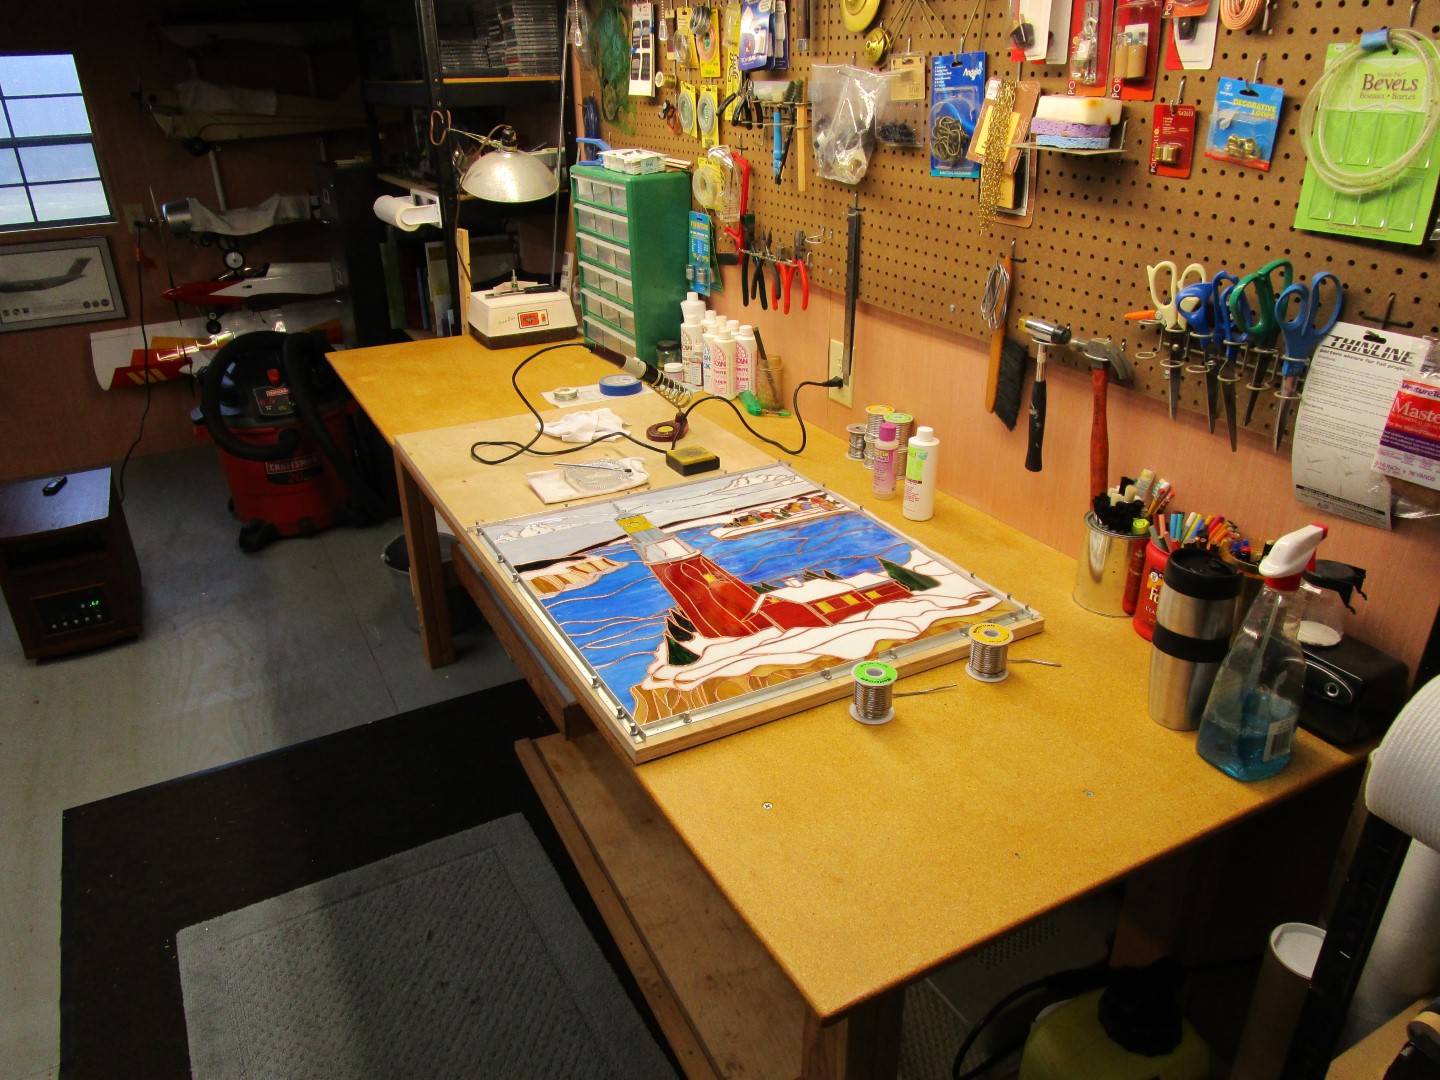
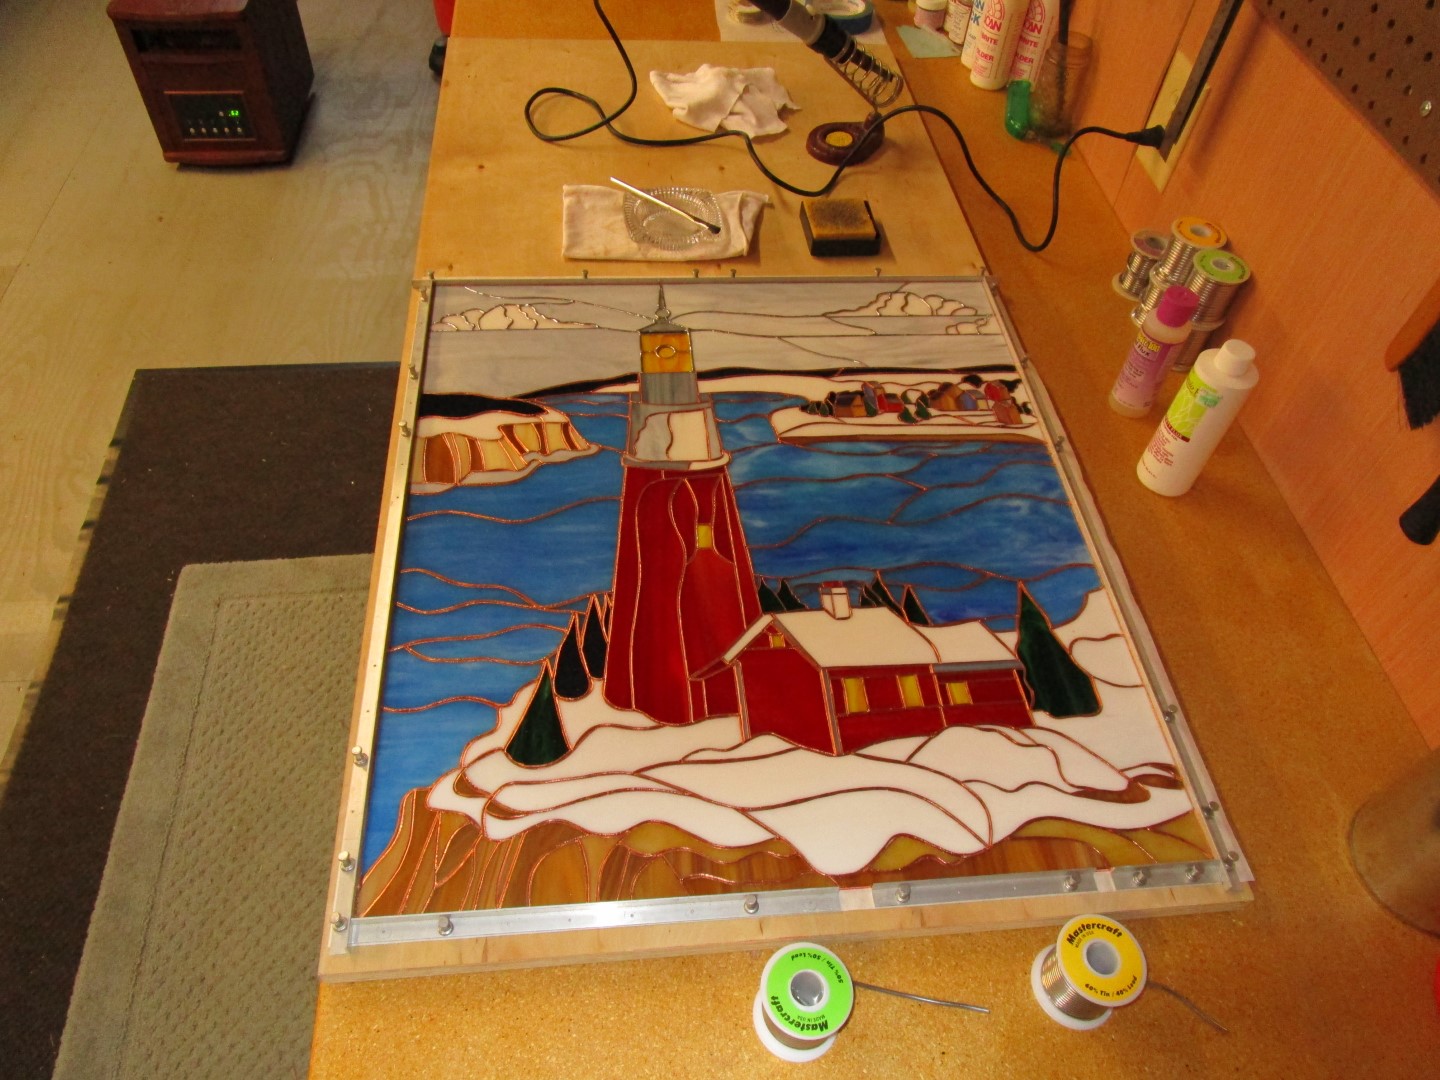
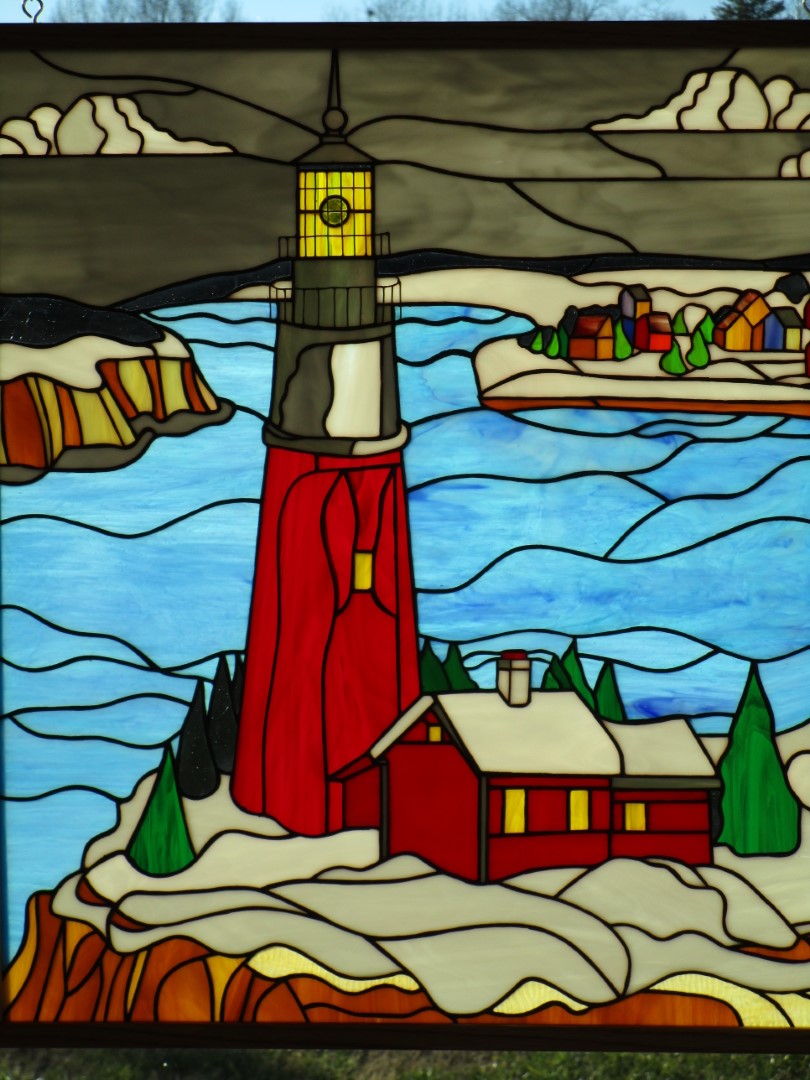
Everyone likes a lighthouse. Several years ago I decided to try and capture the beauty of a lighthouse in a Stained Glass project. There are many lighthouse images on the web to select from for your pattern. I started this project with another Bill Blodgett pattern shown below on the left. It not only has the lighthouse, but places it next to a bay with a small village in the background, all in a snowy and dark winter sky setting. I really like it. That small village makes for a lot of very small glass pieces, and they should be foiled using a very narrow width of foil. The lighthouse railings and window frames at the top are made using copper wire. My resulting project is a 22″x25″ 275 piece panel. All solder joints are colored using black patina for lead, and the panel is mounted in a wooden frame. We normally hang this is panel in our large bay window during the Winter season.
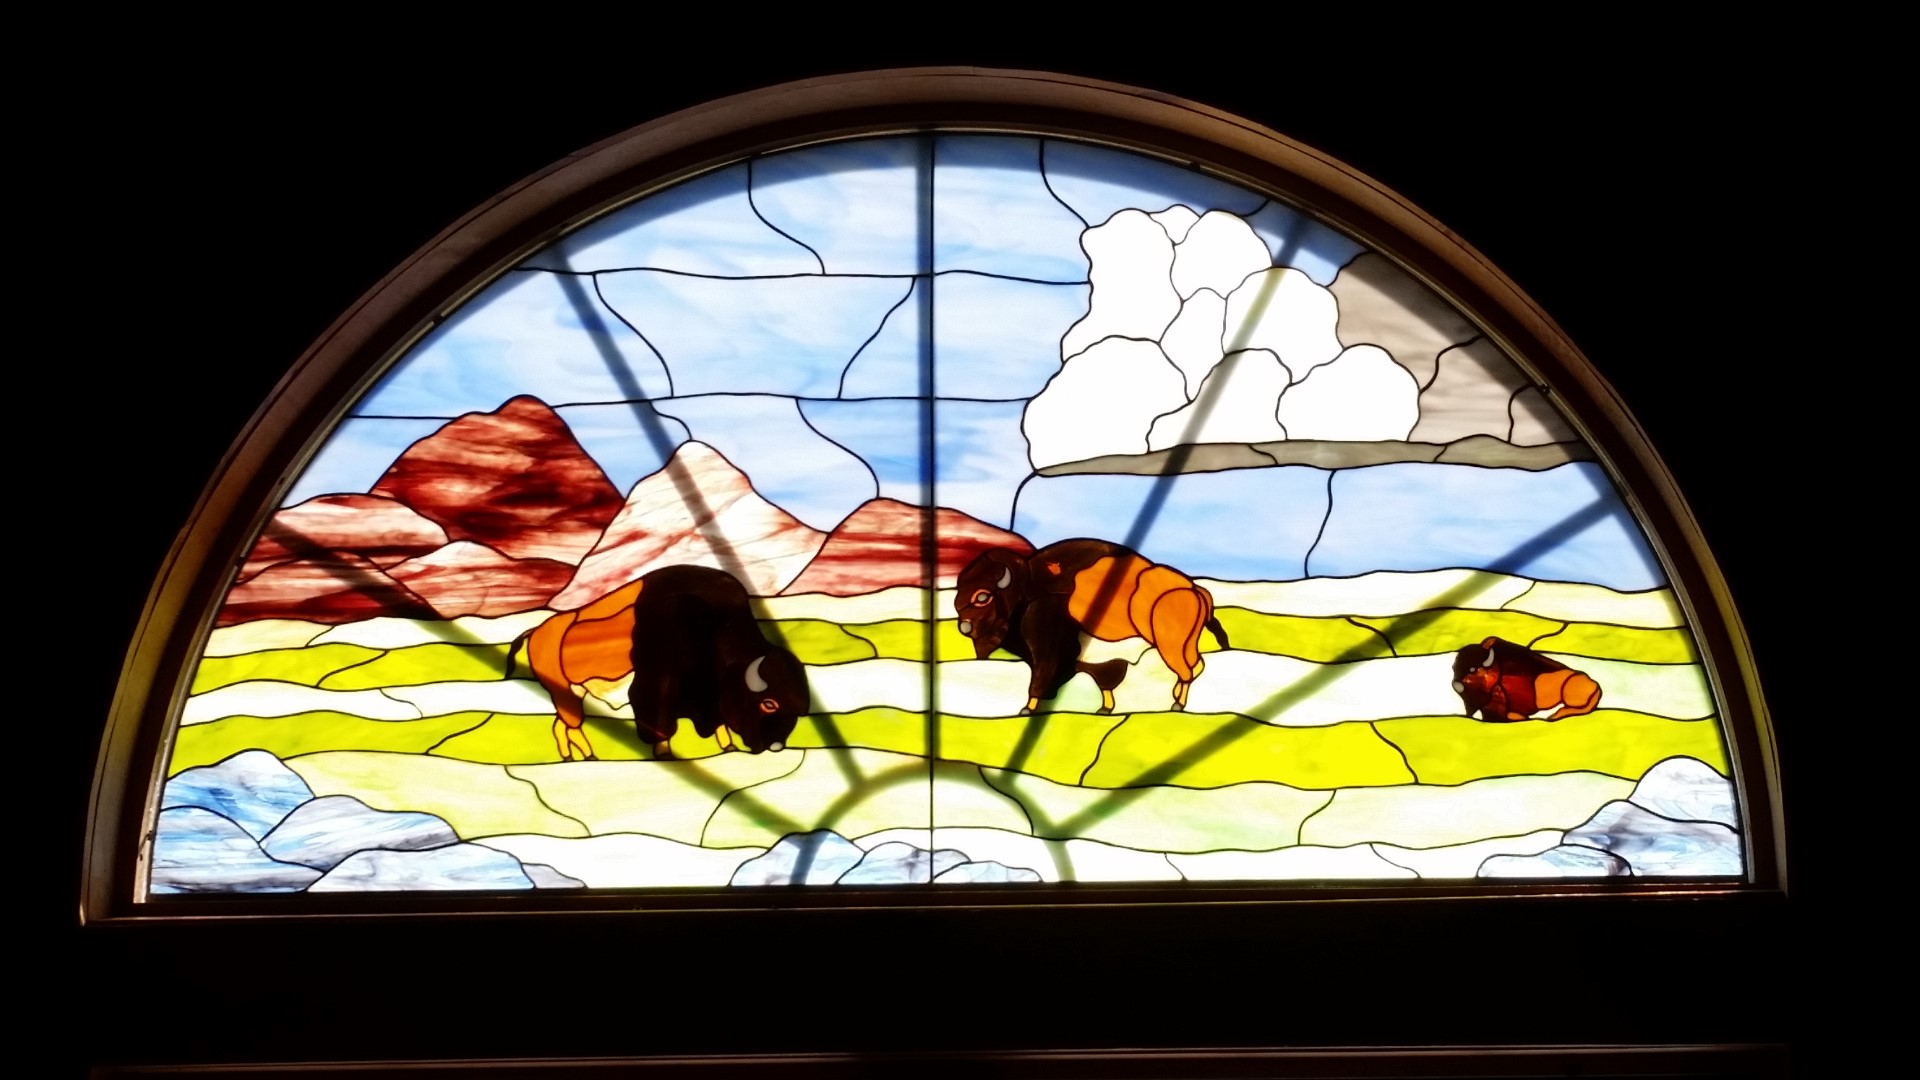
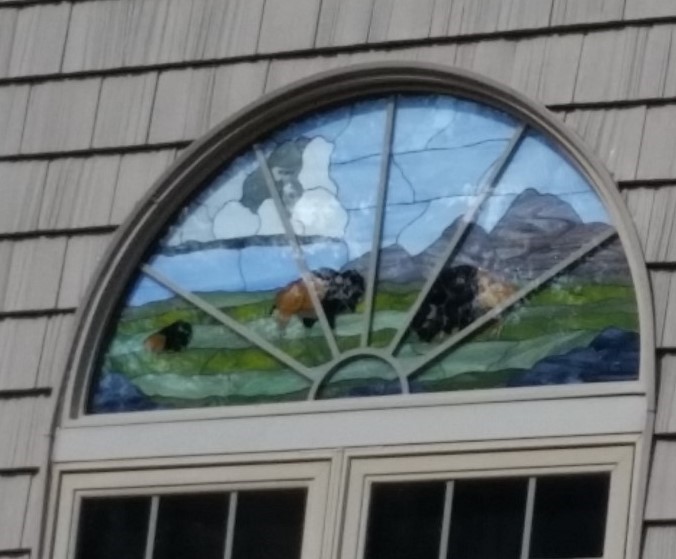
Buffalo on the Prairie Half Circle Scene
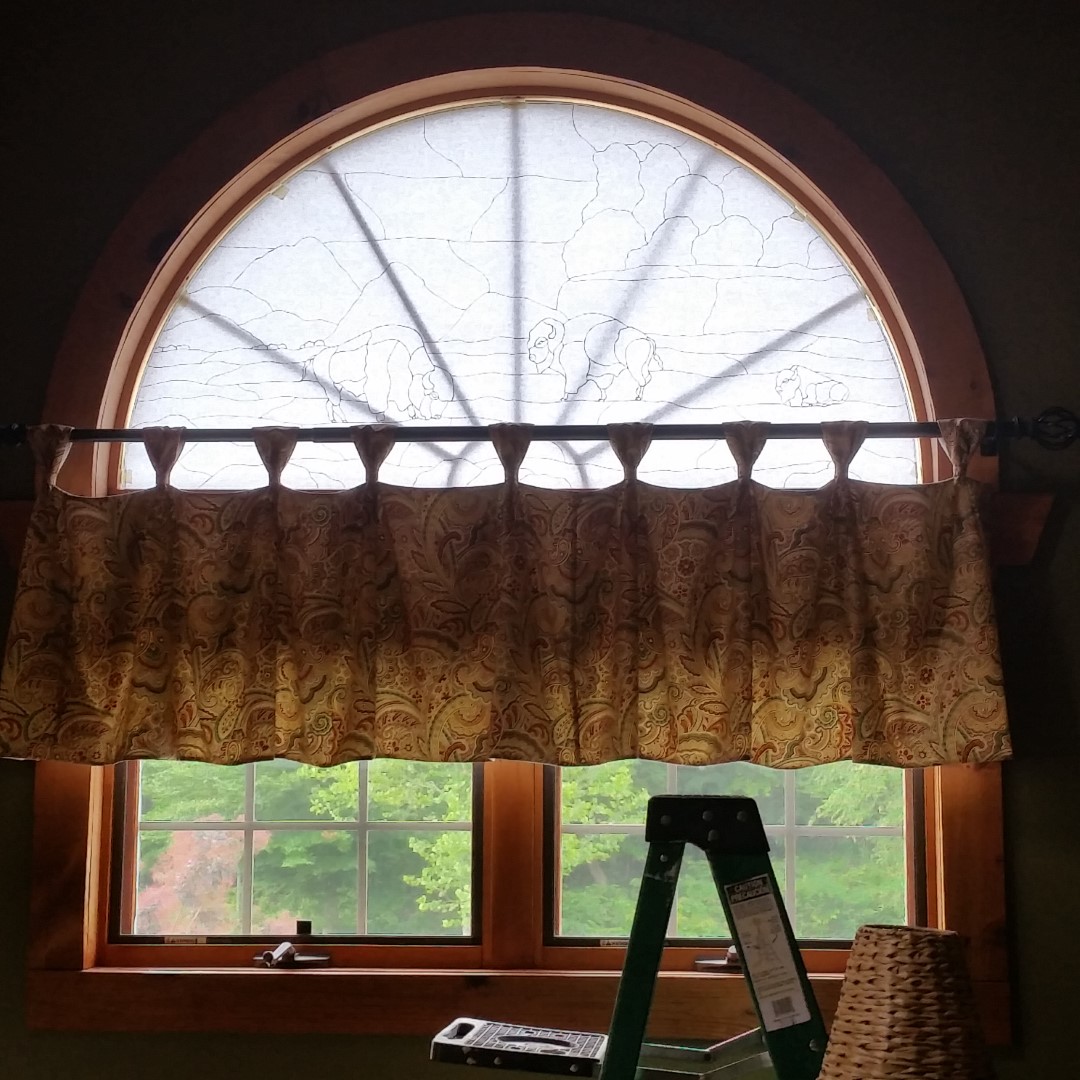
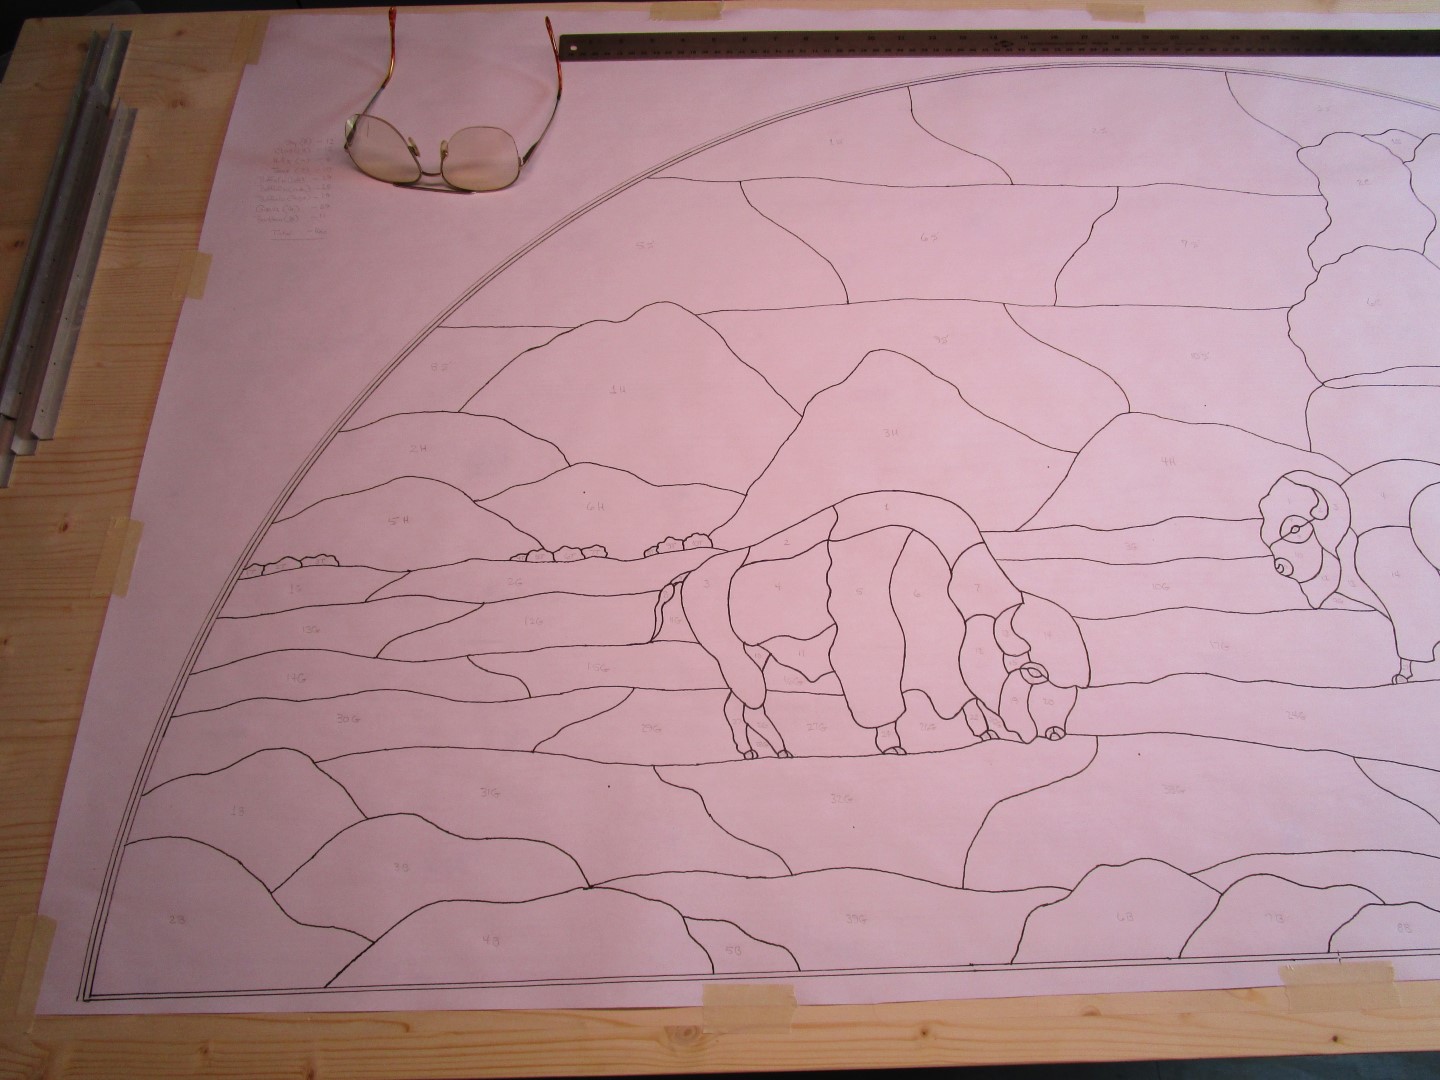
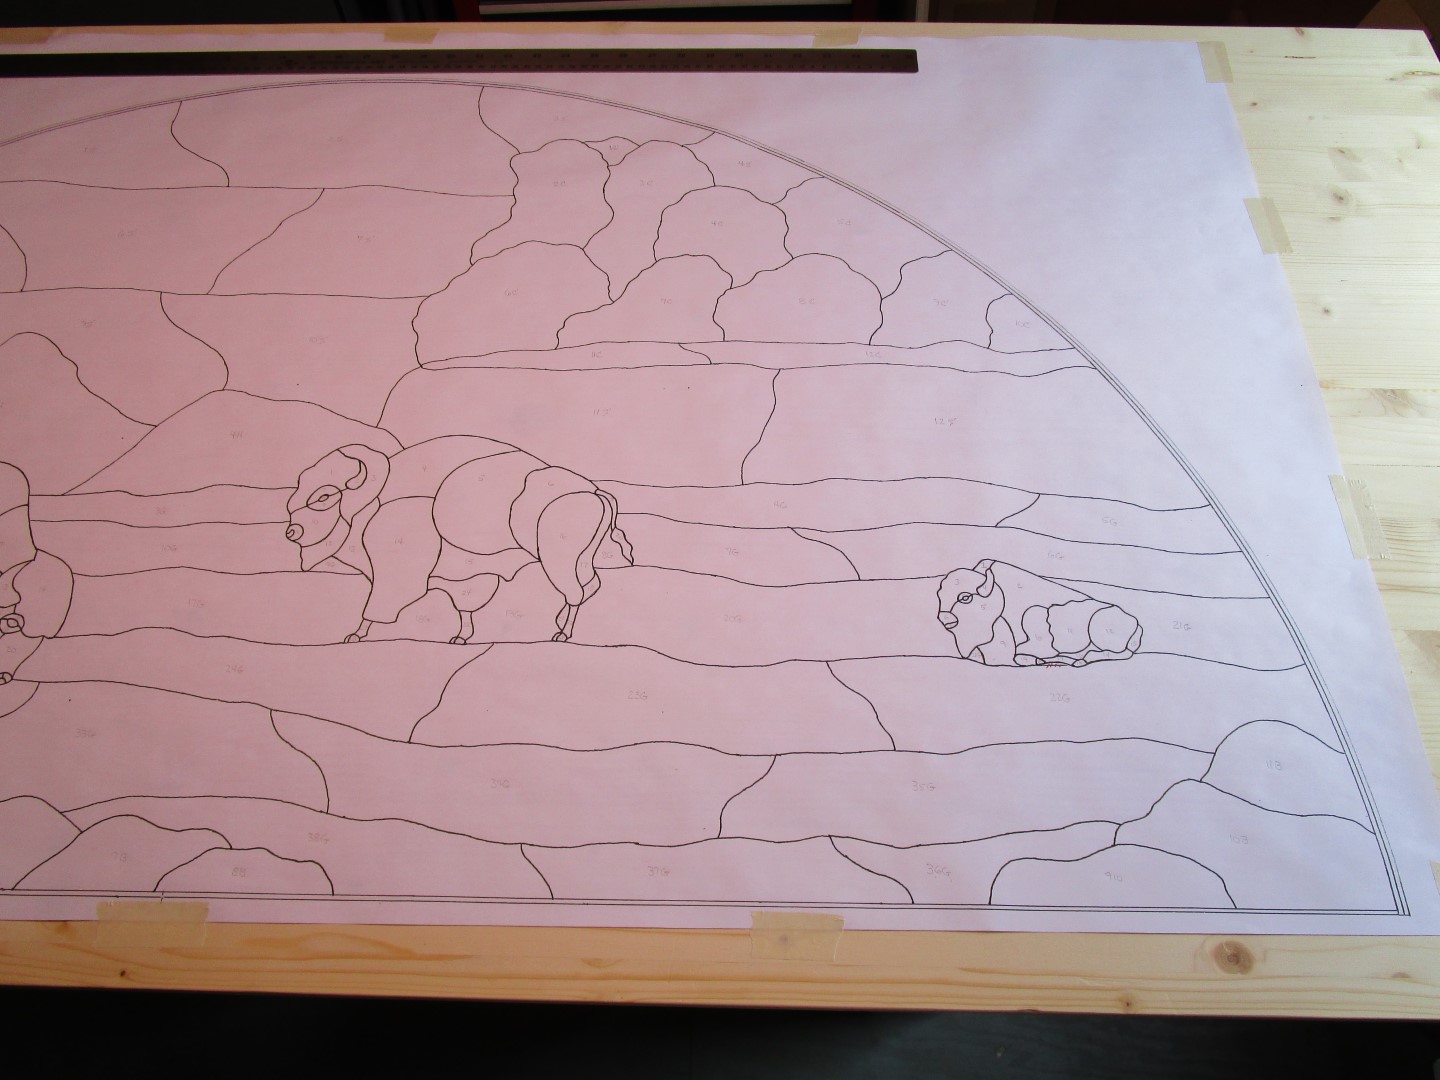
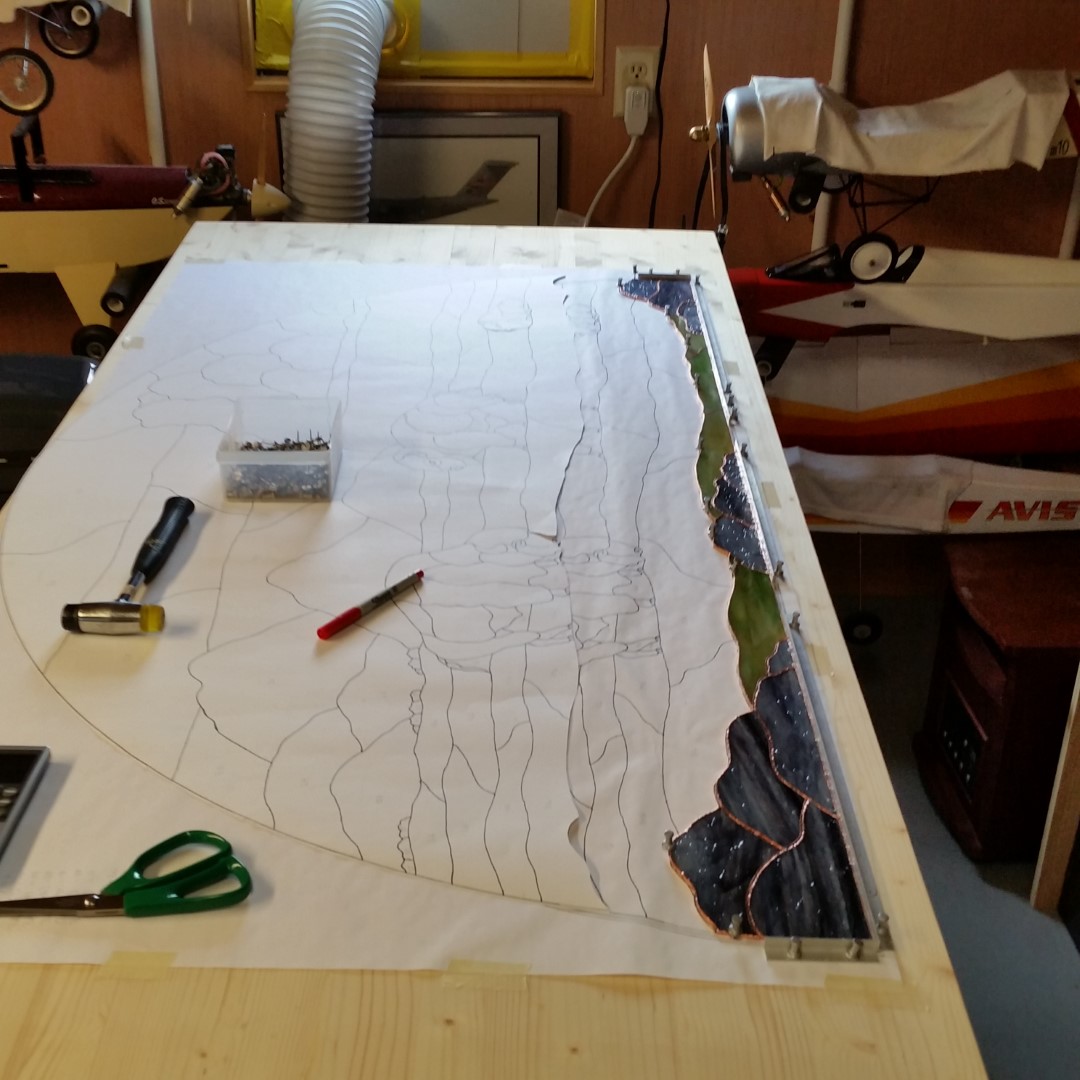
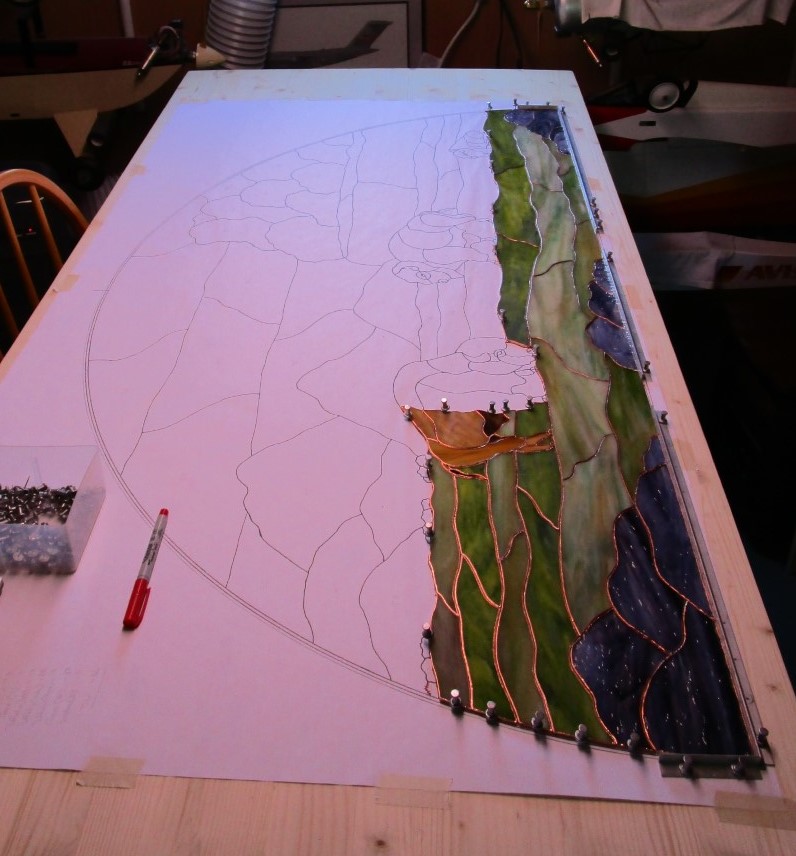
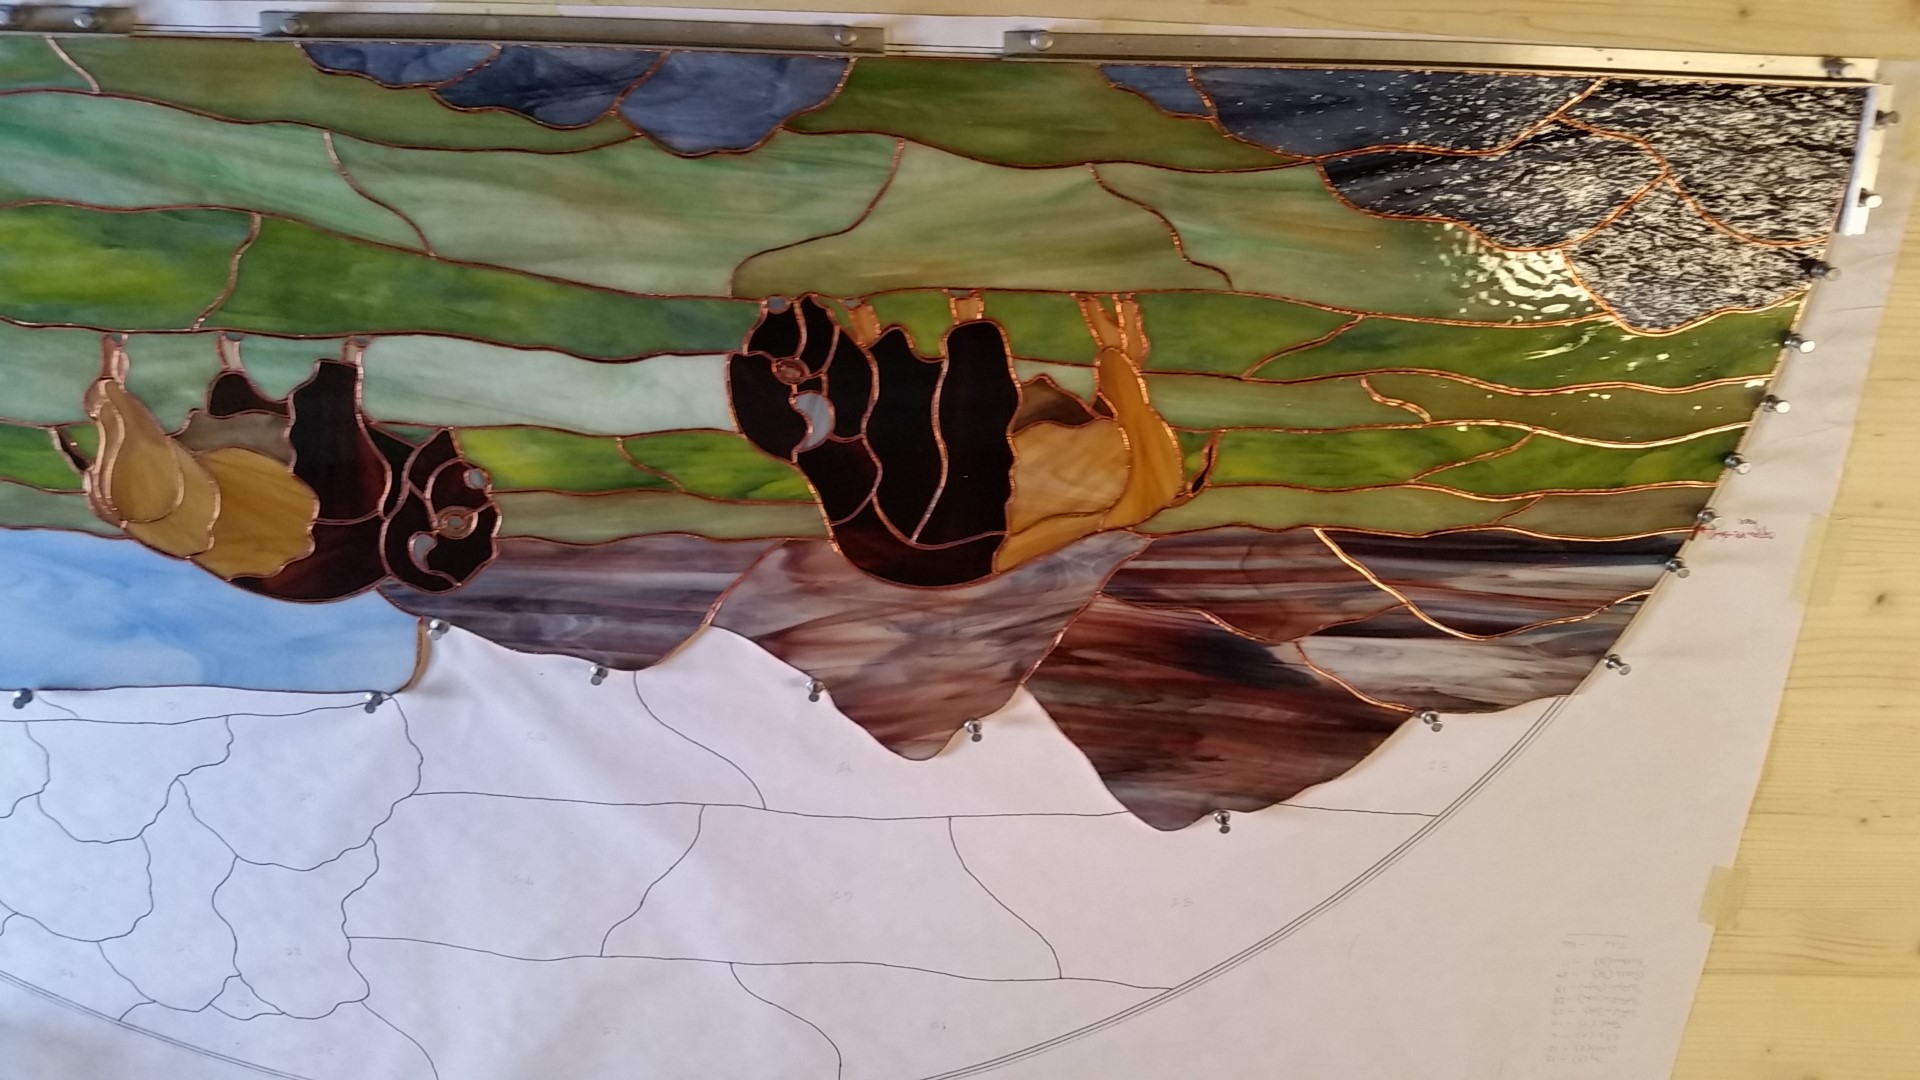
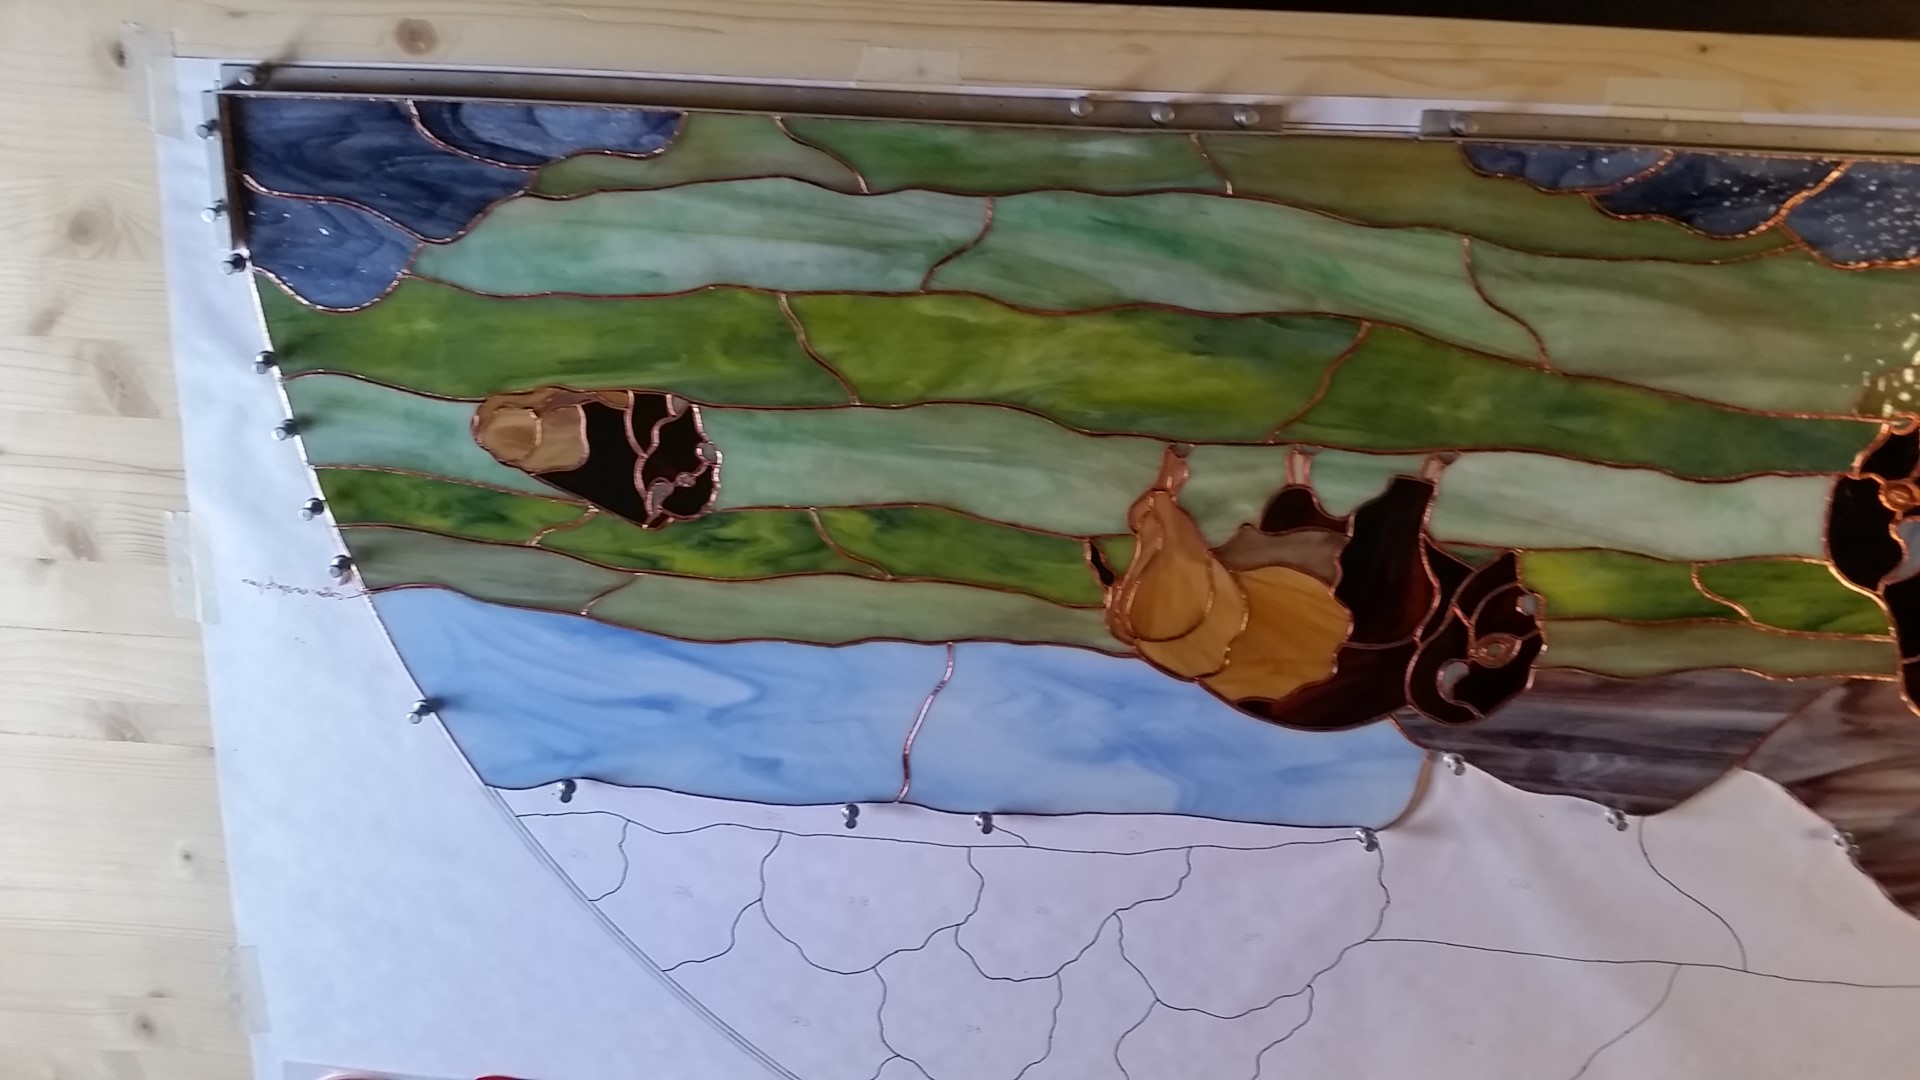
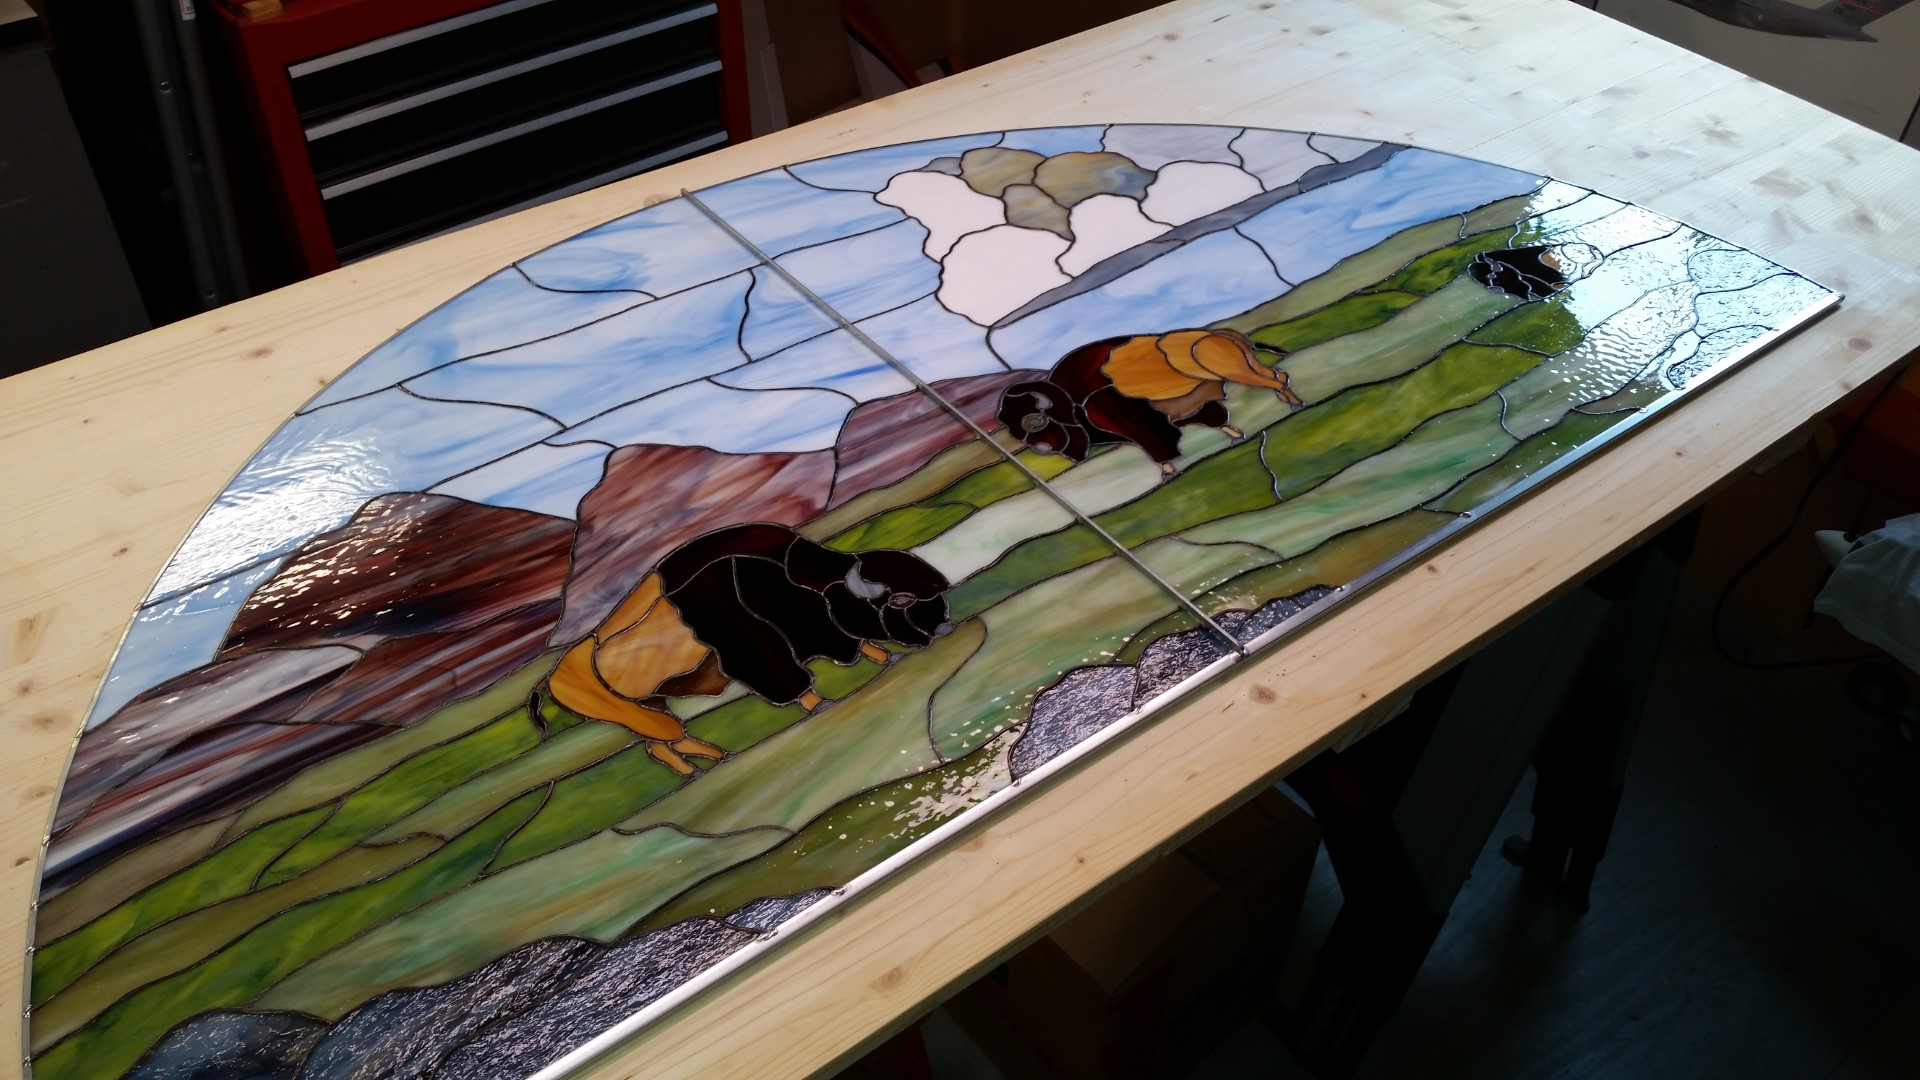
All the projects I have done over these many years were for family members, with the exception of this next project. Some church friends ask me to see if there was any way to cut down on the sunlight coming through a large South facing window above their dining area (top left image). They suggested a Stained Glass panel with buffalo, which would go with the buffalo hide on the floor next to the dining area. So, after taking measurements of the 27″ radius half-circle window, and finding some pencil drawings of buffalo in various positions, I generated my hand drawn pattern. Once it was approved by the now "customer," I pulled together all the glass styles and colors I would need. The progression of the build is captured in the images below. With such a large Stained Glass panel it required some support to keep it from sagging over time. A zinc bar runs vertically thru the center of the half circle (middle row right image), and copper reinforcement strip running horizontally between glass pieces about half way up the panel. The entire panel is framed in zinc channel, and this thing is heavy. They love it and get many comments from their guests.
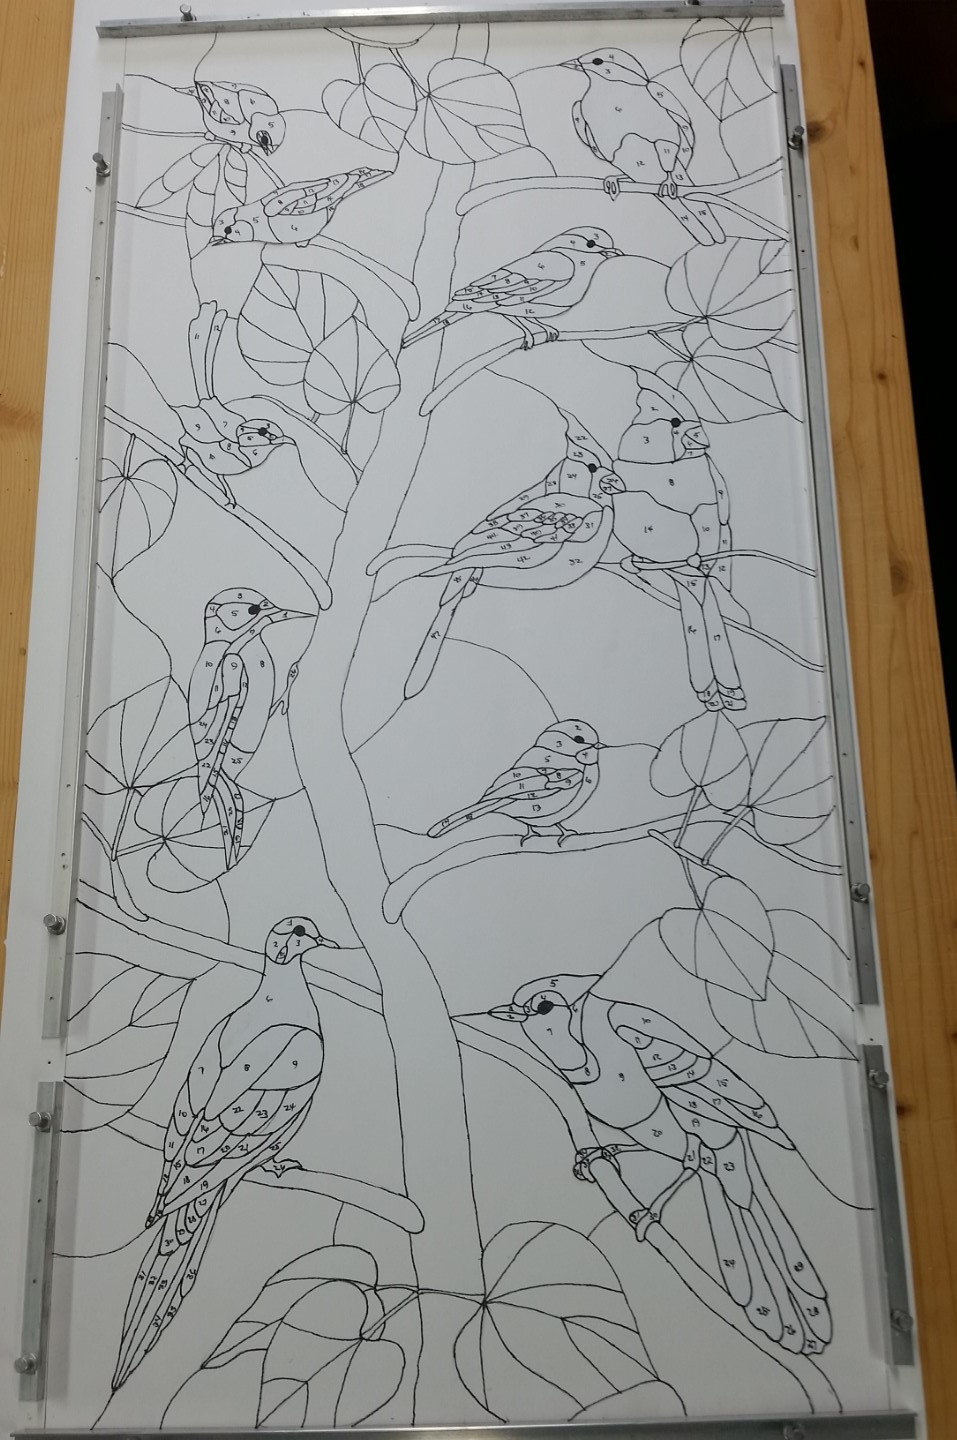
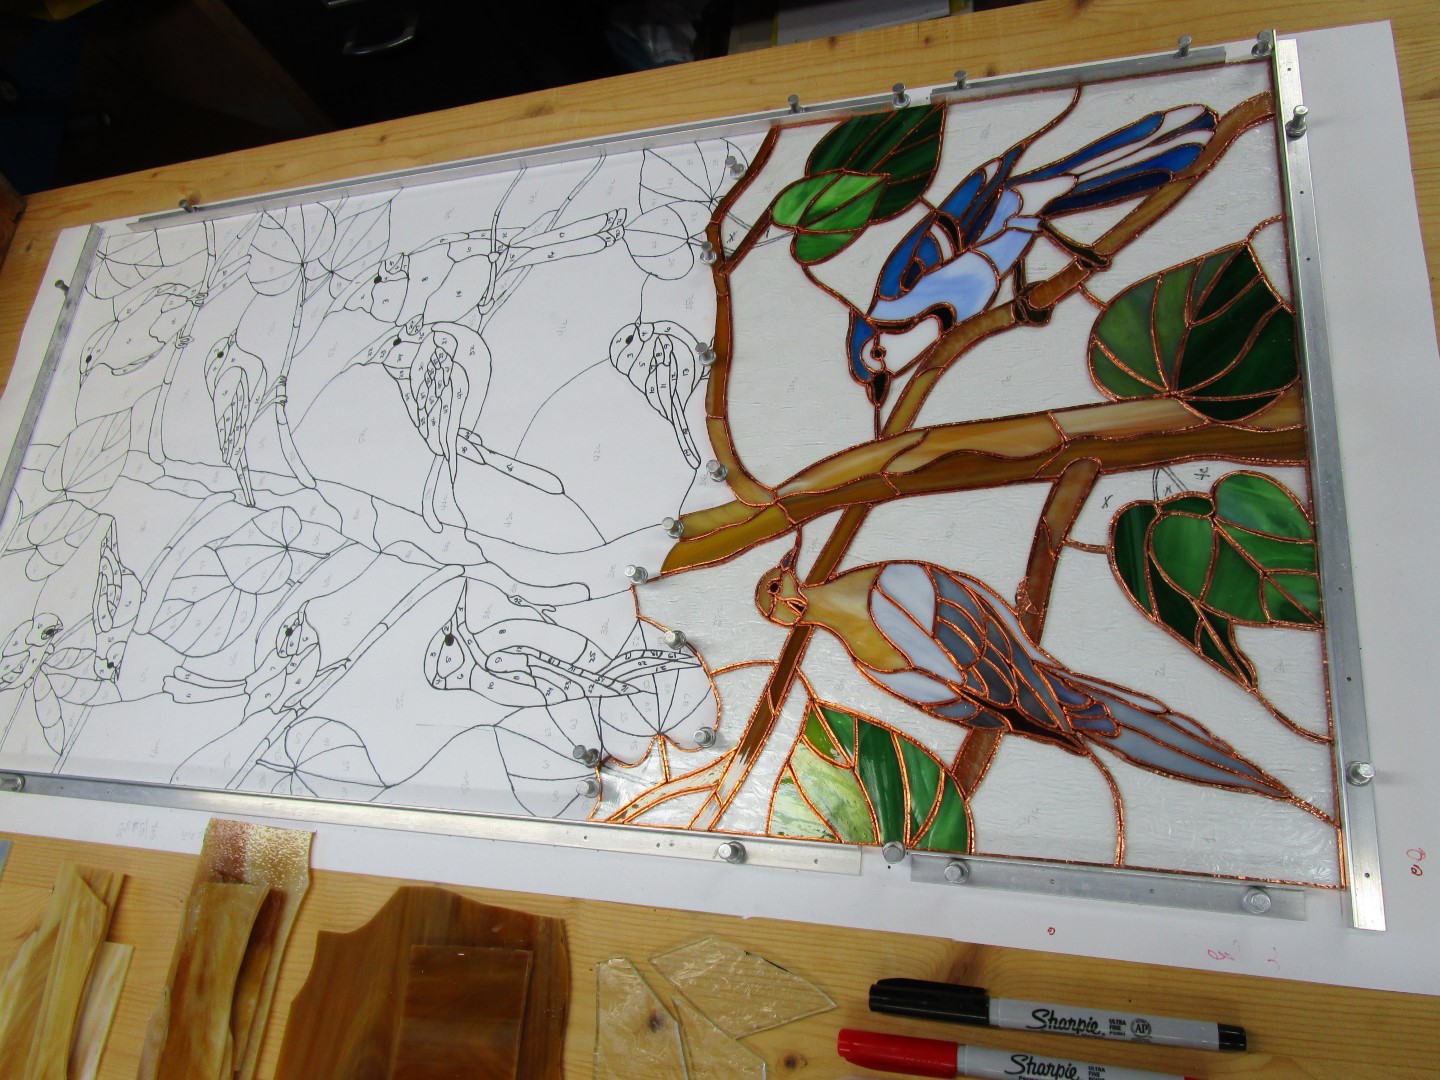
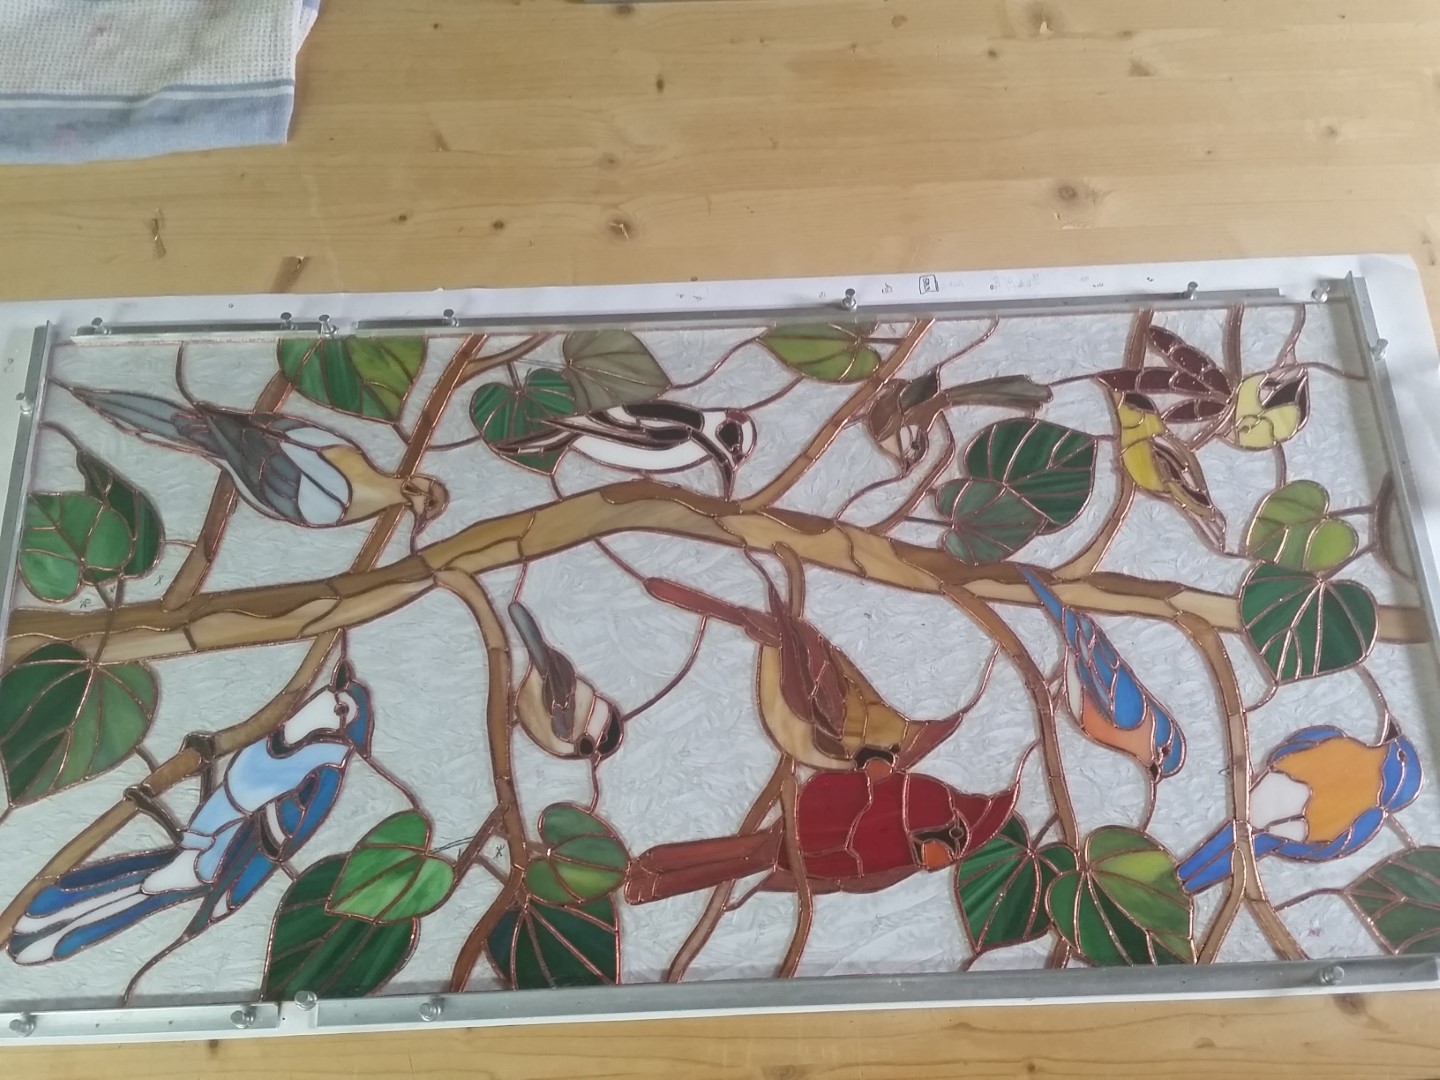
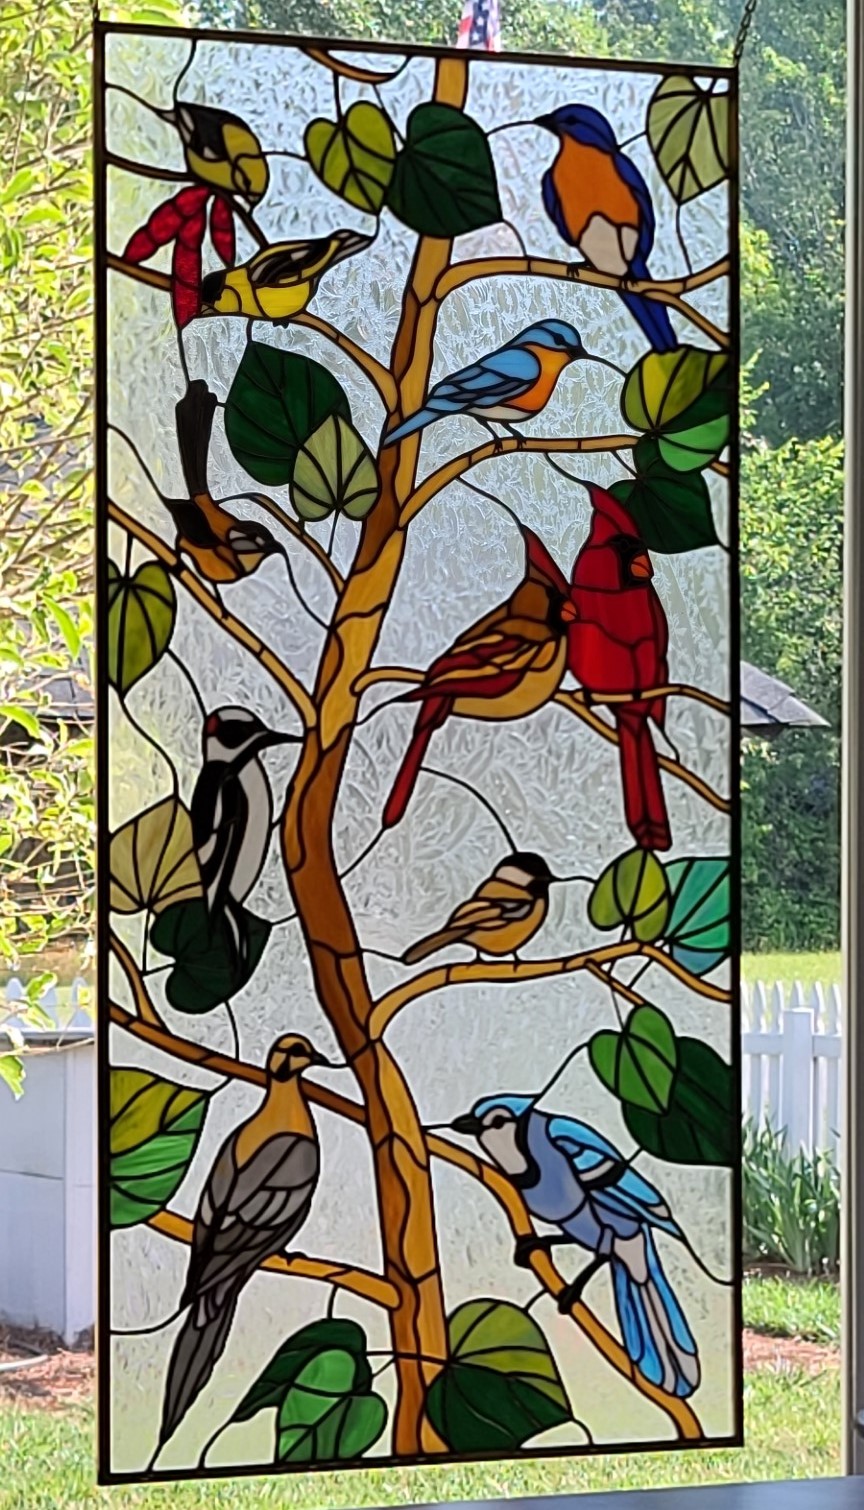
Our Yard Birds Panel
We love our yard birds and have all kinds because we put out several feeders and a heated bird bath during the winter months. Once you feel you have mastered the fine art of making Stained Glass projects, maybe you might want to try something like this next project. This panel may not be considered large at 16″x32″, but it has approx. 583 pieces of cut glass that required grinding, foiling, and lots of joint soldering. All the birds captured here are found in our yard. The bird patterns came from the coloring book website I mentioned earlier. All solder joints are colored with copper patina, and the panel is framed with copper channel. Normally hanging in our bay window, it is interesting to watch the real male cardinals get upset and attack the outside of the bay window trying to get at the cardinals in the panel.
Our Front Porch Outdoor Lanterns
I started this webpage with my current project, a Stained Glass lantern that will end up hanging above the entry to my workshop. Lets now take a look at some other Stained Glass outdoor lanterns. The first project is the two lanterns that hang on the front porch of our 1906 home. I generated my pattern using the top left image as a starting point. Each panel is 3.5″x9″ and 20 pieces of cut glass. From the resulting pattern I made all six sides out of thick poster board so it could be put together, thus ensuring the real Stained Glass panels would fit as needed. The lamps are lighted using 12 volt LED lamps, and controlled with an outdoor lighting transformer with a light sensor.
Our Front Porch Outdoor Lanterns Pattern.
Pergola Outdoor Lanterns
We have two Stained Glass lanterns that hang at each outdoor corner of our pergola. I found a similar design in one of my lantern pattern books and worked from there. Each side panel is 6.5″ at the bottom, 8″ tall, and has 23 pieces of cut glass. The lanterns are lighted using 12 volt LED lamps, and controlled by an outdoor lighting transformer with a light sensor.
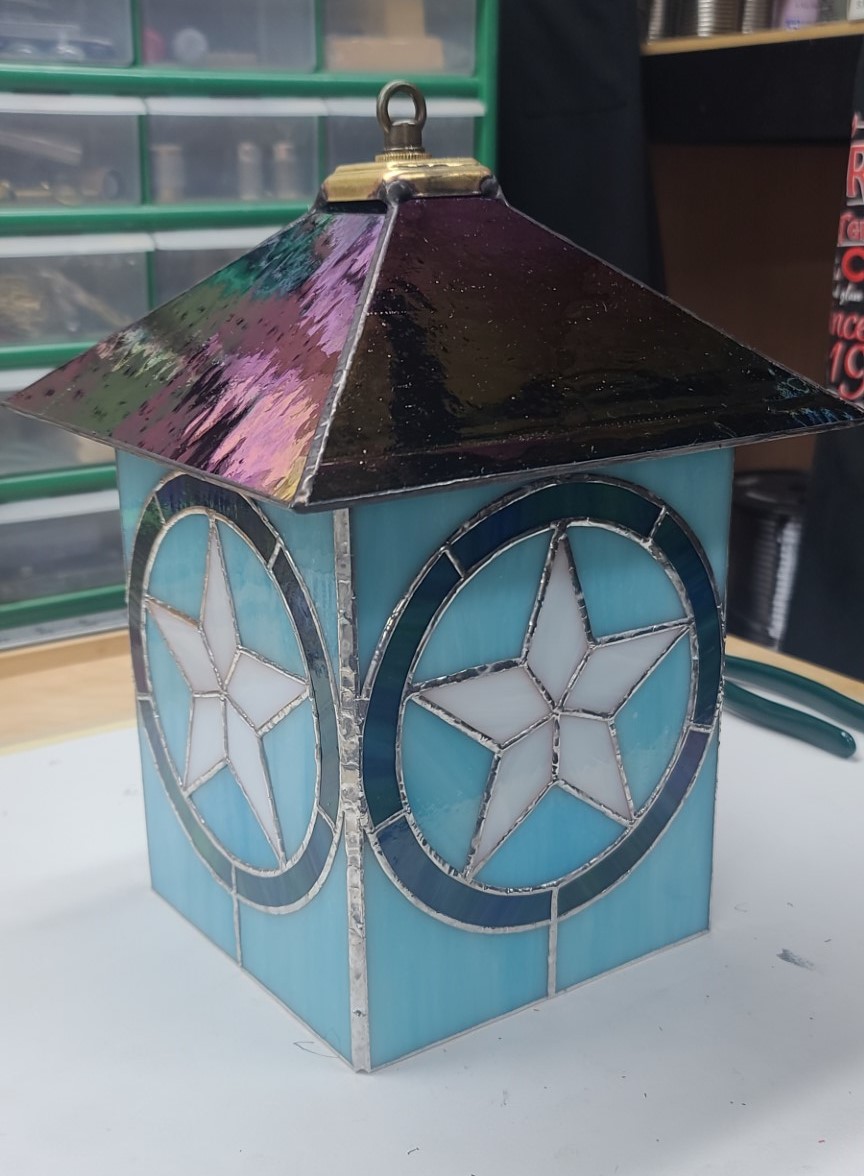
Potting Shed & Mailbox Outdoor Lanterns
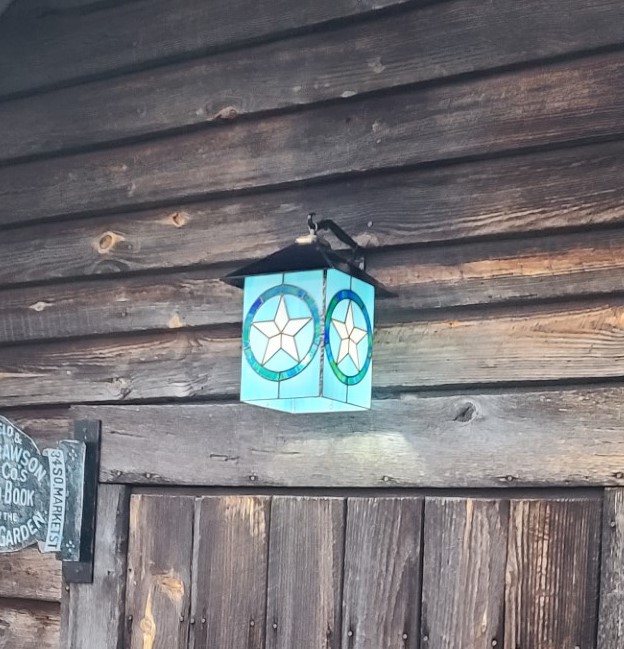
Our home is the original farm home on a North Carolina tobacco farm, and we still have a couple of the original tobacco buildings. One of them I now use as my garden potting shed, and decided I wanted a lantern hanging above the entry doorway. The top left image is what I used to start from for my pattern. Each side panel is 5.75″x8″ and only 17 pieces. The glass top and four sides are all held together using standard lamp hardware, a four arm solid brass lamp spider, and a square brass vase cap.
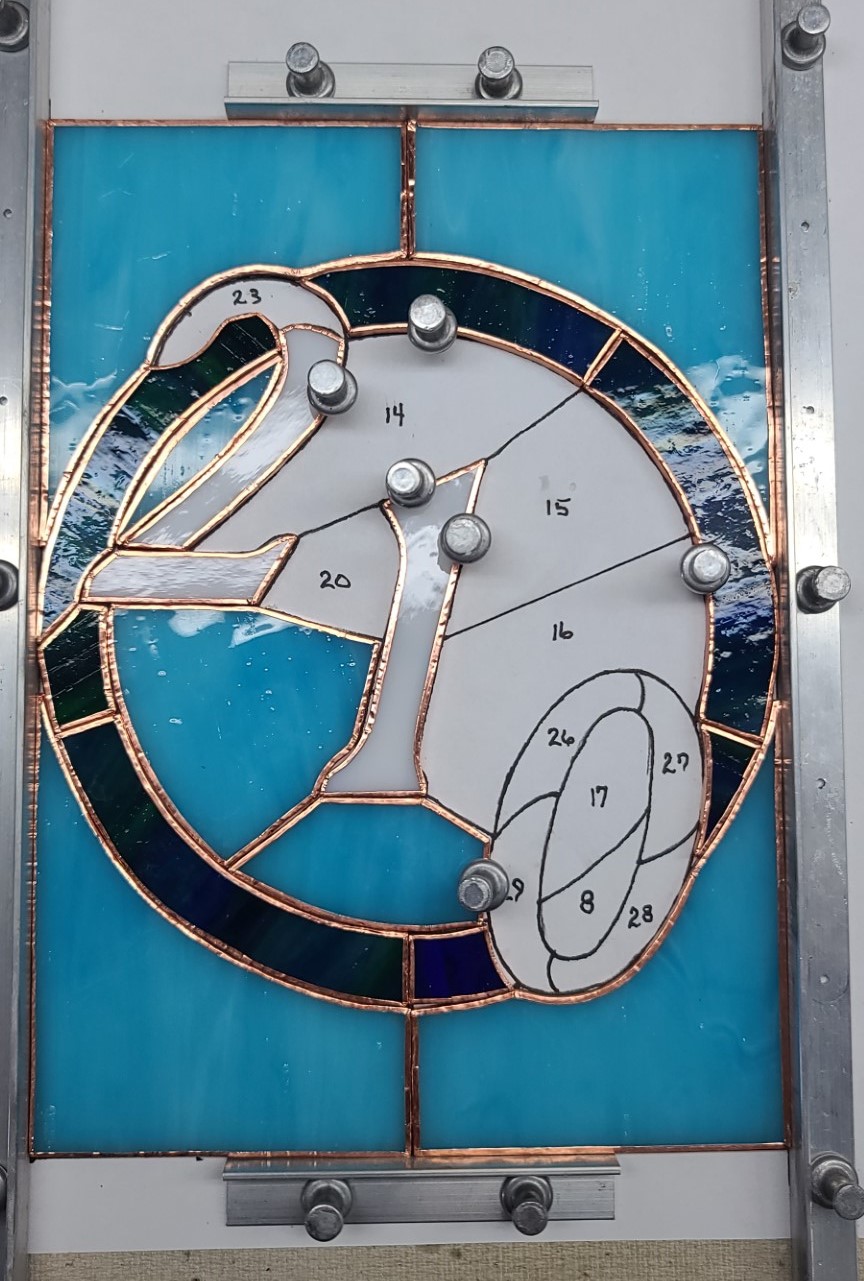
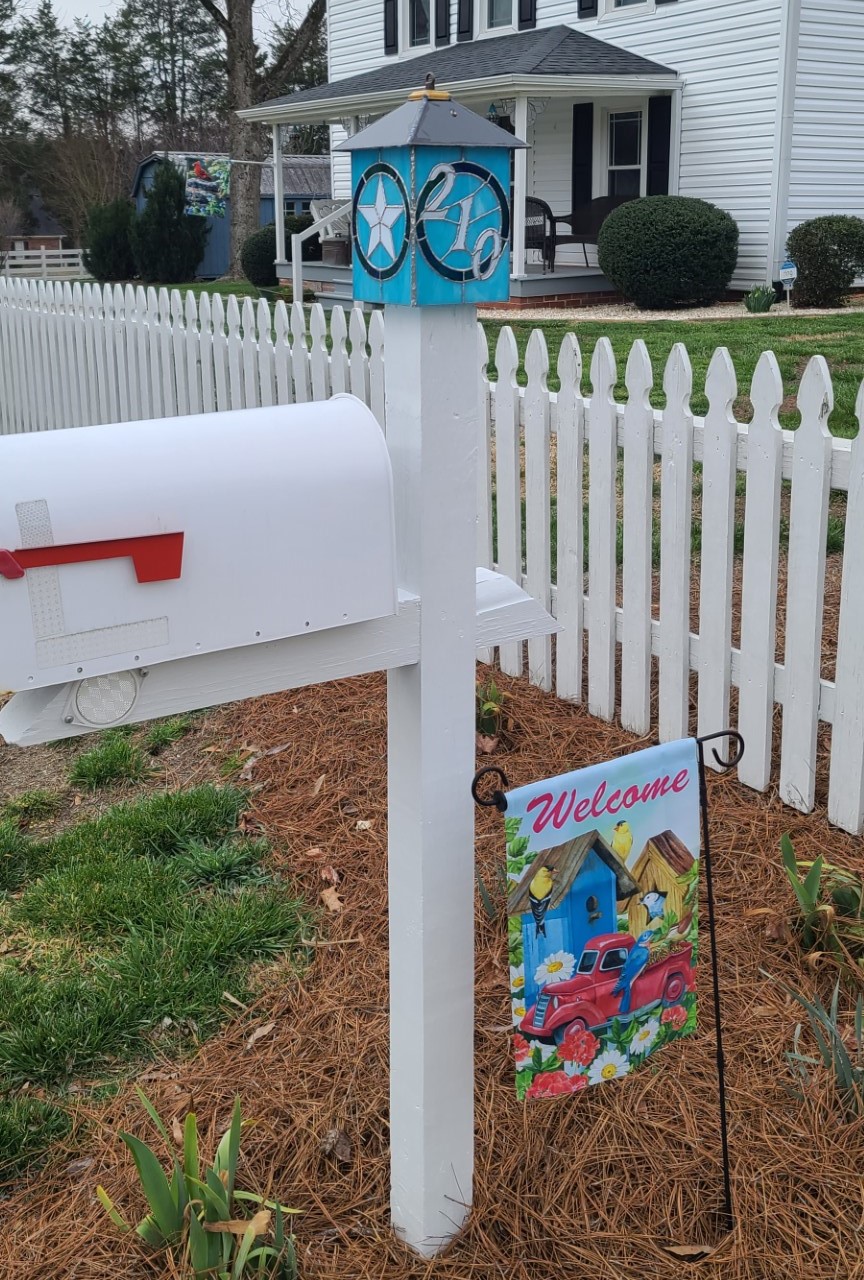
To add some charm to our mailbox, I decided to put a Stained Glass outdoor lantern on the top of the mailbox post. To maintain the theme already set by the potting shed lantern, I modified that pattern to incorporate our home address number. The two bottom images are the results. It really looks nice at night and we get lots of complements from neighborhood residence. Only drawback is everyone wants me to make them one. Both of these lamps are also lighted using 12 volt LED lamps, and controlled by an outdoor lighting transformer with a light sensor.

Window Header Panel
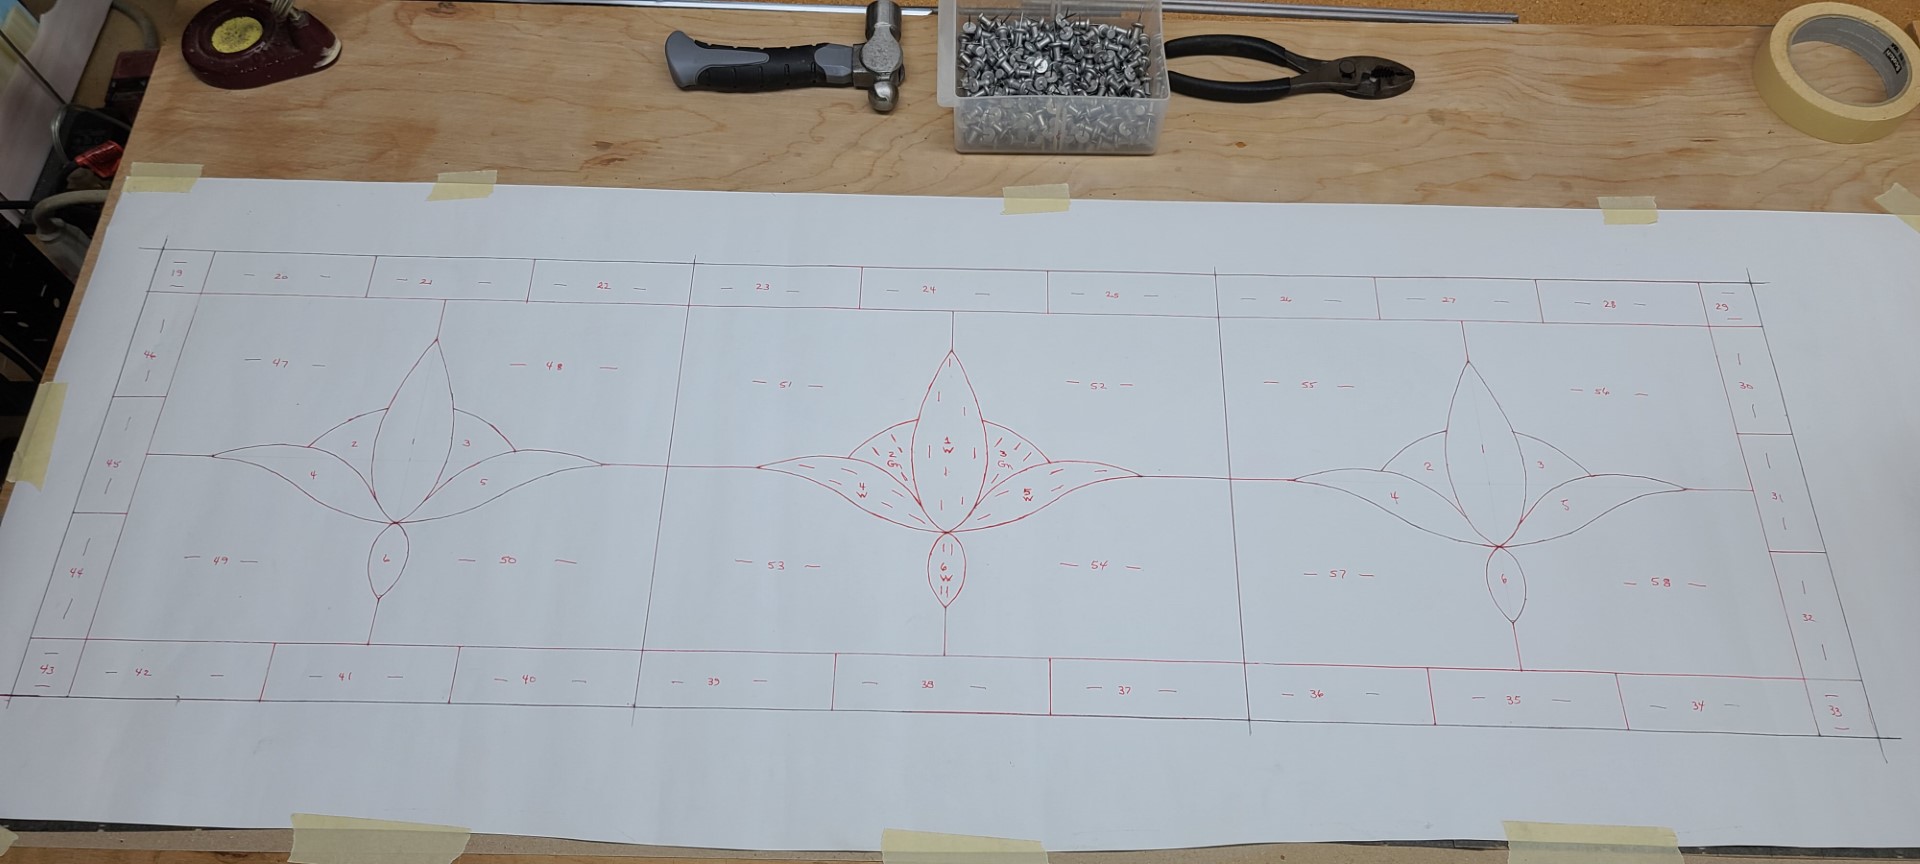
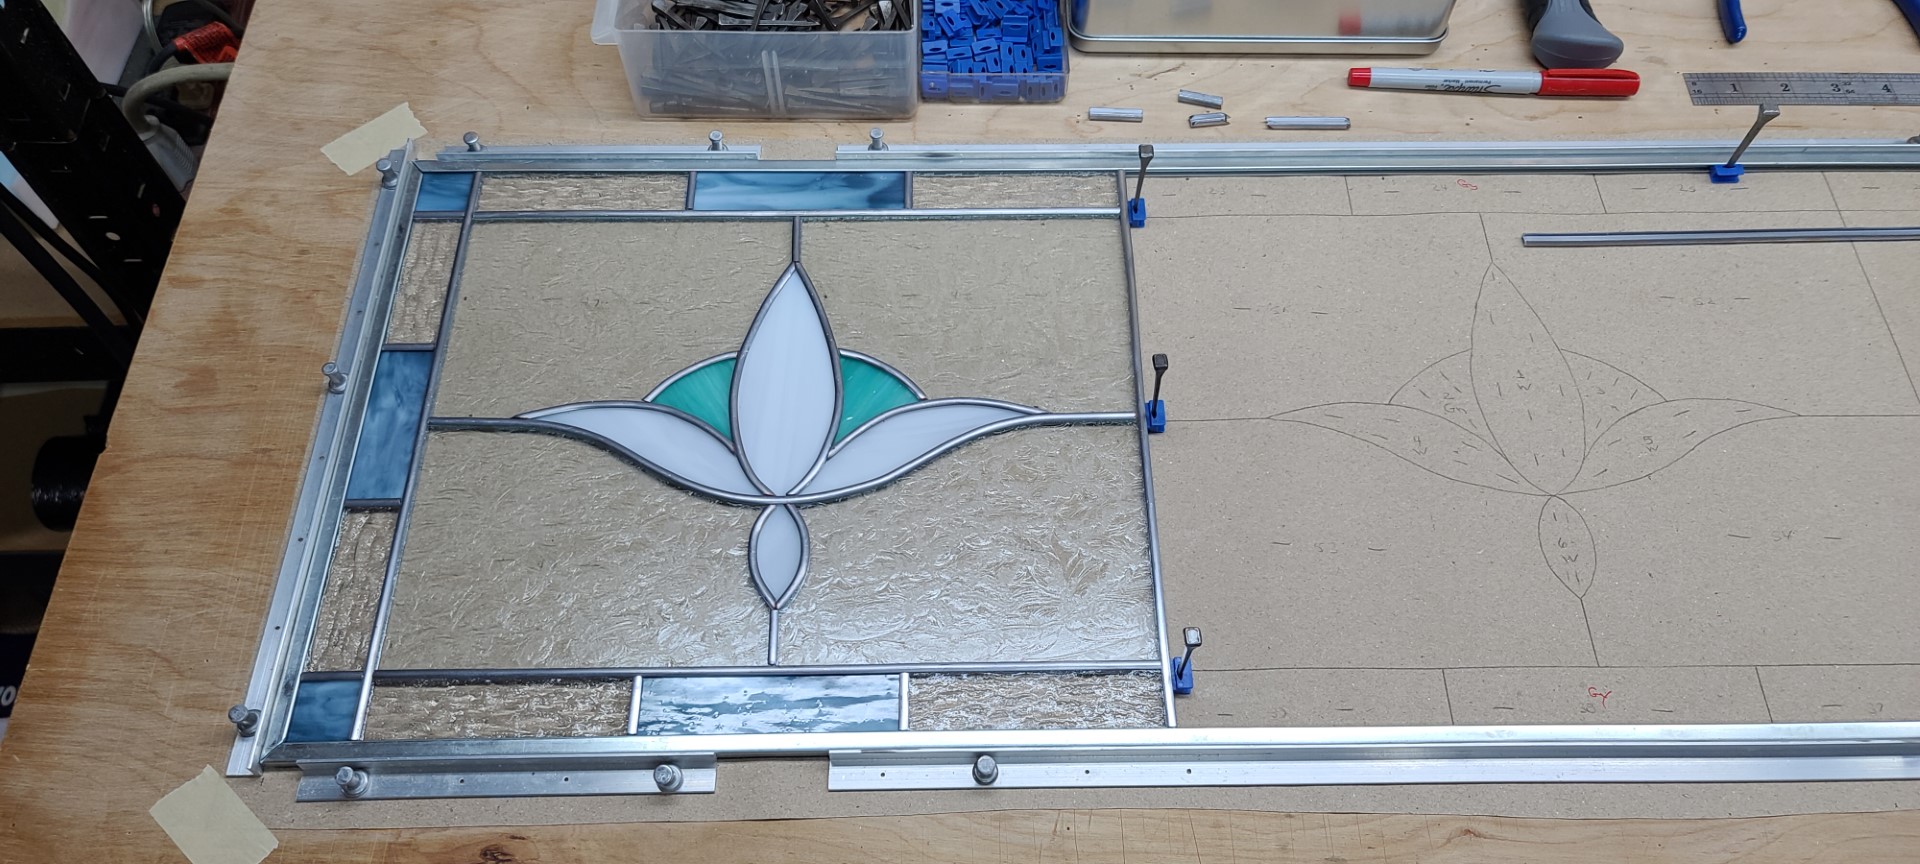
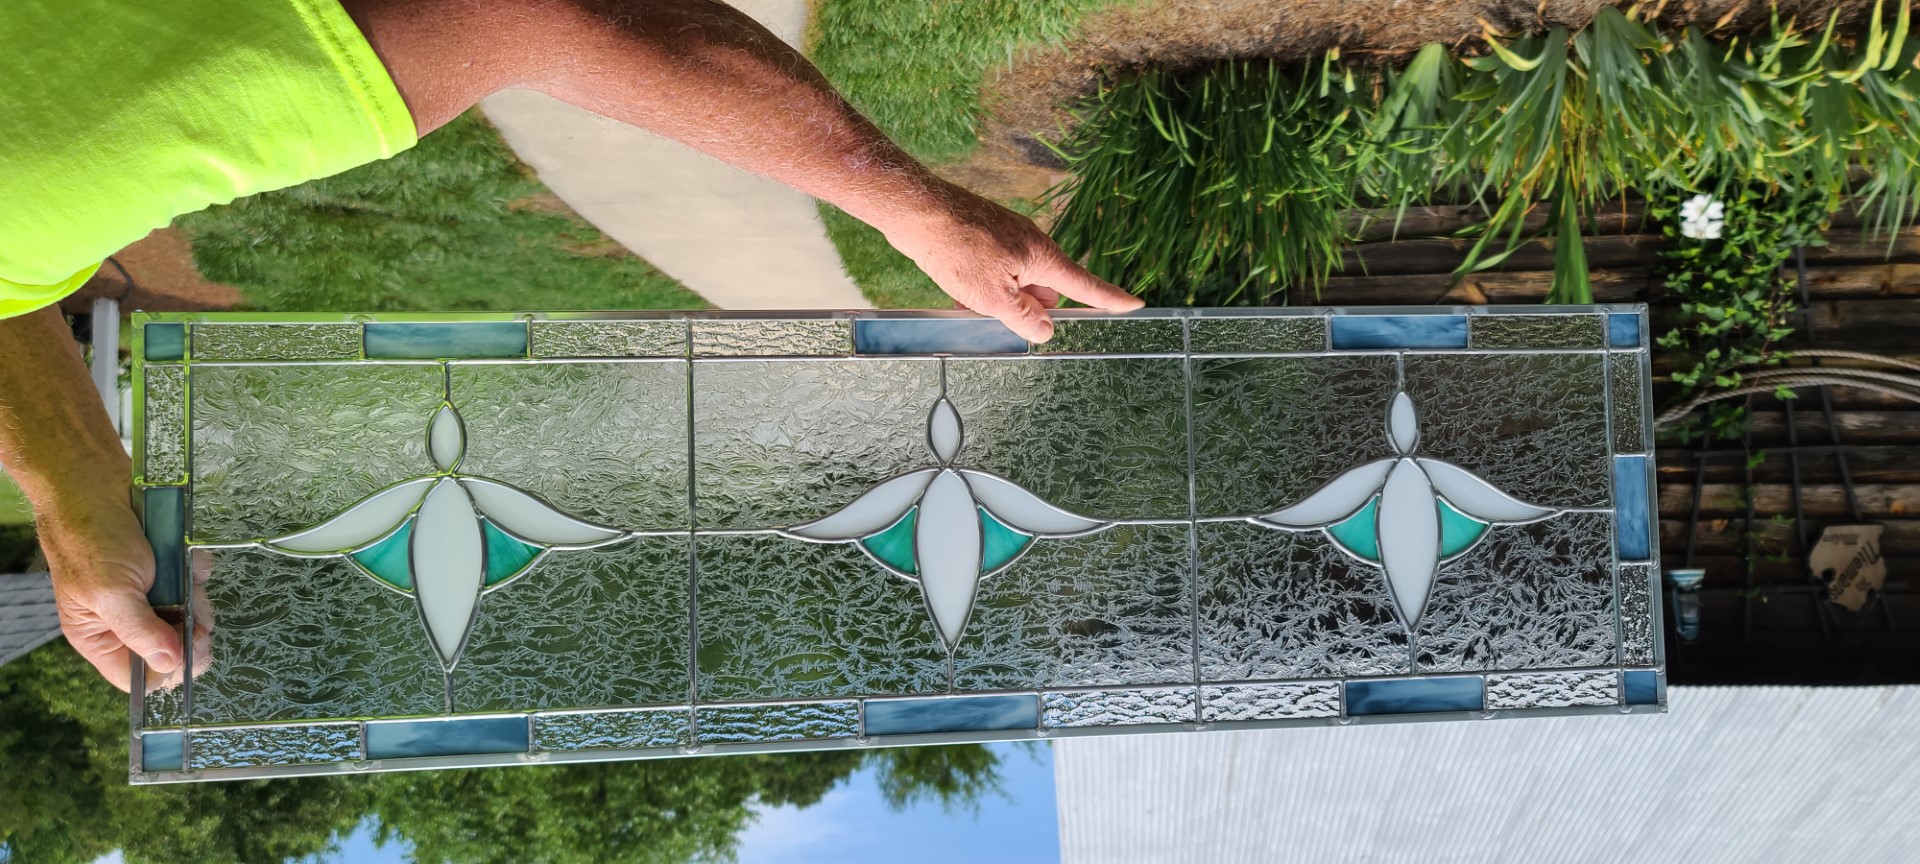
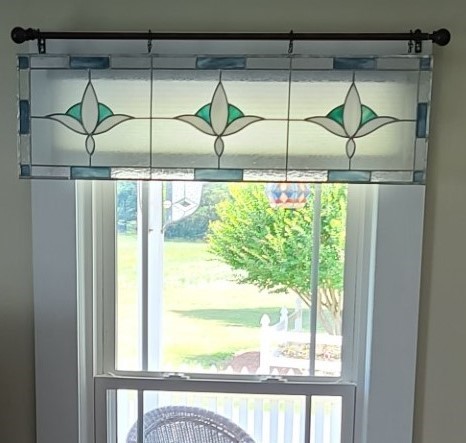
Not all Stained Glass projects need to be window panels, sun catchers, lamps or lanterns. My wife asked if I could come up with something to replace the header curtains in our living room. So I took some measurements of the windows and sat down to draw up a pattern and suggested glass colors for her to approve. The resulting 40″x11.5″ and 58 piece panel(s) (we have two windows in the living room) is shown below. The panels are assembled using lead came and they hang from the existing curtain rods using decorative chain.
Other Misc Stained Glass Projects
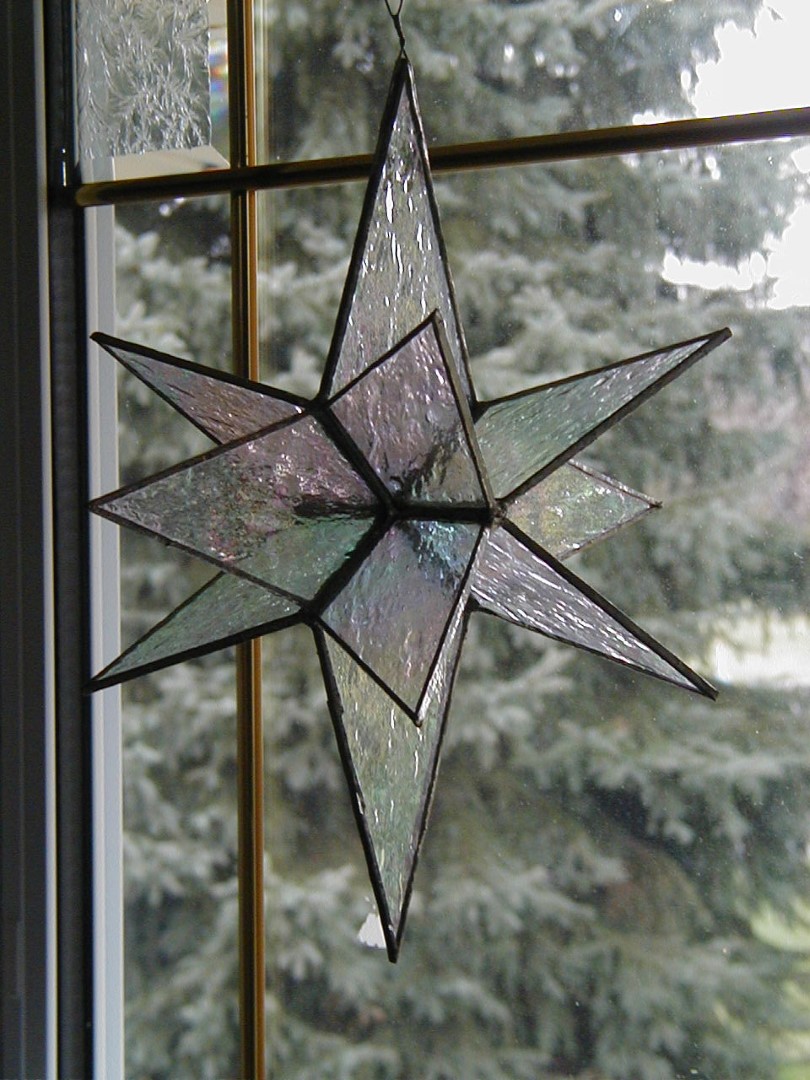
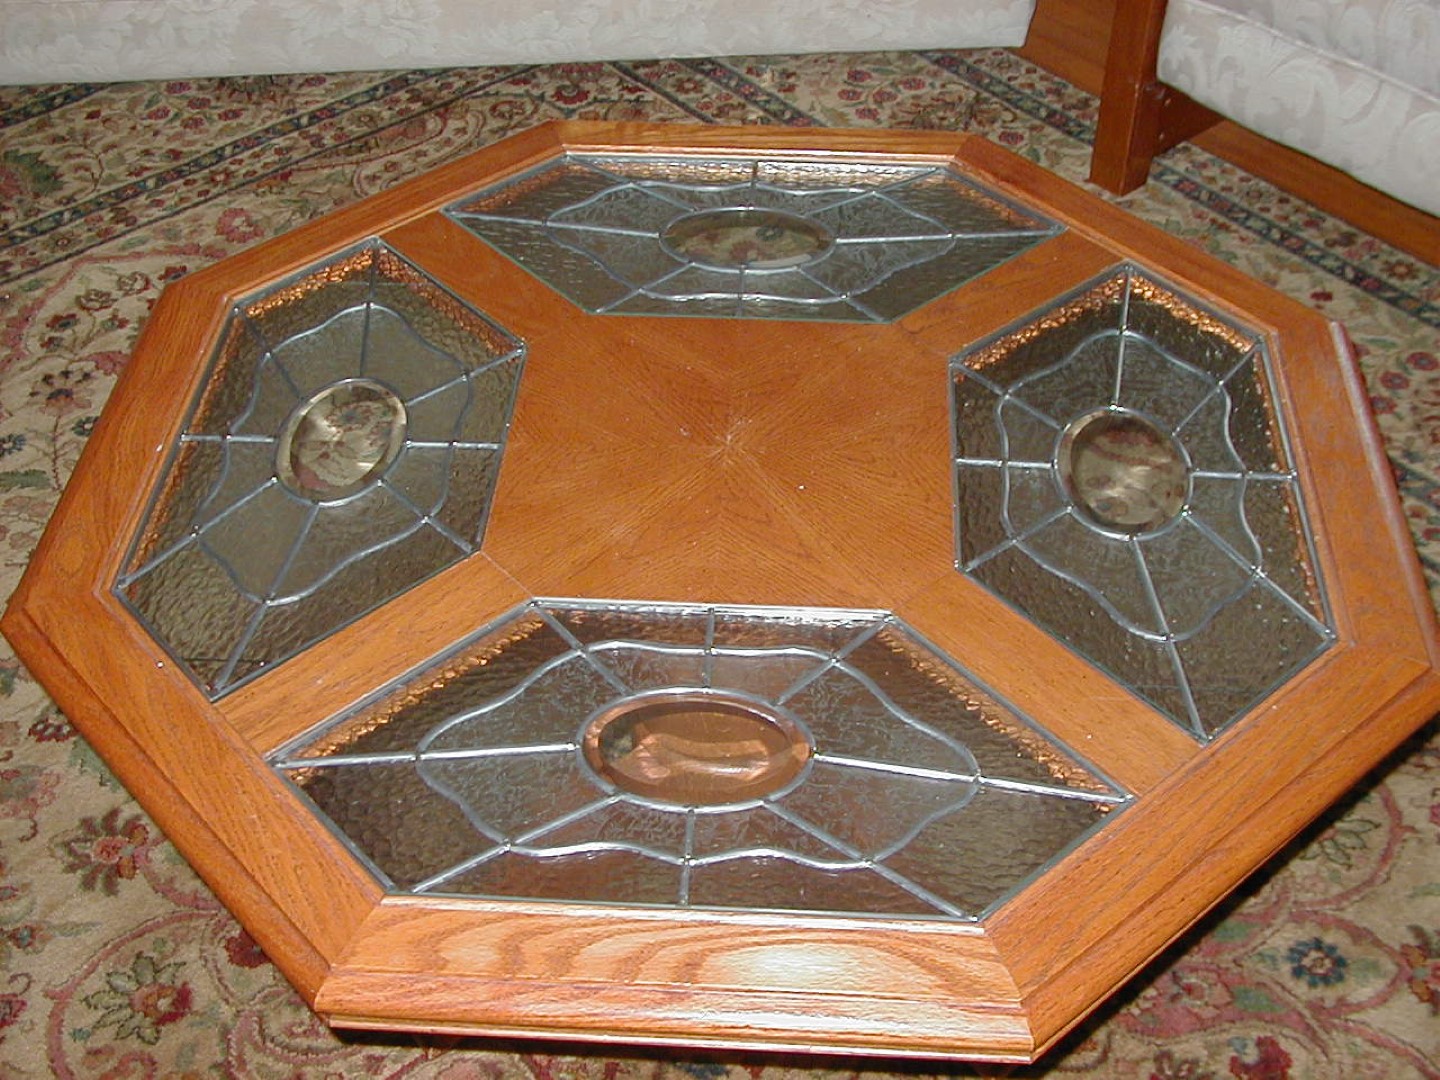
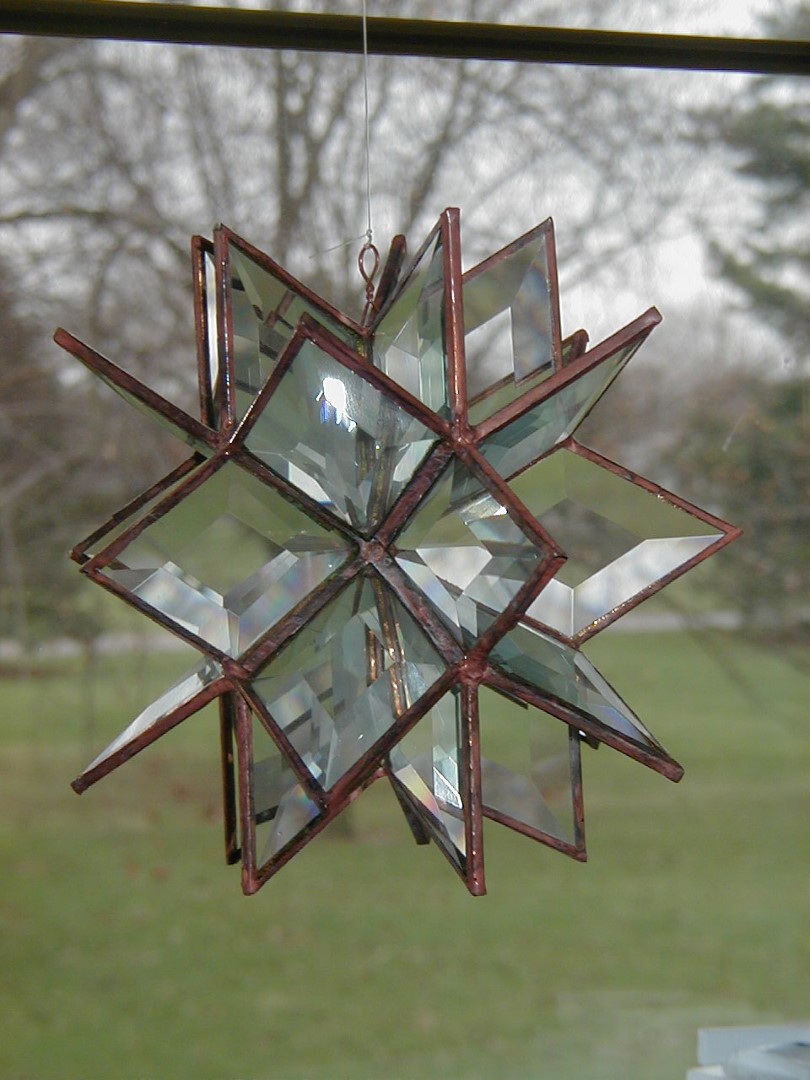
Below are examples of some other kinds of Stained Glass projects you might try. The stars are both good starter projects and will introduce you to 3-D assembly. The star on the far right is made up of all clear glass bevels, all the same size. You just foil the edges of each bevel and solder all of them together. Our coffee table originally had clear glass panels, but as you can see, I could not let it stay that way. These use lead came, and for support clear glass panels are under the Stained Glass panels.
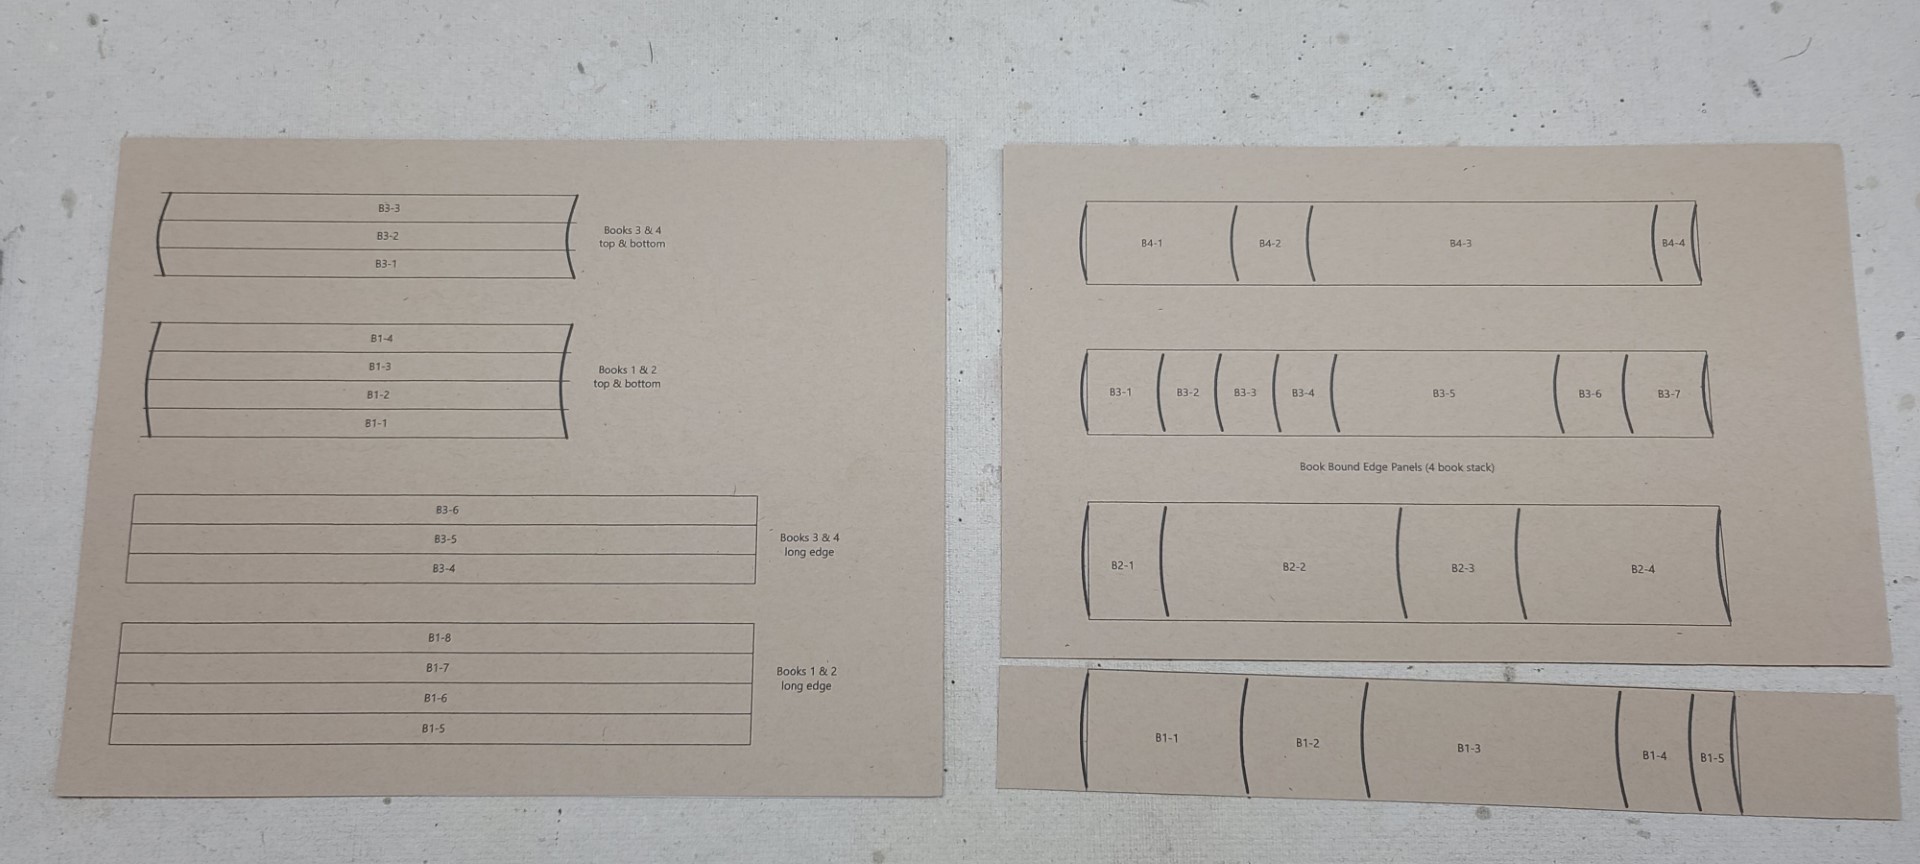
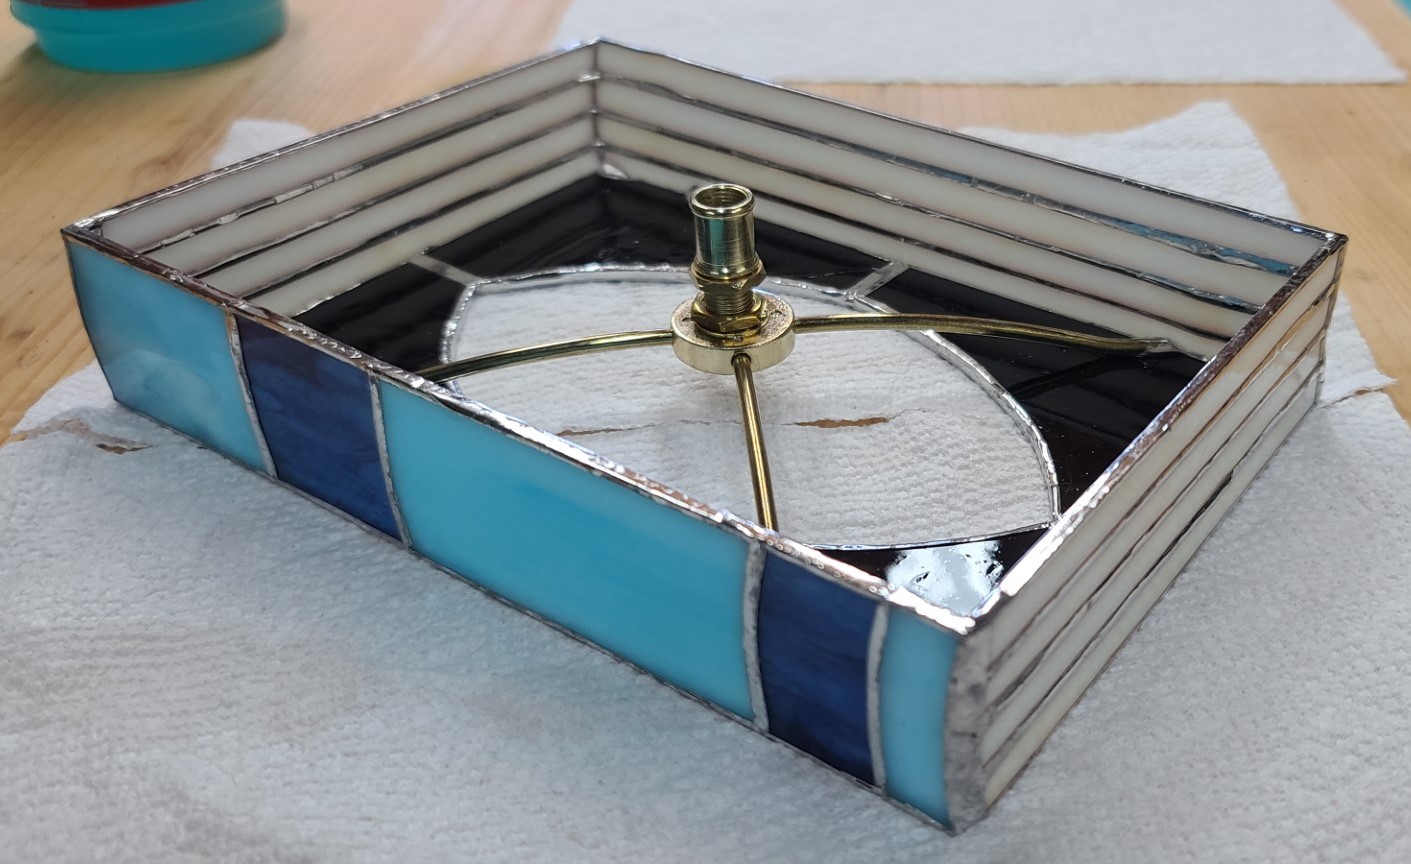
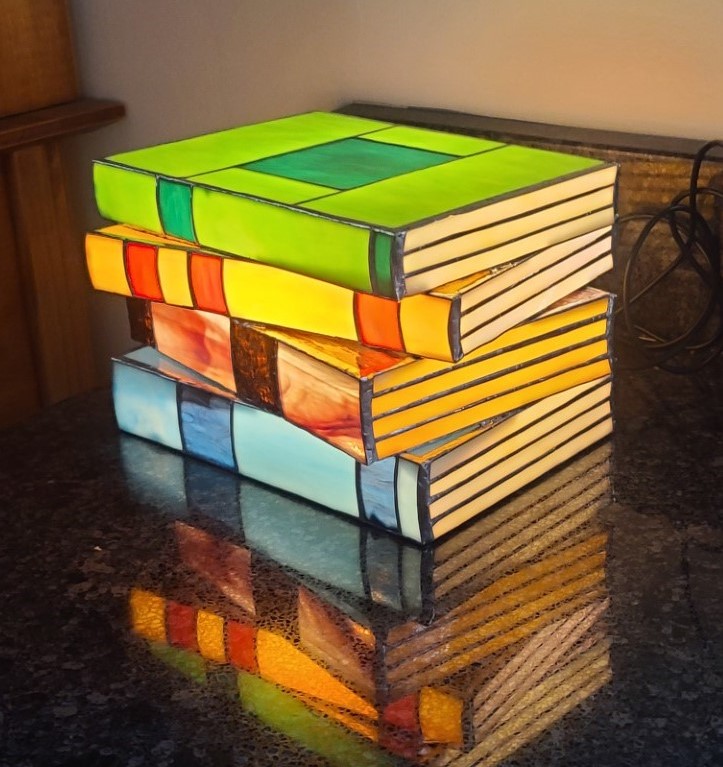
Stacked Books Table Lamp
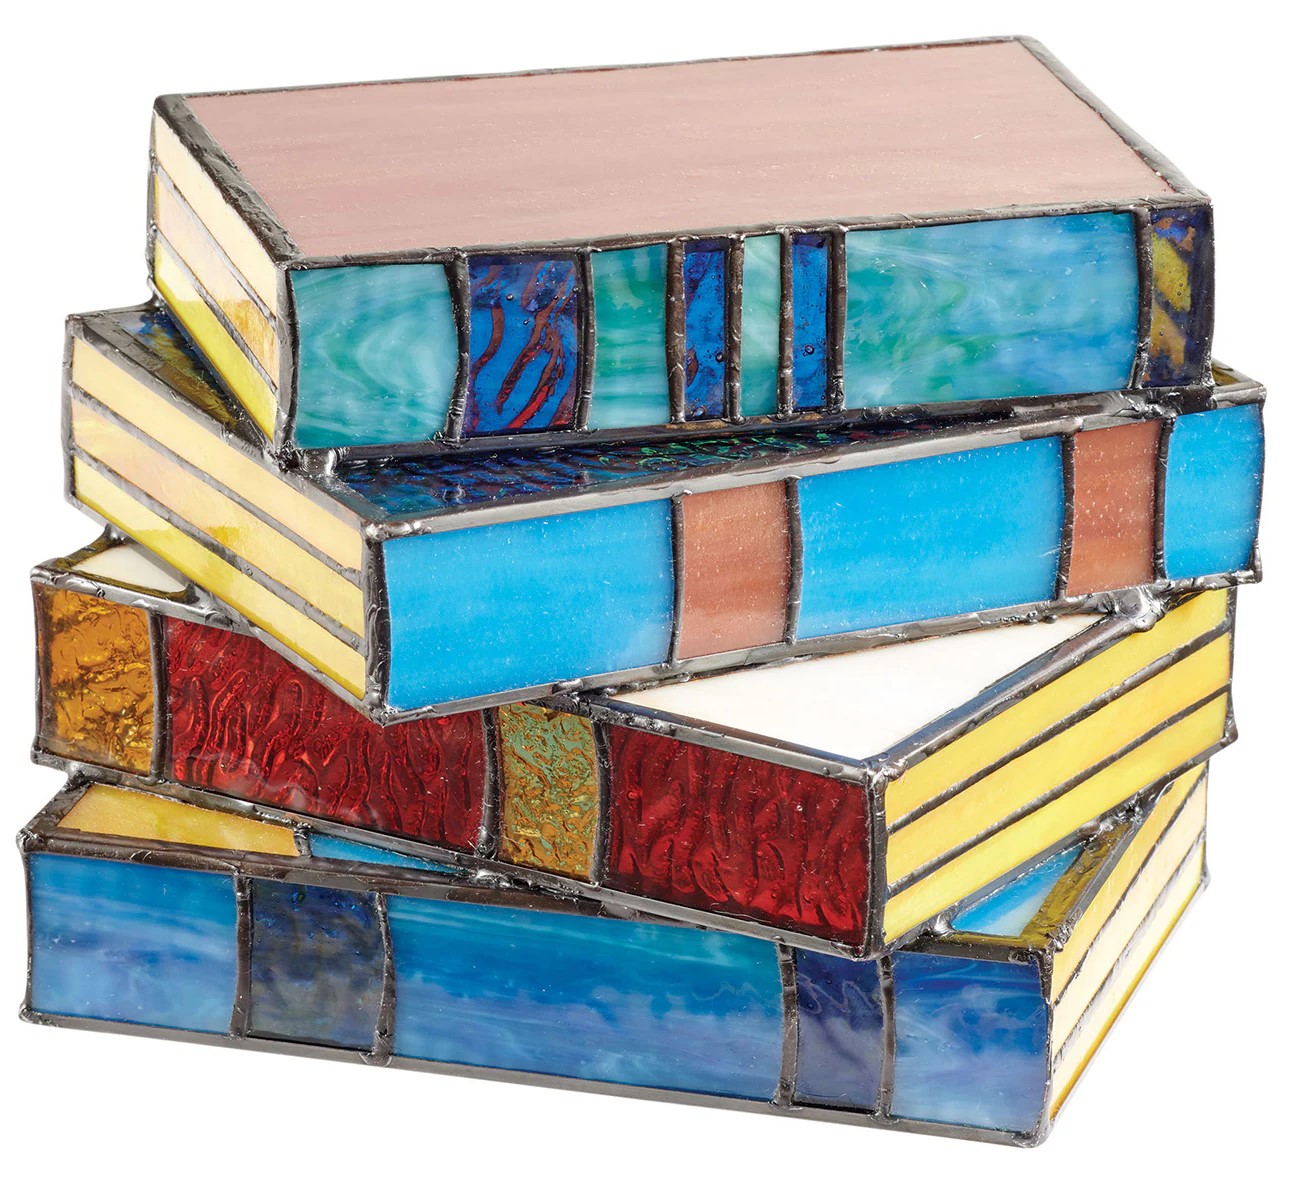
My oldest son and daughter-in-law in Ohio sent me an image (far left) of a Stained Glass books table lantern. I took that image, generated my own pattern, selected the various colors of glass I wanted to use, and set out to create another 3-D Stained Glass heirloom. The results are books that measuring 8″x5.5″ with varying thicknesses, and a total of 79 pieces. The stack is lighted using an LED bulb that's powered by a standard USB wall power box. I think it turned out real nice, and they both love it. Well done for an old man.
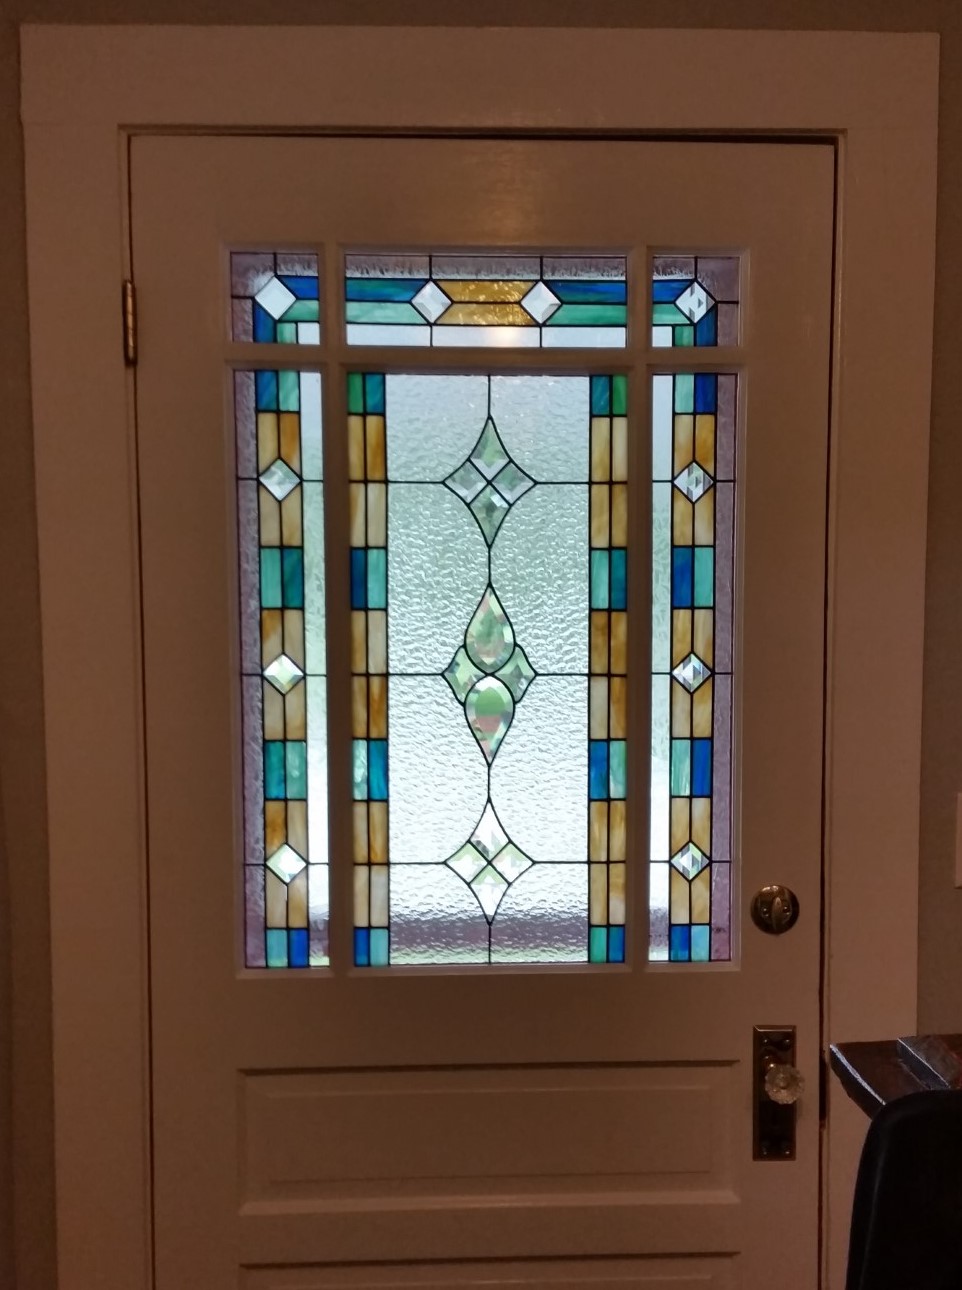
Our Home Front Door Panels
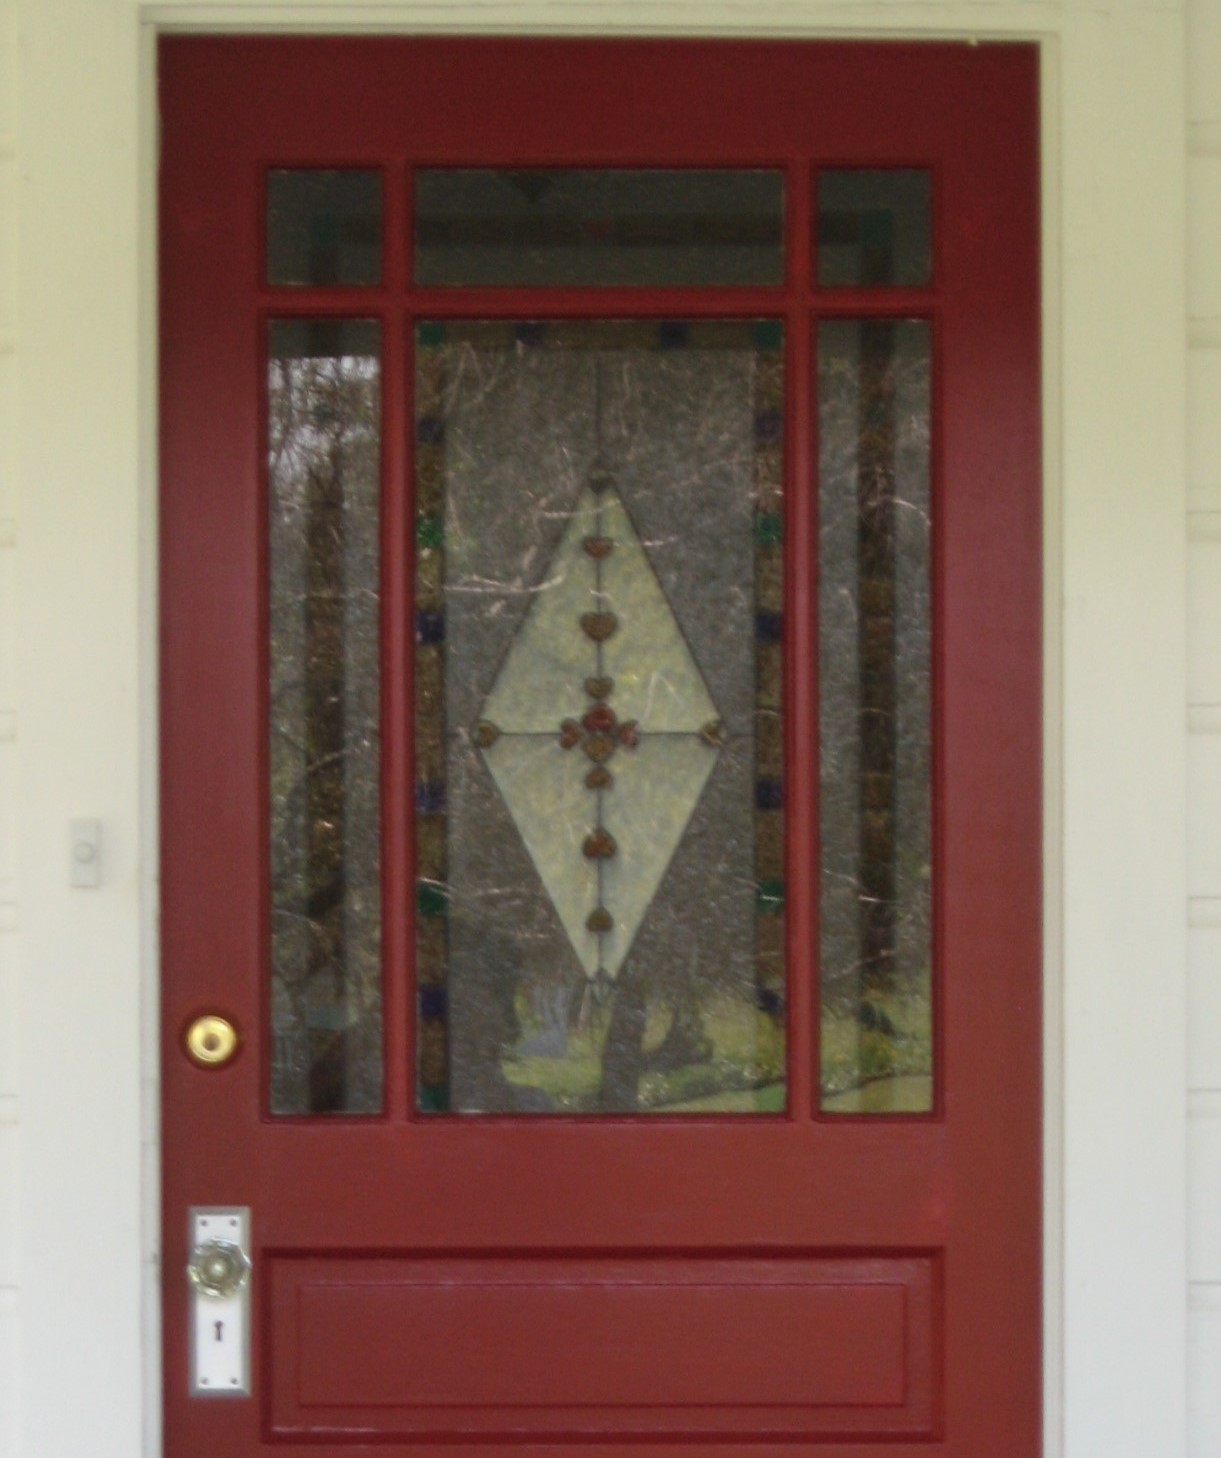
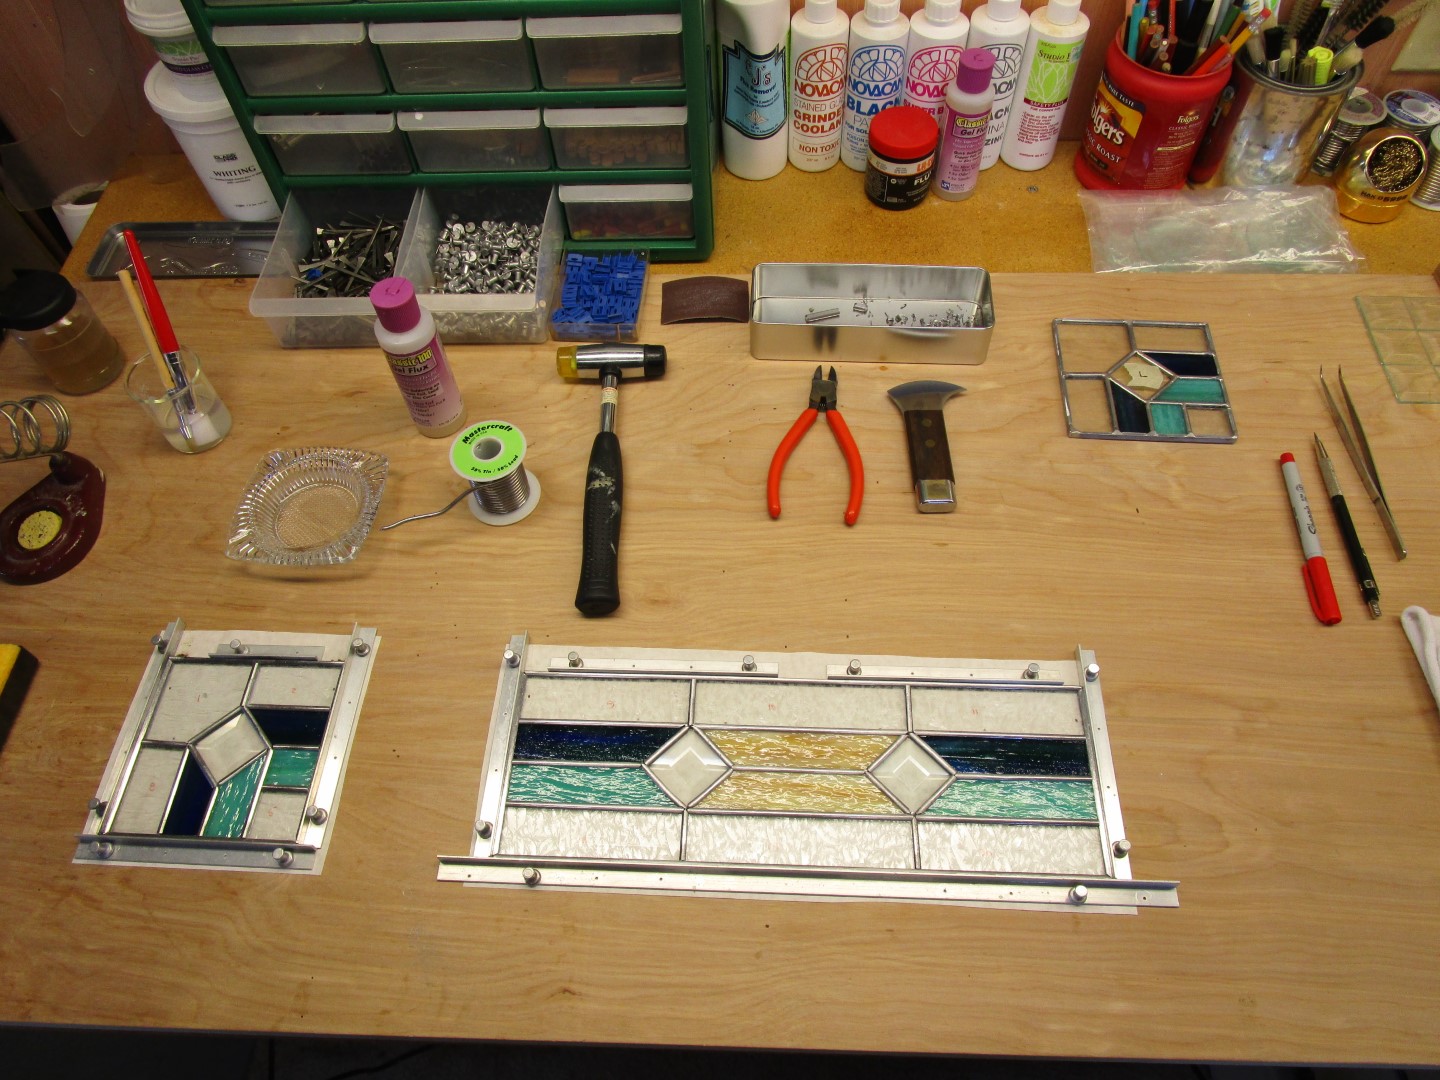
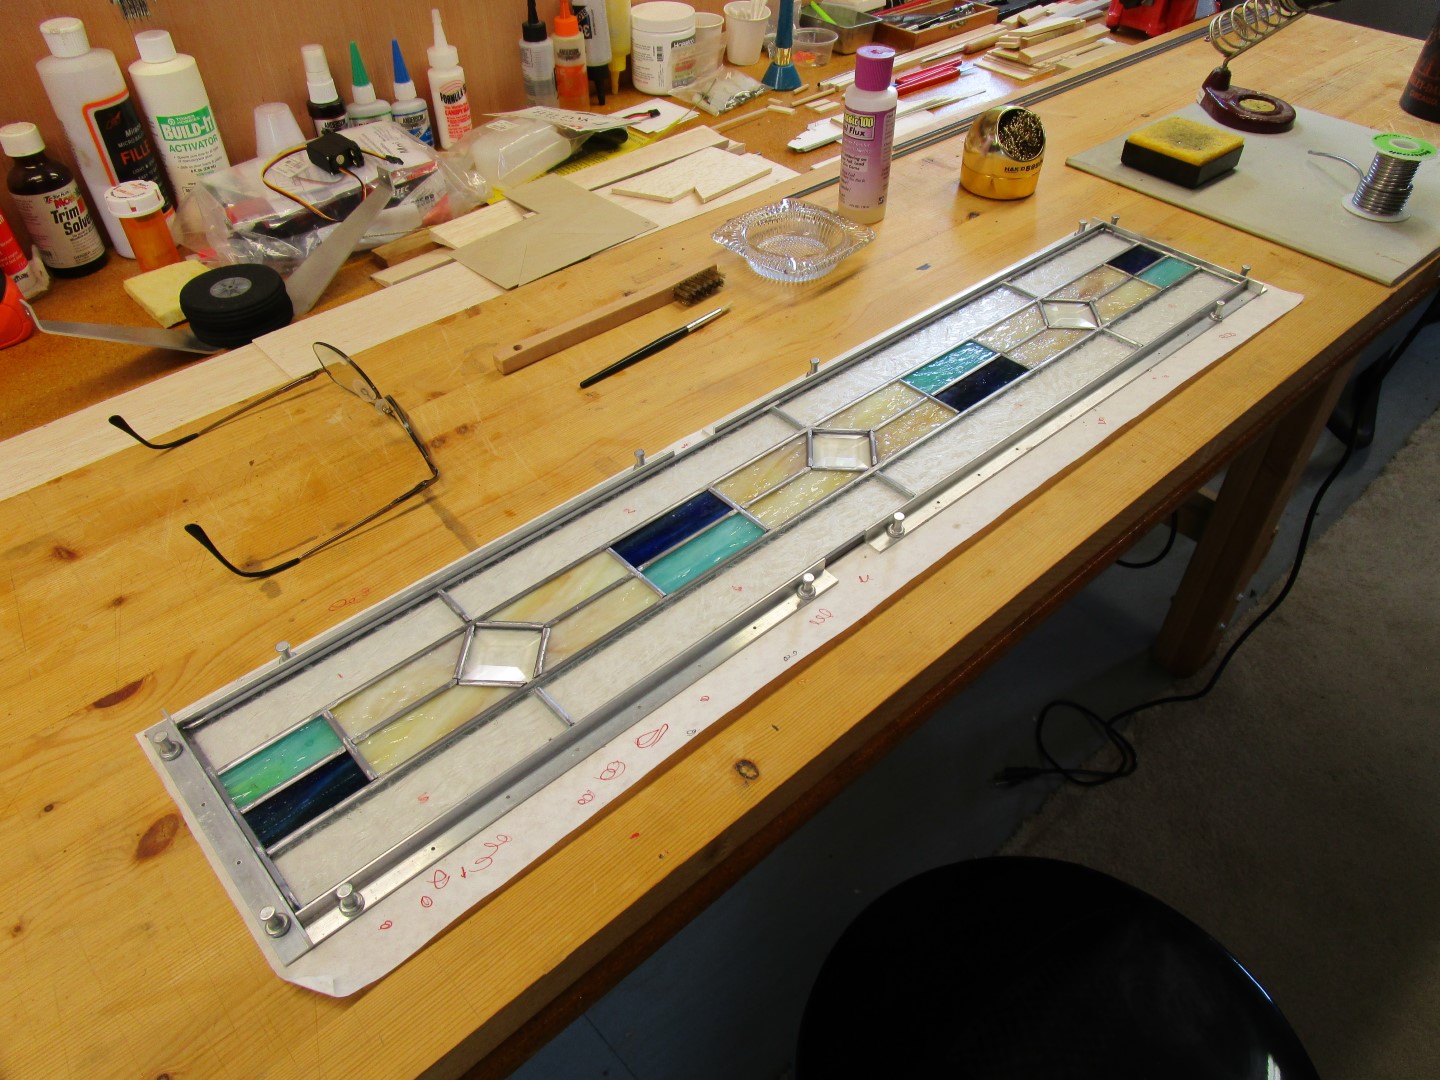
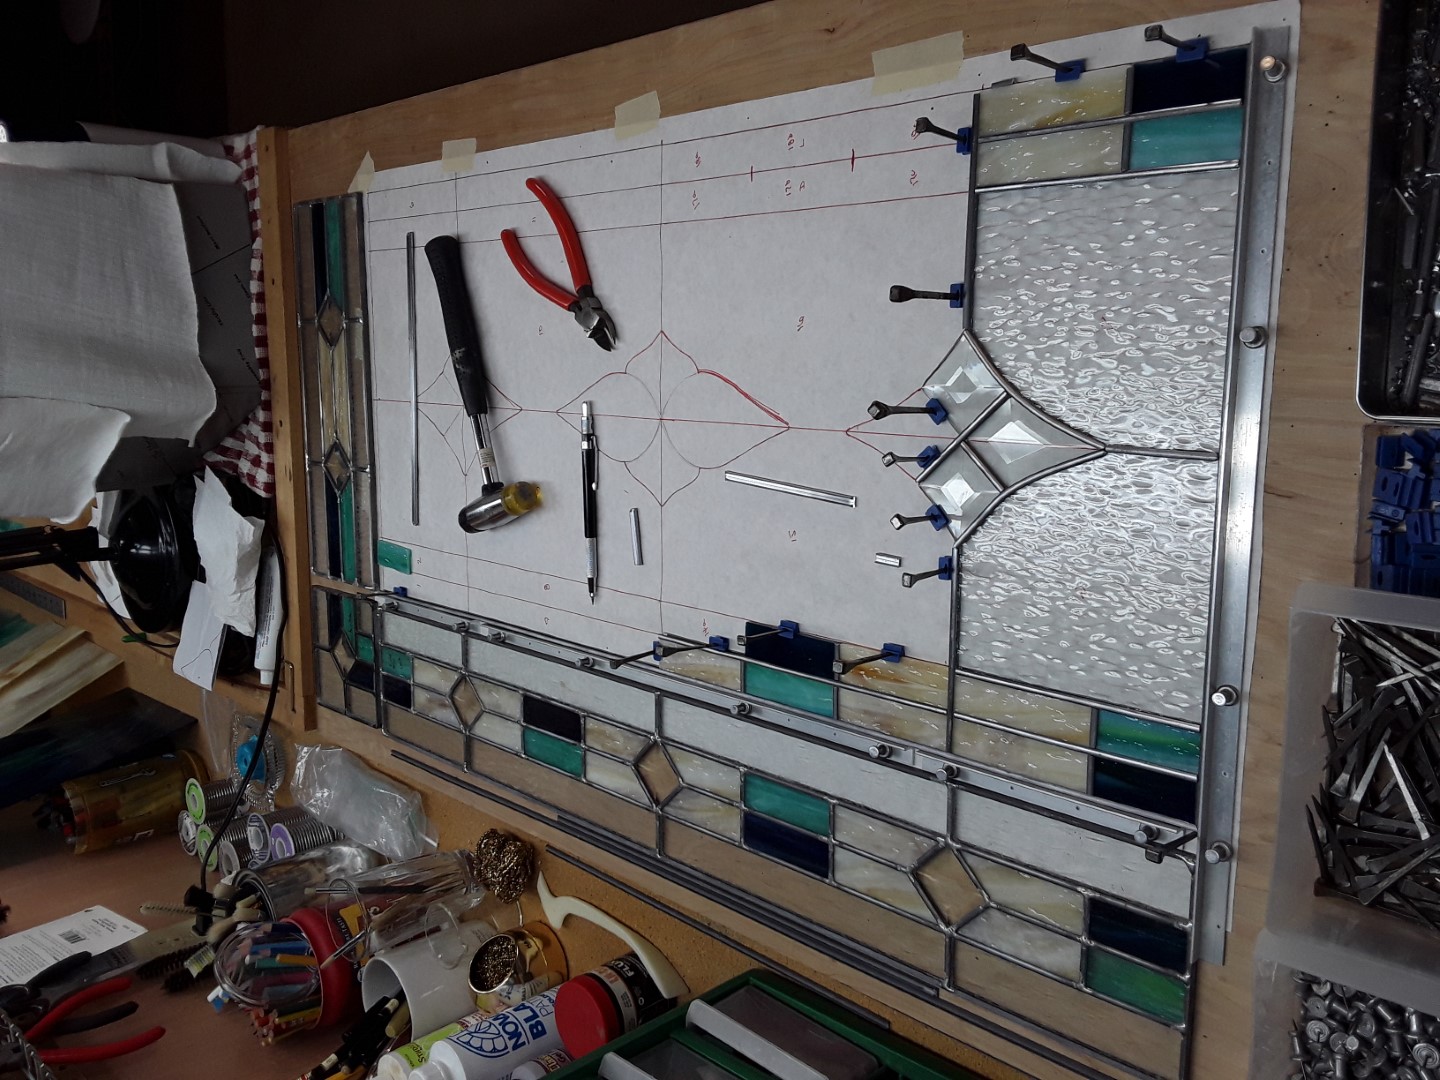
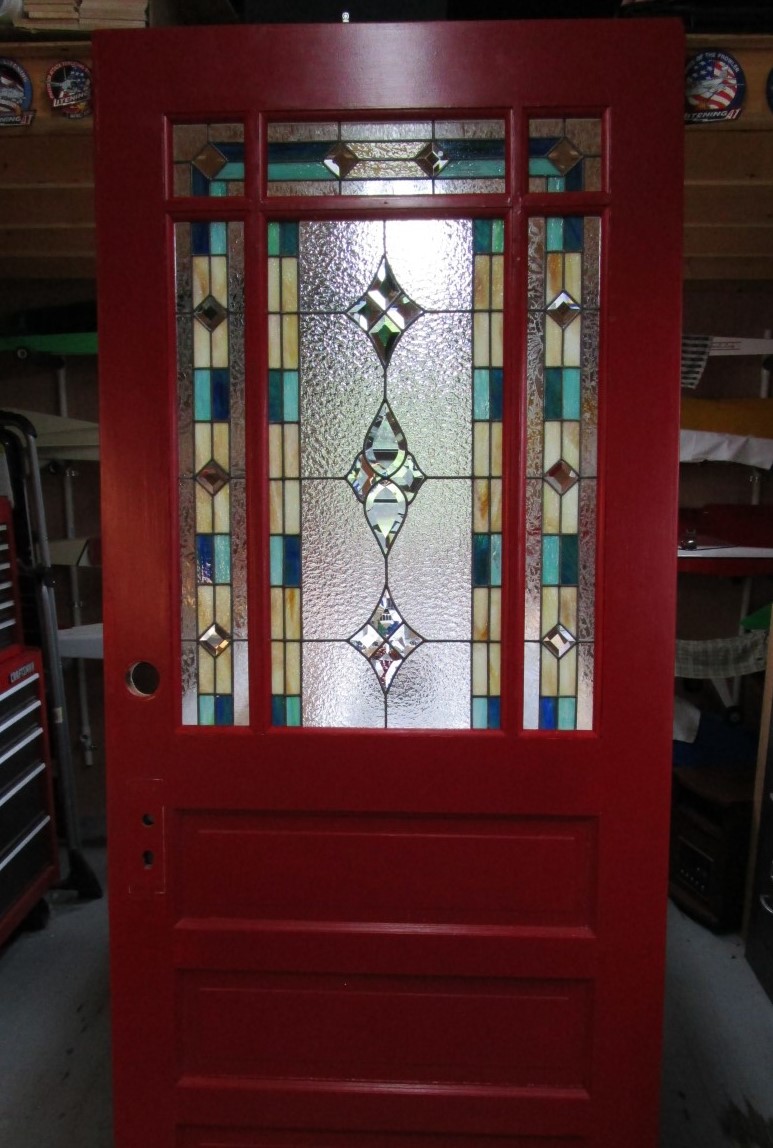
As I had stated earlier, we own an old 1906 farm home in North Carolina. The front door had several glass panels, which the prior owned had painted with fake stained glass patterns (top left image). Well, there was NO WAY that was going to remain that way. I took detailed measurements of each opening in the door and laid out my patterns for the replacement Stained Glass panels using lead came and some nice bevel clusters. The results are displayed for you below, and I'm pretty sure you would agree this is better than the painted stained glass panels.
 All HTML & CSS Coded by Larry