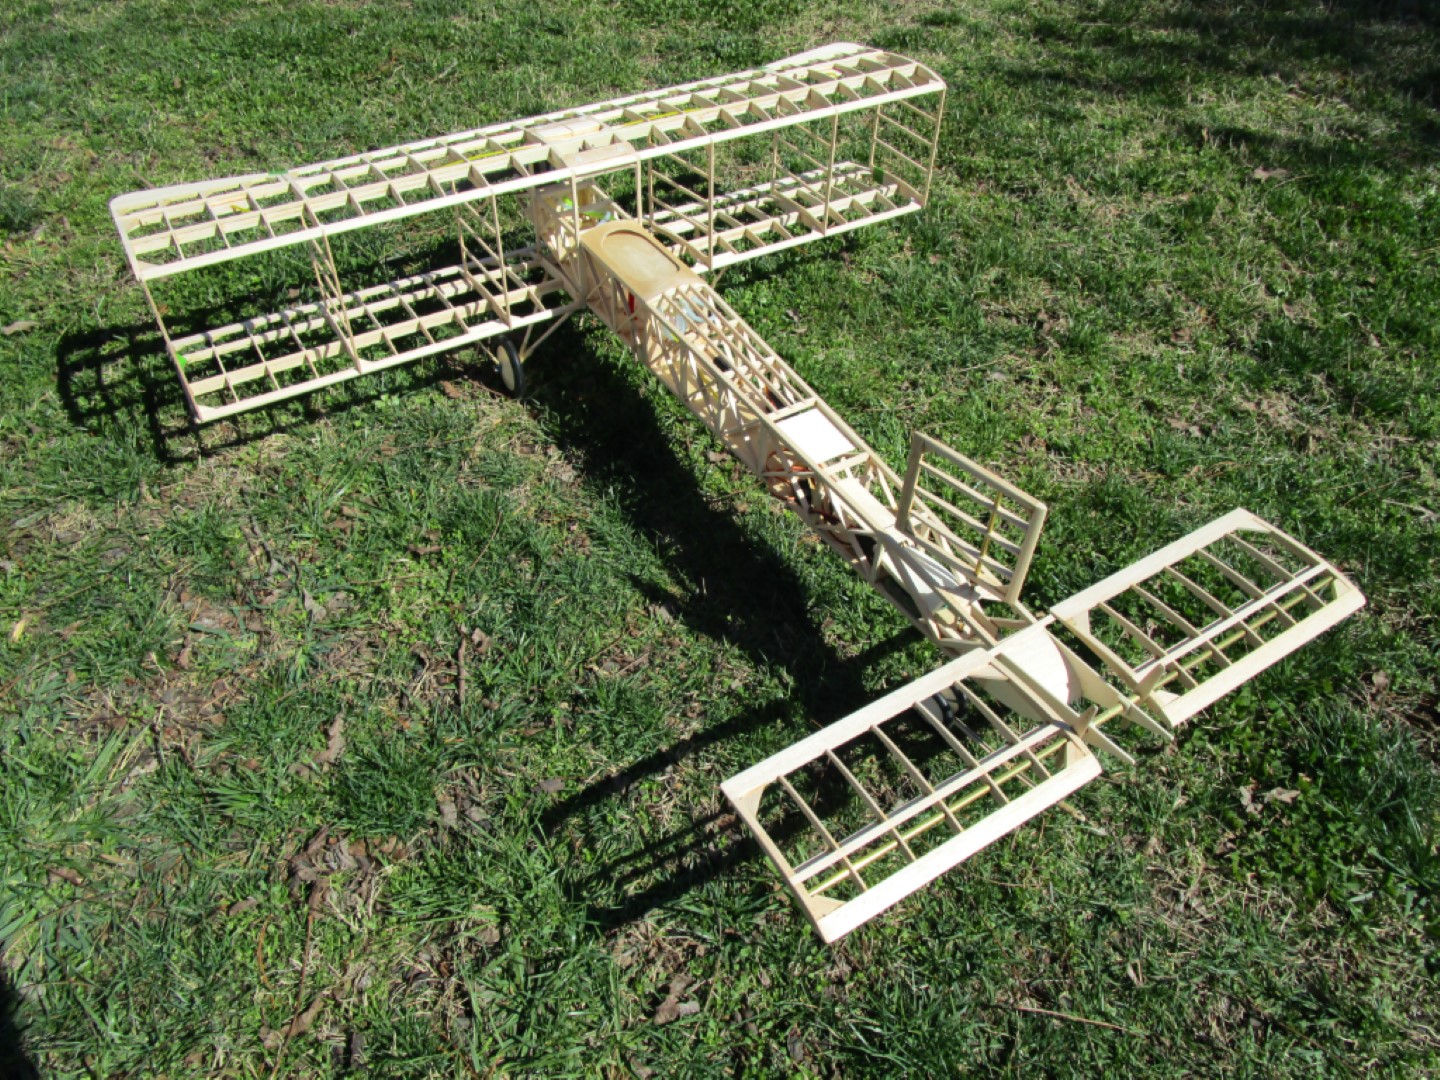

My “Build of the Month” (BOTM) Series was created to help those who are trying to get started in scratch building their own Radio Controlled (RC) Model Aircraft from plans.
"Aerofred.com" and "Outerzone.co.uk" are two of my favorite web sites to obtain free RC model airplane plans for my new builds. Additionally, they like to post images of Builder's models, and both sites have posted my RC model images and build descriptions under the heading of the associated aircraft model. Other good sources for free plans are: "Hip Pocket Aeronautics Builders' Plan Gallery", "Vintage & Old-Timer RCM Free Plans", "James Hatton Blog Free Plans and Articles", "Hlsat Blog RCModeler Free Plans and Articles", and "Don Dewey Memorial RCM Plans Collection."
If you are currently not an active builder, and you would like to be, my BOTM Series is a great place to start. If you have an RC model aircraft that you would like to see featured in this section or feel others may find interesting, please let me know and I will make every attempt to find scratch build plans, photos, and maybe even a published build article, which I will then post in one of my future BOTM editions. Just send me an email @: Build of the Month.
All prior “BOTM” Editions are now available for your viewing pleasure @:
BOTM Series 2023 Archive
BOTM Series 2024 Archive
BOTM Series 2025 Archive
BOTM Series 2026 Archive
NOTE - You can view all images in a “Spotlight Box” by simply clicking on any image.
Build of the Month Series - October 2026 Edition
I hope you enjoyed last months BOTM Edition on the 1912 Blackburn Type D Monoplane. If you have an RC model that you would like to see featured in this section or feel others may find interesting, please let me know and I will make every attempt to find scratch build plans, images, and maybe even a published build article, which I will then post in a future edition. Just send me an email @: Build of the Month.
Ok, now lets see what I have for the month of October 2026. For the 3rd Edition of my “Early Pioneers” Mini-Series, how about another French designed aircraft. Given this requirement, this month features an RC model of the 1909 Blériot XI, one of the most famous accomplishments of the pioneer era of aviation.
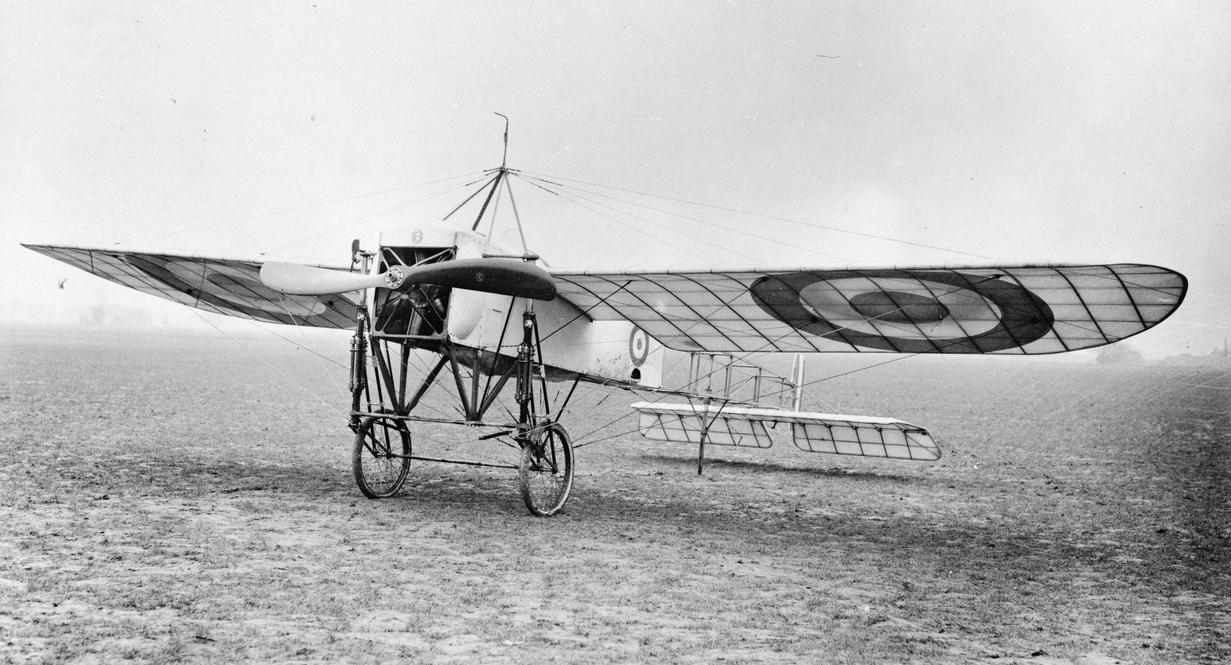
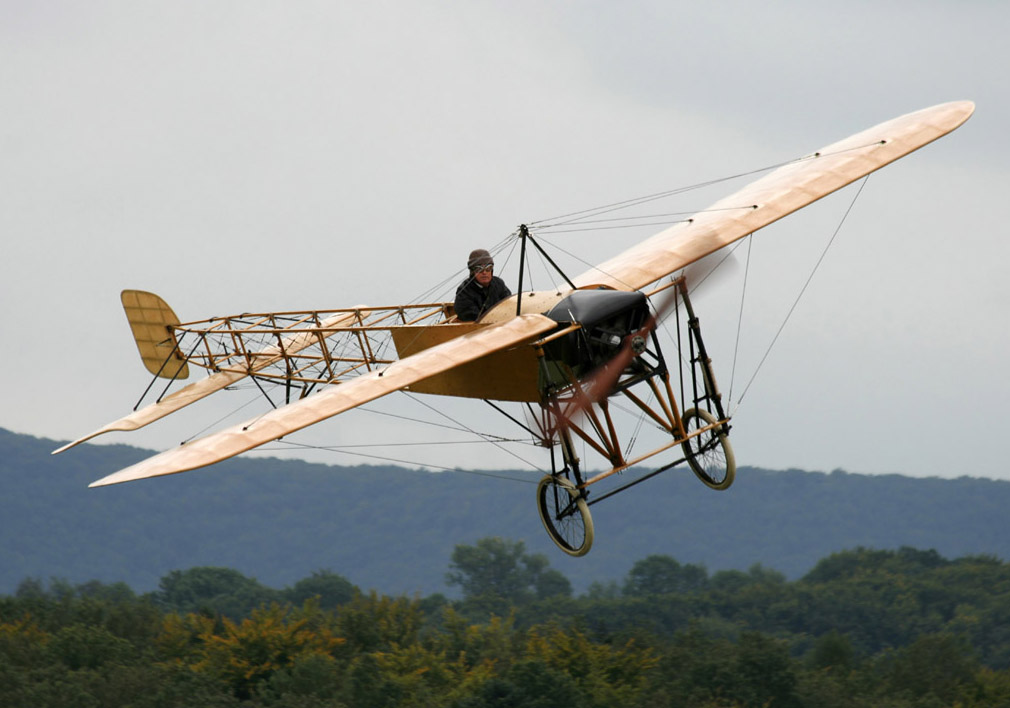
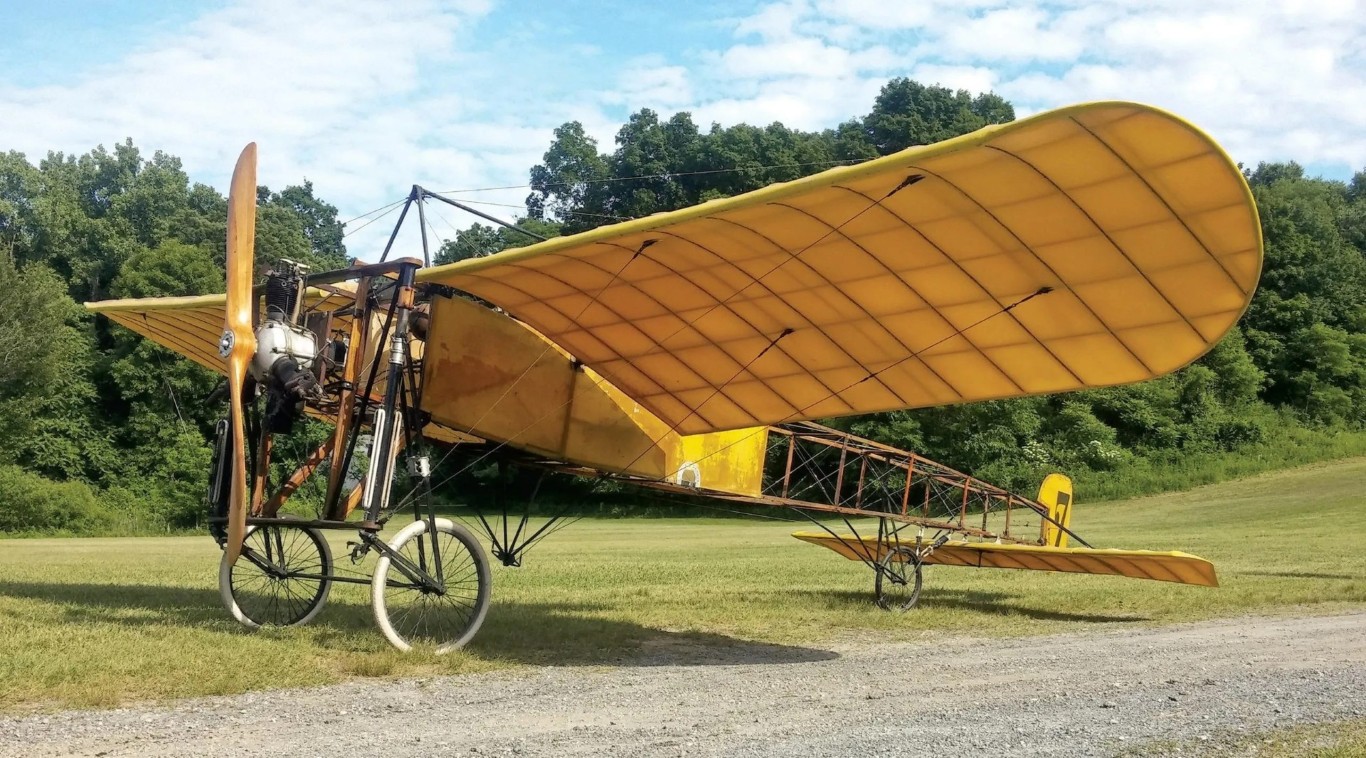
Images Source: Wikipedia, and Hemmings.com.
The Blériot XI is a French aircraft from the pioneer era of aviation. The first example was used by Louis Blériot to make the first flight across the English Channel in a heavier-than-air aircraft, on 25 July 1909. More than any other event in the early history of flight, this epic flight from Calais, France, to Dover, England., underscored the potential of the airplane as both a strategic weapon capable of carrying war to the enemy heartland and as a vehicle of commerce capable of binding countries together. European and Asian countries equipped their embryonic military air units with the famous monoplane, and pilots in Europe and the United States purchased Blériot machines to enter aeronautical competitions and to meet exhibition dates. Blériot emerged as one of the leading first-generation manufacturers of aircraft, and he arranged for the production of additional machines under license in Europe and the United States.
The aircraft was produced in both single and two-seat versions, powered by several different engines, and was widely used for competition and training purposes. Military versions were bought by many countries, continuing in service until after the outbreak of World War I in 1914. Two restored examples, one each in the United Kingdom and the United States, of original Blériot XI aircraft are thought to be the two oldest flyable aircraft in the world.
The Blériot XI, largely designed by Raymond Saulnier, was a development of the Blériot VIII, which Blériot had flown successfully in 1908. Like its predecessor, it was a tractor-configuration monoplane with a partially covered box-girder fuselage built from ash with wire cross-bracing. The principal difference was the use of wing warping for lateral control. The tail surfaces consisted of a small balanced all-moving rudder mounted on the rearmost vertical member of the fuselage and a horizontal tailplane mounted under the lower longerons. This had elevator surfaces making up the outermost part of the fixed horizontal surface; these "tip elevators" were linked by a torque tube running through the inner section. The bracing and warping wires were attached to a dorsal, five-component "house-roof" shaped cabane consisting of a pair of inverted V struts with their apices connected by a longitudinal tube, and an inverted four-sided pyramidal ventral cabane, also of steel tubing, below. When first built it had a wingspan of 7 m (23 ft) and a small teardrop-shaped fin mounted on the cabane, which was later removed.
Like its predecessor, it had the engine mounted directly in front of the leading edge of the wing and the main undercarriage was also like that of the Type VIII, with the wheels mounted in castering trailing arms which could slide up and down steel tubes, the movement being sprung by bungee cords. This simple and ingenious design allowed crosswind landings with less risk of damage. A sprung tailwheel was fitted to the rear fuselage in front of the tailplane, with a similar castering arrangement.
- Full Scale 1909 Blériot XI General Characteristics:
- Crew: One
- Wingspan: 7.79 m (25 ft 7 in)
- Wing Area: 14 m2 (150 sq ft)
- Length: 7.62 m (25 ft 0 in)
- Height: 2.69 m (8 ft 10 in)
- Power Plant: 1 × Anzani 3-cyl. fan 3-cyl. air-cooled fan-style radial piston engine, 19 kW (25 hp)
- Propellers: 2-bladed Chauvière Intégrale, 2.08 m (6 ft 10 in) diameter
- Empty weight: 230 kg (507 lb)
- Maximum speed: 75.6 km/h (47.0 mph, 40.8 kn)
- Service ceiling: 1,000 m (3,300 ft)
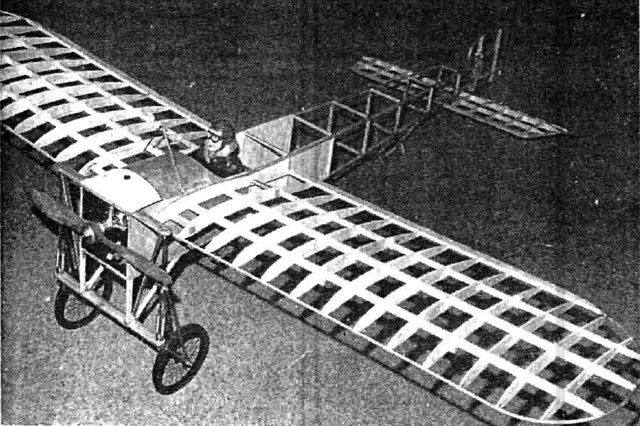
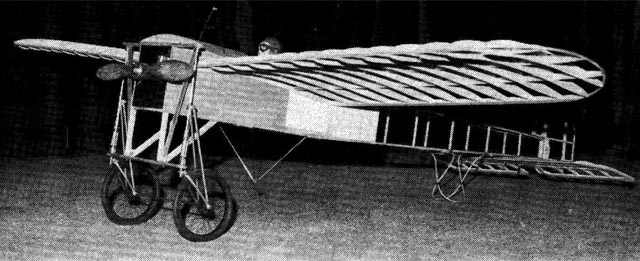
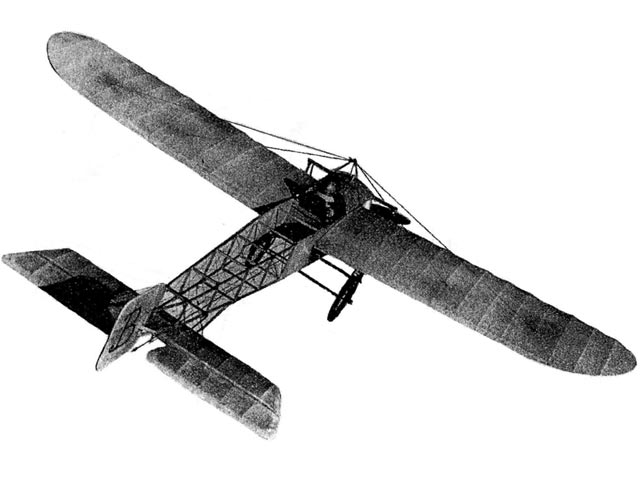
Images Source: Outerzone.
The 1909 Blériot XI RC model in this months BOTM Edition can be built from a set of free full size plans, and the David Boddington two-part article from December 1979 and January 1980 editions of Radio Control Models & Electronics, which are available @: Outerzone.
- 1909 Blériot XI RC Model Specifications:
- Aircraft Type: Scale Pioneer Aviation
- Flight Performance Category: General Sport
- Wing Span: 49″
- Wing Chord: 10.75″
- Wing Area: 526 sq.in.
- Horizontal Stab/Elevator Span: 17.5″
- Horizontal Stab/Elevator Chord: 5″
- Total Length: 38.25″
- Center of Gravity Location: 2.7″ aft of wing LE
- Required No. of Channels: 3 - Throttle, Rudder, and Elevator
- Landing Gear: Tail Dragger
- Glow Fuel Engines: .15 - .20 2-stroke
- Electric Powered: Output of 300 - 400 Watts, 40 - 60 amp ESC, 3-Cell 45C LiPo pack of around 2,200 - 3,300mah.
Much of the following description are extracts from December 1979 and January 1980 editions of Radio Control Models & Electronics, written by David Boddington. Construction of the horizontal stabilizer/elevator is straightforward. Being a flat bottom airfoil, these can be built directly over the plan sheet covered by wax paper. The center spar is built up in the middle to full height, drilled for aluminum tube sleeves and reinforced with plywood on each side. Use mini barbed hinges for fixing the elevator, reinforcing the trailing edge of the horizontal stabilizer and leading edge of the elevator at these points with pieces of 6mm balsa. Construct the outline of the rudder directly over the plan sheet by laminating with three layers of 0.8mm plywood or alternative layers of 0.4mm plywood and 0.4mm balsa. Pins fixed at regular intervals around the inside of the rudder outline will act as a former for this operation. Dampening the 0.8mm ply strips with hot water before laminating makes them easier to bend. When the basic construction of the rudder is complete taper the 3x6mm uprights and crosspieces to blend in with the
laminated outline. The rudder horn is fitted after covering.
The wing build for this model is not something you would normally find in most scratch built models. The wing ribs are made from 1.5mm balsa, and have small rectangular cut-outs to slide the two 3x9mm and one 2x6mm spars through each of the ribs. After cutting all of the wing spars and trailing edges accurately to length, remembering to cut the root ends to the dihedral angle, place the spars and trailing edges over the plan, side by side, and mark the positions of one side of each of the ribs with a soft pencil. Slide all the ribs onto the spars roughly positioning them adjacent to the marks. Glue the ribs to their marks with wood glue, pin down the 6x18mm balsa trailing edge slotted for the ribs, over the plan sheet and glue the rib/spar structure to it. over the plan and glue the rib/spar structure to it. The 3mm hardwood dowel leading edge can then be fitted but first drill the tip end of the dowel and insert a short length of 18g. piano wire.
Boddington shows alternative methods of bracing the fuselage. The first method is to drill vertically through the longerons on either side of the upright. This way is probably more scale-like in appearance but requires care in drilling the holes — just large enough for a fine needle and the thread to pass through. It is easier to pre-drill these holes before starting construction of the fuselage sides, The alternative method is to add small plywood gussets to the longeron/upright junctions with the bracing holes drilled for the internal junctions. Using this method eliminates drilling the longerons and is the safer way of bracing. The basic fuselage sides are constructed over the plan noting that the 3x10mm beech under-carriage supports are included as part of the fuselage side.
The suspension on the undercarriage is authentic and is very forgiving and realistic in appearance. This very effective system adds a lot to the character of the model as well as being practical. But, fitting the posts and fitments must be carried out in the correct sequence. Carefully review the plan sheet and read through the steps in the Boddington article for the undercarriage build. Finishing the model can take many different paths, depending on the extent of scale look you want to achieve. Then there is all the rigging. Fishing trace line (15-20 lbs) can be used for the wing rigging, although nylon monofilament line (15-18 lbs) may be used
for the cabane strut and tail rigging. Ensure you follow the sequence of rigging as outlined in the article so as to not induce any wing warping.
When looking at the plan sheets and reading the Boddington article, the scratch build of this model may seem difficult and complicated. While I would not recommend this model to someone new to scratch building, overall the build is not all that hard, and you may even learn something new along the way. When finished, you will have a model not often seen at the flying field, so put on your goggles and have a great day flying an aircraft from the pioneer era of aviation.
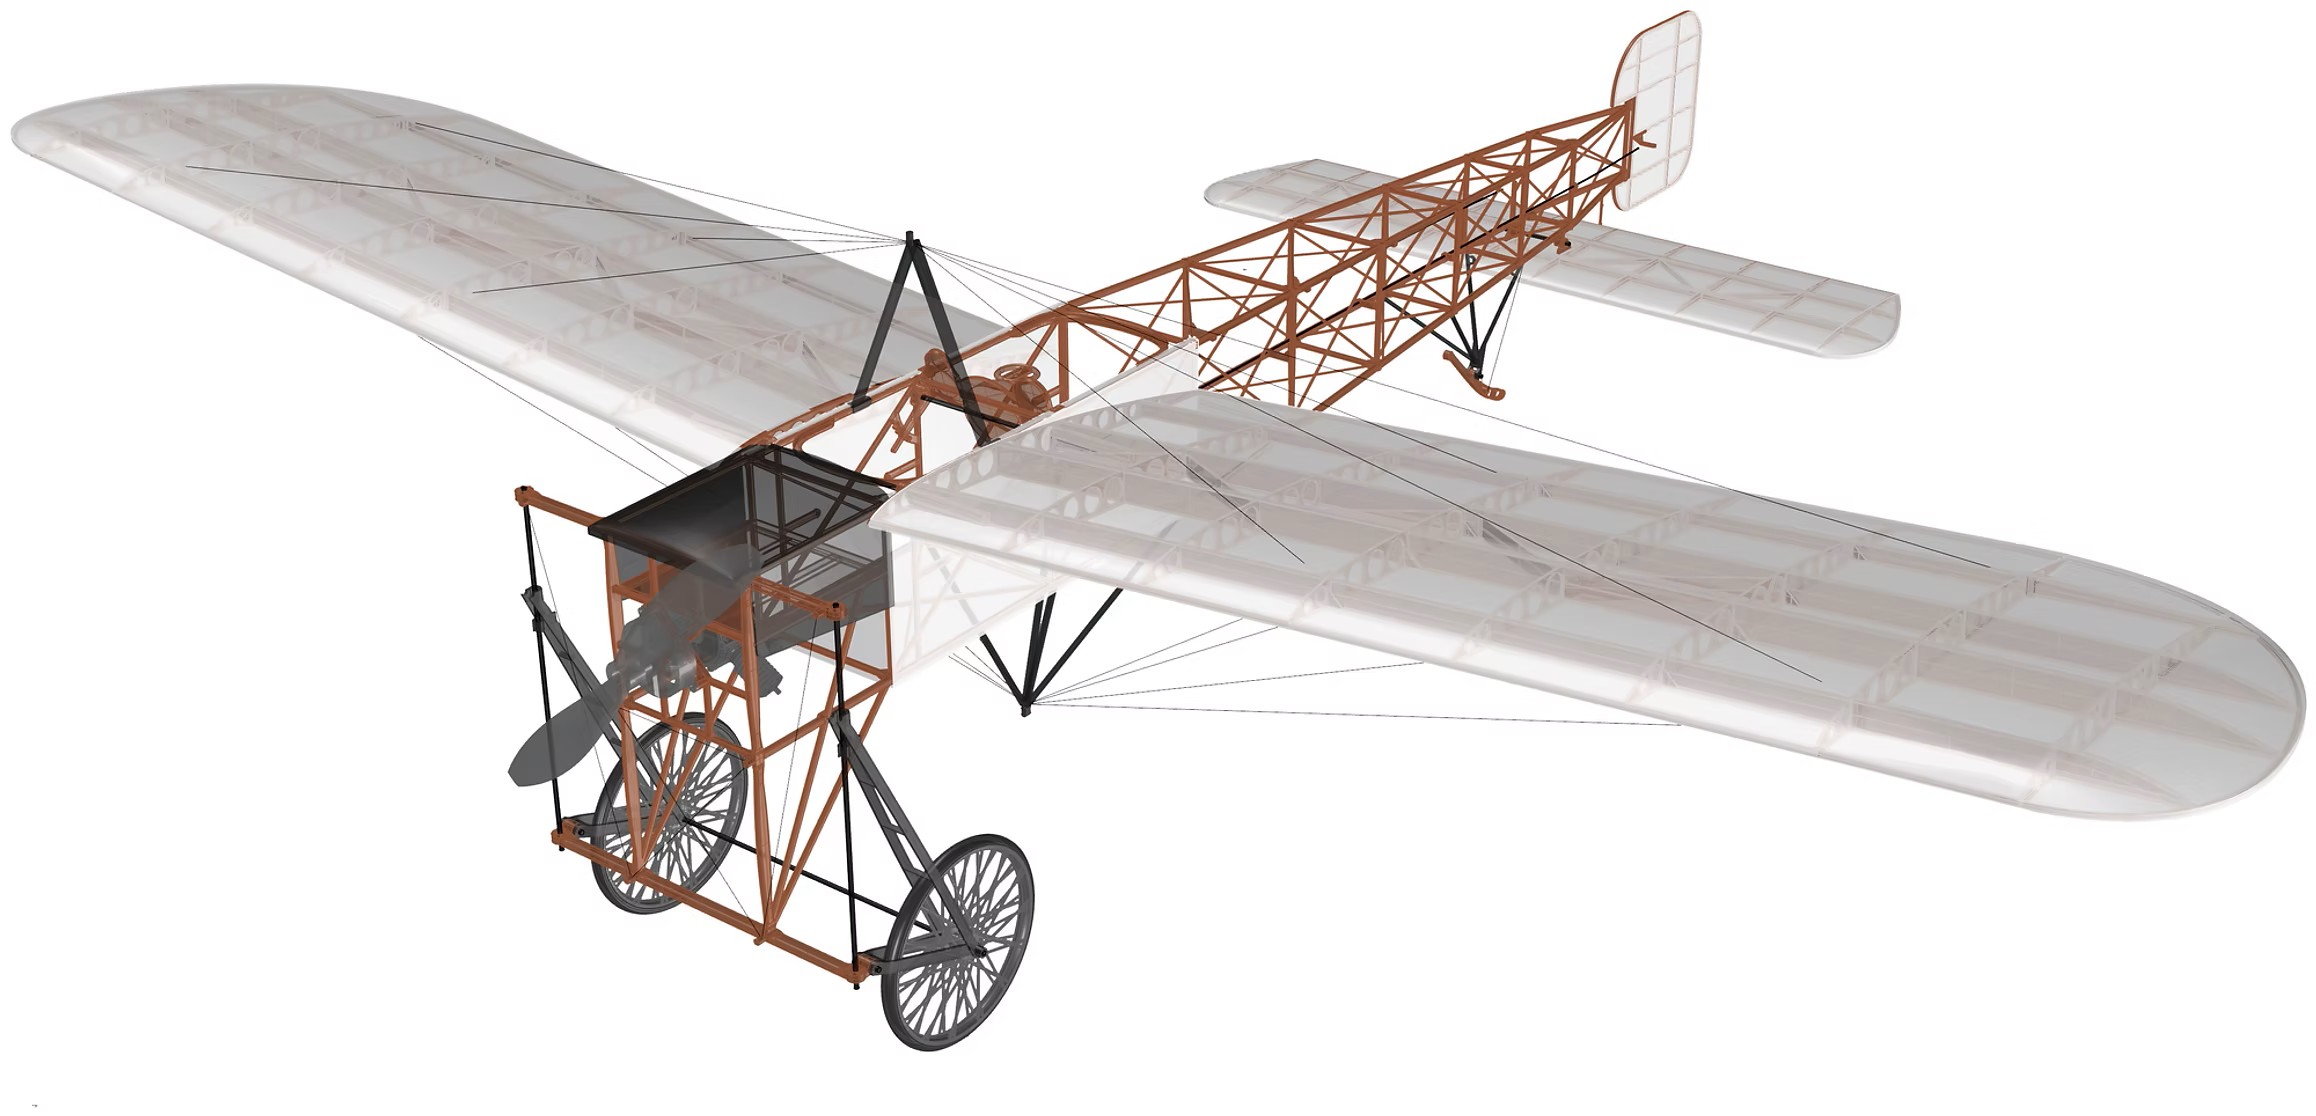
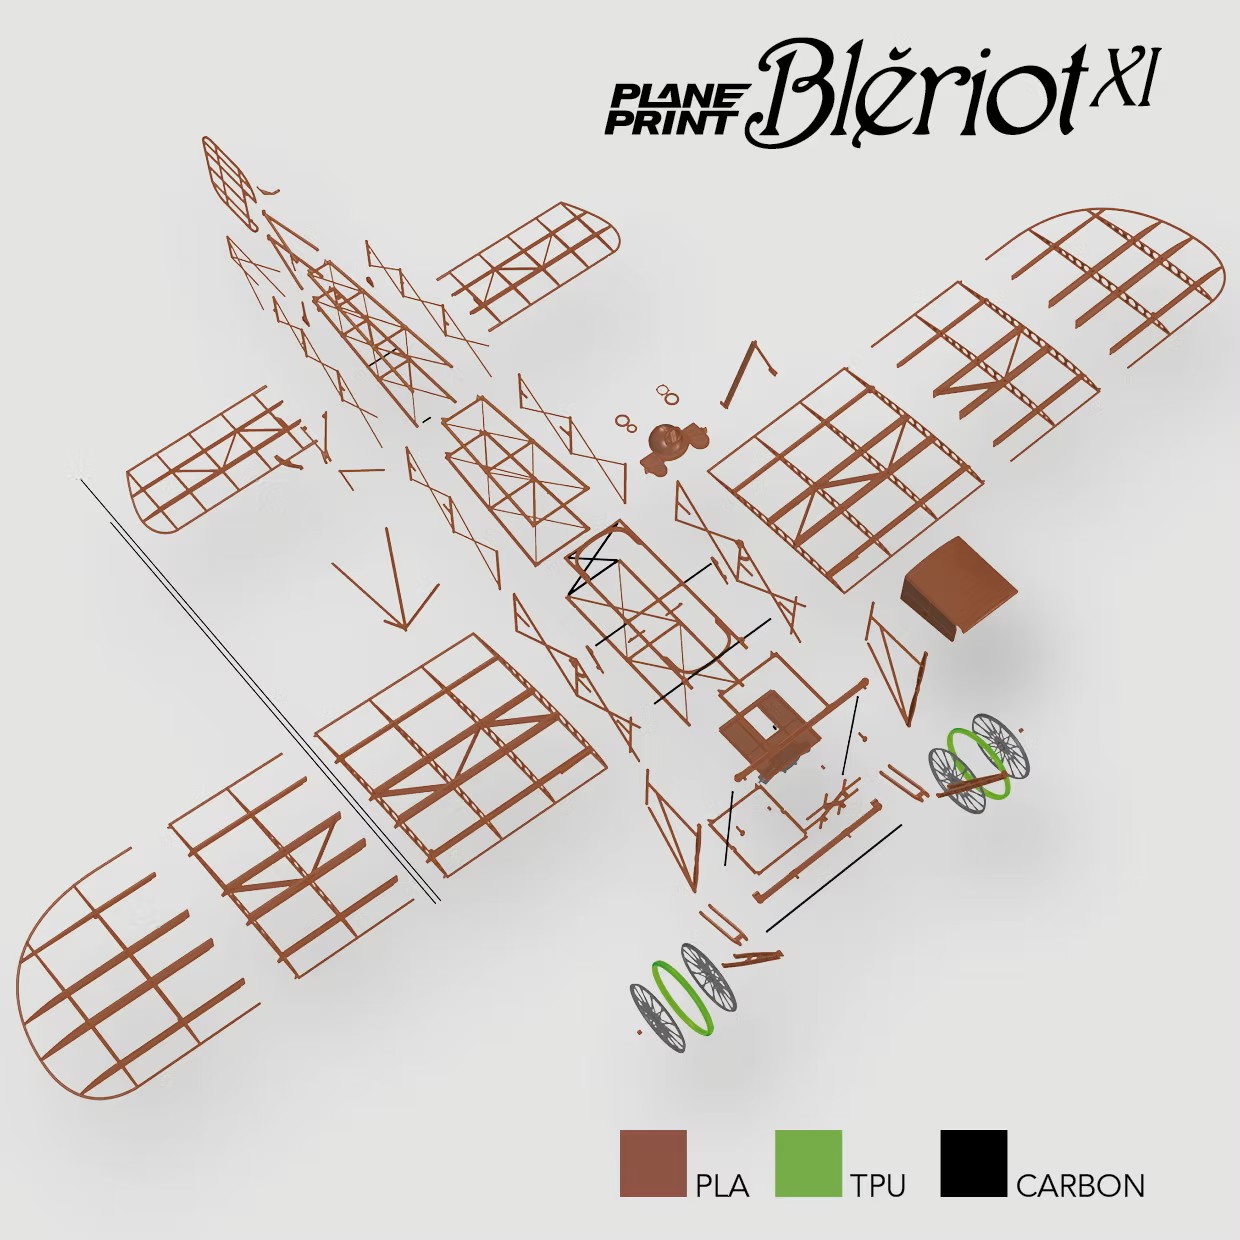
For those of you who might want to try a 3D printed 1909 Blériot XI RC model, check out one I found on the Planeprint website. This 3D printed model has a Wingspan of 1,016mm/40in; flight weight of 285 grams, requires 3 channel receiver, 2203 size electric motor with a 8x4 prop, 15A ESC, 2S 650mah LiPo, and two micro servos. Model is printed using 200g of PLA and 20g of TPU using a standard printer space of 200x200x200mm. Download the free PRINTING & ASSEMBLING MANUAL, where you can see exactly what to expect before you decide to buy the STL data.
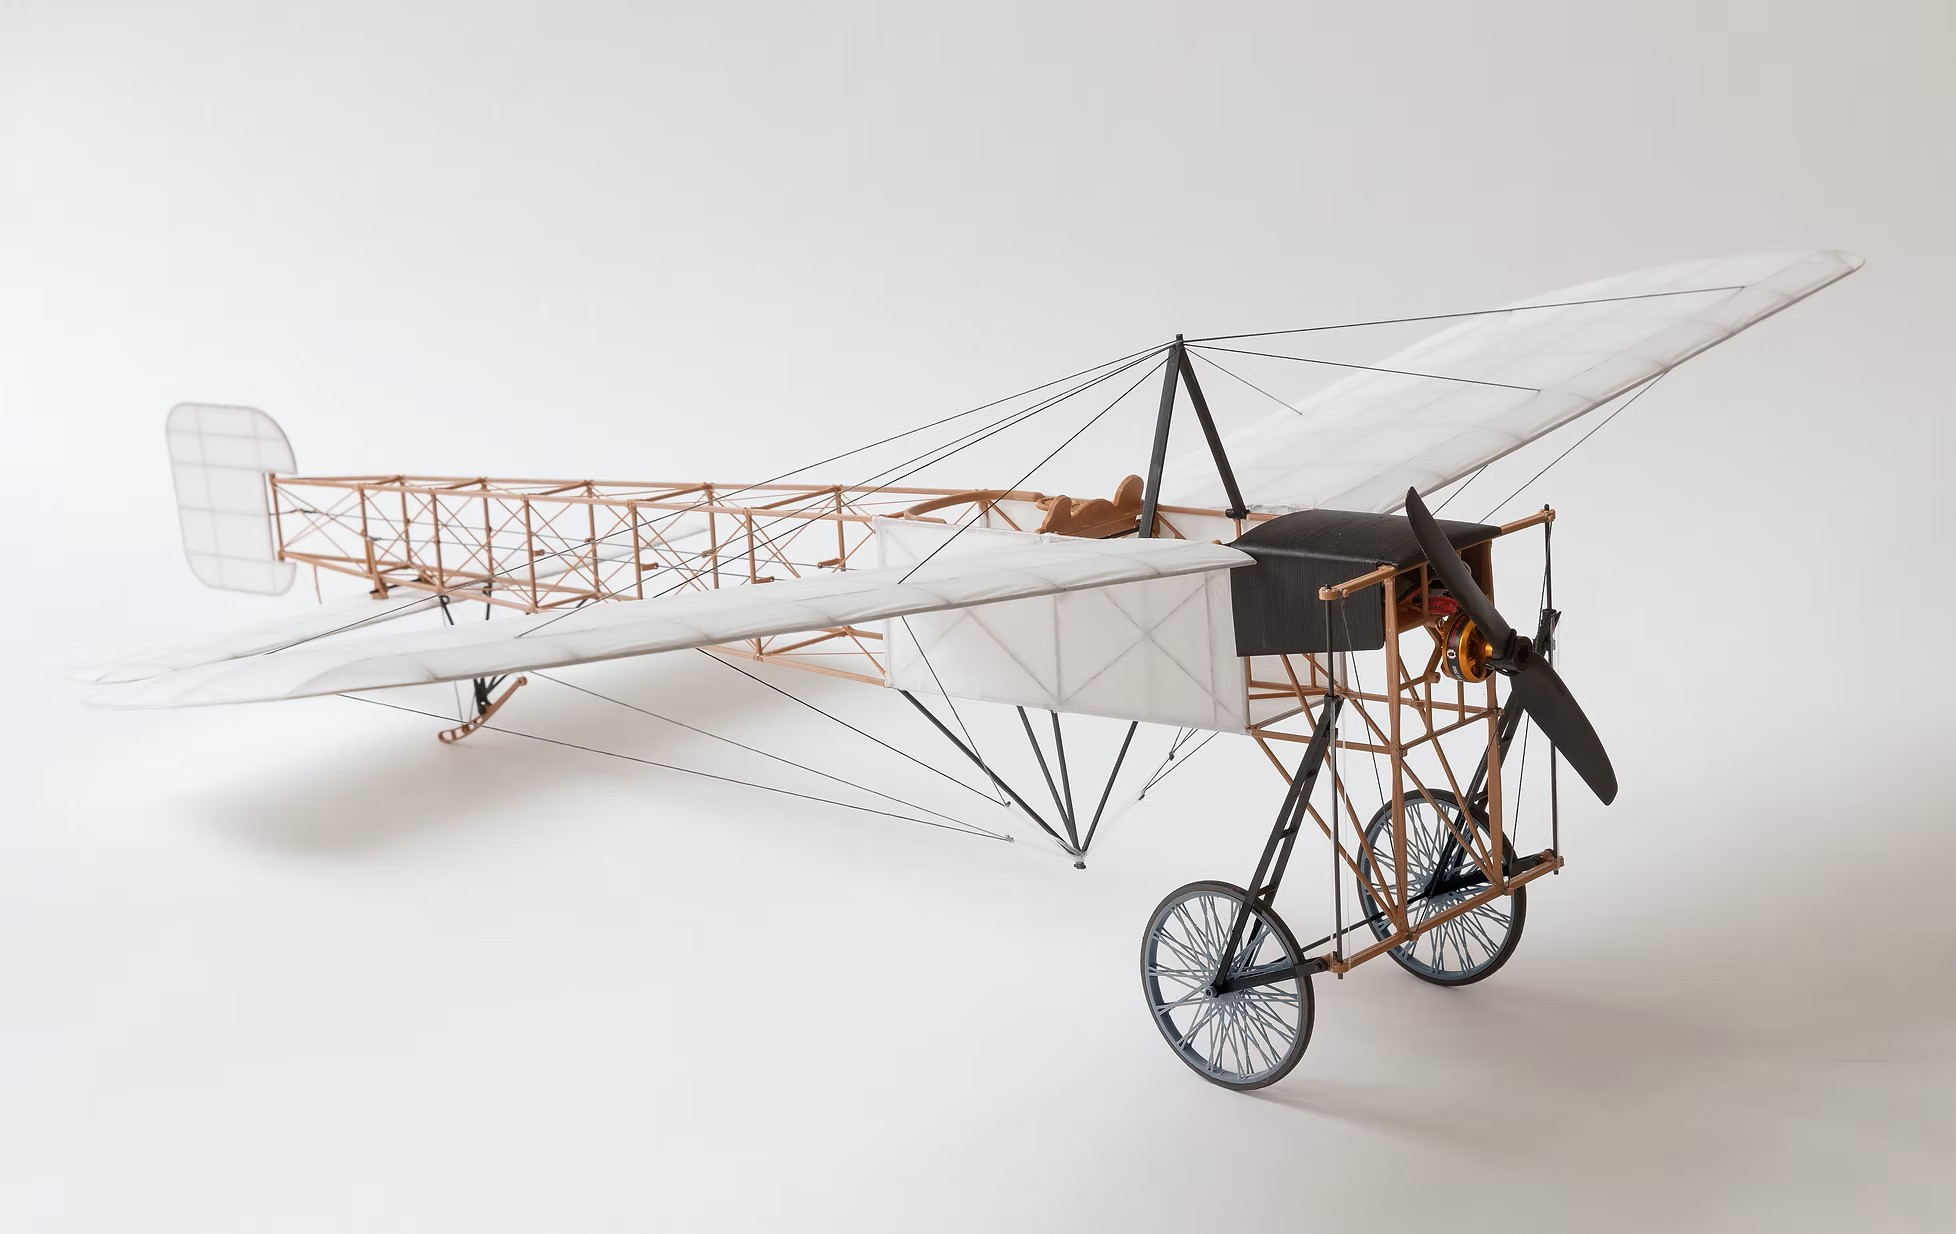
I hope you have enjoyed this months selection, and just maybe, I have spurred some interest in trying your hand at building an RC model airplane.
Until next month - Keep the Balsa Dust Flying!!
 All HTML & CSS Coded by Larry