“Future Projects” Planning Page

 Welcome to my “Future Projects Planning Page.” This is a new page that I added to my website for 2025, where I will provide you some insight to any future projects (Balsa RC model, Stained Glass, or 3D Modeling) that I might have in the planning stage. If anyone has some suggestions, recommendations, or questions about a project, please feel free to contact me @: Future Project Input.

NOTE - You can view all images using a “Spotlight Box” by simply clicking on any image.

Castle Builder Puzzle

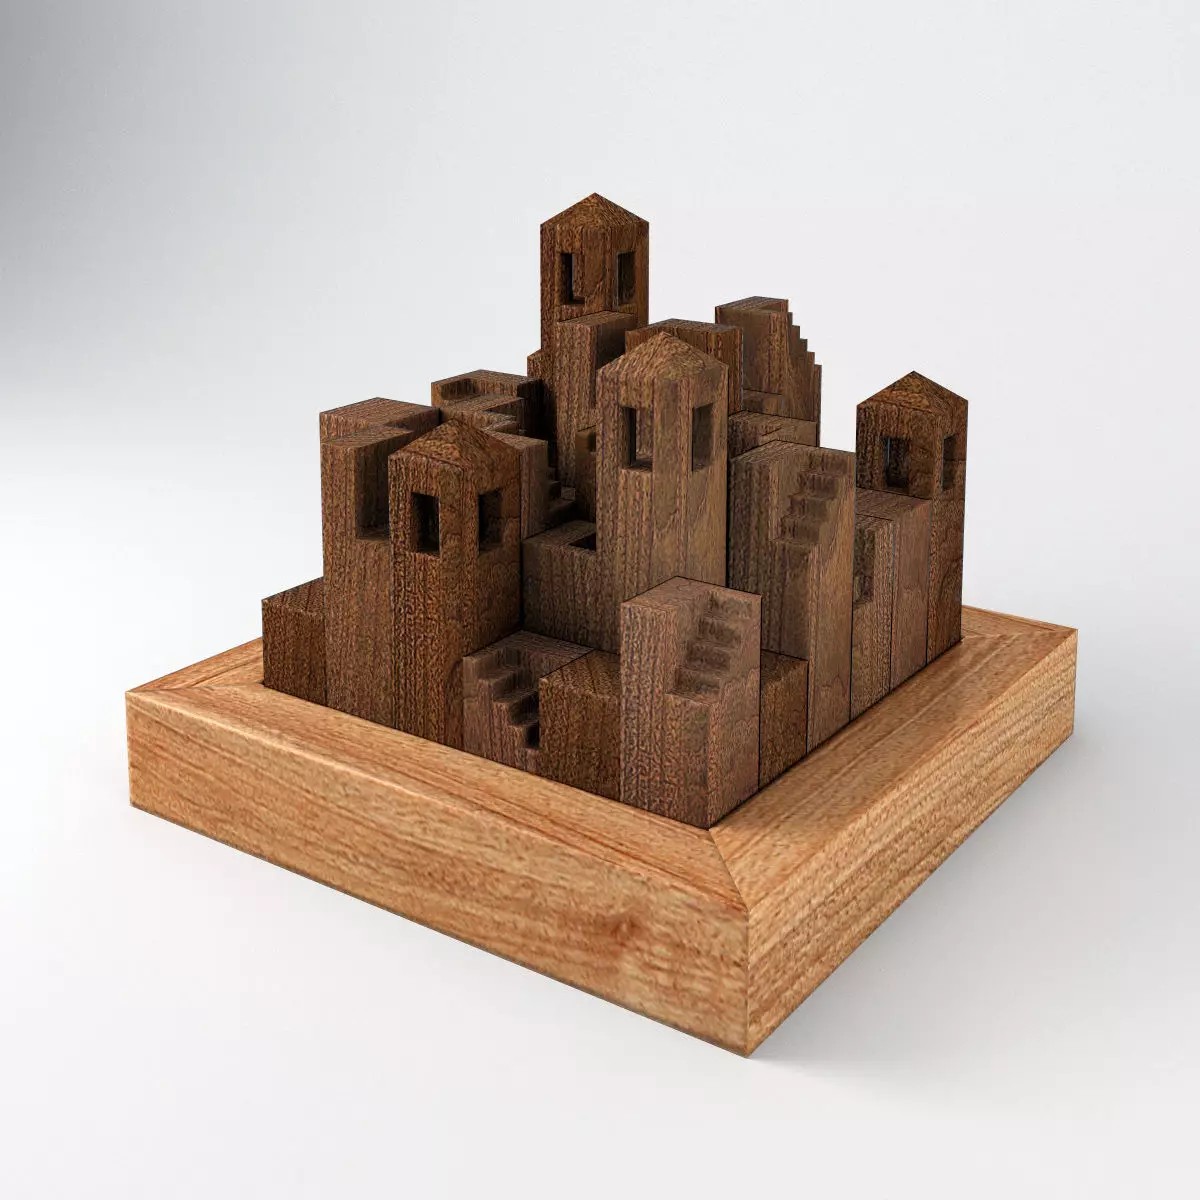
 How about another puzzle to add to the 3D collection for Everly and August. I found the “Castle Builder Puzzle,” created by a modeler named “winzmuc,” which you can purchase from the cgtrader website.
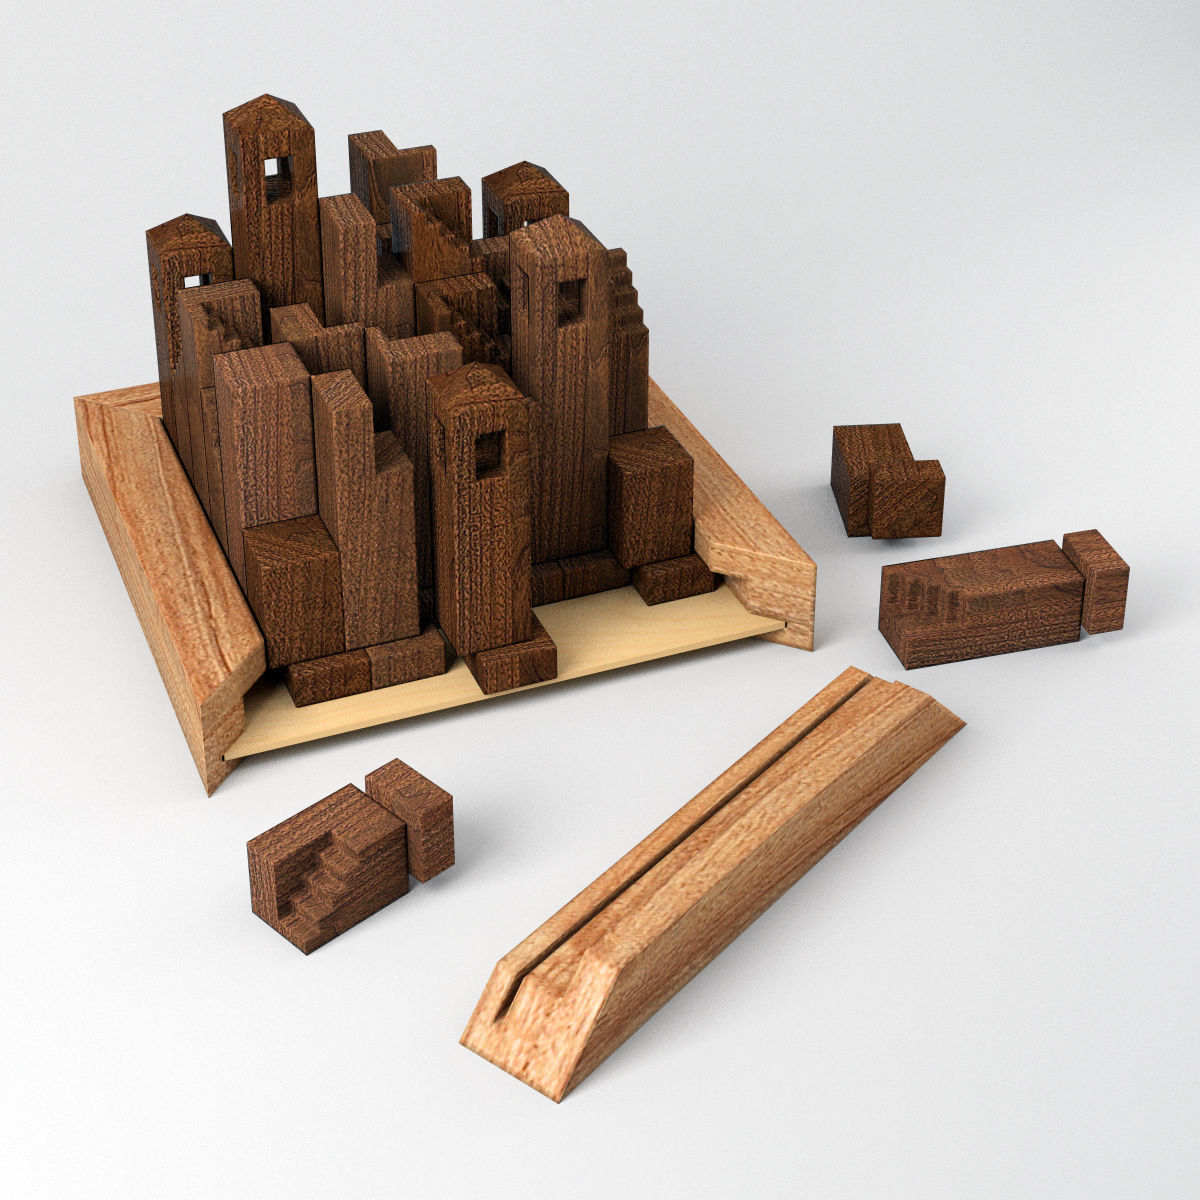
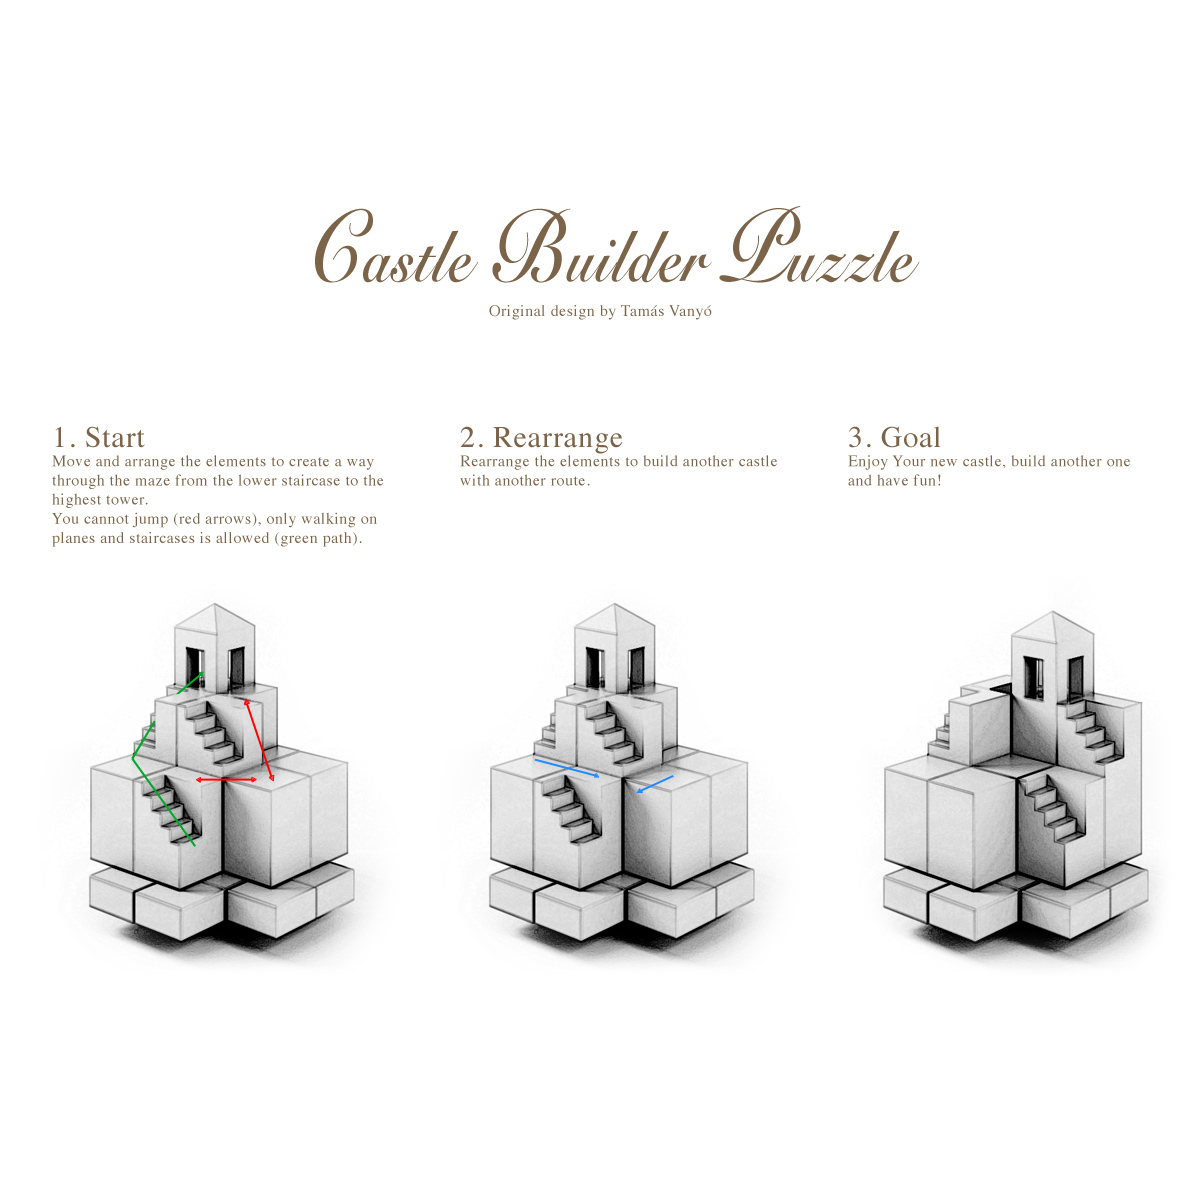
 As described by the “Castle Builders Rules” in the bottom image below, the objective of this puzzle is to rearrange the castle's 35 elements and find a path from the lowest staircase to the highest tower. Using the STL file as provided by the modeler, the overall size of this puzzle would be 164x164x135mm.

 Attention: for building the board you will need a square sheet (152x152mm) of 2-3mm plywood or strong cardboard. Leaving one frame element loose is recommended to be able to rearrange all pieces quickly when stacked completely, as shown in the renderings. I think I might scale the STL file parts by 150% (largest puzzle frame element I can fit on my printers build plate), which would then produce a puzzle with an overall size of 246x246x203mm.

castle1   castle2

castle3

 Source of Images: Castle Builder Puzzle webpage.

Back to the TOP

Tempest Knights Heavy Assault Resistance Eliminator (HARE)

 I didn't want the 3D printer to cool down, so I starting some planning for a couple more 3D models to add to the collection we started for my Grandson Gus. The first one is the “Tempest Knights - Heavy Assault Resistance Eliminator (HARE),” created by a modeler named “themakerscult,” which you can purchase from the cgtrader website.

 This model is a Heavy Assault vehicle designed for use with the Tempest Warriors line of 30mm scale wargaming miniatures. The OBJ files include a couple hull configurations as well as the following weapon options: Gatling Cannons, High Caliber Autocannons, Heavy Bolt Cannons, Heavy Flamethrowers, Lasor Cannons, Phased Vulcan Array, Vulcan Heat Ray, Plasma Cannons, Twin Heavy Bolt Guns, Twin Laser cannons, and Twin Missile Launchers. The weapons are shown in Creality Print 7.0 in the bottom image below. The example model shown in the two top images below were printed on an Ender 3 at 0.12mm Layer height with a 0.4mm nozzle.

hare1   hare2

 Source of Images: cgtrader website.

hare1

Back to the TOP

Imperial Force Utility Aircraft

 The second 3D model in planning for our Grandson Gus is the “Imperial Force Utility Aircraft,” created by a modeler named “redmakers,” which you can purchase from the cgtrader website.

 This model is a Utility Aircraft scaled for 28 mm tabletop wargaming miniatures. The STL files include a couple cockpit, gunner, and weapons configurations, and a table stand if desired. The large lift fans can be tilted and rotated, and the hull has sliding side doorways and a large aft door that can be lowered. All the components are divided in such a way that they can be printed on a 3D printer with a build platform size of 115x65mm. More to follow!

ifua1   ifua2

ifua3   ifua4

 Source of Images: cgtrader website.

Back to the TOP

1/144 Scale LGM-25C Titan II ICBM 3D Model

 When I first entered the Air Force back in August 1969, after nine months of technical training I was assigned to Little Rock AFB, Arkansas as a Guidance and Control Specialist on the Strategic Air Command LGM-25C Titan II ICBM system. I worked not only on the missile inertial guidance system inside the underground silo, but also performed topside missile alignment surveys at night to ensure the inertial guidance system was properly aligned so the warhead could hit it's intended target over six-thousand miles away. It was very rewarding service.

 The Titan II was in service from 1963 to 1987. There were originally 54 Titan II Strategic Air Command missiles. The 54 Titan II missiles were on 24-hour continuous alert with 18 missiles each surrounding three bases: Davis–Monthan Air Force Base near Tucson, Arizona, Little Rock Air Force Base in Arkansas, and McConnell Air Force Base in Wichita, Kansas.

t1   t2

 Source of Images: Wikipedia.

 Here are the Titan II Specs:
  Type: Inter-Continental Ballistic Missile (ICBM)
  Place of origin: United States
  Service history: In service 1962 to 1987
  Used by: United States
  Production history: Manufacturer - Glenn L. Martin Company
  Specifications:
  Total Launch Mass: 342,000 lb. (155,000 kg)
  Stage I length: 67 feet (20 m)
  Stage II length: 29 feet (8.8 m)
  RV length (including spacer): 14 feet (4.3 m)
  Stage I diameter: 10 feet (3.0 m)
  Stage II diameter: 10 feet (3.0 m)
  RV diameter (at missile interface): 8.3 feet (2.5 m)
  Warhead: W-53 9 Mega Ton thermonuclear warhead
  Detonation mechanism: Air-burst or surface contact
  Engine: Two-stage liquid-fueled rocket engines; first stage: LR-87s; second stage: LR-91
  Propellant: N2O4 / Aerozine 50
  Guidance system: Inertial IBM ASC-15
  Launch platform: Missile silo

 I have always wanted a model of the LGM-25C Titan II to have on my shelf along with all the other models of the USAF systems (AGM-69 SRAM, C-17, Global Hawk, Litening Targeting Pod, and others) I worked on during my 41 years with the Air Force. So now that I have a nice 3D printer, I am finally going to be able to fill that wish.

 Cruising around on the web I was able to locate a very nice 1/144 scale 3D model by ESzczesniak on Cults3d.com. The package includes 10 STL files representing stages, nozzles, engine truss, warhead, and stand. This is a fairly simple model. The tolerances are rather tight and may need some light sanding. This was intentional to help insure the model would align itself well in assembly and without risk of introducing bends in the body. The STL's are scaled to 1/144. It should easily upscale, but the panel lines may start to look overdone and the detail may be bland for a larger scale.While the model is intended for resin printing, I will have to see how the STL files will work on my FDM printer. The assembled model in the images below was painted and then spare decals from aircraft model kits used for the markings.

t3   t2

 Source of Images: Cults3d.com.

 Once I find a break in the projects currently lined up for work, I plan to print this little wonder using my 3D printer and Hyper-PLA filaments. So stay tuned for updates to this section. More is yet to come!

Back to the TOP